
Introduction
Oreo Bliss Balls have taken the dessert world by storm, emerging as a beloved treat for those with a sweet tooth. Whether you’re hosting a family gathering, throwing a birthday party, or simply looking for a quick indulgence at home, these delectable morsels are an ideal choice. With their rich, creamy filling encased in a delightful chocolate coating, Oreo Bliss Balls are the epitome of indulgence, captivating both kids and adults alike.
What makes these treats even more appealing is their simplicity and speed of preparation. Unlike more elaborate desserts that can take hours to create, Oreo Bliss Balls come together in no time, requiring just a handful of ingredients and minimal kitchen equipment. In just a few easy steps, you can whip up a batch of these heavenly bites, making them perfect for spontaneous cravings or last-minute gatherings.
In this article, we’ll delve into the irresistible world of Oreo Bliss Balls, exploring their origins, the key ingredients that make them so special, and providing you with detailed step-by-step instructions to create your own batch at home.
Understanding Oreo Bliss Balls
To truly appreciate Oreo Bliss Balls, one must first understand the iconic status of Oreo cookies. Since their introduction in 1912, Oreos have become one of the most recognizable cookies worldwide, with their unique combination of a chocolate wafer exterior and sweet cream filling. Over the years, they have inspired countless dessert variations, ranging from cakes to milkshakes, but the bliss ball trend takes this classic cookie to a whole new level.
The term “bliss balls” refers to bite-sized treats made from a mixture of ground ingredients, often combined with a creamy element and then coated or rolled in various toppings. This concept has surged in popularity due to its versatility and the ease of customization. Bliss balls can be made with an array of flavors and fillings, allowing for creativity in the kitchen. However, the Oreo version stands out as a fan favorite, thanks to the nostalgic flavor of the beloved cookie paired with a rich, creamy filling.
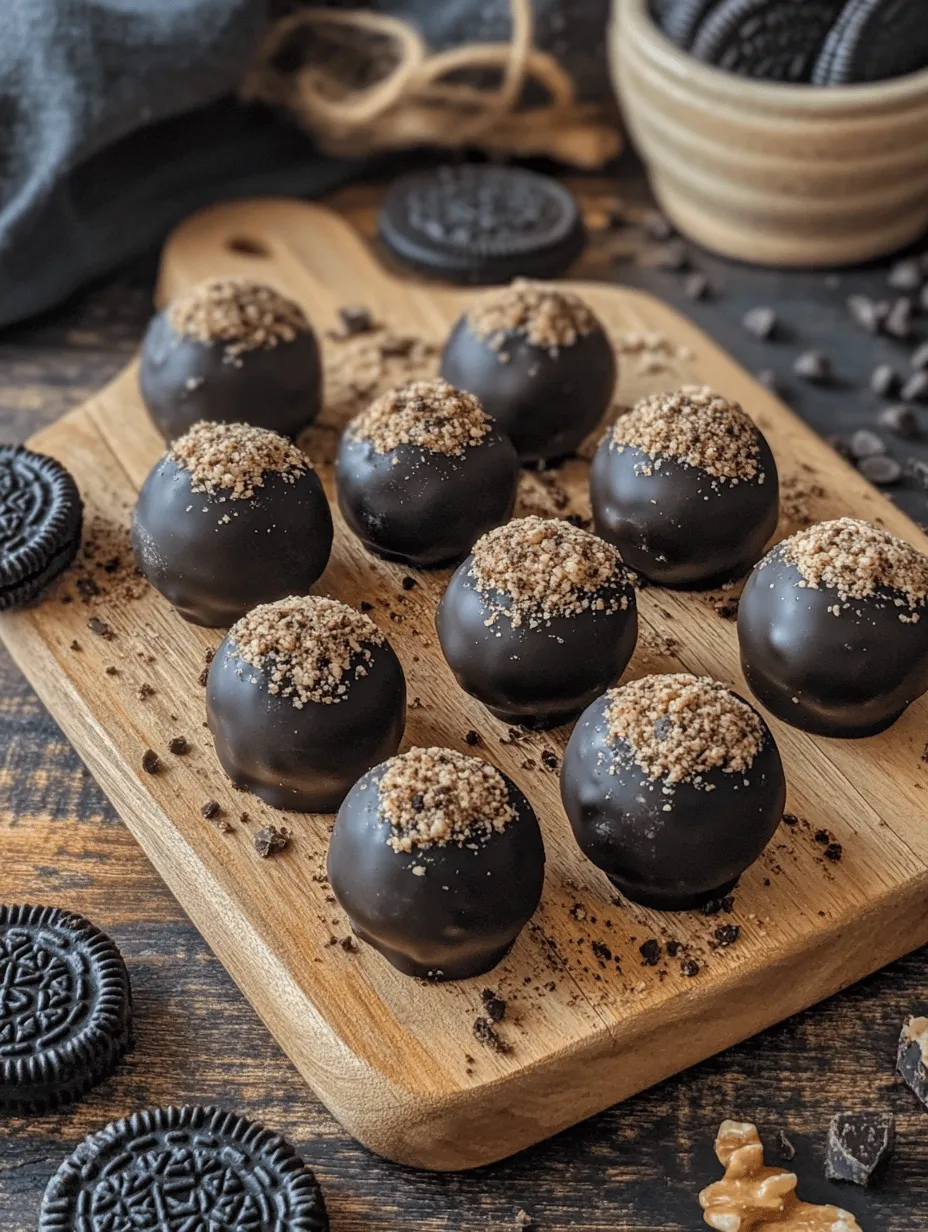
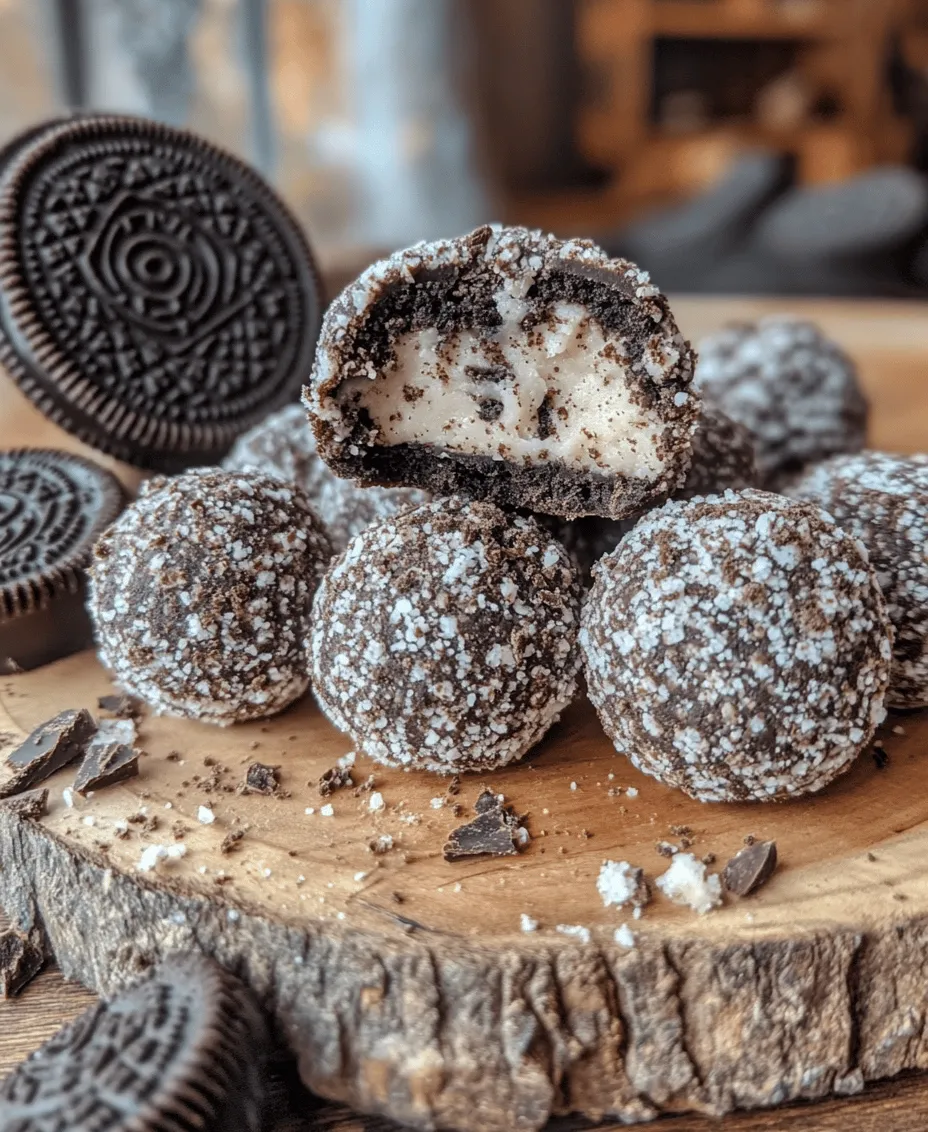
When you bite into an Oreo Bliss Ball, you experience a delightful contrast of textures and flavors. The crunch of the crushed Oreos combined with the smoothness of the cream cheese filling creates a truly indulgent treat. The chocolate coating adds an extra layer of richness, making every bite a little piece of heaven.
Ingredients Breakdown
To create your very own Oreo Bliss Balls, you’ll need just a few simple ingredients. Here’s a detailed breakdown of each component and its role in this delightful recipe:
Oreo Cookies
The star of the show, Oreo cookies, provide the foundation for these bliss balls. While classic Oreos are the most commonly used, there are various flavors available, including Golden Oreos, Birthday Cake Oreos, and even seasonal varieties. Each type brings its unique flavor profile to the recipe. However, for the traditional Oreo Bliss Balls, sticking with the classic chocolate Oreo is recommended, as it gives the best balance of flavors.
Cream Cheese
Cream cheese is essential in creating the luscious filling that binds the crushed Oreos together. It adds a rich, creamy texture and balances the sweetness of the cookies. When mixed with the crushed Oreos, it transforms the combination into a dough-like consistency that is easy to shape into balls. For the best results, use full-fat cream cheese, as it offers the creamiest texture and flavor.
Semi-Sweet Chocolate Chips
The chocolate coating is what elevates Oreo Bliss Balls to a whole new level of decadence. Semi-sweet chocolate chips provide a perfect balance of sweetness and richness, complementing the flavors of the cookies and cream cheese. When melted and drizzled over the chilled bliss balls, they create a shiny, smooth exterior that is both visually appealing and delicious.
Coconut Oil (Optional)
While coconut oil is optional, it can significantly enhance the melting process of the chocolate. By adding a small amount of coconut oil to your chocolate chips, you can achieve a thinner consistency, making it easier to coat the bliss balls evenly. Additionally, the coconut oil helps to create a glossy finish once the chocolate hardens, giving your treats a professional touch.
Additional Toppings
To make your Oreo Bliss Balls even more special, consider customizing them with various toppings. Crushed Oreos can add an extra crunch and visual appeal when sprinkled on top. You can also use colored sprinkles for a festive touch or drizzle with white chocolate for a beautiful contrast. The options are endless, so feel free to get creative based on your preferences.
Step-by-Step Instructions
Now that we’ve gathered our ingredients, it’s time to dive into the step-by-step process of making Oreo Bliss Balls. Follow these instructions carefully to ensure your treats turn out perfectly:
Step 1: Crushing the Oreos
Begin by crushing the Oreo cookies into fine crumbs. There are a couple of methods to achieve this:
1. Food Processor: This is the quickest and most efficient method. Simply place the Oreos into the food processor and pulse until they reach a fine crumb consistency. Be careful not to over-process, as you don’t want a paste.
2. Zip-top Bag: If you don’t have a food processor, place the Oreos in a zip-top bag, seal it, and use a rolling pin or a heavy object to crush the cookies. This method requires a bit more effort but works just as well.
Aim for a consistency that resembles sand; this will help the cookies blend seamlessly with the cream cheese.
Step 2: Mixing with Cream Cheese
In a mixing bowl, combine the crushed Oreos with softened cream cheese. Using a spatula or your hands, mix until the ingredients are well incorporated and form a smooth, dough-like consistency. Ensure that there are no visible lumps of cream cheese remaining. If the mixture feels too dry, you can add a little more cream cheese until it reaches the desired consistency.
Step 3: Forming the Balls
Once your mixture is ready, it’s time to shape the bliss balls. Use a small cookie scoop or your hands to portion out the mixture, roughly 1 inch in diameter. Roll each portion into a smooth ball, ensuring they are uniform in size for even coating. Place the formed balls on a baking sheet lined with parchment paper.
Step 4: Chilling the Balls
After forming the balls, it’s crucial to chill them in the refrigerator for at least 30 minutes. This step helps firm up the mixture, making it easier to coat with chocolate later on. While the bliss balls chill, you can prepare your chocolate coating.
Step 5: Melting the Chocolate
To melt the semi-sweet chocolate chips, use a microwave-safe bowl. Microwave in 30-second intervals, stirring in between, until the chocolate is fully melted and smooth. If you’re using coconut oil, add it to the chocolate at this stage to achieve a thinner consistency. Be cautious not to overheat the chocolate, as it can burn easily.
—
In the following sections, we will explore additional tips for achieving the best results with your Oreo Bliss Balls, as well as answer common questions about preparation and storage. Stay tuned for the delightful conclusion that will inspire you to create these mouthwatering treats!
Coating the Balls: Techniques for an Even Chocolate Cover and Presentation Tips
To achieve a smooth and even chocolate coating for your Oreo Bliss Balls, start by melting your chocolate. You can do this in a microwave or double boiler. If using a microwave, place the chocolate in a microwave-safe bowl and heat it in 30-second intervals, stirring in between to prevent overheating. Once the chocolate is fully melted, let it cool slightly before dipping the balls.
Using a fork or a toothpick, carefully dip each Oreo ball into the melted chocolate. Make sure to coat it thoroughly, allowing any excess chocolate to drip off before placing the ball on a parchment-lined baking sheet. For a refined finish, you can gently tap the fork against the edge of the bowl to remove excess chocolate. This technique helps create a smoother surface and prevents pooling of chocolate.
For an added touch of elegance, consider rolling the coated balls in toppings such as crushed Oreos, sprinkles, or chopped nuts before the chocolate hardens. This not only enhances the visual appeal but also adds texture to each bite, making your Oreo Bliss Balls even more irresistible.
Decorating: Creative Ideas for Personalizing the Appearance
Once your Oreo Bliss Balls are coated and the chocolate has set, it’s time to get creative with your decorations. Simple yet effective decorating ideas include drizzling white chocolate over the top of each ball for a beautiful contrast or adding a sprinkle of edible glitter for a festive touch. You can also create themed decorations for holidays or special occasions by using different colored chocolate melts or toppings.
For a more personalized approach, consider using a piping bag to create intricate designs on the chocolate coating. You can write little messages or draw fun shapes that reflect the occasion. Alternatively, rolling the balls in finely crushed Oreos or colorful sprinkles can add a playful element, making them more enticing for children and adults alike.
Setting the Chocolate: Importance of Allowing Time for the Chocolate to Harden
Setting the chocolate is a crucial step in the process of making Oreo Bliss Balls. After coating each ball, allow them to rest on the parchment paper for about 30 minutes at room temperature. This resting time enables the chocolate to harden properly, ensuring that the coating remains intact when you serve them.
For faster results, you can place the baking sheet in the refrigerator for about 15 minutes. However, avoid leaving them in the fridge for too long, as this can cause condensation when taken out, potentially ruining the smooth surface of the chocolate. Once the chocolate has set, your Oreo Bliss Balls are ready to shine!
Serving Suggestions: Presentation Ideas for Gatherings or Personal Enjoyment
Presentation can elevate your homemade Oreo Bliss Balls from simple treats to stunning desserts perfect for any occasion. Arrange them on a decorative platter or tiered cake stand for gatherings; this adds height and visual interest. You can also place them in individual cupcake liners to create a more polished look.
For themed parties, consider matching your presentation to the occasion. For example, if you’re hosting a birthday party, use vibrant colors and fun decorations. For holidays, tailor your toppings and decorations to reflect seasonal themes, such as red and green sprinkles for Christmas or pastel colors for Easter.
When serving, consider pairing your Oreo Bliss Balls with fresh fruit or a scoop of ice cream for a delightful contrast. This not only enhances the flavor experience but also adds a refreshing touch to the dessert table.
Nutritional Information
Understanding the nutritional content of your Oreo Bliss Balls is essential, especially if you’re mindful of your dietary habits. Each bliss ball contains approximately 100 calories, depending on the specific ingredients used. They are a sweet indulgence, rich in sugars and fats, which is why moderation is key when enjoying these treats.
It’s important to balance indulgence with moderation. While these bliss balls are delicious, they are best enjoyed as a treat rather than a staple. If you’re looking for healthier alternatives, consider substituting regular cream cheese with low-fat cream cheese or Greek yogurt, which can reduce the calorie count while still maintaining a creamy texture.
Variations on Oreo Bliss Balls
To keep your dessert game fresh and exciting, consider experimenting with different flavor profiles for your Oreo Bliss Balls. Here are a few variations to inspire your creativity:
– Mint Oreo Bliss Balls: Add a few drops of mint extract to the mixture for a refreshing twist that complements the chocolate flavor beautifully. You can even use Mint Oreos for an extra minty punch.
– Peanut Butter Oreo Bliss Balls: Mix in some creamy or crunchy peanut butter into the filling for a nutty flavor. This not only adds a new dimension to the taste but also pairs wonderfully with the chocolate coating.
– Gluten-Free Options: For those with gluten sensitivities, simply substitute regular Oreos with gluten-free Oreos. This makes the recipe accessible to more people without compromising on taste.
Storage Tips
To maintain the freshness of your Oreo Bliss Balls, proper storage is essential. Store them in an airtight container at room temperature for up to a week. If you want to preserve them longer, consider refrigerating them, where they can last for up to two weeks.
For longer-term storage, freezing is a great option. Arrange the balls in a single layer on a baking sheet and freeze until solid. Once frozen, transfer them to a freezer-safe container or bag. They can be kept for up to three months in the freezer. To enjoy, simply take them out and let them thaw at room temperature for about 30 minutes.
Culinary Techniques and Tips
While making Oreo Bliss Balls is relatively simple, having the right kitchen tools can enhance your experience. Essential tools include a food processor for crushing the Oreos effectively, a microwave-safe bowl for melting chocolate, and a baking sheet lined with parchment paper for easy cleanup.
Another vital culinary technique is mise en place, which means having all your ingredients prepped and organized before you start cooking. This not only saves time but also ensures that you don’t forget any component during the preparation process.
Understanding the science behind chilling and coating desserts is also beneficial. Chilling the mixture helps it firm up, making it easier to form balls. Meanwhile, a proper coating technique ensures that the chocolate adheres well, resulting in a professional finish.
Conclusion
In summary, making Oreo Bliss Balls is a delightful and straightforward process that yields indulgent treats everyone will love. Their rich flavors combined with the versatility of variations make them perfect for any occasion—be it a birthday party, holiday gathering, or simply a sweet treat for yourself.
I encourage you to try this recipe and explore the various creative possibilities it offers. Whether you stick to the classic version or experiment with flavors, the joy of sharing homemade treats with family and friends is truly unparalleled. Embrace the process, enjoy the delectable results, and most importantly, have fun in the kitchen!