

Introduction
Red velvet cookies have recently taken the baking world by storm, captivating both the eyes and taste buds of cookie lovers everywhere. With their striking crimson hue and rich flavor, these cookies offer a delightful twist on the classic red velvet cake. The combination of buttery cookies with a hint of cocoa, paired with a luscious cream cheese frosting, creates a dessert that is not only visually appealing but also a delight to eat.
Baking is an art that thrives on the balance of flavors and textures, and red velvet cookies epitomize this principle perfectly. The soft, chewy texture of the cookies complements the creamy, tangy frosting, making each bite a harmonious experience. Whether you are celebrating a special occasion or simply indulging in a sweet treat, these cookies are sure to impress. In this recipe, we will guide you through the process of creating these delectable cookies, highlighting the unique features that set them apart from traditional cookies.
The Allure of Red Velvet
The allure of red velvet desserts dates back to the early 20th century, with its origins often linked to the Southern United States. The combination of cocoa powder and buttermilk not only provided a unique flavor profile but also resulted in the signature reddish hue that defines red velvet treats. While the exact origins are somewhat murky, it is widely believed that the vibrant color was initially enhanced by the reaction between cocoa powder and acidic ingredients, such as buttermilk and vinegar. Today, many bakers opt for food coloring to achieve that iconic crimson shade, adding to the visual appeal of the dessert.
The significance of color in the red velvet flavor profile cannot be overstated. The bright red color often symbolizes love and passion, making red velvet desserts a popular choice for celebrations like Valentine’s Day, weddings, and anniversaries. The taste itself is a delightful blend of mild cocoa flavor, richness from the butter, and a tangy kick from the cream cheese frosting, all of which come together to create a uniquely satisfying treat. This combination makes red velvet cookies an ideal choice for gatherings, where they can serve as a conversation starter, as well as a delicious dessert option.
Ingredients Breakdown
To create the perfect red velvet cookies with cream cheese frosting, it’s essential to understand the role of each ingredient. Here’s a detailed breakdown of what you’ll need:
For the Cookies:
– All-Purpose Flour: The foundation of our cookies, providing structure and stability. The right amount of flour will help create a chewy yet tender cookie that holds its shape well.
– Cocoa Powder: While red velvet is not a chocolate cookie, cocoa powder contributes a subtle flavor that balances the sweetness. It also enhances the color, giving the cookies their distinctive hue.
– Baking Soda: This leavening agent helps the cookies rise and gives them that soft, fluffy texture. It reacts with the acidic ingredients, creating carbon dioxide bubbles that lift the dough.
– Salt: A critical component that enhances the flavors of the cookies and balances the sweetness. Salt also helps to strengthen the dough.
– Unsalted Butter: The key to rich flavor and a tender crumb. Using unsalted butter allows for better control over the salt content in the cookies.
– Granulated Sugar and Brown Sugar: A mix of both sugars adds depth of flavor and moisture. Brown sugar contributes to the chewiness, while granulated sugar helps the cookies crisp up around the edges.
– Egg: The egg acts as a binding agent, helping to hold the ingredients together while also contributing to the cookies’ richness.
– Red Food Coloring: The star of the show, this ingredient gives the cookies their vibrant red hue. It’s essential to use high-quality food coloring to achieve a consistent color.
– Vanilla Extract: A splash of vanilla adds warmth and enhances the overall flavor of the cookies.
For the Cream Cheese Frosting:
– Cream Cheese: The base of our frosting, cream cheese provides a rich, tangy flavor that pairs perfectly with the sweetness of the cookies. The creaminess of cream cheese is essential for achieving that velvety texture.
– Unsalted Butter: Similar to the cookie dough, butter in the frosting adds richness and helps achieve a smooth consistency.
– Powdered Sugar: This fine sugar is essential for sweetness and helps create a thicker, spreadable frosting. The finely ground nature allows for easy incorporation into the cream cheese and butter.
– Vanilla Extract: Just like in the cookies, a touch of vanilla enhances the flavor of the frosting, making it even more delicious.
Tips on Selecting the Best Quality Ingredients
To create the most flavorful and visually stunning red velvet cookies, it’s crucial to select high-quality ingredients. Look for fresh, organic eggs, real vanilla extract, and premium cocoa powder to elevate the flavor of your cookies. When it comes to food coloring, opt for gel colors rather than liquid ones, as they provide a more vibrant hue without adding excess moisture to the dough. Finally, ensure that your butter and cream cheese are at room temperature before beginning the frosting, as this will help achieve a smooth, creamy consistency.
Step-by-Step Instructions to Perfect Red Velvet Cookies
Preparing the Baking Environment
Before diving into the mixing and baking, it’s important to prepare your baking environment. Start by preheating your oven to 350°F (175°C). This ensures that the cookies bake evenly and achieve the perfect texture. While the oven is heating, line two baking sheets with parchment paper. This not only prevents the cookies from sticking but also promotes even baking and easy cleanup.
Mixing the Dry Ingredients
In a mixing bowl, combine the all-purpose flour, cocoa powder, baking soda, and salt. Whisk these dry ingredients together until they are well blended. Each component plays a critical role in the structure of the cookies. The flour provides stability, while the cocoa powder adds flavor and color. Baking soda is essential for leavening, and salt enhances the overall flavor of the cookie.
Creaming the Butter and Sugars
In a separate large mixing bowl, cream together the unsalted butter, granulated sugar, and brown sugar. Use an electric mixer on medium speed for about 2-3 minutes until the mixture is light and fluffy. This creaming process is crucial for incorporating air into the dough, which helps the cookies rise and gives them a light, tender texture. The sugars should be fully combined with the butter, resulting in a smooth, creamy mixture.
The Science Behind Creaming for Optimal Cookie Fluffiness
During the creaming process, the butter traps air bubbles, which expand during baking to create a fluffy cookie. Ensure that the butter is at room temperature, as cold butter will not cream properly, resulting in dense cookies. Scrape down the sides of the bowl as needed to ensure even mixing.
Incorporating the Wet Ingredients
Once the butter and sugars are well creamed, it’s time to add the egg, red food coloring, and vanilla extract. Mix on low speed until just combined, being careful not to overmix. The egg will bind the ingredients together, while the food coloring will provide that beautiful red hue. If you desire a more intense color, feel free to add a bit more food coloring, but always mix well to ensure an even distribution.
As you begin this exciting journey into baking red velvet cookies, remember that the key to their success lies in the quality of your ingredients and the care taken during the mixing process. From the rich buttery flavor to the tangy cream cheese frosting, these cookies are destined to become a favorite in your baking repertoire. Stay tuned for the next part where we will guide you through the final steps of baking and decorating these delightful treats!
Combining Mixtures
Once your butter and sugars are creamed together, it’s time to incorporate your dry ingredients into this luscious mixture. Start by gradually adding the dry ingredients to the wet ingredients. This step is crucial, as it ensures an even distribution of the cocoa powder, baking soda, and flour, leading to consistently flavored cookies.
When combining the mixtures, it’s important to mix just until combined. Overmixing the dough can lead to tough cookies, which we certainly want to avoid. The goal is to maintain softness, resulting in cookies that are chewy on the inside and slightly crisp on the outside. You’ll know you’ve mixed enough when no dry flour or cocoa powder remains visible in the dough.
Scooping and Shaping the Cookies
Now that your dough is ready, it’s time to scoop and shape your cookies. Use a cookie scoop or a tablespoon to portion the dough. This ensures that each cookie is uniform in size, which is essential for even baking. Ideally, each cookie should weigh about 1.5 tablespoons.
To shape the cookies, roll the scooped dough between your palms to create smooth balls. This helps to prevent any rough edges that might cause uneven baking. Place the cookies on your prepared baking sheets, leaving about two inches of space between each ball, as they will spread while baking.
Baking the Cookies
Preheat your oven to 350°F (175°C) while you prepare your cookies. This temperature ensures that the cookies bake evenly and develop that perfect golden edge. Place your cookie sheets in the oven and set a timer for about 10-12 minutes.
Keep a close eye on your cookies during the last few minutes of baking. You’ll know they’re done when the edges are set and the centers look slightly underbaked. They will continue to firm up as they cool on the baking sheet. It’s vital to remove them from the oven at just the right moment to achieve that soft, chewy texture.
Making the Cream Cheese Frosting
While your cookies cool, it’s time to prepare the cream cheese frosting, the crowning glory of your red velvet cookies. Start with softened cream cheese and unsalted butter in a mixing bowl. Beat them together on medium speed until the mixture is smooth and creamy, which usually takes about 2-3 minutes.
Techniques for Achieving a Smooth and Creamy Texture
To ensure your frosting has the best texture, make sure both the cream cheese and butter are at room temperature before you begin. This helps them blend seamlessly, preventing lumps in your frosting. If you happen to notice any lumps, simply beat the mixture a bit longer until smooth.
Adjusting Consistency
Your frosting’s consistency is crucial for spreading or piping. If your frosting seems too thick, you can add a splash of heavy cream or milk, one teaspoon at a time, until you reach your desired thickness. Conversely, if it’s too thin, add a little more powdered sugar until it thickens up.
The addition of vanilla extract is not just a flavor enhancer; it rounds out the taste of the frosting beautifully. A teaspoon of pure vanilla extract will elevate the overall flavor profile, making it even more delicious.
Frosting Your Cookies
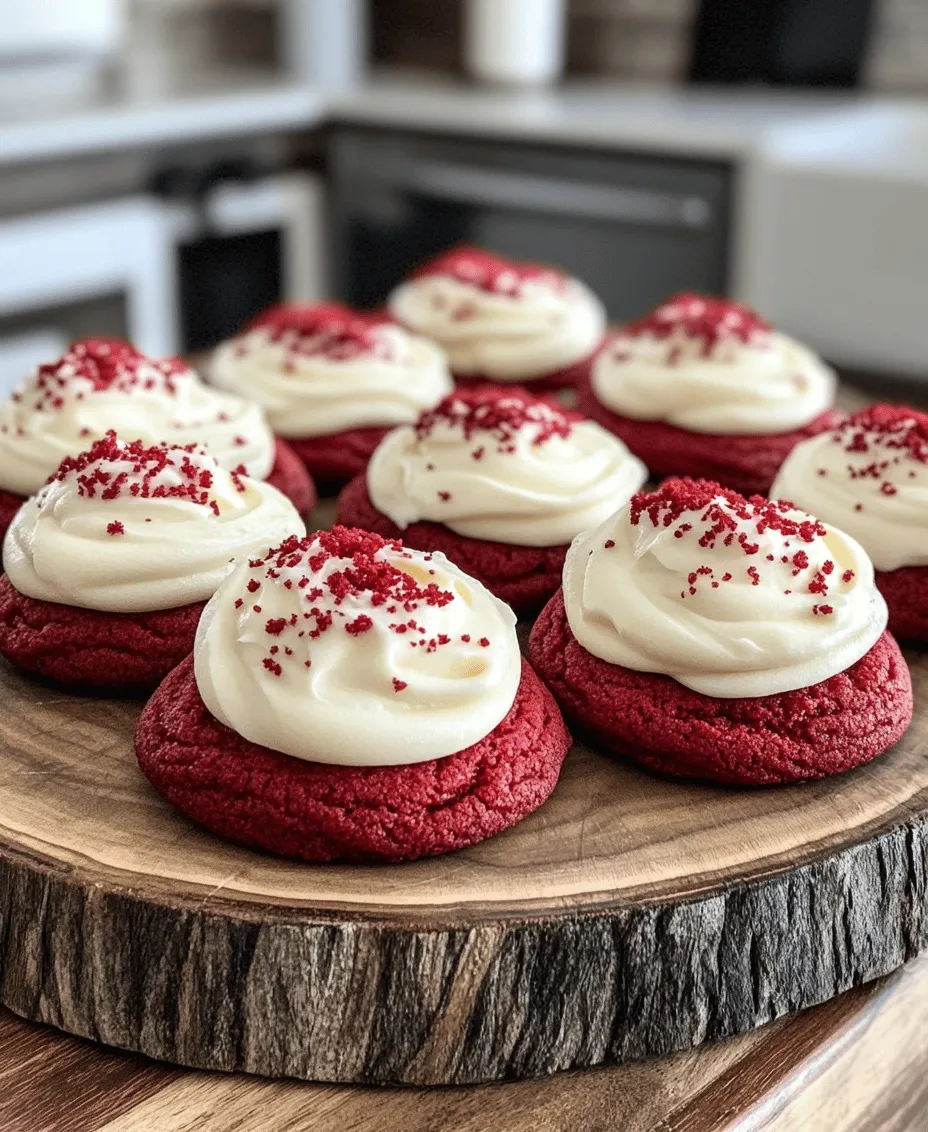
Now comes the fun part—frosting your cookies! Start with a cooled cookie and use a butter knife or an offset spatula to spread the cream cheese frosting generously on top. For a more decorative touch, consider using a piping bag fitted with a star or round tip to pipe the frosting onto the cookies.
To achieve a professional-looking finish, work in circles and apply even pressure as you pipe. For added flair, sprinkle some red velvet cake crumbs, chocolate shavings, or even a dusting of cocoa powder on top of the frosted cookies. This not only enhances the visual appeal but also adds a delightful textural contrast.
Serving Suggestions
When it comes to serving your red velvet cookies, presentation matters. Arrange them on a beautiful platter, and consider garnishing with fresh mint leaves or edible flowers to add a touch of elegance. These cookies are perfect for various occasions, whether it’s a birthday party, a holiday gathering, or a casual afternoon tea.
Pair your red velvet cookies with complementary beverages like a rich cup of coffee, a soothing herbal tea, or a glass of cold milk. The contrast of flavors will enhance the overall experience and make for a delightful treat any time of day.
Storing Red Velvet Cookies
To keep your red velvet cookies fresh, store them in an airtight container at room temperature. They will stay delicious for about a week. If you want to preserve their freshness for a longer period, consider freezing them.
To freeze your cookies, first, allow them to cool completely. Then, place them in a single layer on a baking sheet and freeze until solid. Once frozen, transfer the cookies to a freezer-safe bag or container, separating layers with parchment paper to prevent sticking. They can be stored in the freezer for up to three months.
If you’ve made extra cream cheese frosting, you can also freeze it for later use. Just be sure to store it in an airtight container, and when you’re ready to use it, thaw it in the refrigerator and re-whip it briefly to restore its texture.
Conclusion
Baking red velvet cookies with cream cheese frosting is a joyous experience that brings warmth and sweetness into any kitchen. The combination of the soft, chewy cookie with the creamy, tangy frosting creates a treat that is not only visually stunning but also irresistibly delicious.
We encourage you to try this recipe and share it with your loved ones. There’s something truly special about homemade treats that create lasting memories, whether enjoyed at a festive gathering or a quiet moment at home. So gather your ingredients, preheat your oven, and let the joy of baking take over as you create these delightful red velvet cookies. Happy baking!