
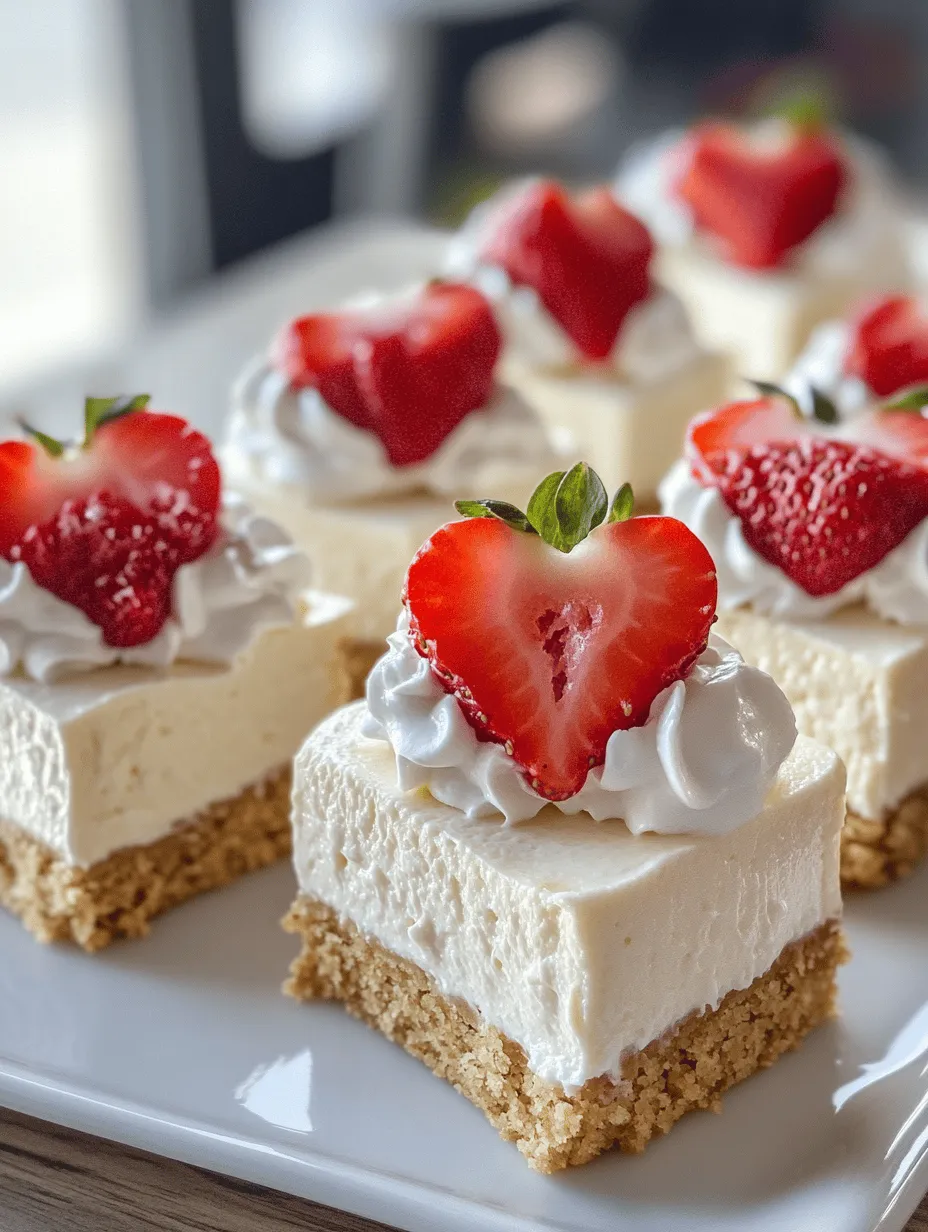
Indulging in a sweet treat that’s both delicious and visually appealing is a joy for many, and these delightful heart-shaped mini cheesecakes are the perfect way to satisfy that craving. Ideal for any occasion—be it a romantic dinner, a festive gathering, or simply a personal dessert indulgence—these mini cheesecakes are not only easy to make but also allow for creativity with flavor additions such as fresh fruit purees. In this blog post, we will explore the art of crafting these charming desserts, providing you with a comprehensive guide that includes detailed instructions, ingredient insights, and serving suggestions.
Understanding the Ingredients
To create the perfect heart-shaped mini cheesecakes, it’s essential to understand the role of each ingredient in the recipe. This not only helps in better preparation but also ensures that your cheesecakes turn out delicious every time.
Exploring the Components of the Cheesecake
At its core, a cheesecake is a creamy dessert made primarily from cheese, sugar, and a crust. The beauty of cheesecakes lies in their versatility. You can create a variety of flavors and textures by incorporating different ingredients and toppings. For our delightful heart-shaped mini cheesecakes, we’ll focus on a classic recipe that can be easily adapted.
Examining the Role of Cream Cheese in Cheesecake
Cream cheese is the star ingredient in any cheesecake recipe. Its rich and creamy texture forms the base of the filling, providing that signature velvety mouthfeel that cheesecake lovers adore. When selecting cream cheese, opt for full-fat varieties for the best flavor and texture. Soften the cream cheese to room temperature before mixing, as this will help achieve a smooth and lump-free batter.
The Importance of Sour Cream for Creaminess and Flavor
Sour cream is another key ingredient that contributes to the creaminess of the cheesecake filling. It adds a slight tanginess, balancing the sweetness and enhancing the overall flavor profile. The combination of cream cheese and sour cream creates a rich, creamy texture that is both indulgent and satisfying. If you’d like, you can substitute sour cream with Greek yogurt for a slightly healthier twist while maintaining the creaminess.
Graham Cracker Crust: A Classic Foundation
No cheesecake is complete without its crust, and for our mini cheesecakes, a graham cracker crust is the perfect choice. The buttery and slightly sweet flavor of the graham cracker crust complements the rich filling beautifully. To make the crust, you’ll need crushed graham crackers, melted butter, and a bit of sugar. This classic combination not only provides a delightful crunch but also serves as a sturdy base to hold the creamy filling.
Unpacking the Sweetness: Granulated vs. Powdered Sugar
In cheesecake recipes, sugar plays a vital role in enhancing flavor and balancing the tanginess of the cream cheese and sour cream. Granulated sugar is commonly used for mixing into the filling, while powdered sugar can be employed for a smoother texture. Using powdered sugar can help prevent any grittiness, especially in no-bake cheesecakes. For our heart-shaped mini cheesecakes, either type of sugar works well, but it’s essential to measure accurately for the best results.
The Role of Eggs in Cheesecake Structure
Eggs are critical for providing structure to the cheesecake. They help bind the ingredients together, creating a cohesive filling that sets nicely during baking. For best results, use large eggs and make sure they are at room temperature before mixing. This ensures they incorporate evenly into the batter without creating a lumpy texture.
Adding a Fruity Twist: Fresh Strawberry Puree Explained
One of the most delightful aspects of these mini cheesecakes is the ability to customize the flavors. For a fruity twist, consider adding fresh strawberry puree. Strawberries not only add vibrant color but also impart a natural sweetness and freshness that complements the creamy filling. To prepare the puree, simply blend fresh strawberries until smooth and strain to remove any seeds. You can adjust the sweetness of the puree based on your preference, making it an adaptable addition.
Preparation Steps for Heart-Shaped Mini Cheesecakes
Now that we understand the essential ingredients, let’s dive into the preparation steps for crafting these delightful heart-shaped mini cheesecakes. Following these steps will help ensure that your cheesecakes are not only delicious but also beautifully presented.
Setting the Stage: Preparing Your Kitchen and Equipment
Before you start baking, it’s crucial to prepare your kitchen and gather all necessary equipment. Make sure your workspace is clean and organized to streamline the process. You will need a mixing bowl, a hand or stand mixer, measuring cups and spoons, and, of course, heart-shaped mini cheesecake pans. These pans are essential for achieving that charming shape and allowing for easy removal of the finished cheesecakes.
Preheating the Oven for Perfect Baking
Preheating your oven is a vital step in baking, as it ensures that your cheesecakes cook evenly. Set your oven temperature to 325°F (160°C) and allow it to preheat fully before placing the cheesecakes inside. This will help create the ideal environment for the cheesecake to rise and set properly.
Choosing the Right Pan: Heart-Shaped Mini Cheesecake Pans
When it comes to heart-shaped mini cheesecakes, the right pan can make all the difference. Opt for high-quality non-stick heart-shaped mini cheesecake pans, which typically have removable bottoms. This feature allows for easy release of the cheesecakes after baking, ensuring they maintain their beautiful shape. If you don’t have a heart-shaped pan, you can also use a standard muffin tin with heart-shaped liners for a similar effect.
Creating the Graham Cracker Crust: Step-by-Step
Now, let’s move on to making the graham cracker crust. Follow these simple steps:
1. Crush the Graham Crackers: Place graham crackers in a resealable bag and crush them with a rolling pin until you have fine crumbs. Alternatively, you can use a food processor for this step.
2. Mix the Ingredients: In a mixing bowl, combine the crushed graham crackers, melted butter, and granulated sugar. Stir until the mixture resembles wet sand.
3. Press into the Pan: Take a small amount of the crust mixture and press it firmly into the bottom of each heart-shaped pan. Use the back of a measuring cup to ensure an even layer. This crust will provide a delicious base for your mini cheesecakes.
4. Pre-bake the Crust: Place the pans in the preheated oven and bake for about 5-7 minutes, or until the crust is lightly golden. Keep an eye on it to prevent burning. Once done, remove the pans from the oven and let them cool while you prepare the cheesecake filling.
Mixing the Cheesecake Filling: Techniques for a Smooth Batter
With the crust cooling, it’s time to prepare the cheesecake filling. Follow these steps to achieve a smooth batter:
1. Soften the Cream Cheese: Ensure your cream cheese is at room temperature for easier mixing. If you forget to take it out of the fridge, you can microwave it in short intervals, checking to avoid melting.
2. Beat the Cream Cheese: In a mixing bowl, use a hand mixer or stand mixer to beat the softened cream cheese until it is smooth and creamy, about 2-3 minutes.
3. Add the Sugar: Gradually add the granulated sugar, continuing to mix until fully incorporated. Scrape down the sides of the bowl as needed to ensure even mixing.
4. Incorporate the Sour Cream: Add the sour cream to the mixture and blend until well combined. This will enhance the creaminess of the filling.
5. Add Eggs: Beat the eggs in a separate bowl, then gradually add them to the cream cheese mixture. Mix on low speed until just combined. Avoid overbeating, as this can incorporate too much air into the batter, leading to cracks during baking.
Incorporating Eggs: Tips for Mixing without Overbeating
When adding eggs to your cheesecake batter, it’s important to do so gently to maintain the desired texture. Here are some tips for incorporating eggs without overbeating:
– Add One at a Time: Introduce each egg individually, mixing just until combined after each addition. This allows for even distribution without over-mixing.
– Use Low Speed: When mixing in the eggs, set your mixer to low speed. High speeds can incorporate excess air, which may cause the cheesecake to rise too quickly and crack.
– Scrape the Bowl: Periodically stop to scrape down the sides of the mixing bowl. This ensures that all ingredients are well combined and helps achieve a uniform consistency.
By following these preparation steps, you’ll set the foundation for creating the most delightful heart-shaped mini cheesecakes. Stay tuned for the next part of this guide, where we will delve into the baking process and explore creative serving suggestions that will impress your guests and delight your taste buds.
Adding Strawberry Puree: When and How to Incorporate
To achieve that delightful strawberry flavor in your heart-shaped mini cheesecakes, incorporating strawberry puree is essential. This step should be done after you’ve prepared your cheesecake filling. Here’s how to do it correctly:
1. Prepare the Strawberry Puree: Start by washing and hulling fresh strawberries. Blend them in a food processor until smooth. For a sweeter touch, you can add a tablespoon of sugar or honey, depending on your preference. Strain the mixture through a fine sieve to remove the seeds if desired, producing a silky puree.
2. Incorporate the Puree: Once your cheesecake batter is ready, divide it into two bowls. In one bowl, mix in a generous amount of the strawberry puree, approximately 1/3 to 1/2 cup, depending on how pronounced you want the strawberry flavor to be. Gently fold the puree into the batter, careful not to overmix, as you want to retain some of the lovely swirls for visual appeal.
3. Layering the Flavors: For an artistic presentation, you can also create a marbled effect. Pour half of the plain cheesecake batter into the prepared heart-shaped molds, then add a layer of the strawberry-infused batter. Use a toothpick or skewer to swirl them together before adding the remaining batter on top, ensuring a beautiful gradient of colors.
Pouring and Baking: Ensuring Even Distribution
With your flavors prepared, it’s time to pour and bake the mini cheesecakes. This step is crucial for achieving a perfect texture and consistent flavor throughout.
1. Filling the Molds: Carefully pour the cheesecake batter into your heart-shaped molds, filling each one about 3/4 full to allow space for rising. Using a small measuring cup or a ladle can help with controlled pouring and reduce mess.
2. Baking Temperature and Time: Preheat your oven to 325°F (160°C). Place the filled molds on a baking tray to catch any drips. Bake the cheesecakes for approximately 20-25 minutes, or until the edges are set but the center remains slightly jiggly. This ensures the center will firm up as it cools, avoiding cracking.
3. Water Bath Technique: To prevent cracking and to ensure even baking, consider using a water bath. Wrap the outside of each mold with aluminum foil to prevent water from seeping in, and place them in a larger pan filled with hot water. This creates a gentle steam environment, promoting a creamy texture.
Cooling and Chilling: The Importance of Temperature Control
After baking, proper cooling and chilling are vital for achieving the ideal cheesecake consistency.
1. Cooling Down: Once baked, turn off the oven and crack the door, allowing the cheesecakes to cool gradually. This helps prevent sudden temperature changes that can lead to cracks. Let them cool in the oven for about 10 minutes before transferring them to a wire rack.
2. Chilling: After the mini cheesecakes have cooled to room temperature, cover them loosely with plastic wrap and refrigerate for at least 4 hours, or overnight if possible. Chilling allows the flavors to meld together and the texture to set perfectly.
Presentation and Serving Suggestions
Once your heart-shaped mini cheesecakes have chilled and are ready to be served, presentation plays a significant role in elevating this delightful dessert.
Decorating Your Mini Cheesecakes: Garnish Ideas
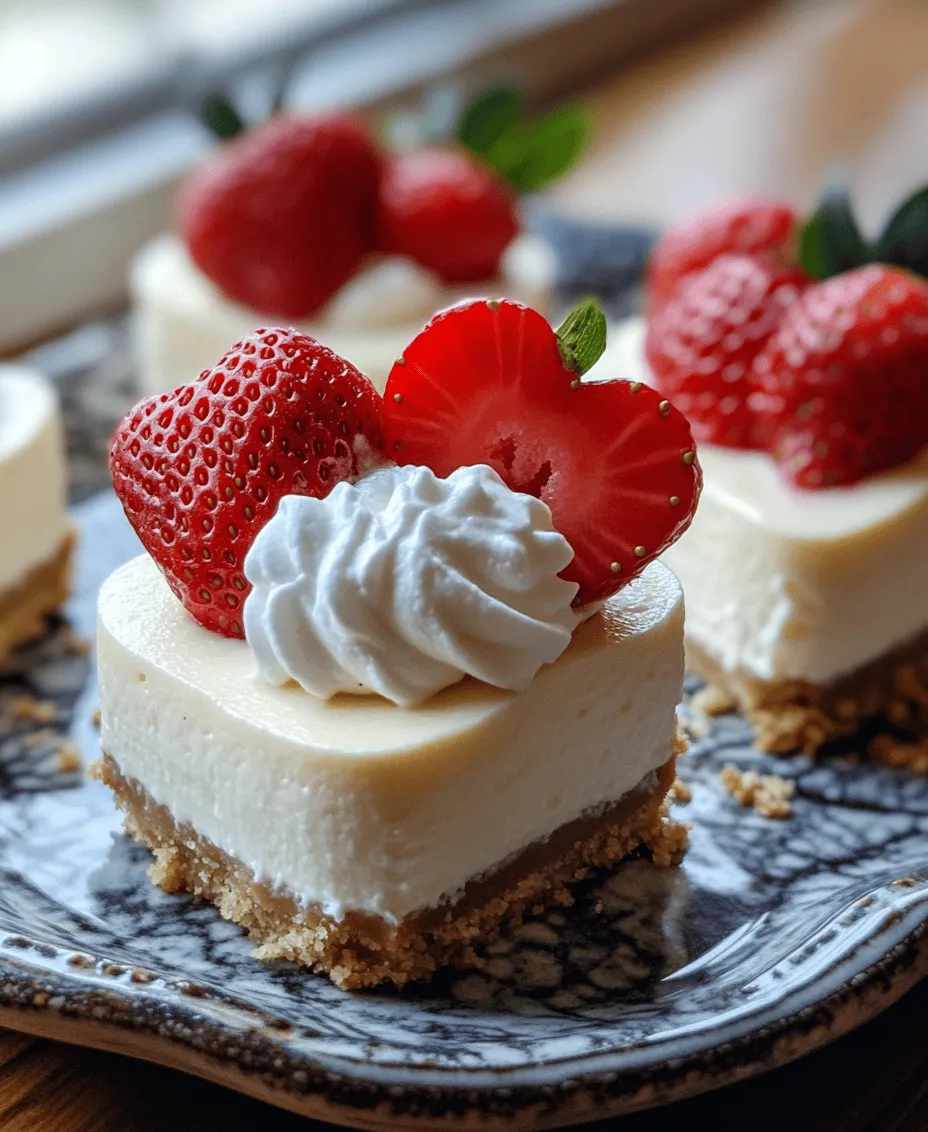
1. Whipped Cream: A dollop of freshly whipped cream on top adds a light, airy complement to the rich cheesecake. You can also pipe it onto the cheesecakes for a more polished look.
2. Fresh Strawberries: Use whole or sliced fresh strawberries as a topping. They not only enhance the strawberry flavor but also add a vibrant color contrast.
3. Mint Leaves: A sprig of fresh mint can add a pop of color and a refreshing aroma that balances the sweet richness of the cheesecake.
4. Chocolate Drizzle: For an indulgent twist, drizzle melted chocolate over the top. Dark or white chocolate can create a stunning visual effect and added flavor.
Pairing with Fresh Fruits: Enhancing Flavor and Visual Appeal
Fresh fruits can beautifully complement your mini cheesecakes. Here are some great ideas:
1. Raspberry or Blueberry Compote: A fruity compote can add a tart contrast to the sweetness of the cheesecakes. Simply simmer berries with a bit of sugar until they break down into a sauce.
2. Citrus Zest: A sprinkle of lemon or lime zest over the top can brighten the flavors and add a zesty kick.
3. Sliced Peaches or Mango: For a tropical twist, consider topping your cheesecakes with thinly sliced peaches or mangoes, enhancing both the flavor and presentation.
Serving Options: From Casual to Elegant
1. Casual Gatherings: Serve the mini cheesecakes on a simple platter, perhaps with a few sprigs of mint for color. This casual presentation is perfect for family get-togethers or picnics.
2. Elegant Events: For a more sophisticated setting, consider placing each cheesecake on individual dessert plates, garnished with a berry and a sprig of mint. Drizzle with berry sauce for added flair.
3. Party Favors: Wrap individual cheesecakes in clear cellophane and tie with a ribbon to create charming party favors for guests to take home.
Variations and Customizations
While strawberry mini cheesecakes are delightful, exploring different flavor variations can keep your dessert game exciting.
Exploring Flavor Variations Beyond Strawberry
1. Lemon Cheesecake: Substitute the strawberry puree with lemon juice and zest for a refreshing citrus cheesecake. This bright flavor is perfect for summer gatherings.
2. Chocolate Cheesecake: For chocolate lovers, mix cocoa powder into the filling or fold in chocolate chips for a rich twist on the classic recipe.
3. Peanut Butter Swirl: Incorporate creamy peanut butter into your cheesecake batter for a nutty flavor that pairs wonderfully with chocolate or banana toppings.
Incorporating Other Fruits: Raspberry, Blueberry, or Mango
1. Raspberry: Replace the strawberry puree with raspberry puree for a tart and sweet flavor. Fresh raspberries make a lovely garnish as well.
2. Blueberry: Blueberry puree can be incorporated similarly to the strawberry and adds a beautiful color. Consider using fresh blueberries as a topping.
3. Mango: For a tropical vibe, mango puree can be used, providing a sweet and exotic flavor. Top with diced mango for extra texture.
Chocolate Lovers: Adding Cocoa or Chocolate Chips
1. Cocoa Powder: Add 1/4 cup of unsweetened cocoa powder to the batter for a chocolatey cheesecake. Adjust the sugar to balance the flavors.
2. Chocolate Chips: Fold in semi-sweet or dark chocolate chips to the batter for added richness and texture.
Gluten-Free Options: Substituting Ingredients for Dietary Needs
1. Crust Alternatives: Use gluten-free graham crackers or almond flour mixed with melted butter for the crust to accommodate gluten-sensitive guests.
2. Thickening Agents: If using a gluten-free option for the filling, ensure your thickening agents (like cornstarch) are certified gluten-free.
Storing and Enjoying Leftovers
If you find yourself with leftovers, proper storage will ensure your mini cheesecakes stay fresh and delicious.
Best Practices for Storing Mini Cheesecakes
1. Airtight Containers: Store the cheesecakes in airtight containers in the refrigerator. They will keep well for up to five days.
2. Freezing: For longer storage, you can freeze the mini cheesecakes. Wrap each one individually in plastic wrap and place them in a freezer-safe container. They can last up to three months.
How to Reheat or Serve Chilled Treats Again
1. Thawing: When ready to enjoy frozen mini cheesecakes, transfer them to the refrigerator and let them thaw overnight. Avoid thawing at room temperature to prevent sogginess.
2. Serving Frozen: If you prefer a frozen treat, serve them straight from the freezer. They will have a delightful ice-cream-like texture, perfect for warm days.
Conclusion: The Joy of Heart-Shaped Mini Cheesecakes
Heart-shaped mini cheesecakes are not only a feast for the eyes but also a celebration of flavor and creativity. Their charming appearance makes them perfect for sharing with loved ones on special occasions or enjoying as a sweet treat at any time. With simple ingredients and straightforward steps, you can create a dessert that delights the palate and warms the heart.
By understanding the intricacies of each component and the process, you are well-equipped to make these delightful treats a staple in your dessert repertoire. Experiment with various flavors, toppings, and presentation styles to make each batch uniquely yours. Embrace the joy of baking and delight your taste buds with these charming mini cheesecakes—because every bite is a celebration!