
Introduction
Pizza is one of the most beloved foods worldwide, enjoyed in countless forms and flavors. From the classic margherita to the robust pepperoni, this dish has evolved into an international favorite that caters to every palate. While traditional pizzas hold a special place in our hearts, the rise of sheet pan pizza has introduced a new level of convenience and creativity to pizza-making.
Sheet pan pizza is a game-changer when it comes to serving large groups or feeding a family. It offers an easy way to whip up a satisfying meal without the fuss of individual pizzas. With a simple dough that can be topped with your favorite ingredients, this style of pizza allows for a variety of flavor combinations, ensuring that everyone at the table will find something they enjoy. Whether you’re hosting a party, looking for a fun family dinner, or just craving a slice (or three), sheet pan pizza has you covered.
One of the best aspects of this recipe is its adaptability. You can customize it to reflect seasonal ingredients, dietary needs, or personal preferences—all while keeping the process straightforward. So, if you’re ready to dive into the world of homemade pizza, let’s explore how to create this delicious dish that’s sure to impress your friends and family.
Understanding Sheet Pan Pizza
Sheet pan pizza, also known as pan pizza, is characterized by its thick, fluffy crust that bakes in a rectangular sheet pan. This style of pizza is different from traditional versions like Neapolitan or New York-style pizzas, which typically feature a thinner crust and are cooked at high temperatures on a stone or in a wood-fired oven. The sheet pan pizza’s unique baking method allows for a golden, crispy exterior while maintaining a soft and chewy interior.
One of the standout features of sheet pan pizza is its versatility. Unlike traditional pizzas that may require specific techniques or equipment, this style can be made with minimal tools—just a sheet pan and an oven. The ease of preparation makes it a favorite among home cooks, especially those new to pizza-making.
Moreover, making pizza at home presents several advantages over ordering takeout. First, the flavor of freshly baked pizza is unmatched; you can experiment with different toppings, sauces, and cheeses to create a pie that’s truly your own. Additionally, homemade pizza allows you to control the ingredients, making it easier to accommodate dietary restrictions. Finally, the process of making pizza can be a fun and rewarding activity to share with family or friends, turning a simple meal into a memorable experience.
Key Ingredients for Sheet Pan Pizza
To create the perfect sheet pan pizza, you’ll need a handful of essential ingredients that work together to produce a delightful dish. Here’s a closer look at what you’ll need:
Flour
The foundation of any pizza dough is the flour. For sheet pan pizza, all-purpose flour is the go-to choice. It strikes the right balance between protein content and gluten development, resulting in a dough that is both strong and pliable. While you can experiment with bread flour for a chewier crust, all-purpose flour is ideal for achieving that classic pizza texture.
Yeast
Yeast is crucial for leavening the dough and giving it that airy quality. Instant yeast is particularly beneficial for this recipe as it doesn’t require proofing, making the preparation process quicker. It activates quickly when combined with warm water, allowing the dough to rise efficiently.
Sugar and Salt
Sugar plays a dual role in pizza dough: it helps to activate the yeast while also enhancing the overall flavor of the crust. On the other hand, salt is vital for flavor enhancement and helps to strengthen the dough’s structure. Together, these ingredients create a well-balanced flavor profile that complements the toppings.
Olive Oil
Olive oil adds richness and flavor to the dough while also contributing to its texture. When incorporated into the dough, it helps keep the crust tender and prevents it from becoming too dry. Additionally, a drizzle of olive oil on the surface of the sheet pan before spreading the dough creates a beautifully crisp bottom crust.
Pizza Sauce
Choosing the right pizza sauce can elevate your sheet pan pizza to new heights. You can opt for store-bought sauces for convenience or whip up a quick homemade version using canned tomatoes, garlic, and herbs. The sauce should be spread evenly on the dough to provide a flavorful base for your toppings.
Cheese
When it comes to cheese, mozzarella is the quintessential choice for pizza. Its excellent melting properties and mild flavor make it the perfect topping. For added depth, consider blending mozzarella with other cheeses such as provolone, cheddar, or even a sprinkle of parmesan for an extra kick.
Assorted Toppings
The beauty of sheet pan pizza lies in its customizability. You can choose from a wide range of toppings, from classic pepperoni and vegetables to gourmet options like arugula and prosciutto. This flexibility allows everyone to personalize their slice, making it a fantastic option for gatherings.
Step-by-Step Instructions for Making Sheet Pan Pizza
Now that we’ve covered the essential ingredients, let’s dive into the step-by-step process of making your own sheet pan pizza. This section will focus on preparing the dough, which is a crucial aspect of achieving the desired texture and flavor.
Preparing the Dough
The first step in creating your sheet pan pizza is preparing the dough. This can be done by hand or with a stand mixer, depending on your preference.
Combining Dry Ingredients
Begin by measuring out your all-purpose flour, instant yeast, sugar, and salt. In a large mixing bowl, combine the flour, sugar, and salt. Mix these dry ingredients thoroughly to ensure even distribution of the yeast and salt, which is essential for proper dough development.
Importance of Water Temperature
Next, you’ll need to add water to the dry mixture. The temperature of the water is critical for activating the yeast. Ideally, the water should be between 100°F and 110°F (37°C to 43°C). Water that is too hot can kill the yeast, while water that is too cold will slow down the activation process. If you don’t have a kitchen thermometer, a good rule of thumb is to use water that feels warm to the touch but not scalding.
Once you’ve added the warm water to the dry ingredients, mix until a shaggy dough forms.
Kneading the Dough
Kneading is the next vital step in developing the dough’s gluten structure. If you’re using a stand mixer, attach the dough hook and knead on low speed for about 5-7 minutes until the dough is smooth and elastic. If kneading by hand, turn the dough out onto a lightly floured surface and knead for approximately 10 minutes.
While kneading, pay attention to the texture of the dough. It should become smooth and elastic, indicating that the gluten has developed properly. If the dough feels too sticky, you can sprinkle in a little more flour as needed, but avoid adding too much to ensure a tender crust.
Signs of Properly Kneaded Dough
After kneading, perform the “windowpane test” to check if your dough is ready. Take a small piece of the dough and stretch it between your fingers. If it forms a thin membrane without tearing, it means the gluten is well-developed, and your dough is ready for the next step.
First Rise
Once the dough is kneaded to perfection, it’s time for the first rise. Lightly oil a large bowl and place the dough inside, turning it to coat the surface in oil. Cover the bowl with a clean kitchen towel or plastic wrap to create a warm environment for the dough to rise.
The first rise typically takes about 1 to 1.5 hours, depending on the ambient temperature. You’re looking for the dough to double in size, which indicates that the yeast has activated and created air bubbles within the dough.
This rising process is critical as it contributes to the dough’s flavor and texture. The longer you let the dough rise, the more complex the flavors will become, so if time permits, consider allowing it to rise for longer than the minimum requirement.
With the first rise complete, you’ll be well on your way to creating an easy and delicious sheet pan pizza that will satisfy everyone at your table. Stay tuned for the next section, where we will continue with the shaping, second rise, and baking instructions that will bring your homemade pizza to life!
Ideal Conditions for Dough Rising
To achieve the perfect dough for your sheet pan pizza, it’s crucial to create an environment conducive to rising. Yeast thrives in warmth, so aim for a spot that is warm but not too hot—around 75°F to 80°F (24°C to 27°C) is ideal. You can create this environment by placing your covered dough in a draft-free area, such as an oven that’s turned off but has the light on, or near a warm stove. The dough should rise until it has doubled in size, which usually takes about 1 to 2 hours, depending on the ambient temperature.
Preheating the Oven and Preparing the Pan
While your dough is rising, preheat your oven to a high temperature—475°F (245°C) is optimal for achieving a crisp crust. A hot oven helps to create steam, which gives the pizza a nice lift and allows the crust to become wonderfully crispy.
As the oven heats, prepare your sheet pan. A standard half-sheet pan (18×13 inches) works perfectly for this recipe. To grease the pan effectively, use a combination of cooking spray and a thin layer of olive oil. This dual approach ensures that the dough won’t stick and allows for an even, golden crust. Spread the oil evenly across the surface of the pan using a pastry brush or your fingers, making sure to cover the corners and edges.
Importance of High Oven Temperature for Achieving a Crisp Crust
High oven temperatures are essential for pizza, as they mimic the intense heat of a traditional pizza oven. This heat cooks the pizza quickly, which helps achieve that desired crunchy bottom while keeping the toppings fresh and flavorful. If your oven doesn’t reach high temperatures, consider using a pizza stone or steel to boost the heat further. Preheat these tools in the oven for at least 30 minutes before baking to maximize the crispiness of your crust.
How to Properly Grease the Sheet Pan for Easy Removal
Proper greasing of the sheet pan is vital to ensure your pizza can be easily removed once baked. After lightly coating the pan with olive oil, consider dusting it with a bit of cornmeal or flour. This additional layer creates a barrier that enhances the non-stick properties and adds a pleasant texture to the base of your crust. Ensure you cover the entire surface to avoid any sticking issues, particularly at the edges.
Shaping the Dough
Once your dough has risen beautifully, it’s time to shape it. Gently punch it down to release excess air, then transfer it to a lightly floured surface. Use your hands to stretch and press the dough into a rectangle that fits the dimensions of your sheet pan.
Techniques for Stretching and Pressing the Dough Evenly
To stretch the dough evenly, start at the center and work your way out, using your fingertips to push the dough outward. If you find that the dough is resistant, let it rest for a few minutes before continuing to stretch. This resting period allows the gluten to relax, making it easier to shape.
For a crust with a slight lip, use your fingers to create a thicker edge around the perimeter of the dough. This will help hold in the sauce and toppings, giving you a perfect crust to bite into.
Adding Sauce and Toppings
Now comes the fun part: adding your sauce and toppings! Start with a generous layer of your favorite pizza sauce. Spread it evenly across the dough, leaving about half an inch around the edges for the crust.
Guidelines for Layering Sauce, Cheese, and Toppings for Optimal Flavor
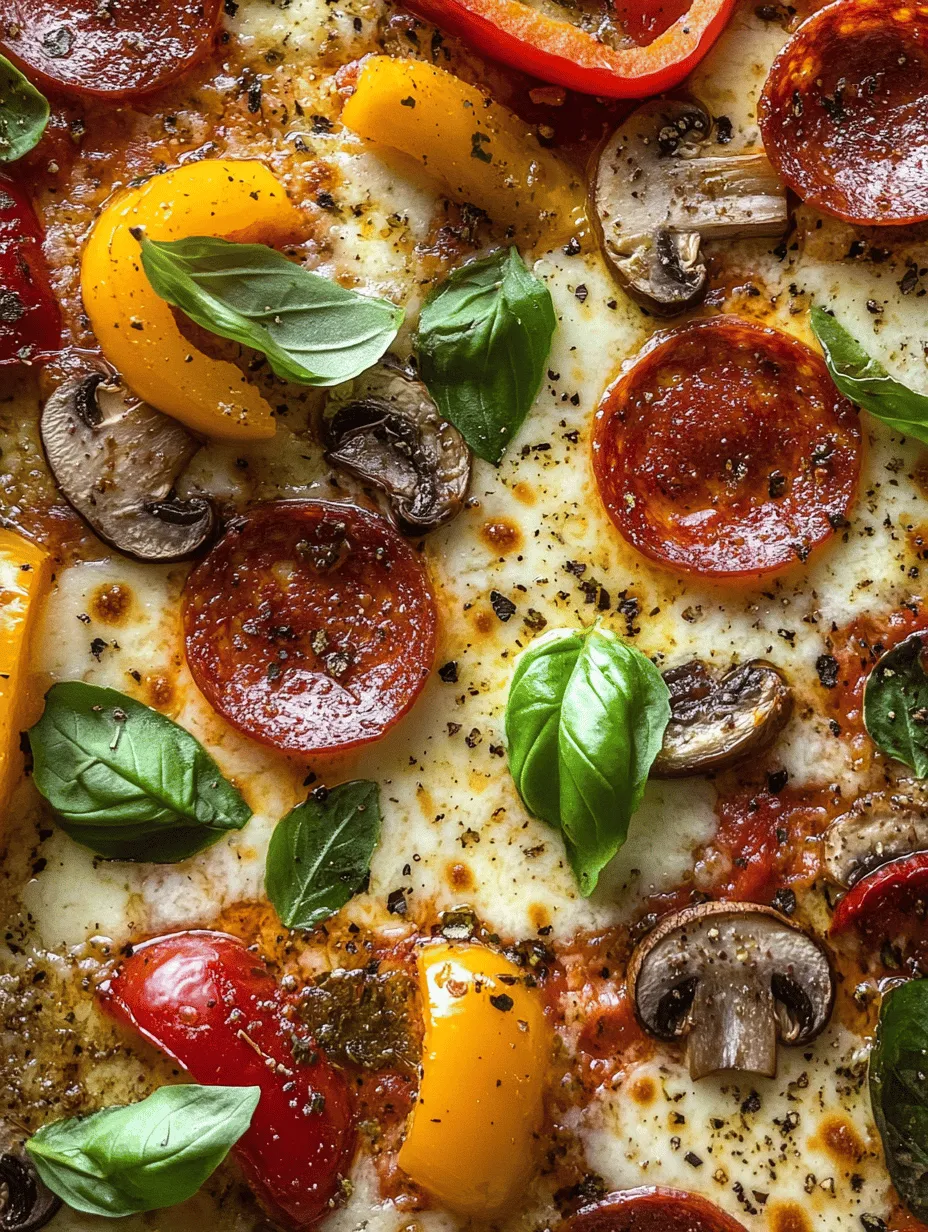
For the cheese, a mix of mozzarella and provolone works wonderfully for a gooey, flavorful experience. Sprinkle the cheese evenly over the sauce, ensuring every bite will have that melty goodness. Then, layer your toppings thoughtfully.
Consider the order: meat toppings generally go beneath the cheese, while veggies can go either on top or beneath depending on how you want them to cook. For example, bell peppers and onions should be placed on top for a slight char, while pepperoni can be placed directly on the cheese for that classic look.
Suggestions for Unique Topping Combinations and Seasonal Variations
Get creative with your toppings! Try a Mediterranean twist with olives, feta, and artichokes, or a BBQ-inspired pizza with pulled pork, red onions, and cilantro. Seasonal variations can include pumpkin and sage in the fall or fresh tomatoes and basil in the summer. The possibilities are endless!
Baking the Pizza
After assembling your pizza, it’s time to bake! Carefully place the sheet pan in the preheated oven.
Importance of Timing and Visual Cues for Doneness
Keep an eye on the pizza while it bakes. It typically takes about 15 to 20 minutes. Look for visual cues: the cheese should be bubbly and golden, and the crust should be firm and slightly browned. If you find that the edges are browning too quickly, you can rotate the pan halfway through baking.
Tips for Achieving a Bubbly, Golden Cheese Topping
For an extra bubbly cheese topping, consider broiling the pizza for the last 1-2 minutes of baking. This will give you that gorgeous, restaurant-style finish. Just be sure to watch it closely to avoid burning!
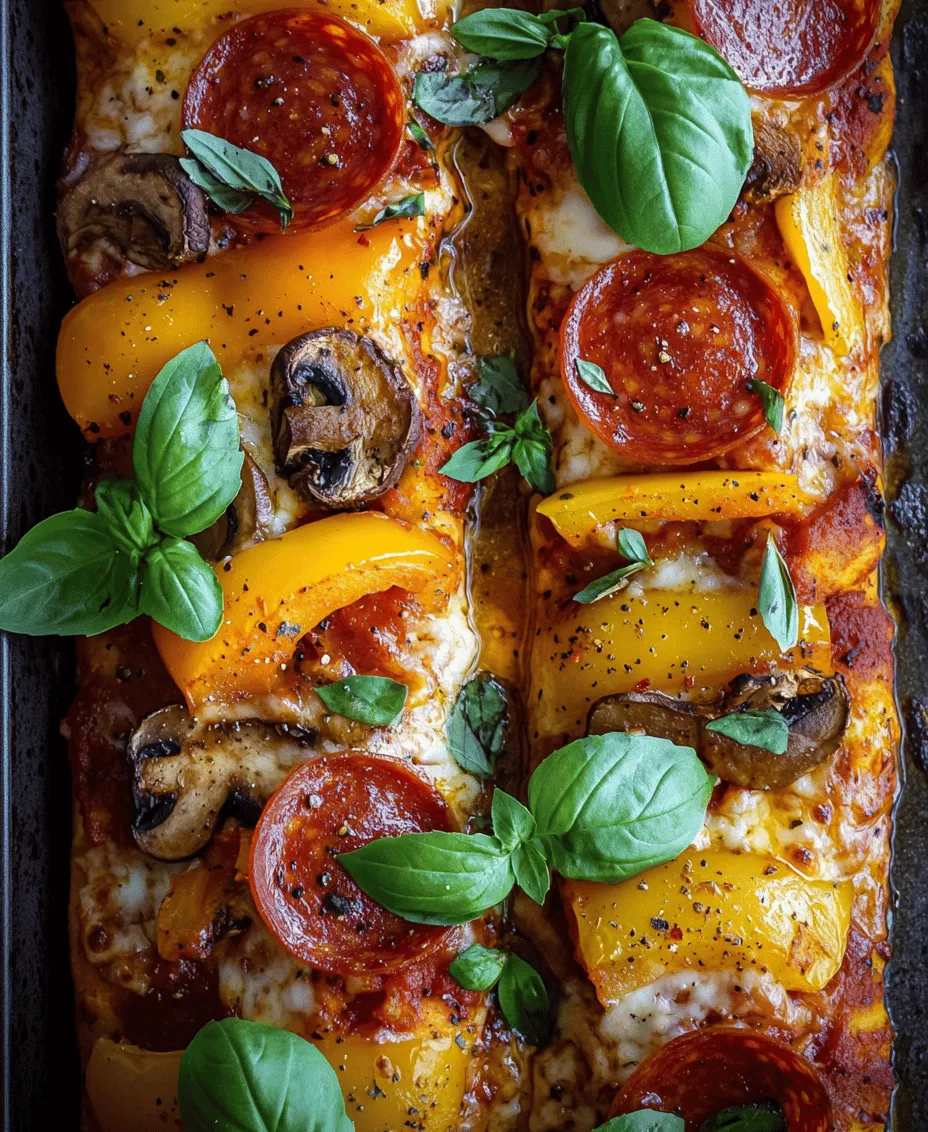
Finishing Touches
Once your pizza is out of the oven, let it rest for a few minutes before slicing. This helps the cheese set up a bit and makes cutting easier.
Ideas for Garnishing and Enhancing Presentation
For a beautiful presentation, consider garnishing your pizza with fresh herbs, such as basil or arugula, or a sprinkle of red pepper flakes for a kick. Drizzle with a bit of olive oil or balsamic glaze for added flavor and visual appeal.
Optional Ingredients to Elevate Flavor
To elevate the flavor, think about adding a sprinkle of grated Parmesan or a dash of garlic powder before baking. These small touches can make a big difference in the overall taste of your pizza.
Serving Suggestions
When it comes to serving your sheet pan pizza, consider pairing it with a fresh salad or a side of garlic bread for a complete meal. A nice glass of red wine or a craft beer can also enhance the dining experience.
Presentation Tips for Serving Pizza at Gatherings or Parties
For gatherings, slice the pizza into squares for easy serving. Arrange the slices on a large platter, and consider adding small bowls of dipping sauces, such as marinara or ranch, for an interactive element.
Creative Ways to Repurpose Leftovers (If Any)
If you have leftovers, don’t fret! Sheet pan pizza can be repurposed in various ways. Try making breakfast pizza by topping cold slices with scrambled eggs and cheese, then reheating. Alternatively, chop the pizza into pieces and toss it with greens for a quick and delicious salad.
Nutritional Information
Making pizza at home allows you to control the ingredients, making it a healthier option compared to takeout.
Overview of the Nutritional Benefits of Homemade Pizza
Homemade pizza can be packed with nutrients, especially if you load it up with vegetables. Whole wheat crusts can provide more fiber, while using fresh ingredients can enhance flavor without excess sodium or preservatives.
Considerations for Dietary Restrictions
For those with dietary restrictions, there are numerous options available. Gluten-free pizza crusts are widely available, or you can make your own using almond flour or cauliflower. For a vegan option, substitute dairy cheese with plant-based alternatives and load up on veggies for flavor and texture.
Conclusion
There’s something truly special about making and sharing homemade sheet pan pizza. This recipe not only allows for creativity and personalization but also brings family and friends together in the kitchen.
Don’t be afraid to experiment with flavors and toppings, and remember that the joy of cooking is in the journey as much as the destination. Whether it’s a casual weeknight dinner or a festive gathering, sheet pan pizza is sure to please everyone at the table. So roll up your sleeves, gather your loved ones, and enjoy the delightful experience of homemade pizza!