
Introduction
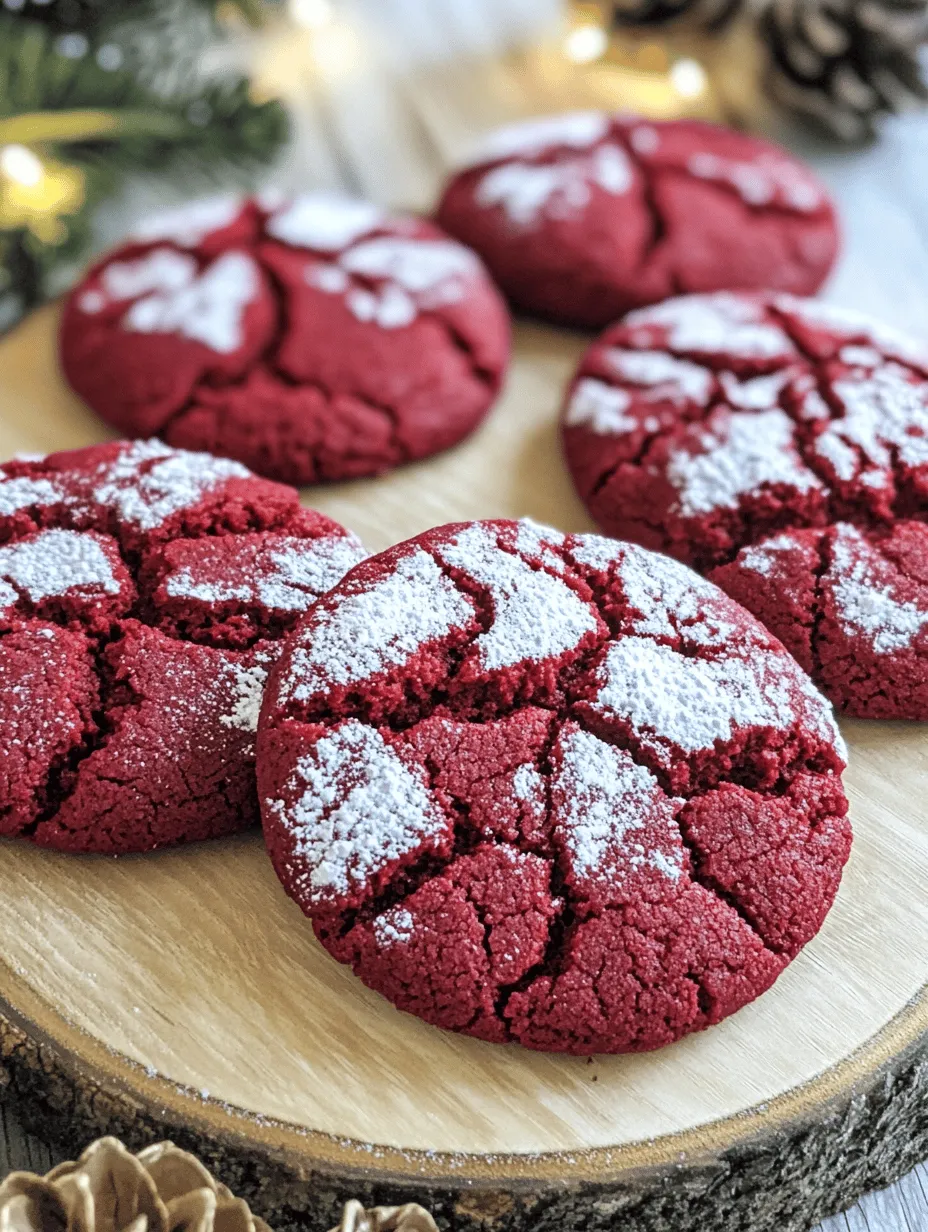
When it comes to holiday baking, few treats capture the festive spirit quite like red velvet crinkle cookies. These cookies are not just a feast for the taste buds but also a visual delight, boasting a rich crimson hue and a beautiful, crinkled finish that makes them the star of any dessert table. Traditionally associated with the beloved red velvet cake, this cookie version has emerged as a popular choice for celebrations, bringing joy and a touch of elegance to gatherings.
The history of red velvet as a dessert trend can be traced back to the early 20th century. Known for its subtle cocoa flavor and striking color, red velvet gained widespread popularity in the 1980s, especially after being featured in a famous restaurant’s recipe. As culinary trends evolved, so did the ways we enjoy red velvet, leading to innovative creations such as cupcakes, brownies, and of course, these delightful crinkle cookies. The allure of red velvet lies not only in its taste but also in its ability to evoke a sense of nostalgia and celebration.
Baking during the holidays is a cherished tradition for many, often serving as a way to connect with loved ones and create lasting memories. The act of mixing, measuring, and baking can be therapeutic, while the aroma of cookies wafting through the home brings warmth and excitement. Festive red velvet crinkle cookies are perfect for sharing with friends and family, making them an ideal addition to holiday festivities, gift baskets, or simply enjoyed with a glass of milk by the fireplace.
The Allure of Festive Red Velvet Crinkle Cookies
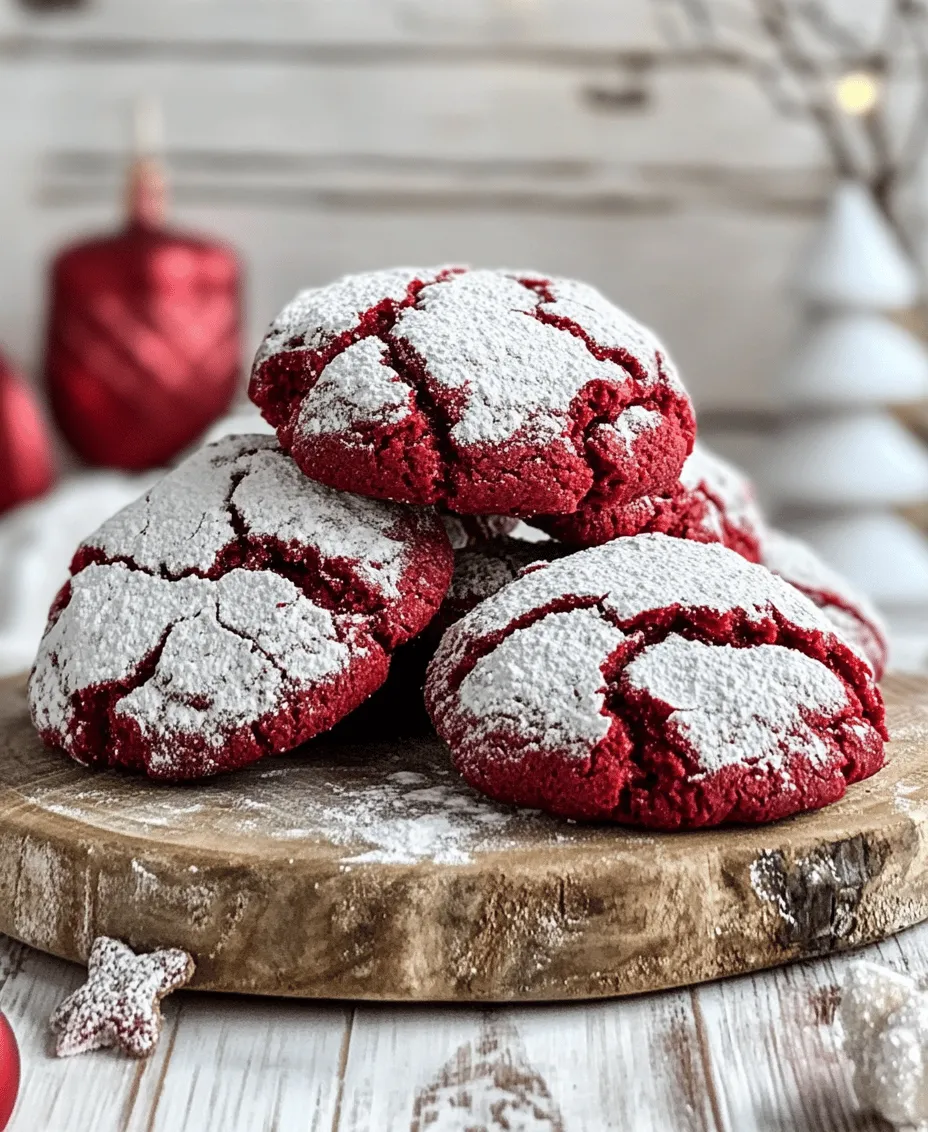
What sets festive red velvet crinkle cookies apart from other treats is their unique texture and vibrant color. The cookies boast a soft and chewy interior, contrasted by a slightly crisp outer layer dusted with powdered sugar. This combination creates a delightful mouthfeel that is both satisfying and indulgent. The signature red hue not only adds to their visual appeal but also signals the special occasion that often accompanies their baking.
These cookies are perfect for celebrations and gatherings, embodying the essence of holiday cheer. Whether adorning a cookie platter at a holiday party, being gifted to neighbors, or served at family gatherings, they are a crowd-pleaser that brings smiles to faces. Their striking color makes them an eye-catching addition to any dessert spread, sparking joy and conversation as people reach for just one more.
Baking is an emotional experience, especially during the festive season. It serves as an avenue for creativity and expression, allowing bakers to share their love through delicious treats. The process of preparing red velvet crinkle cookies can foster connections, as families gather in the kitchen to create something beautiful together. The laughter, shared stories, and the anticipation of tasting the final product create moments that will be cherished for years to come.
Understanding the Ingredients
To create the perfect festive red velvet crinkle cookies, it’s essential to understand each ingredient’s role in the recipe. Here’s a comprehensive breakdown of the key components that come together to form these delightful cookies.
All-Purpose Flour
All-purpose flour serves as the foundation for the cookies, providing the necessary structure. The proteins in the flour develop gluten when mixed, which helps the cookies hold their shape while baking. For the best results, it’s important to measure the flour correctly—too much can lead to dense cookies, while too little can cause them to spread too much.
Unsweetened Cocoa Powder
Adding richness and depth of flavor, unsweetened cocoa powder is a pivotal ingredient in red velvet cookies. It not only contributes to the signature taste but also enhances the dark color, creating the perfect contrast against the vibrant red. Sifting the cocoa powder before use can help eliminate any lumps and ensure an even distribution throughout the dough.
Baking Powder and Baking Soda
Both baking powder and baking soda act as leavening agents in the recipe. These ingredients work together to help the cookies rise and achieve a soft, chewy texture. Baking soda requires an acid (like vinegar or buttermilk) to activate, while baking powder contains its own acid, making it a double-acting agent. This combination ensures that the cookies bake to perfection.
Salt
While salt may seem like a minor ingredient, it plays a crucial role in enhancing the overall flavor of the cookies. It balances the sweetness and brings out the richness of the cocoa, making each bite more satisfying.
Unsalted Butter
Unsalted butter is essential for creating a rich, tender cookie. It adds moisture and flavor, while also aiding in the creaming process when combined with sugar. Using unsalted butter allows for better control over the overall saltiness of the cookies, which is important for achieving the perfect balance of flavors.
Granulated Sugar
Granulated sugar is the primary sweetener in red velvet crinkle cookies, contributing to their delightful sweetness and texture. During the creaming process, sugar helps to incorporate air into the butter, resulting in a light and fluffy cookie. The sugar also caramelizes slightly during baking, adding to the overall flavor profile.
Eggs
Eggs are a crucial component of the cookie dough, providing binding and moisture. They help to hold the ingredients together, creating a cohesive dough that bakes into soft, chewy cookies. Adding eggs one at a time ensures proper incorporation, leading to a more uniform texture.
Red Food Coloring
The vibrant red food coloring is what sets these cookies apart from others. Typically, a gel or liquid food coloring is used to achieve a rich, bold hue. The amount of food coloring can be adjusted depending on personal preference, but it’s important to use a high-quality product for the best results.
Vanilla Extract
Vanilla extract enhances the overall flavor depth of the cookies, complementing the cocoa and sugar. A splash of vanilla adds warmth and complexity, making each bite more enjoyable. For an even richer flavor, consider using pure vanilla extract instead of imitation.
Powdered Sugar
The signature crinkle finish of red velvet crinkle cookies comes from a dusting of powdered sugar. This not only adds a touch of sweetness but also creates a beautiful visual contrast against the vibrant red of the cookie. The powdered sugar should be generously applied before baking, as it will melt slightly during the cooking process, leaving behind that distinctive crinkled appearance.
Step-by-Step Instructions for Perfect Cookies
Now that we’ve covered the essential ingredients that make up festive red velvet crinkle cookies, it’s time to dive into the step-by-step instructions for creating these delightful treats. Follow these guidelines closely to ensure your cookies turn out perfectly every time.
Preheating the Oven and Preparing Baking Sheets
Before starting the mixing process, it’s crucial to preheat your oven. Set it to 350°F (175°C) to ensure that the cookies bake evenly. A properly preheated oven is key for achieving the right texture and preventing the cookies from spreading too much.
While the oven is heating, prepare your baking sheets. Lining them with parchment paper not only prevents the cookies from sticking but also makes for an easier cleanup. Parchment paper helps to create an even baking surface, promoting uniform cooking.
Mixing Dry Ingredients
Start by whisking together the dry ingredients in a bowl. Combine the all-purpose flour, unsweetened cocoa powder, baking powder, baking soda, and salt. Whisking these ingredients together ensures that they are evenly distributed, which is essential for consistent flavor and texture. For an extra step, sift the cocoa powder as you add it to the mix to avoid lumps.
Creaming Butter and Sugar
In a separate mixing bowl, cream together the softened unsalted butter and granulated sugar using an electric mixer. Beat the mixture on medium speed until it becomes light and fluffy, typically about 2-3 minutes. This process is important as it incorporates air into the butter, which will help the cookies rise and achieve a tender texture.
Incorporating Eggs and Color
Once the butter and sugar are well-creamed, it’s time to add the eggs. Introduce them one at a time, mixing well after each addition until fully incorporated. This gradual addition helps to maintain the emulsification of the mixture, ensuring a smooth and cohesive dough.
After the eggs are mixed in, add the red food coloring and vanilla extract. Start with a small amount of food coloring and gradually add more until you reach your desired shade of red. Mix thoroughly to ensure that the color is evenly distributed throughout the dough.
By following these detailed steps, you will be well on your way to creating the most delightful festive red velvet crinkle cookies. The next part will guide you through the remaining steps to complete this delicious recipe, ensuring that your holiday baking is a resounding success.
Tips on Achieving an Even Color Throughout the Dough
Achieving a vibrant, even color in your red velvet crinkle cookies is essential for both visual appeal and flavor depth. To ensure the red hue is consistent throughout the dough, follow these simple tips:
1. Choose the Right Food Coloring: Opt for high-quality gel food coloring rather than liquid. Gel colors provide a more concentrated hue, which is crucial for vibrant results without altering the dough’s consistency.
2. Mix Thoroughly Before Adding Dry Ingredients: When combining your wet ingredients, make sure to mix the food coloring thoroughly into the wet mixture. This ensures that the color is evenly distributed before you incorporate the dry ingredients.
3. Sift Dry Ingredients: Sifting the dry ingredients, especially cocoa powder and flour, helps to eliminate lumps and promotes uniform integration when combined with the wet mixture.
4. Avoid Overmixing: While it’s important to achieve uniformity in color, avoid overmixing the dough once the dry ingredients are added. This could lead to tough cookies, which is counterproductive to achieving the perfect texture.
Combining Wet and Dry Mixtures
Once you have your wet ingredients ready, it’s time to combine them with the dry mixture. Start by adding the dry ingredients to the bowl containing your wet mixture. Use a rubber spatula or wooden spoon to gently fold the two together. This method helps to maintain the airiness of the dough while ensuring everything is incorporated without becoming tough.
Importance of Not Overmixing
Overmixing is a common pitfall when baking cookies. The gluten in the flour develops and can create a chewy texture rather than the desired softness of crinkle cookies. Only mix until the dry ingredients are just incorporated and no flour streaks remain. The dough may appear slightly lumpy, but that’s perfectly fine!
Signs of Properly Combined Dough
You’ll know your dough is properly combined when it has a smooth appearance with no visible flour lumps. The dough should feel slightly sticky but manageable. If it’s too wet, you may need to adjust the flour slightly. However, be cautious not to add too much, as this can alter the final texture.
Chilling the Dough
Chilling your cookie dough is a crucial step that should not be overlooked. When you chill the dough, it solidifies the fats, making the cookies easier to handle and shape. Here’s why this step is essential:
1. Easier Handling: Chilled dough is less sticky, making it easier to roll into balls and coat with powdered sugar.
2. Improved Texture: Chilling the dough allows the flavors to meld, which enhances the overall taste of the cookies. Additionally, it helps create a chewier center while maintaining a slightly crisp edge.
Preparing Cookie Balls
After chilling, it’s time to prepare your cookie balls. Here’s how to do it effectively:
1. Scoop the Dough: Use a cookie scoop or tablespoon to portion out the dough. Aim for uniform sizes to ensure even baking.
2. Roll in Your Hands: Lightly roll each portion of dough between your palms to form a smooth ball. This step is crucial for achieving a nice round shape.
3. Coat in Powdered Sugar: Place the cookie balls in a bowl of powdered sugar. Roll them until they are evenly coated. Making sure to cover all sides ensures that the crinkle effect appears beautifully once baked.
Baking the Cookies
Now that your cookie balls are ready, it’s time for the moment of truth—baking! Follow these tips to ensure perfect cookies:
1. Optimal Baking Times: Preheat your oven to 350°F (175°C). Bake the cookies for 10-12 minutes. Keep an eye on them; the cookies should puff up and develop cracks on the surface.
2. Signs of Doneness: The edges should appear set while the center remains soft. Remember, cookies continue to cook slightly after being removed from the oven, so it’s better to take them out a little underdone.
3. Importance of Spacing: Ensure each cookie ball is spaced at least 2 inches apart on the baking sheet. This allows room for the cookies to spread without merging into one another.
Cooling Process
Once baked, the cooling process is crucial for achieving the best texture. Here’s how to do it right:
1. Cooling on the Baking Sheets: Allow the cookies to cool on the baking sheets for about 5 minutes before transferring them. This helps them set and prevents them from falling apart.
2. Transferring to Wire Racks: After they’ve cooled slightly, use a spatula to transfer the cookies to wire racks. This allows air to circulate around them, preventing them from becoming soggy on the bottom.
Tips for Achieving the Best Red Velvet Crinkle Cookies
Baking can be a bit tricky, and there are common pitfalls to avoid to ensure your red velvet crinkle cookies turn out perfectly:
1. Overmixing Dough: As mentioned before, be gentle while mixing. Overmixing can lead to dense cookies.
2. Not Chilling Properly: If you skip the chilling step or don’t chill the dough long enough, you may end up with flat cookies that lack the desired texture.
3. Adjusting for Humidity and Temperature Changes: Baking is sensitive to environmental changes. On humid days, you may need to add a bit more flour, while on drier days, less flour may be needed. Keep an eye on the dough’s consistency.
The Perfect Pairings for Festive Red Velvet Crinkle Cookies
Enjoying your red velvet crinkle cookies is even better when paired with the right beverages and desserts. Here are some suggestions to enhance your festive experience:
1. Beverage Recommendations: Pair your cookies with a warm cup of coffee or a creamy hot chocolate. For a holiday twist, consider serving them alongside spiced chai or peppermint tea.
2. Complementary Desserts: Create a festive dessert platter by including mini cheesecakes, chocolate truffles, or even a selection of holiday-themed cakes. The vibrant red color of the cookies adds a beautiful contrast to any dessert table.
Storing and Preserving Your Cookies
To maintain the freshness of your red velvet crinkle cookies, follow these best practices for storage:
1. Best Practices for Storing Cookies: Keep your cookies in an airtight container at room temperature. This helps to maintain their softness and prevents them from drying out.
2. Freezing Options for Long-Term Storage: If you want to save some cookies for later, they freeze well! Place them in a single layer on a baking sheet, freeze until solid, and then transfer them to a freezer-safe bag or container. They can be enjoyed for up to three months. To thaw, simply leave them at room temperature for a few hours or pop them in the microwave for a few seconds.
Conclusion
Baking and sharing festive red velvet crinkle cookies is a delightful way to embrace the holiday spirit. These cookies, with their vibrant color and rich flavor, bring joy to any gathering or celebration. Not only do they taste amazing, but the process of baking together can foster cherished memories with family and friends.
As you whip up these cookies, consider exploring variations of the recipe, such as adding white chocolate chips or nuts, to make them your own. Each batch can become a new family tradition, creating a sense of warmth and togetherness during the festive season. So, gather your loved ones, roll up your sleeves, and let the joy of baking fill your kitchen!