Introduction
Marshmallows have long been a beloved staple in desserts and snacks, captivating both young and old with their unique texture and delightful sweetness. From classic s’mores to fluffy toppings on hot cocoa, marshmallows add a special touch to a variety of treats. While store-bought marshmallows are convenient, the magic of homemade marshmallows offers a unique experience that allows for creativity and personalization. One flavor that stands out, evoking joyous memories from childhood, is cotton candy. The mere mention of cotton candy can whisk us back to summer fairs and bustling carnivals, where the sweet, airy treats spun on sticks delightfully melted in our mouths.
This article aims to provide a detailed guide on how to make fluffy cotton candy marshmallows at home. Not only will you learn how to create these whimsical confections, but you will also enjoy the fun and rewarding experience of crafting your very own marshmallows. Whether you’re planning a party, looking for a unique gift, or simply want to indulge your sweet tooth, this recipe is sure to bring a smile to your face.
Understanding the Ingredients
To create the perfect fluffy cotton candy marshmallows, it’s essential to understand the role of each ingredient in the recipe. Here’s a closer look at what you’ll need:
Granulated Sugar
The foundation of any marshmallow recipe, granulated sugar serves two primary roles: sweetness and structure. When heated, granulated sugar caramelizes slightly, contributing to the overall flavor profile of the marshmallows. The sugar also forms the body of the marshmallow, providing the necessary structure that allows it to maintain its shape after being whipped and cooled.
Light Corn Syrup
Light corn syrup plays a crucial role in achieving the desired texture of the marshmallows. It helps prevent crystallization, which can lead to a grainy texture. By adding corn syrup, you ensure that your marshmallows remain smooth and fluffy, creating that signature melt-in-your-mouth experience.
Water
Water is vital in the initial stages of dissolving the sugar and gelatin. It acts as a solvent, allowing the sugar to dissolve completely and ensuring that the gelatin can bloom properly. The right balance of water is crucial, as it affects the overall consistency and texture of the marshmallows.
Salt
Though it may seem counterintuitive, a pinch of salt enhances the flavor profile of the marshmallows. Salt balances the sweetness and intensifies the overall taste, ensuring that the marshmallows aren’t overly sugary.
Unflavored Gelatin
Unflavored gelatin is the key ingredient that gives marshmallows their characteristic fluffy texture. When hydrated, gelatin forms a network that traps air, creating the light and airy structure we associate with marshmallows. It’s essential to use unflavored gelatin, as flavored varieties may alter the final taste.
Cotton Candy Flavoring
To capture the essence of cotton candy, you’ll need cotton candy flavoring. This can be found at specialty baking stores or online. If you can’t find it, there are alternatives such as vanilla extract or other flavored extracts, though they won’t replicate the exact taste of cotton candy.
Food Coloring
To enhance the visual appeal of your marshmallows, consider using food coloring. You can create vibrant or pastel shades, allowing your cotton candy marshmallows to look as delightful as they taste. Gel food coloring is recommended, as it doesn’t alter the consistency of the marshmallow mixture.
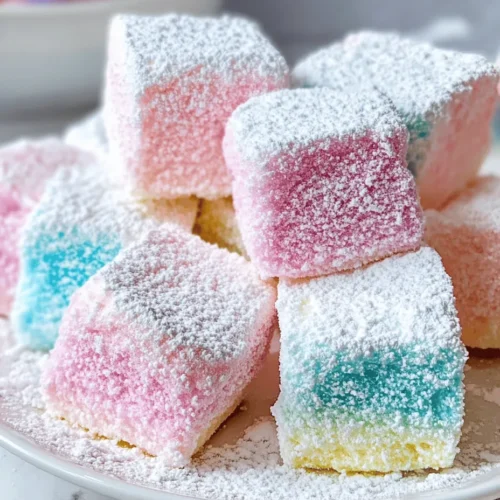
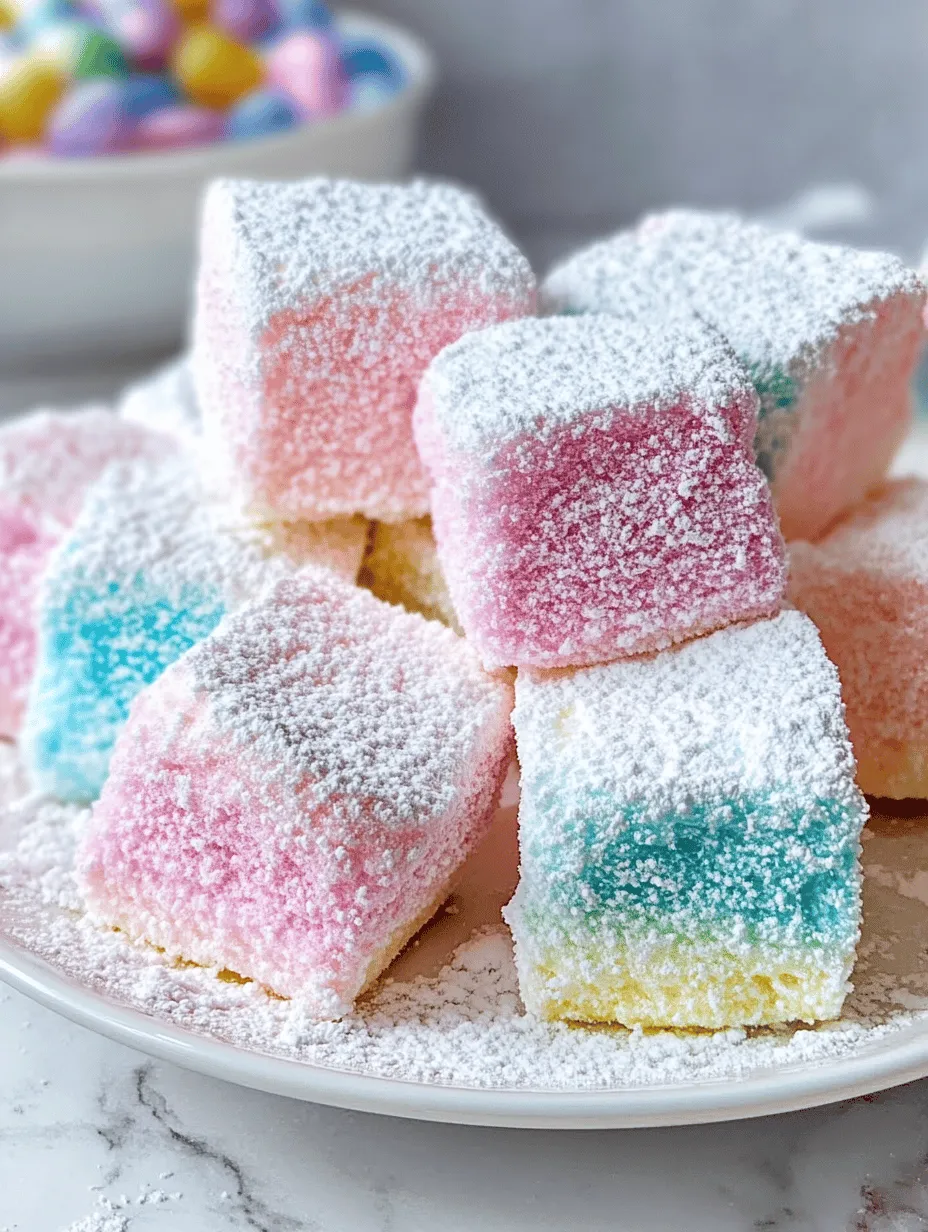
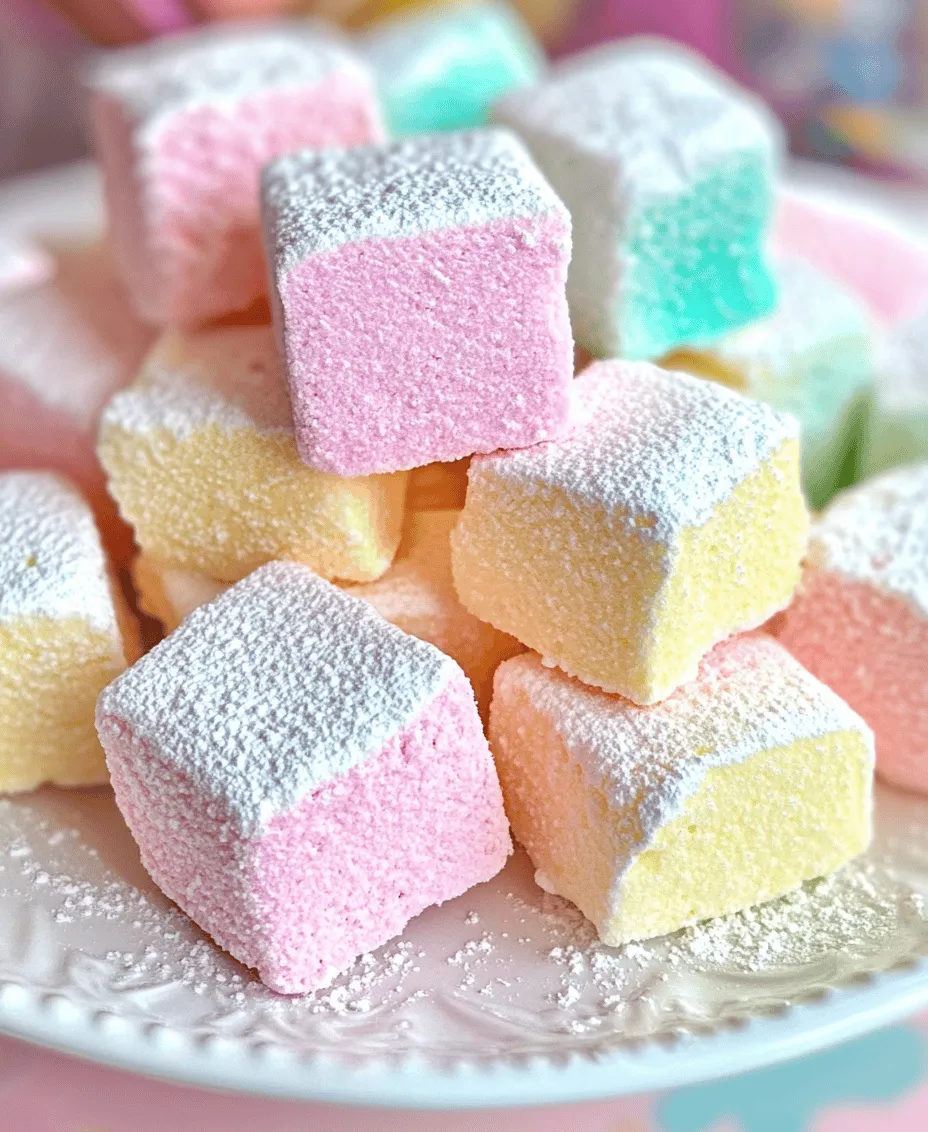
Powdered Sugar and Cornstarch
Lastly, powdered sugar and cornstarch are essential for dusting the marshmallows. This mixture helps prevent stickiness, allowing the marshmallows to be cut and handled without becoming a gooey mess. A light dusting of this mixture will keep your marshmallows looking pristine and ready for enjoyment.
Step-by-Step Preparation Guide
Now that we’ve covered the essential ingredients, let’s dive into the step-by-step preparation guide for your fluffy cotton candy marshmallows. This process may seem intricate, but with careful attention to detail, you’ll be rewarded with delicious, homemade marshmallows.
Preparing the Gelatin
The first step in making your marshmallows is preparing the gelatin. Start by measuring out the unflavored gelatin and placing it in a mixing bowl. Pour in about half a cup of cold water, ensuring that the gelatin is fully submerged. Let it sit for about 10 minutes to allow the gelatin to bloom. Blooming is the process in which the gelatin absorbs water and swells, becoming soft and spongy. This step is crucial, as properly bloomed gelatin will ensure a fluffy texture in your marshmallows.
Making the Sugar Syrup
While the gelatin is blooming, it’s time to prepare the sugar syrup. In a medium saucepan, combine granulated sugar, light corn syrup, and the remaining water. Stir the mixture over medium heat until the sugar dissolves. It’s important to keep an eye on the temperature at this stage; using a candy thermometer, monitor the syrup until it reaches the soft-ball stage, which is 240°F (115°C). This temperature ensures that the sugar syrup has reached the right consistency for marshmallow making.
Safety is paramount when working with hot sugar syrup. Be cautious not to touch the syrup directly, as it can cause severe burns. Use long-handled utensils and avoid splashes.
Combining Gelatin and Syrup
Once your sugar syrup has reached the desired temperature, it’s time to combine it with the bloomed gelatin. Carefully pour the hot sugar syrup into the bowl containing the bloomed gelatin. Be sure to do this slowly and steadily, as the heat from the syrup will dissolve the gelatin. Using an electric mixer, begin mixing on low speed to incorporate the syrup with the gelatin. Gradually increase the speed to medium-high, whipping the mixture until it becomes thick, glossy, and fluffy. This process usually takes about 10-15 minutes. You’ll know it’s ready when the mixture has doubled in volume and holds stiff peaks, resembling whipped egg whites.
Flavoring and Coloring the Marshmallows
Now comes the fun part! Once the marshmallow mixture has reached the desired consistency, it’s time to add your cotton candy flavoring and any food coloring. Start by adding the cotton candy flavoring to the mixture, and mix gently to combine. If you’re using food coloring, add it gradually until you achieve the desired hue. You can mix in a few drops for a pastel look or more for a vibrant finish. Be careful not to over-mix, as you want to maintain the airiness of the marshmallow mixture.
With the flavoring and coloring complete, your marshmallow mixture is now ready to be transferred into a prepared pan, bringing you one step closer to enjoying your homemade fluffy cotton candy marshmallows.
Experimenting with Flavors and Colors
One of the most delightful aspects of making fluffy cotton candy marshmallows is the endless possibilities for flavor and color customization. While the classic cotton candy flavor is a nostalgic favorite, don’t hesitate to experiment with other combinations to create your unique marshmallow experience.
Flavor Variations: You can incorporate various extracts to enhance the taste of your marshmallows. For instance, try adding a few drops of cherry, raspberry, or even vanilla extract to your mixture. If you’re feeling adventurous, consider using natural fruit purees or flavored syrups for a more pronounced taste.
Coloring Your Marshmallows: To achieve beautiful pastel hues, gel food coloring is your best friend. Gel colors are more concentrated than liquid dyes, allowing you to achieve vibrant shades without altering the marshmallow’s consistency. When adding color, start with a small amount and gradually increase until you reach your desired shade. Keep in mind that the color may appear lighter once the marshmallows have set, so aim for a slightly darker tone than you want for the final product.
Whipping the Mixture
The key to achieving the perfect fluffy texture for your marshmallows lies in the whipping process. After your sugar syrup has reached the right temperature, it’s time to whip it into a fluffy cloud of sweetness.
Techniques for the Right Consistency: Begin by pouring the hot syrup into your stand mixer bowl while it’s running on low speed. Gradually increase the speed to medium-high, allowing the mixture to whip for about 10-15 minutes. You’ll know it’s ready when it turns glossy and begins to hold stiff peaks. The marshmallow fluff should be thick enough to hold its shape but still spreadable.
Indicators That the Mixture is Ready: Keep an eye on the texture and color. The marshmallow mixture is ready when it becomes white and fluffy, resembling a thick meringue. You should be able to pull the whisk or paddle attachment away from the mixture, leaving a peak that stands upright without drooping.
Preparing the Pan
Proper preparation of your pan is crucial for successful marshmallow making. If the pan isn’t adequately greased and dusted, you may find it nearly impossible to remove your marshmallows without causing damage.
Greasing and Dusting Recommendations: Use a non-stick cooking spray or a thin layer of vegetable oil to grease the bottom and sides of a pan (usually 9×13 inches). After greasing, dust the pan generously with a mixture of powdered sugar and cornstarch. This combination helps prevent sticking and creates a delightful coating on your marshmallows.
Spreading the Marshmallow Mixture
Once the marshmallow mixture is whipped to perfection, it’s time to transfer it to the prepared pan.
Achieving an Even Top: Pour the marshmallow mixture into the greased and dusted pan, using a spatula to spread it evenly. To achieve a smooth top, lightly spray the spatula with non-stick spray before smoothing out the mixture. This will prevent it from sticking and allow you to create a beautiful, even surface.
Preventing Stickiness: To avoid the marshmallow mixture sticking to your hands or tools, dust them lightly with powdered sugar as well. This will help you work with the mixture without it clinging to everything.
Setting and Cutting the Marshmallows
After spreading the marshmallow mixture, patience is key as it sets.
Importance of Letting the Marshmallows Set: For the best texture, allow your marshmallows to set at room temperature overnight. This resting period allows them to develop their ideal fluffiness and structure, making them easier to cut and enjoy.
Releasing the Marshmallows from the Pan: Once set, gently pull the edges of the marshmallows away from the sides of the pan using a butter knife. If you’ve greased and dusted correctly, they should come away easily. Flip the pan upside down over a clean cutting board or countertop, giving it a gentle tap to release the marshmallows.
Cutting Methods for Uniformity: Use a sharp knife or pizza cutter dusted with powdered sugar to slice your marshmallows into squares or desired shapes. For extra neatness, clean the knife between cuts to ensure clean edges.
Additional Dusting Tips: After cutting, dust all sides of the marshmallows with powdered sugar or a cornstarch-sugar mixture to help prevent sticking. This also adds a nice finish to your marshmallows, making them look professional and inviting.
Storage and Enjoyment Suggestions
To keep your homemade cotton candy marshmallows fresh and delicious, proper storage is essential.
Best Practices for Storing Homemade Marshmallows: Store your marshmallows in an airtight container at room temperature. If you live in a particularly humid climate, consider adding a few packets of silica gel to absorb moisture and keep your marshmallows fluffy.
Creative Ways to Enjoy Marshmallows: Beyond enjoying them as a sweet snack, there are numerous creative ways to incorporate your cotton candy marshmallows into various treats:
– Pairing with Hot Chocolate: Top a steaming mug of hot chocolate with your fluffy marshmallows for a whimsical twist on this classic beverage. The marshmallows will melt slightly, creating a delightful sweetness.
– Incorporating into Desserts: Use your cotton candy marshmallows as an ingredient in s’mores, cupcakes, or brownies. They add a fun flavor and texture to any dessert.
– Fun Topping for Treats: Sprinkle your marshmallows over ice cream or yogurt for an extra pop of sweetness. They also make for a playful topping on cakes or cookies, bringing a carnival vibe to any event.
Conclusion
Creating homemade cotton candy marshmallows is not just about the end product; it’s about the joy and satisfaction that comes from crafting something sweet and nostalgic from scratch. The process of experimenting with flavors and colors allows for personalization, making each batch uniquely yours.
As you delve into the world of marshmallow-making, embrace the opportunity to explore different flavor combinations and pastel hues. The experience of transforming simple ingredients into fluffy, delightful confections brings a taste of carnival fun right into your kitchen. So gather your supplies, unleash your creativity, and enjoy every moment of making these delightful treats!