
Introduction
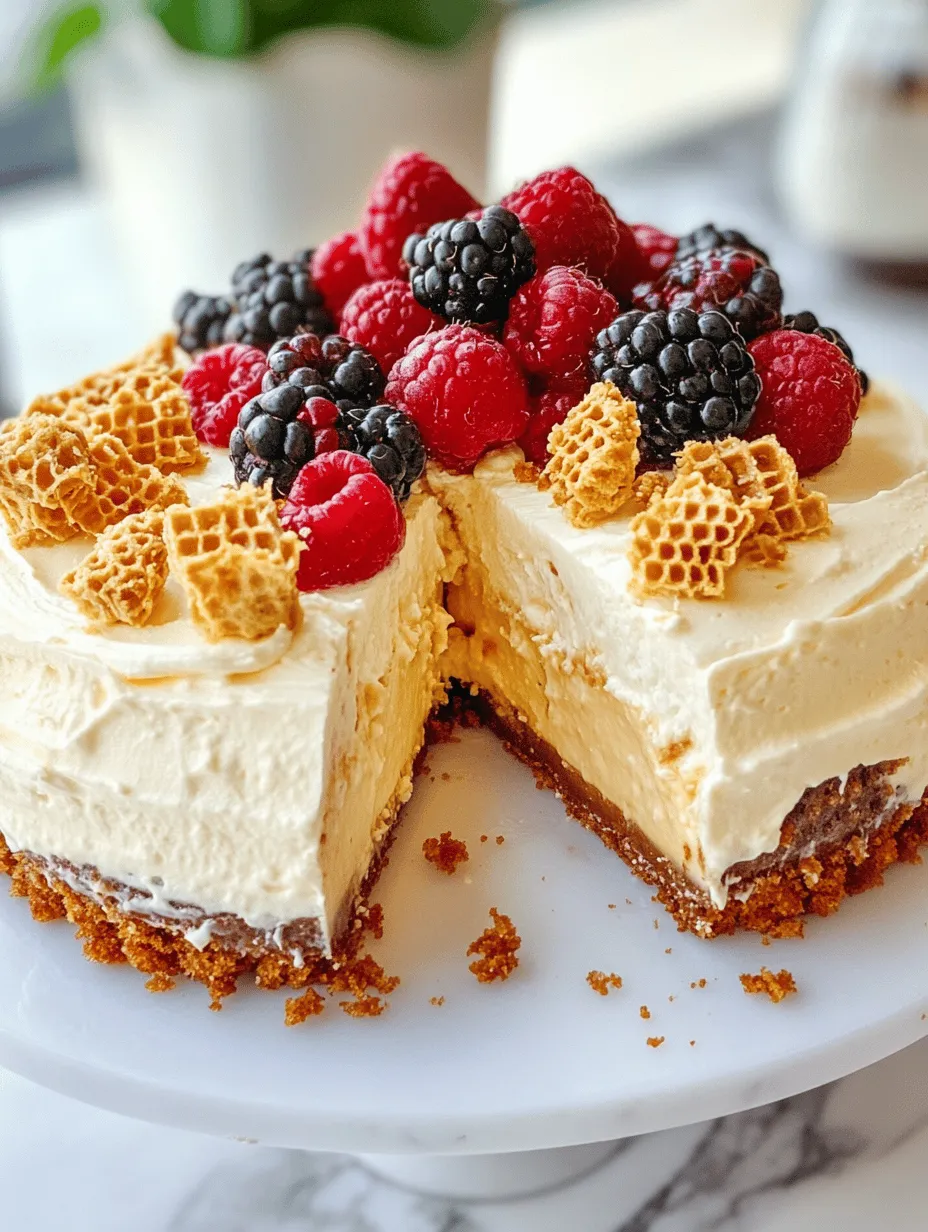
The Honeycomb Cheesecake Cake is a stunning dessert that perfectly marries the rich, creamy goodness of cheesecake with the delightful crunch of homemade honeycomb. This dessert is not just a feast for the eyes; it tantalizes the taste buds with its unique flavor combination and textures. The smooth, velvety cheesecake contrasts beautifully with the crispy, caramelized honeycomb, creating a delightful experience in every bite.
What makes this cake even more appealing is its versatility. Whether you are celebrating a birthday, hosting a special gathering, or simply indulging in a sweet treat after a long week, the Honeycomb Cheesecake Cake fits seamlessly into any occasion. Its impressive appearance and delicious taste make it a showstopper that will leave your guests in awe. Best of all, this recipe is accessible for bakers of all skill levels, from novices to seasoned chefs, ensuring that everyone can enjoy creating this delightful dessert.
In this article, we will take you through a detailed recipe for the Honeycomb Cheesecake Cake, breaking down each component and guiding you through the steps to achieve the perfect balance of flavors and textures. Let’s dive into the ingredients that make this cake so special!
Understanding the Ingredients
Cheesecake Layer
The cheesecake layer is the heart of this cake, and its success hinges on the quality of its ingredients. Here’s a closer look at what you’ll need:
– Cream Cheese: The star of the cheesecake layer, cream cheese provides the rich and tangy flavor that defines cheesecake. It’s essential to use full-fat cream cheese for optimal creaminess and texture. Be sure to let it soften at room temperature before mixing to avoid lumps.
– Greek Yogurt: This ingredient adds a slightly tangy flavor while contributing to the cheesecake’s creamy consistency. It also helps lighten the filling, making it less dense compared to traditional cheesecakes.
– Powdered Sugar: This ingredient sweetens the cheesecake without adding any graininess. Its fine texture allows it to blend effortlessly into the cream cheese mixture, resulting in a smooth finish.
– Vanilla Extract: A splash of vanilla extract enhances the overall flavor profile of the cheesecake, adding a warm and aromatic note that complements the creamy filling.
– Heavy Whipping Cream: The heavy whipping cream is crucial for achieving a light and airy texture in the cheesecake layer. When whipped, it adds volume and richness, ensuring that the cheesecake is not only delicious but also has the perfect consistency.
Honeycomb
The honeycomb is what elevates this cheesecake cake from ordinary to extraordinary. Here’s what you need to know about this delightful addition:
– Texture and Flavor: Honeycomb brings a unique crunch and a caramel-like sweetness that contrasts beautifully with the smooth cheesecake layer. Its crispy texture adds dimension to each bite.
– Ingredients: The honeycomb itself is made from a few simple ingredients:
– Granulated Sugar: This is the main component that caramelizes to create the honeycomb structure.
– Golden Syrup: This syrup adds a rich flavor and helps to achieve the correct consistency during cooking.
– Baking Soda: This ingredient is crucial as it reacts with the syrup to create bubbles, giving the honeycomb its airy structure.
– Vinegar: A small amount of vinegar helps stabilize the mixture and enhances the color of the honeycomb.
The combination of these ingredients not only creates a unique flavor profile but also adds an element of surprise to the cake, making every bite an exciting experience.
Cake Base
The base of the Honeycomb Cheesecake Cake is essential for providing a sturdy foundation for the cheesecake and honeycomb layers. Here’s a breakdown of the base ingredients:
– Flour: All-purpose flour is typically used to provide structure to the cake. It forms the backbone of the cake, ensuring it holds together well while remaining tender.
– Sugar: Granulated sugar sweetens the cake and helps create a light, tender crumb. It also contributes to the cake’s moistness.
– Butter: Unsalted butter adds richness and flavor to the cake. Make sure to use room-temperature butter for easier creaming with the sugar.
– Eggs: Eggs serve as a binding agent, helping the cake hold its shape. They also contribute to the cake’s moisture and richness.
– Milk: Milk adds moisture to the batter, ensuring a soft and fluffy texture. It also helps dissolve the dry ingredients, creating a smooth batter.
– Baking Powder: This leavening agent is crucial for helping the cake rise, resulting in a light and airy texture.
– Vanilla: Just like in the cheesecake layer, vanilla extract enhances the flavor profile of the cake, giving it a warm and inviting aroma.
Choosing high-quality ingredients for each component of the cake is essential for achieving the best results. Fresh, organic ingredients can make a noticeable difference in taste and texture, so take the time to source the best products you can find.
Step-by-Step Instructions
Preparing the Honeycomb
The first step in making your Honeycomb Cheesecake Cake is to prepare the honeycomb. This component can be made ahead of time and stored until you are ready to assemble the cake. Follow these detailed instructions to create your honeycomb:
1. Gather Your Ingredients: Make sure you have all your ingredients ready—granulated sugar, golden syrup, baking soda, and vinegar.
2. Prepare the Cooking Surface: Line a baking tray with parchment paper and set it aside. This will be where you pour the honeycomb mixture once it is cooked.
3. Combine Sugar and Syrup: In a heavy-bottomed saucepan, combine the granulated sugar and golden syrup. Place the saucepan over medium heat, stirring gently until the sugar has dissolved completely.
4. Bring to a Boil: Once the sugar is dissolved, stop stirring and allow the mixture to come to a boil. Use a candy thermometer to monitor the temperature; you want to reach the hard crack stage, which is around 300°F (150°C).
5. Whisk in Baking Soda and Vinegar: Once the mixture reaches the desired temperature, remove it from the heat. Quickly whisk in the baking soda and vinegar. Be careful, as the mixture will bubble up significantly. This reaction is what creates the airy texture of the honeycomb.
6. Pour and Cool: Immediately pour the mixture onto the lined baking tray. Spread it out gently if needed, but do not touch it too much. Allow the honeycomb to cool completely at room temperature. Once cooled, break it into pieces for decoration on your cheesecake cake later.
Making the Cheesecake Filling
While the honeycomb is cooling, you can start preparing the cheesecake filling. Follow these steps to create a luscious cheesecake layer:
1. Cream the Cheese: In a large mixing bowl, add the softened cream cheese. Using an electric mixer, beat the cream cheese on medium speed until it is smooth and free of lumps.
2. Add Greek Yogurt: Next, add the Greek yogurt to the bowl and continue mixing until well combined. This will help create a lighter texture in the cheesecake.
3. Incorporate Sugar and Vanilla: Gradually add the powdered sugar and vanilla extract to the cream cheese mixture. Beat until everything is well combined, and the mixture is smooth.
4. Whip the Cream: In a separate bowl, pour in the heavy whipping cream. Using a clean mixer, whip the cream until stiff peaks form. This step is crucial as it adds airiness to the cheesecake layer.
5. Fold in the Cream: Gently fold the whipped cream into the cream cheese mixture, being careful not to deflate the whipped cream. Use a spatula to combine until just incorporated; the mixture should be light and fluffy.
6. Chill the Filling: Once your cheesecake filling is ready, cover the bowl with plastic wrap and refrigerate it for at least 30 minutes to an hour. Chilling will allow the flavors to meld and the filling to set slightly, making it easier to assemble the cake later.
With the honeycomb prepared and the cheesecake filling chilling, you are well on your way to creating a stunning Honeycomb Cheesecake Cake. In the next segment, we will cover how to prepare the cake base and assemble all the delicious components to bring this dessert to life. Stay tuned!
Techniques for Whipping Heavy Cream
Whipping heavy cream to soft peaks is a crucial step in achieving that light and airy texture for your Honeycomb Cheesecake Cake. Start by ensuring that your heavy cream is chilled, as cold cream whips better. Use a large mixing bowl and a whisk or an electric mixer fitted with a whisk attachment.
1. Start Slow: Begin whisking on a low speed to avoid splattering, gradually increasing to medium speed. This allows the cream to thicken evenly.
2. Watch for Soft Peaks: Continue whipping until soft peaks form. This means that when you lift the whisk out of the cream, the peaks should gently bend over at the tips. Be careful not to over-whip, as this can turn the cream grainy.
3. Folding Technique: Once you have achieved the desired consistency, it’s time to fold the whipped cream into your cheesecake mixture. Use a silicone spatula to gently lift the cream from the bottom of the bowl and fold it over the cheesecake mixture. The key is to be gentle and use a figure-eight motion to maintain the airiness of the whipped cream. This step is essential in keeping the cheesecake light and fluffy.
Baking the Cake
Now that your cream is whipped and folded, it’s time to bake the cake layers that will complement your cheesecake filling.
Preheating the Oven and Preparing Cake Pans
1. Preheat the Oven: Set your oven to 350°F (175°C) to ensure it’s adequately heated when you place the cakes inside.
2. Prepare Your Cake Pans: Grease two 9-inch round cake pans with butter or non-stick spray to prevent sticking. You can also line the bottoms with parchment paper for extra assurance.
Creaming Butter and Sugar
1. Cream the Mixture: In a large mixing bowl, beat 1 cup of softened butter and 1 ½ cups of granulated sugar together until the mixture is pale and fluffy. This usually takes about 3-5 minutes. The incorporation of air during this step is key to achieving a light cake.
2. Add Eggs: Add 4 large eggs, one at a time, ensuring that each egg is fully incorporated before adding the next. This helps in achieving a smooth batter.
Mixing Dry and Wet Ingredients
1. Combine Ingredients: In a separate bowl, whisk together 2 ½ cups of all-purpose flour, 2 ½ teaspoons of baking powder, and a pinch of salt. Gradually add the dry ingredients to the creamed mixture, alternating with 1 cup of milk. Start and end with the dry ingredients. Mix until just combined to avoid overworking the batter.
2. Monitor Baking Time: Pour the batter evenly into the prepared cake pans and smooth the tops. Bake for 25-30 minutes, or until a toothpick inserted in the center comes out clean. Keep an eye on the cakes as oven temperatures can vary.
Assembling the Cake
Once your cake layers have cooled completely, it’s time to assemble your Honeycomb Cheesecake Cake.
Layering the Cheesecake Filling
1. First Layer: Place one cake layer on a serving platter. Spread a generous layer of cheesecake filling over the top. Make sure it reaches the edges for a beautiful presentation.
2. Add Honeycomb: Crumble some honeycomb over the cheesecake filling. This adds texture and sweetness.
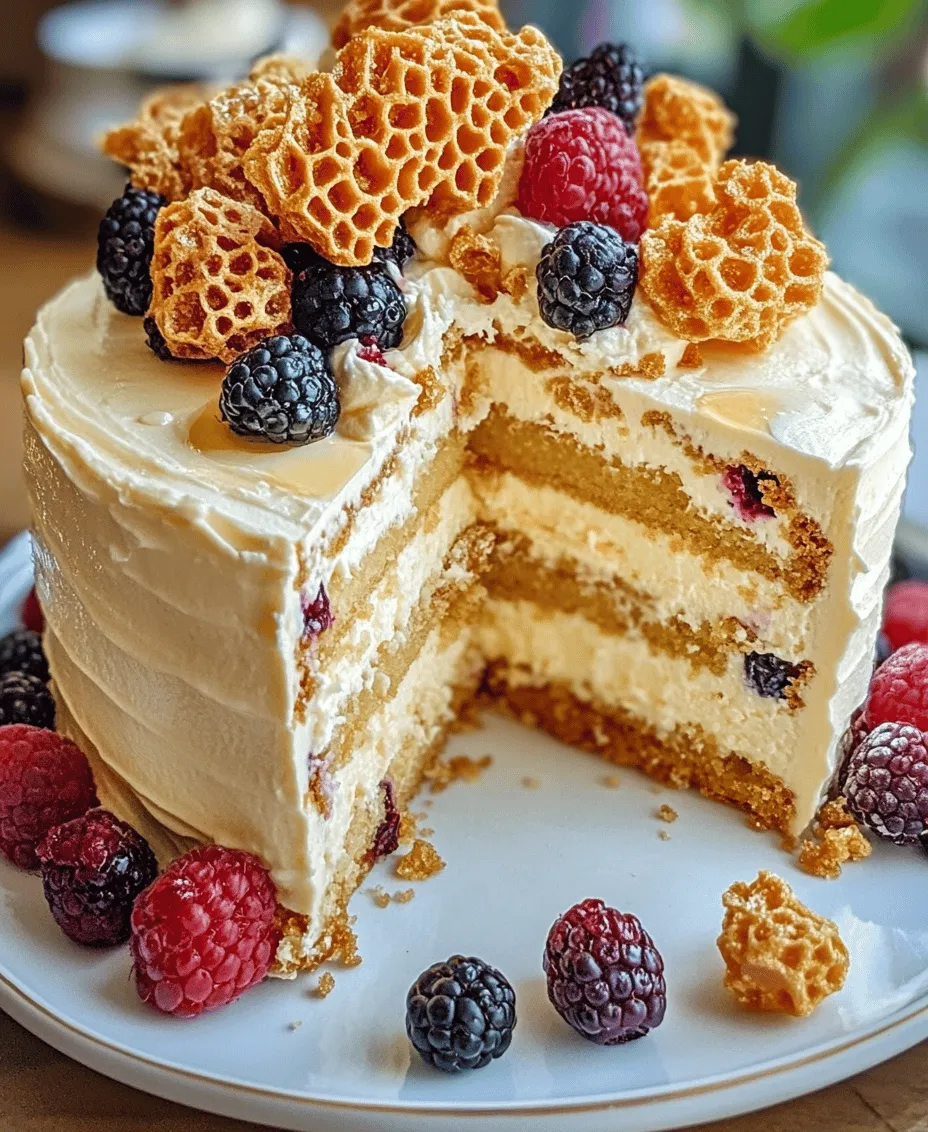
3. Second Layer: Carefully place the second cake layer on top. Repeat the process by adding more cheesecake filling and crumbled honeycomb.
Decorating the Top
1. Finish with Cream: Use any remaining whipped cream to cover the top of the cake.
2. Creative Ideas: For decoration, consider adding whole pieces of honeycomb, fresh berries like raspberries or blueberries, or even a drizzle of honey for a polished look.
3. Neat Assembly Tips: To ensure a neat assembly, use a cake leveler or serrated knife to trim the tops of the cakes if they have domed. This will help them fit together flawlessly.
Chilling and Serving
Chilling your assembled cake is crucial for setting the cheesecake layer properly.
1. Chill: Cover the cake with plastic wrap and refrigerate for at least 4 hours, preferably overnight. This allows the layers to meld together and the cheesecake to firm up.
2. Presentation Tips: When ready to serve, slice the cake with a hot knife (run it under hot water and wipe it dry) for clean cuts. Serve each slice with a garnish of additional fresh berries or a sprig of mint for an elegant touch.
Flavor Profile and Texture
The flavor combination of the Honeycomb Cheesecake Cake is a delightful experience.
– Creamy Cheesecake: The creamy cheesecake layer offers a rich, velvety taste that melts in your mouth, perfectly balanced by the sweetness of the honeycomb.
– Textural Contrast: The fluffy cake layers provide a light, airy counterpoint to the smooth cheesecake. The crunchy honeycomb adds an unexpected texture that elevates each bite, creating a dessert that is both sophisticated and comforting.
– Flavor Harmony: The blend of sweet honey with the tang of cream cheese creates a harmonious flavor profile that is both indulgent and refreshing.
Occasions for Serving Honeycomb Cheesecake Cake
This Honeycomb Cheesecake Cake is a versatile dessert that shines on many occasions.
– Celebratory Events: It’s perfect for birthdays, anniversaries, and holiday gatherings, making it a show-stopper at any dessert table.
– Pairing Suggestions: Consider pairing it with coffee, a sweet dessert wine, or a refreshing herbal tea to complement the rich flavors of the cake. The cake’s sweetness can be beautifully balanced by a bitter beverage, enhancing the overall tasting experience.
– Making Lasting Impressions: Its stunning presentation and delightful flavor make it an ideal choice for potlucks or as a centerpiece for any festive occasion.
Conclusion
The Honeycomb Cheesecake Cake is an exquisite blend of flavors and textures, featuring the luxurious creaminess of cheesecake, the lightness of cake, and the delightful crunch of honeycomb. Each element harmonizes beautifully, creating a dessert that is sure to impress.
Encouragement to readers: We invite you to try making this cake and savor its unique taste. Share your experiences, variations, or any creative twists you put on this recipe. Whether for a special occasion or a cozy family gathering, this cake will surely become a cherished favorite. Enjoy the process of creating this masterpiece, and let the delightful flavors bring joy to your table!
