
Introduction
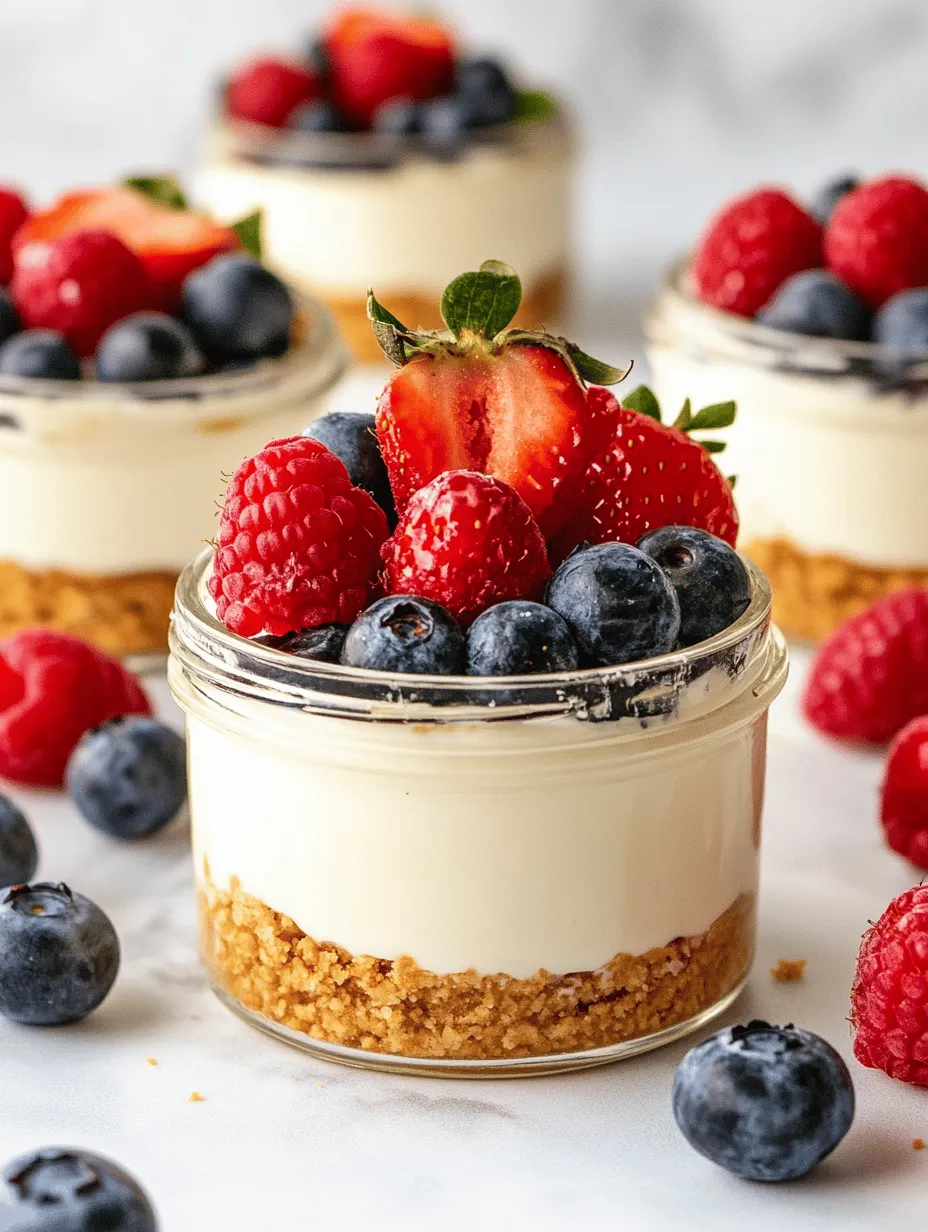
In today’s health-conscious world, the demand for desserts that strike a balance between indulgence and nutrition is on the rise. High-protein desserts have gained immense popularity, especially among fitness enthusiasts and those seeking healthier alternatives to traditional sweets. One such delectable option that has captured the hearts of many is the high protein cheesecake jar. These delightful treats encapsulate the creamy richness of cheesecake while packing in a powerful protein punch, making them a perfect guilt-free indulgence.
Cheesecake is already a beloved dessert with its velvety texture and sweet flavor profile. However, the traditional version often comes with a hefty calorie count and high fat content. Enter the high protein cheesecake jar: a versatile dessert that can be easily prepared at home, customizable to suit individual tastes, and perfect for satisfying those sweet cravings without the guilt. In this article, we will walk through the delectable world of high protein cheesecake jars, highlighting their nutritional benefits, ingredient breakdowns, and step-by-step instructions for making these delightful treats.
Understanding the Ingredients
The success of any recipe lies in its ingredients, and the high protein cheesecake jar is no exception. Each component plays a crucial role in not only enhancing flavor but also contributing to the overall nutritional profile of the dessert. Below, we explore the key ingredients that make up this delicious treat.
Low-Fat Cream Cheese
One of the star ingredients of our cheesecake jars is low-fat cream cheese. This choice is fundamental in creating a creamy base without the excess calories and fat that typically accompany regular cream cheese. Low-fat cream cheese maintains that rich, smooth texture we all love in cheesecake, allowing us to enjoy its taste while being mindful of our dietary goals. With lower calorie content, this ingredient helps in keeping the overall calorie count of the dessert in check, making it an excellent option for those watching their weight.
Greek Yogurt
Another powerhouse ingredient found in high protein cheesecake jars is Greek yogurt. Renowned for its thick, creamy consistency, Greek yogurt is a fantastic addition that significantly boosts the protein content of the dessert. A single serving can add up to 10 grams of protein or more, depending on the brand. Additionally, Greek yogurt is a source of probiotics, which are beneficial for gut health, making this ingredient not just a tasty choice but also a nutritious one. The tangy flavor of Greek yogurt complements the sweetness of the other components, resulting in a well-rounded dessert.
Protein Powder
To elevate the protein content even further, incorporating protein powder is key. There are various types available—whey protein, plant-based protein, casein, and more—each providing unique benefits. Whey protein, derived from milk, is quickly absorbed, making it an excellent choice for post-workout recovery. On the other hand, plant-based proteins, such as pea or hemp protein, cater to those following vegan diets. When choosing a protein powder, consider flavor options; vanilla or chocolate protein powders can seamlessly blend into the cheesecake mix, enhancing both taste and nutritional value.
Sweeteners: Honey vs. Maple Syrup
The sweetness of our high protein cheesecake jars comes from natural sweeteners like honey or maple syrup. Both options offer a more wholesome alternative to refined sugars, providing additional nutrients along with sweetness. Honey, with its lower glycemic index, causes a slower rise in blood sugar levels, making it a suitable choice for those monitoring their sugar intake. Maple syrup, on the other hand, is rich in antioxidants and contains minerals such as manganese and zinc. The choice between the two often boils down to personal preference, both adding a delightful flavor that perfectly complements the creaminess of the cheesecake.
Graham Crackers and Coconut Oil
To create that essential cheesecake crust, graham crackers are a must. They bring a delightful crunch and a hint of sweetness to the dessert. When combined with coconut oil, which provides healthy fats and enhances the flavor, you achieve a crust that is both satisfying and nutritious. Coconut oil also acts as a binding agent, helping to hold the crust together while imparting a subtle tropical flavor that pairs beautifully with the creamy filling.
Toppings and Garnishes
The fun doesn’t end with the cheesecake base; toppings and garnishes allow for endless creativity. Fresh berries, such as strawberries, blueberries, or raspberries, not only add vibrant color to your jars but also provide additional vitamins, minerals, and antioxidants. Nuts, whether chopped almonds, walnuts, or pecans, introduce a delightful crunch and healthy fats, enhancing the overall texture. For a touch of decadence, consider adding dark chocolate shavings; their rich flavor can elevate your cheesecake jars while offering health benefits, such as improved heart health due to their antioxidant properties.
Step-by-Step Instructions for High Protein Cheesecake Jars
Creating high protein cheesecake jars is a straightforward process that anyone can master, regardless of their culinary skills. Below, we provide a detailed breakdown of the preparation steps, ensuring clarity for readers at all levels.
Step 1: Gather Your Ingredients
Before diving into the preparation, it’s essential to have all your ingredients ready. Here’s what you’ll need:
– For the Cheesecake Filling:
– 8 oz. low-fat cream cheese, softened
– 1 cup Greek yogurt
– 1/2 cup protein powder (vanilla or chocolate flavored)
– 1/4 cup honey or maple syrup (adjust to taste)
– 1 teaspoon vanilla extract
– A pinch of salt
– For the Crust:
– 1 cup graham cracker crumbs
– 1/4 cup melted coconut oil
– For Toppings:
– Fresh berries, nuts, or dark chocolate shavings (your choice)
Step 2: Prepare the Crust
1. Mix the Ingredients: In a medium-sized bowl, combine the graham cracker crumbs and melted coconut oil. Stir until the crumbs are evenly coated, resembling a wet sand consistency.
2. Form the Crust: Spoon the graham cracker mixture into the bottom of your jars, pressing down firmly to create an even layer. This will serve as the base for your cheesecake filling.
Step 3: Make the Cheesecake Filling
1. Blend the Base: In a large mixing bowl, add the softened low-fat cream cheese and Greek yogurt. Use an electric mixer to beat them together until smooth and creamy, ensuring there are no lumps.
2. Add the Protein Powder: Gradually add the protein powder to the mixture, continuing to blend until fully incorporated.
3. Sweeten the Mixture: Pour in the honey or maple syrup, vanilla extract, and a pinch of salt. Mix again until all the ingredients are well combined and the mixture is smooth.
Step 4: Layer the Cheesecake Jars
1. Fill the Jars: Carefully spoon the cheesecake filling over the graham cracker crust in each jar, filling them about three-quarters of the way full. Smooth out the top with the back of a spoon or a spatula.
2. Chill the Jars: Once filled, cover the jars with lids or plastic wrap and refrigerate them for at least 2 hours, allowing the flavors to meld and the cheesecake to set.
Step 5: Add Your Toppings
1. Serve and Garnish: After chilling, remove the jars from the refrigerator. Just before serving, top each cheesecake jar with your choice of fresh berries, nuts, or dark chocolate shavings to add a burst of flavor and texture.
By following these simple steps, you can create delicious high protein cheesecake jars that are not only satisfying but also nutritious. Keep reading to discover tips for perfecting your cheesecake jars and answers to common questions related to this delightful dessert.
Preparing the Base
To create a delicious graham cracker crust for your High Protein Cheesecake Jars, start by gathering your ingredients: crushed graham crackers, melted coconut oil (or unsalted butter), and a touch of sugar. The combination of these elements will provide the perfect foundation for your cheesecake.
1. Crush the Graham Crackers: If you’re using whole graham crackers, place them in a food processor and pulse until they reach a fine crumb consistency. You can also use a zip-top bag and a rolling pin to crush them manually if you don’t have a processor. Aim for about 1 ½ cups of fine crumbs.
2. Mix the Ingredients: In a mixing bowl, combine the crushed graham crackers with 4 tablespoons of melted coconut oil and 2 tablespoons of sugar. The oil will help bind the crumbs together, while the sugar adds a hint of sweetness.
3. Achieve the Right Texture: Mix until the crumbs are evenly coated with the oil and sugar. The mixture should resemble wet sand; when squeezed in your hand, it should hold its shape. If it’s too dry, add a little more melted coconut oil, one teaspoon at a time.
4. Press the Mixture: Divide the crust mixture evenly among your jars (about 2 tablespoons per jar). Use the back of a spoon or your fingers to firmly press the mixture down into the bottom of each jar. This step is crucial for ensuring that the crust holds together and provides a solid base for the cheesecake filling.
Making the Cheesecake Filling
Now that your crust is ready, it’s time to create the creamy cheesecake filling. This part is essential for achieving that luscious, smooth texture that everyone loves.
1. Gather Your Ingredients: You will need high-protein cream cheese, Greek yogurt, a sweetener of your choice (like honey or maple syrup), vanilla extract, and protein powder (vanilla or unflavored works well).
2. Mix the Ingredients: In a large mixing bowl, combine 8 ounces of softened high-protein cream cheese and 1 cup of Greek yogurt. Beat them together using an electric mixer on medium speed until the mixture is smooth and creamy with no lumps.
3. Add Sweetener and Flavor: Next, add 1/4 cup of your chosen sweetener and 1 teaspoon of vanilla extract. If you’re using protein powder, this is the time to add 1 to 2 scoops, depending on your preference for protein content.
4. Blend Until Smooth: Continue mixing until everything is well incorporated and the filling is completely smooth. This step is vital, as a grainy or lumpy filling will detract from the overall texture of your cheesecake jars.
Layering the Jars
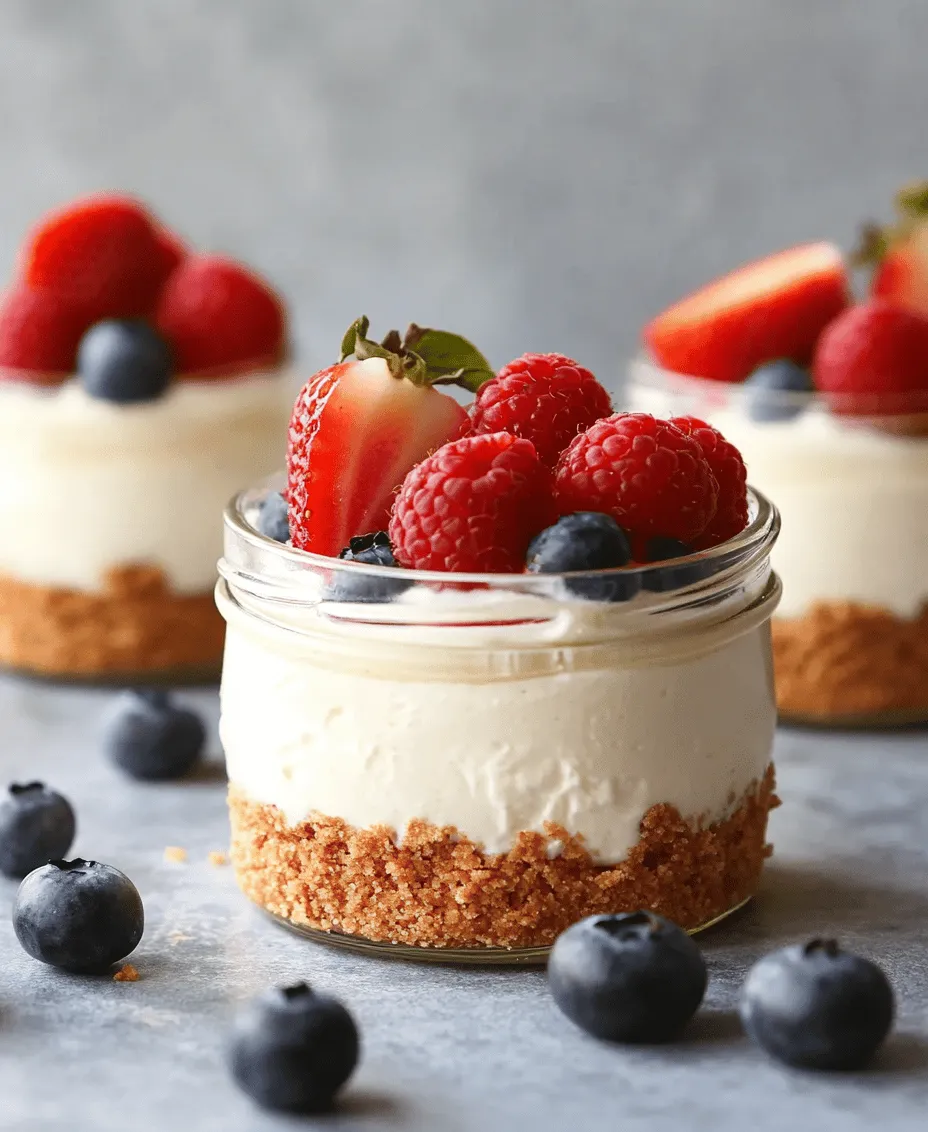
Layering your cheesecake jars is where creativity shines. The visual appeal of these jars enhances the dining experience, making it a treat for the eyes as well as the palate.
1. Start with the Base: Begin by adding a layer of your graham cracker crust to the bottom of each jar. Use the back of a spoon to smooth it out evenly.
2. Add the Cheesecake Filling: Using a piping bag or a spoon, carefully add a layer of your cheesecake filling on top of the crust. Aim for about 1/4 to 1/3 of the jar’s height, depending on how many layers you want.
3. Continue Layering: You can alternate layers of crust and filling as desired. For a delightful twist, consider adding fruit, such as berries or banana slices, between layers to introduce additional flavors and textures.
4. Be Creative: Don’t hesitate to play with the layering. Consider creating a marbled effect by gently swirling the filling with a spoon or adding a layer of fruit puree on top.
Chilling the Jars
Once your jars are beautifully layered, it’s time to chill them. This step is essential for setting the cheesecake and allowing the flavors to meld together.
1. Cover and Chill: Seal each jar with a lid or plastic wrap to prevent them from absorbing any odors in the refrigerator. Chill the jars for at least 4 hours, though overnight is preferable for the best texture and flavor.
2. Understand the Importance of Chilling: Chilling allows the filling to firm up, making it easier to scoop and ensuring that each bite is creamy and satisfying. The resting time also allows the sweetness and flavors to blend harmoniously.
Finishing Touches
Now that your cheesecake jars are chilled and set, it’s time to add the finishing touches that will elevate their presentation and flavor.
1. Add Toppings: Before serving, consider adding a dollop of whipped cream, a sprinkle of crushed nuts, or a drizzle of chocolate sauce. Fresh fruits, like sliced strawberries or blueberries, can also enhance both the flavor and appearance.
2. Visual Appeal: The jars themselves present beautifully, so consider garnishing the top layer with a sprig of mint or a piece of fruit for an extra pop of color. The visual appeal can make your dessert even more enticing.
3. Serve Directly in Jars: These jars are perfect for serving as they are. Simply place them on a platter and let your guests dig in with spoons, enjoying the layered beauty of the cheesecake.
Nutritional Information
Understanding the nutritional content of your High Protein Cheesecake Jars can help you appreciate their benefits. Each serving generally contains:
– Calories: Approximately 200-250, depending on the ingredients used.
– Protein: Around 15-20 grams, thanks to the Greek yogurt and protein powder.
– Fat: Roughly 10-12 grams, primarily from the cream cheese and coconut oil.
– Carbohydrates: About 20-25 grams, largely from the graham crackers and any added sweeteners.
This dessert fits into a balanced diet, offering a satisfying sweet treat without excessive calories or sugar. It’s an ideal option for those who are health-conscious yet don’t want to sacrifice flavor.
Benefits of High Protein Desserts
Incorporating high-protein desserts like these cheesecake jars into your diet has several advantages:
1. Muscle Recovery: The protein content helps repair and build muscle tissue, making it a great post-workout treat.
2. Weight Management: High-protein foods can promote feelings of fullness, reducing overall calorie intake and helping to manage weight effectively.
3. Satisfying Sweet Cravings: With their rich flavor and creamy texture, high-protein desserts can satisfy sweet cravings without the guilt often associated with traditional sugary treats.
Variations and Customizations
One of the best parts of making cheesecake jars is the ability to customize them to your taste. Here are some ideas to get you started:
1. Flavor Infusions: Consider adding citrus zest (like lemon or orange) to the filling for a refreshing twist.
2. Different Protein Powders: Experiment with flavored protein powders, such as chocolate or strawberry, to change the flavor profile of your cheesecake.
3. Alternative Crusts: For a gluten-free option, substitute graham crackers with almond flour or gluten-free cookie crumbs, mixed with melted coconut oil and a bit of sweetener for binding.
Storage Tips
To keep your cheesecake jars fresh and delicious:
1. Refrigeration: Store the jars in the refrigerator for up to five days. Make sure they are covered to maintain freshness.
2. Freezing: If you want to prepare them ahead of time, these jars can be frozen for up to 2 months. Just be sure to leave off any toppings until you’re ready to serve.
3. Thawing: To enjoy frozen jars, transfer them to the refrigerator to thaw overnight before serving.
Conclusion
High Protein Cheesecake Jars are an appealing, delicious, and nutritious dessert option that caters to both health-conscious individuals and dessert lovers alike. This recipe is simple to prepare and allows for personalization, making it a perfect treat for any occasion. With their creamy filling, delightful crust, and endless variations, you can enjoy these jars guilt-free, knowing they fit well within a balanced diet. Indulge in this delightful dessert and experience the satisfaction of a treat that is both nourishing and enjoyable.