
Introduction
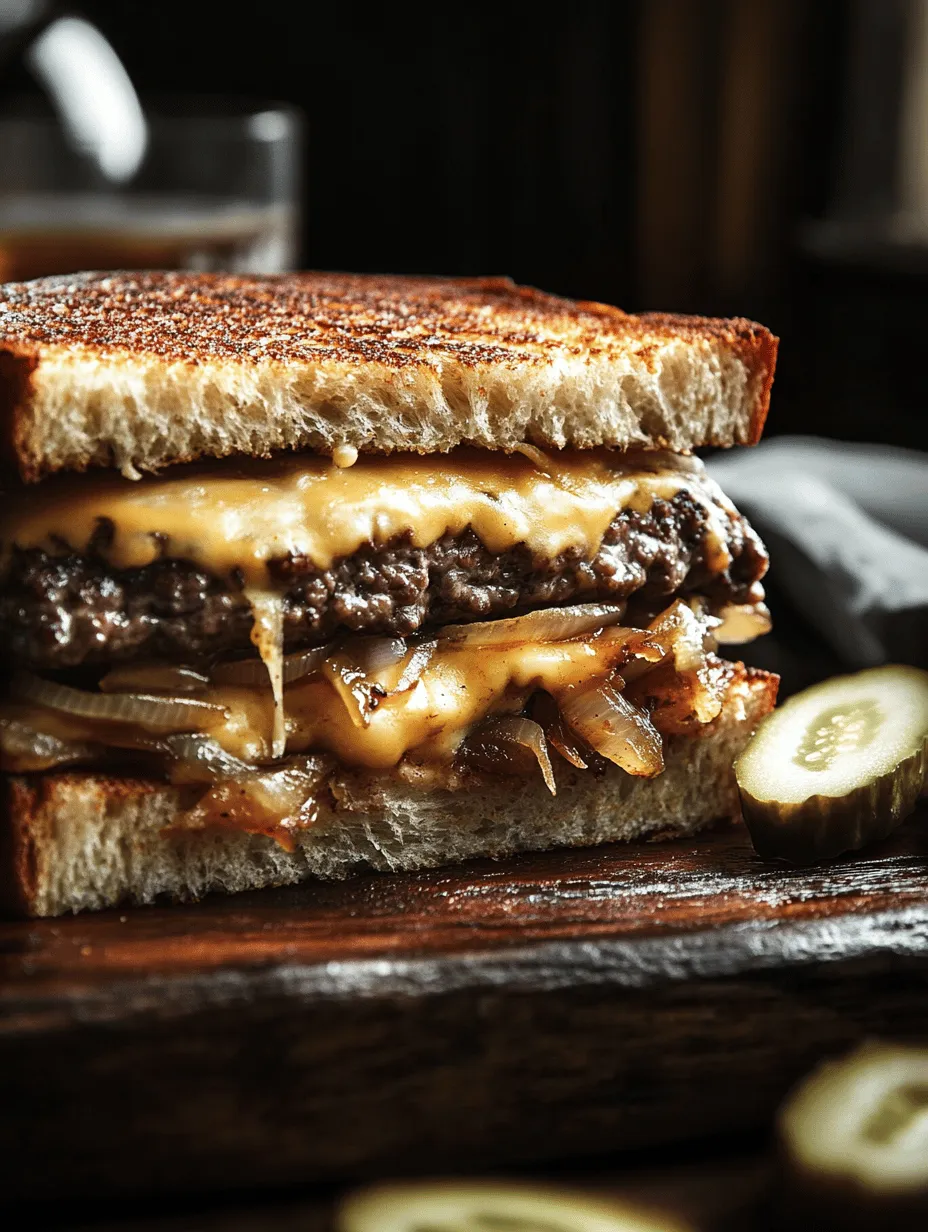
The patty melt is a beloved classic American comfort food that has stood the test of time. This iconic sandwich melds the best of two worlds: the hearty satisfaction of a juicy burger and the warm, comforting embrace of grilled cheese. Imagine biting into a perfectly toasted sandwich, where the crispy exterior gives way to a succulent beef patty, layered with sweet, caramelized onions and oozy melted cheese. Each ingredient plays a crucial role in delivering a symphony of flavors that are both nostalgic and satisfying.
As home cooks and food enthusiasts alike seek to recreate cherished restaurant favorites, the patty melt has become a go-to dish for casual dining and family meals. Whether you’re whipping it up for a weeknight dinner or serving it at a weekend gathering, this indulgent dish promises to please any palate. In this article, we will guide you through the process of creating your own irresistible classic patty melt at home, ensuring that you can enjoy this timeless treat any time you desire.
Understanding the Patty Melt
To fully appreciate the patty melt, it’s essential to understand its origins and evolution within American cuisine. The patty melt is essentially a hybrid sandwich, combining elements of a hamburger and a grilled cheese sandwich. The earliest references to this delightful creation date back to the 1940s, when it was popularized in diners across the United States. The patty melt quickly gained a reputation as a satisfying comfort food, thanks to its combination of flavor and texture.
The traditional patty melt consists of a hamburger patty, usually made from ground beef, cooked to juicy perfection, and topped with cheese and sautéed onions. It’s sandwiched between two slices of bread—most commonly rye, but variations include sourdough or even white bread. The sandwich is then grilled until golden brown and crispy, making it a favorite among comfort food lovers.
Its popularity has spread across various regions, leading to numerous variations. Some people experiment with different types of cheeses, such as Swiss or cheddar, while others add additional toppings like bacon or pickles. Despite these variations, the essence of the patty melt remains the same: a celebration of quality ingredients and simple cooking techniques that yield exceptional flavors.
The appeal of the patty melt extends beyond its taste; it’s a dish that embodies the spirit of casual dining. Whether served at a bustling diner or crafted in the comfort of your own kitchen, the patty melt invites a relaxed atmosphere where friends and family can gather to enjoy good food and great company.
Ingredients Breakdown
To create a classic patty melt, it’s crucial to select the right ingredients that will contribute to the overall flavor and texture of the sandwich. Here’s a breakdown of the key components you’ll need:
Ground Beef
The foundation of any great patty melt is the ground beef. We recommend using an 80/20 blend of ground beef, which strikes the perfect balance between flavor and juiciness. The 20% fat content ensures that the patties remain moist and rich, providing a satisfying bite. When choosing your meat, look for high-quality beef from a reputable source to elevate your sandwich from good to unforgettable.
Onions
The role of onions in a patty melt cannot be overstated. They add depth of flavor and a subtle sweetness when caramelized. The process of caramelization transforms the onions from sharp and pungent to soft and golden brown, enhancing the overall taste of the sandwich. Using yellow onions is a popular choice, but you can also experiment with sweet onions like Vidalia or even red onions for a different flavor profile.
Rye Bread
Rye bread is the traditional choice for a patty melt, offering a slightly tangy flavor that complements the richness of the beef and cheese. Its sturdy texture holds up well to grilling, preventing sogginess and providing a satisfying crunch. However, feel free to explore other types of bread, such as sourdough or whole grain, to suit your personal taste.
Cheese
No patty melt is complete without cheese. The classic choice is Swiss cheese, which melts beautifully and adds a creamy texture. Alternatively, you can use cheddar for a sharper flavor or a blend of cheeses for a more complex taste. The key is to choose cheeses that melt well, ensuring that every bite is gooey and satisfying.
Optional Ingredients
While the classic patty melt is delicious as is, there are plenty of opportunities to personalize the recipe with optional ingredients. Consider adding crispy bacon for extra flavor, sautéed mushrooms for an earthy touch, or even a dollop of spicy mustard for a kick. The possibilities are endless, allowing you to put your unique spin on this classic dish.
Caramelizing the Onions: A Step-by-Step Guide
One of the most critical steps in achieving a mouthwatering patty melt is the caramelization of the onions. This process brings out the natural sugars in the onions, resulting in a rich, sweet flavor that perfectly complements the savory beef and cheese. Here’s how to caramelize onions to perfection:
Equipment Needed
To caramelize onions effectively, you’ll need a few basic tools:
– A heavy-bottomed skillet or frying pan
– A spatula or wooden spoon for stirring
– A sharp knife for slicing the onions
Step-by-Step Process
1. Slice the Onions: Start by peeling and slicing your onions thinly. Aim for uniform slices to ensure even cooking. Depending on your preference, you can choose to slice them into half-moons or rings.
2. Heat the Skillet: Place your skillet over medium heat and add a tablespoon of oil or butter. Allow it to heat until shimmering but not smoking.
3. Add the Onions: Once the skillet is hot, add the sliced onions. Stir them gently to coat with oil or butter, ensuring that they are evenly distributed across the pan.
4. Cook Slowly: Reduce the heat to low to allow the onions to cook slowly. This is key to achieving that deep caramel color and flavor. Stir the onions every 5-10 minutes to prevent sticking or burning.
5. Season: After about 15-20 minutes of cooking, you can add a pinch of salt to enhance the flavor. Some people also like to add a teaspoon of sugar to speed up the caramelization process, though this is optional.
6. Watch for Color: Continue cooking the onions for another 20-30 minutes, stirring occasionally. You’ll know they are done when they are soft, golden brown, and have a sweet aroma. The total cooking time can vary, but expect to spend about 40-50 minutes on this step.
7. Cool and Set Aside: Once caramelized, remove the onions from the skillet and set them aside. They will add a layer of flavor that is essential to your patty melt.
Tips for Perfect Caramelization
– Low and Slow: Cooking the onions over low heat allows them to caramelize evenly without burning. Patience is key here.
– Stirring: While frequent stirring is important, avoid constantly stirring. Let them sit for a few minutes between stirs to develop color.
– Visual Cues: Perfectly caramelized onions should be a deep golden brown color with a soft, jam-like consistency. They should taste sweet and rich, with no bitterness.
Preparing the Perfect Patties
Now that you have your delicious caramelized onions ready, it’s time to focus on preparing the beef patties. The method of mixing and shaping the patties can significantly impact their tenderness and overall flavor.
Importance of Mixing Ground Beef
When preparing your patties, it’s important to handle the ground beef gently. Overmixing can lead to tough, dense patties rather than the tender, juicy burgers you’re aiming for. Here’s how to mix your ground beef properly:
1. In a bowl, combine your ground beef with seasonings: A classic mix includes Worcestershire sauce, salt, and pepper. This will infuse the meat with flavor and enhance the overall taste of the sandwich.
2. Gently mix the ingredients using your hands: Be careful not to overwork the meat. The goal is to combine the seasonings without compressing the beef.
3. Divide the meat into equal portions: Depending on your desired patty size, you can make 4-6 ounce patties. Form each portion into a ball, then gently flatten it into a disc shape. Aim for a slight indentation in the center to prevent puffing during cooking.
Seasoning the Meat Effectively
Seasoning your patties is crucial for building flavor. Here’s a simple yet effective way to season your beef:
– Worcestershire Sauce: This adds a rich, umami flavor to the meat. Use about 1 tablespoon per pound of beef.
– Salt and Pepper: Generously season the patties with kosher salt and freshly ground black pepper just before cooking. This allows the seasoning to penetrate the meat without drawing out moisture.
By following these steps and tips, you will set the stage for crafting an unforgettable patty melt that is sure to impress. In the next section, we’ll explore how to bring all these elements together in the final assembly and cooking of your classic patty melt. Stay tuned for the mouthwatering conclusion!
Tips for Shaping Patties to Prevent Shrinkage During Cooking
When crafting the perfect patty for your melt, the shape and size of the patty play a pivotal role in achieving that ideal texture and flavor. To prevent shrinkage during cooking, follow these expert tips:
1. Use a Gentle Hand: When forming the patties, avoid overworking the meat. This can lead to a denser texture and increased shrinkage. Gently shape the meat into a patty, being careful not to compress it too tightly.
2. Make a Dimple: Press a slight dimple in the center of each patty. This technique helps the patty cook evenly and prevents it from puffing up while cooking.
3. Keep Them Cold: Chill the patties in the refrigerator for about 30 minutes before cooking. Cold patties hold their shape better when exposed to heat.
4. Size Matters: Ensure your patties are slightly larger than your bread. This accounts for shrinkage during cooking, allowing the patty to fit perfectly within the sandwich once assembled.
Cooking the Patties to Perfection
Cooking your patties to the right level of doneness is crucial for a satisfying patty melt. Here are the recommended methods and timings to achieve that:
Recommended Cooking Methods
– Skillet: A cast-iron skillet is ideal for achieving a nice sear on your patties. Preheat the skillet over medium-high heat, adding a little oil or butter to prevent sticking.
– Grill: If you prefer grilling, ensure the grill grates are well-oiled and preheated. This method imparts a smoky flavor and beautiful grill marks.
Cooking Times for Desired Doneness
– Medium: For a juicy, pink center, cook the patties for about 3-4 minutes on each side. The internal temperature should reach 130-135°F (54-57°C).
– Well-Done: If you prefer your burger fully cooked, aim for an internal temperature of 160°F (71°C), cooking for approximately 5-6 minutes per side.
Importance of Cheese Melting Techniques and Timing
To achieve that gooey cheese experience, add the cheese to the patties during the last minute of cooking. Cover the skillet or grill with a lid; this traps the heat and allows the cheese to melt uniformly. Choose classic American cheese for its excellent melting properties, but feel free to experiment with cheddar or Swiss for a flavor twist.
Assembling the Patty Melt
Once your patties are cooked and your cheese is perfectly melted, it’s time to assemble your patty melt for optimal flavor and texture.
Step-by-Step Instructions for Assembling the Sandwich
1. Choose Your Bread: Rye bread is traditional, but you can use any bread you prefer. Sourdough or whole wheat adds a unique flavor.
2. Layer the Ingredients: Begin with a slice of bread, add a patty topped with melted cheese, followed by sautéed onions. Finish with another slice of bread.
3. Butter the Bread: Generously butter the outer sides of the bread slices. This will create a crispy, golden crust when grilled.
Tips for Layering Ingredients for Balanced Flavor
– Start with the cheese on top of the patty to ensure it melts against the meat.
– Distribute sautéed onions evenly to ensure every bite is flavorful.
– Consider adding a layer of mustard or a special sauce for an extra kick.
Grilling the Sandwiches
Grilling your assembled patty melts creates that signature crunchy texture while ensuring the cheese inside is perfectly melted.
Techniques for Grilling Sandwiches to Achieve Golden-Brown Perfection
1. Preheat the Pan or Grill: Ensure your skillet or grill is hot before placing the sandwiches on it. This helps achieve that golden crust.
2. Press the Sandwich: Use a spatula to press down on the sandwich gently. This ensures even cooking and helps the cheese melt fully.
Suggested Cooking Times and Visual Indicators for Doneness
– Grill each sandwich for about 3-4 minutes on one side until golden brown.
– Carefully flip and grill the other side for an additional 3-4 minutes.
– Look for a deep golden color on both sides and melted cheese oozing from the sides as signs of doneness.
Serving Suggestions
Now that your patty melts are grilled to perfection, it’s time to serve them in a way that enhances their deliciousness.
Ideal Ways to Serve Patty Melts
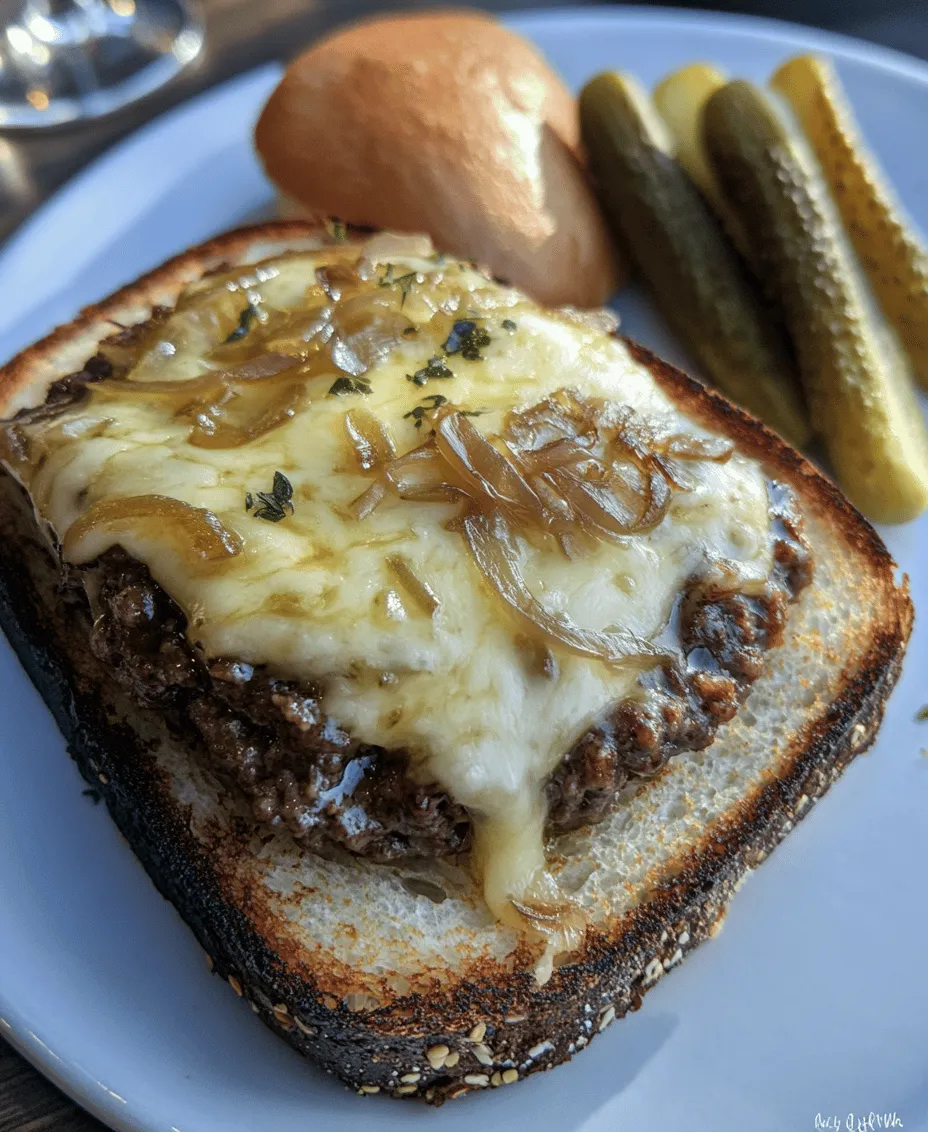
– Presentation: Cut the sandwiches diagonally and arrange them on a plate. Garnish with fresh parsley for a pop of color.
– Sides: Consider serving with crispy fries, onion rings, or a simple side salad to balance the richness of the sandwich.
Discussion of Optional Toppings and Condiments
– Pickles: Dill pickles or spicy pickles provide a refreshing crunch that contrasts nicely with the rich patty melt.
– Sauces: Homemade or store-bought sauces, like a zesty chipotle mayo or classic ketchup, can elevate the flavor profile.
Pairing Ideas for Sides and Beverages
– Sides: Pair with crispy potato chips for crunch, or a classic coleslaw for a refreshing counterpoint.
– Beverages: A cold beer or a classic soda complements the savory flavors of the patty melt. For a lighter option, serve with iced tea or lemonade.
Nutritional Information
Understanding the nutritional aspects of your patty melt can help you make informed choices.
Overview of Nutritional Aspects
– Calories: A classic patty melt typically ranges from 600 to 800 calories per serving, depending on portion sizes and ingredients used.
– Protein: A good source of protein, with each serving providing around 30-40 grams, making it a satisfying meal.
– Fat Content: Expect around 35 grams of fat per serving, primarily from the beef and cheese.
Healthier Alternatives and Substitutions
– Lean Meat: Opt for lean ground beef or turkey to reduce fat content.
– Whole Grain Bread: Choose whole grain or sprouted bread for added fiber.
– Reduced-Fat Cheese: Use reduced-fat cheese options to lower calories without sacrificing flavor.
Conclusion
The classic patty melt is more than just a sandwich; it’s a nostalgic comfort food that brings joy and satisfaction with each bite. Making this delightful dish at home allows for customization and creativity in the kitchen. Whether you stick to the traditional recipe or explore new flavor combinations, the experience of savoring this iconic sandwich is unmatched.
So gather your ingredients, follow these tips, and don’t hesitate to experiment with variations that suit your taste. The perfect patty melt awaits you, ready to impress family and friends alike!