
Introduction
Thumbprint cookies are a beloved classic in the world of baking, cherished for their delightful combination of a tender, buttery base and a luscious filling. These cookies have earned their spot in kitchens around the globe, providing a canvas for creativity with their various fillings and shapes. While traditional thumbprint cookies typically feature a round shape, a heart-shaped variation adds a special touch that elevates them to the next level. Perfect for celebrations such as Valentine’s Day, anniversaries, or even just a simple gesture of love, these heart-shaped thumbprint cookies are not only visually appealing but also incredibly delicious.
As we delve into this recipe, you’ll discover how to create these charming cookies that are sure to impress anyone who lays eyes on them. We promise a detailed guide that covers everything from the essential ingredients to tips for achieving the perfect heart-shaped cookies. Whether you’re making them for a special occasion or simply to brighten someone’s day, these cookies are bound to become a favorite in your baking repertoire.
The Allure of Heart-Shaped Thumbprint Cookies
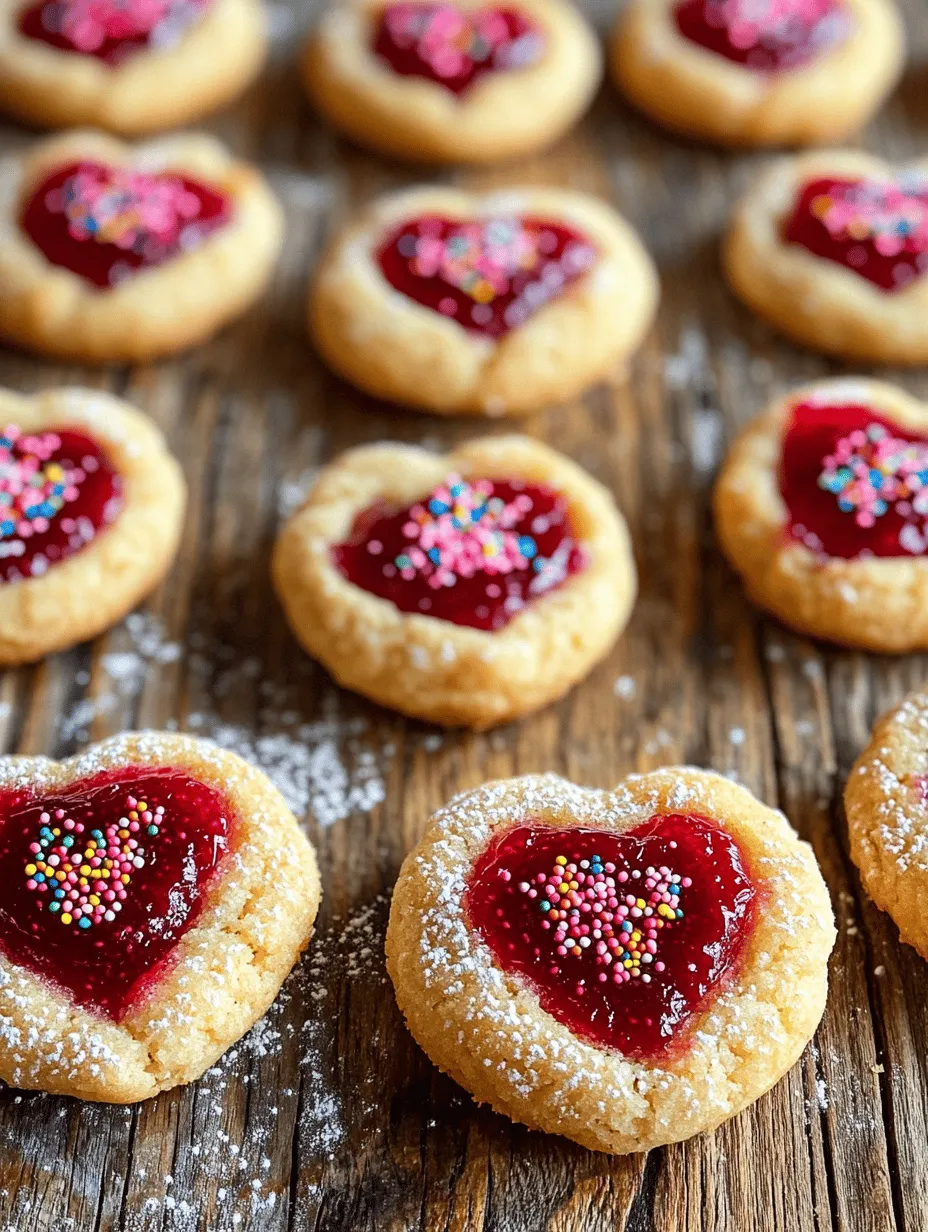
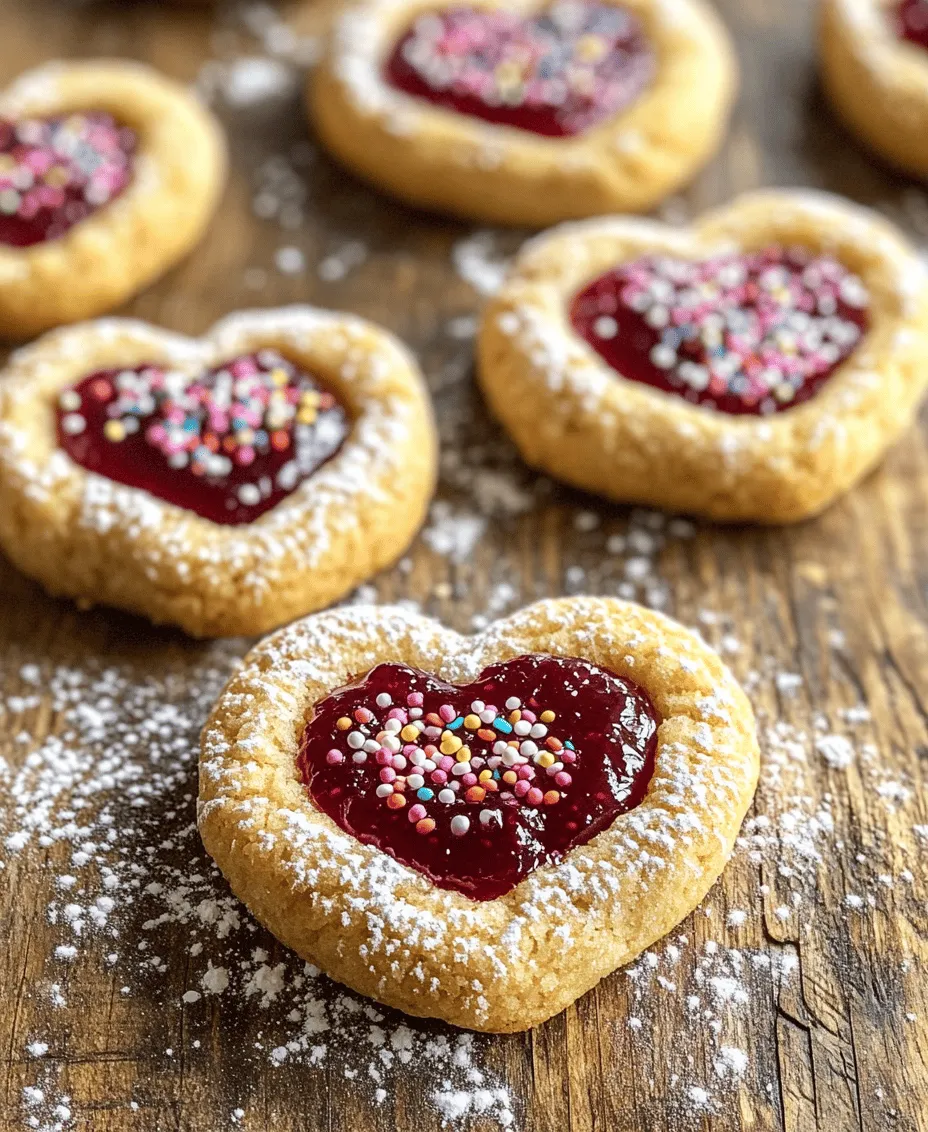
What makes heart-shaped thumbprint cookies so irresistible? It begins with their visual charm. The heart shape itself is synonymous with love and affection, making these cookies an ideal treat for any romantic occasion or celebration of friendship. Their warm, golden-brown hue contrasts beautifully with the vibrant jam filling, creating a stunning array that is both inviting and sophisticated.
Biting into one of these cookies reveals a delightful combination of textures: the soft, buttery cookie cradles a fruity jam that bursts with flavor. Each bite offers a satisfying balance of sweetness and richness, complemented by a hint of crunch around the edges. This delightful texture contrast makes them not just a treat for the taste buds but also a sensory experience that one can savor.
Beyond their aesthetic appeal, heart-shaped thumbprint cookies provide a personal touch when gifted. Baking a batch of these cookies for a loved one sends a heartfelt message that speaks volumes. They can be beautifully packaged in a decorative box or jar, making them a thoughtful and homemade gift that’s perfect for any occasion.
Essential Ingredients for Heart-Shaped Thumbprint Cookies
To create the perfect heart-shaped thumbprint cookies, it’s essential to understand the role of each ingredient in the recipe. Here’s a breakdown of what you’ll need:
– Unsalted Butter: The cornerstone of any great cookie, unsalted butter is crucial for achieving the right flavor and texture. It’s important to use butter that’s at room temperature, allowing it to cream easily with the sugar, which contributes to the cookie’s softness and richness.
– Granulated Sugar: This ingredient not only sweetens the cookies but also affects their texture. The sugar helps create a tender crumb by incorporating air during the creaming process, resulting in a light and fluffy cookie.
– Vanilla and Almond Extracts: For flavor complexity, a combination of vanilla and almond extracts is used. Vanilla adds a classic sweetness, while almond extract imparts a warm, nutty flavor that complements the fruit filling beautifully.
– All-Purpose Flour and Salt: All-purpose flour serves as the base of the dough, providing structure and stability. A pinch of salt enhances the overall flavor, balancing the sweetness of the sugars and fruit.
– Jam or Fruit Preserves: The filling is where you can truly get creative. Popular choices include raspberry, strawberry, or apricot jam, each bringing its unique flavor profile to the cookies. Opt for high-quality preserves for the best taste.
– Optional Decorations: For an extra touch of flair, consider adding powdered sugar, colorful sprinkles, or even edible glitter on top of the cookies after baking. These decorations not only enhance the visual appeal but also add a fun element to the finished product.
Step-by-Step Instructions for Perfect Cookies
Preheating the Oven
Before diving into the mixing and baking process, it’s crucial to preheat your oven to the correct temperature—typically around 350°F (175°C). Preheating ensures that your cookies bake evenly and achieve that golden-brown color we all love. An oven thermometer can be a handy tool to confirm that your oven is at the right temperature, as even slight variations can impact the final outcome of your cookies.
Mixing the Dough
The next step is to mix the dough, which is where the magic begins. Start by creaming the room-temperature unsalted butter and granulated sugar together in a mixing bowl. Using an electric mixer, beat the mixture on medium speed until it becomes light and fluffy, which usually takes about 2-3 minutes. This process is essential for incorporating air into the dough, contributing to the overall tenderness of the cookies.
Once the butter and sugar are well combined, add in the vanilla and almond extracts, mixing until just combined. This stage is where the dough begins to take on a lovely aroma, thanks to the extracts. Next, gradually add the all-purpose flour and salt into the mixture. It’s best to do this in portions, mixing on low speed to avoid flour flying everywhere. Continue to mix until the dough comes together; it should be soft and slightly sticky, but still manageable.
Now, let’s give the dough a little time to rest. Cover it with plastic wrap and refrigerate for about 30 minutes. Chilling the dough not only makes it easier to handle but also helps prevent the cookies from spreading too much during baking, ensuring they maintain their lovely heart shape.
Following these initial steps will set the stage for creating irresistibly delicious heart-shaped thumbprint cookies. Stay tuned for the next part, where we will guide you through the shaping, filling, and baking processes that will result in these delightful treats.
Adding Extracts: How to Properly Incorporate Flavors for Depth
To elevate your heart-shaped thumbprint cookies, incorporating high-quality extracts is essential. Vanilla extract is a classic choice, providing a warm, inviting flavor that complements the sweetness of the cookies. However, experimenting with other extracts can create unique taste profiles. Almond extract adds a nutty richness, while lemon or orange extract introduces a refreshing citrus note that can brighten the cookies.
When adding extracts, start with the recommended amount in the recipe (usually around one teaspoon). Measure carefully and mix it into the wet ingredients before combining them with the dry ingredients. This method ensures even distribution throughout the dough, preventing any concentrated flavors in one spot. For even more depth, consider adding a pinch of salt to enhance the sweetness and flavor complexity.
Combining Dry Ingredients: Tips for Avoiding Overmixing
Combining the dry ingredients is a crucial step in cookie-making that requires a gentle touch. Begin by whisking together the flour, baking powder, and salt in a separate bowl. This process not only ensures even distribution of the leavening agents but also helps avoid lumps.
When it’s time to combine the dry ingredients with the wet mixture, use a spatula or wooden spoon and fold the ingredients together. The key here is to mix just until combined; overmixing can lead to tough cookies due to gluten development. Look for a dough that is slightly crumbly but holds together when squeezed. If it feels too dry, a tablespoon of milk can help bring it together without overworking the dough.
Shaping Cookies: Detailed Guidance on Creating Heart Shapes with Thumbprints
Once your dough is ready, it’s time to shape your cookies. Start by preheating your oven to 350°F (175°C) and preparing a baking sheet lined with parchment paper. Scoop out about a tablespoon of dough and roll it into a ball between your palms. To create the heart shape, gently press the dough ball into a rounded shape, then use your thumb to make an indentation in the center.
For a more pronounced heart shape, you can use the following technique: After rolling the dough into a ball, flatten it slightly before pinching the top to form the heart’s peak. Then, press your thumb into the center to create the thumbprint. This method not only gives a lovely shape but also ensures there is enough space for the jam filling.
Filling with Jam: Best Practices for Filling Without Overflow
Filling your thumbprint cookies with jam is where the magic happens. Choose your favorite jam—strawberry, raspberry, or apricot are popular picks—and use a teaspoon to dollop the jam into the indentation made by your thumb.
To avoid overflow during baking, be mindful of the amount of jam you use. A teaspoon is generally a good measure, but be cautious not to overfill. The jam will spread and bubble up as it heats, so it’s best to leave a little space around the edges of the thumbprint. If you’re unsure, it’s better to start with less jam and add more if necessary.
Baking: Timing and Visual Cues for Optimal Doneness
Baking your cookies to perfection is crucial for achieving the right texture. Place the filled cookies in the preheated oven and set a timer for 10-12 minutes. Keep an eye on them as they bake; the edges should be golden brown while the centers remain slightly soft. If your cookies are browning too quickly, consider rotating the baking sheet halfway through for even cooking.
An important visual cue is the cookies’ surface. They should look set and slightly puffed. If they appear too shiny or wet in the center, they may need additional time. Remember, cookies will continue to cook slightly after being removed from the oven, so don’t be alarmed if they seem a little underbaked when you first take them out.
Cooling: Why Cooling is Crucial for Texture and Taste
Cooling your cookies properly is a step that should not be overlooked. Once you’ve removed the cookies from the oven, allow them to cool on the baking sheet for about 5 minutes. This resting period helps them firm up, making it easier to transfer them to a wire rack without breaking.
After the initial cooling, carefully move the cookies to a wire rack to cool completely. This step is crucial as it allows air to circulate around the cookies, preventing them from becoming soggy on the bottom. Proper cooling also helps the flavors to meld and the texture to set, ensuring a delightful bite when you take your first taste.
Decorating: Creative Ideas for Presentation
While heart-shaped thumbprint cookies are charming as they are, a little decoration can elevate them for special occasions. Here are some creative ideas to enhance their presentation:
1. Glaze: Drizzle a simple glaze made from powdered sugar and milk over the cooled cookies for a sweet finishing touch. Add a few drops of food coloring for a fun, festive look.
2. Sprinkles: Before baking, roll the dough balls in colored sprinkles to add a bit of color and texture.
3. Chocolate Drizzle: Melt some chocolate and drizzle it over the cooled cookies for a decadent finish. You can use white, milk, or dark chocolate depending on your preference.
4. Themed Decorations: For holidays or special occasions, consider using themed sprinkles or edible glitter to match the celebration.
Troubleshooting Common Issues
Overbaking: Signs and Prevention
Overbaking is a common issue that can lead to dry, crumbly cookies. Signs of overbaking include a darkened color and a hard texture. To prevent this, always set a timer and check the cookies a minute or two before the recommended baking time. If they look set and slightly soft in the center, it’s time to take them out.
Sticky Dough: Solutions for Handling Dough Consistency
If your dough is too sticky, it can be difficult to shape. This often occurs in humid environments or if too much liquid has been added. To remedy this, sprinkle a little extra flour on your work surface and your hands while shaping the cookies. Alternatively, refrigerate the dough for 30 minutes; this will firm it up and make it easier to handle.
Jam Overflow: Tips for Proper Filling Amounts and Techniques
Jam overflow can happen if too much filling is added. To prevent this, use a measuring teaspoon for filling and keep the amount to about one teaspoon per cookie. If you find yourself with excess jam, consider using it for a fruit topping on pancakes or yogurt instead.
Storing Cookies: Best Practices for Freshness and Longevity
To keep your heart-shaped thumbprint cookies fresh, store them in an airtight container at room temperature. They can last for up to a week. If you want to preserve them for a longer time, freeze them. Place the cookies in a single layer on a baking sheet to freeze individually, then transfer them to a freezer-safe bag or container. They can last up to three months in the freezer.
The Versatility of Heart-Shaped Thumbprint Cookies
Heart-shaped thumbprint cookies are incredibly versatile, allowing you to customize them for various occasions and taste preferences. Here are a few suggestions:
Suggestions for Variations
– Different Jams: Experiment with various jams or preserves. Try unique flavors such as blueberry, cherry, or even lemon curd for a zesty alternative.
– Flavored Doughs: Consider adding cocoa powder for chocolate thumbprints or incorporating spices like cinnamon or nutmeg for a seasonal touch.
Ideas for Themed Decorations for Various Occasions
These cookies can easily be adapted to fit any celebration. For Valentine’s Day, use pink and red sprinkles, or for Christmas, decorate with festive colors and edible glitter. Birthdays can be celebrated with colorful icing or a fun mix of jams.
Pairing Suggestions
Pair these cookies with a cup of tea or coffee for a delightful afternoon treat. For dessert, serve them alongside vanilla ice cream or a dollop of whipped cream for a special touch. They also make a lovely gift when packaged in a decorative box.
Conclusion
Heart-shaped thumbprint cookies are not just a treat; they are a delightful experience that brings joy to both the maker and those who enjoy them. The process of creating these cookies—mixing the dough, shaping them into hearts, and filling them with sweet jam—creates a connection to the heart of baking itself.
Whether you are looking to celebrate a special occasion or simply want to brighten a regular day, these cookies are the perfect choice. They embody love, creativity, and the joy of sharing homemade treats with family and friends.
Don’t hesitate to experiment with flavors, fillings, and decorations to make this recipe your own. Each batch can be a unique reflection of your personality and the moments you wish to celebrate. Happy baking!