Introduction
Mini cheesecakes have gained immense popularity in recent years, captivating dessert lovers with their adorable size and rich flavors. These bite-sized treats offer all the indulgence of a traditional cheesecake without the necessity of slicing and serving a whole cake. Their individual portions make them ideal for parties, gatherings, or simply enjoying as a personal treat. Among the many variations of mini cheesecakes, the Mini Biscoff Cheesecake stands out with its unique flavor profile that beautifully combines the caramelized notes of Biscoff cookies with the creamy richness of cheesecake.
Biscoff cookies, known for their distinctive spiced flavor, are a beloved treat that has rapidly grown in popularity. When paired with the luxurious texture of cream cheese, they create a harmonious blend that keeps dessert enthusiasts coming back for more. Additionally, the iconic Biscoff spread, made from crushed Biscoff cookies, adds an extra layer of flavor and creaminess that elevates these mini cheesecakes to another level.
In today’s fast-paced lifestyle, no-bake cheesecake recipes have become increasingly favored for their convenience and delightful taste. They allow home bakers to whip up a luscious dessert without the need for an oven, making them perfect for warm days or any time you want a quick yet impressive sweet treat. In this article, we will delve into the steps required to create these delectable Mini Biscoff Cheesecakes, ensuring each bite is as delightful as the last.
Understanding the Ingredients
To create the perfect Mini Biscoff Cheesecakes, it is essential to understand the key ingredients that contribute to their taste and texture. Each component plays a significant role in crafting this scrumptious dessert.
Biscoff Cookies
At the heart of our mini cheesecakes are Biscoff cookies. These delectable cookies are known for their unique flavor, derived from a blend of spices such as cinnamon and nutmeg, combined with a caramelized sugar profile. The rich, crispy texture of Biscoff cookies serves as the perfect base for our cheesecake crust, adding both flavor and crunch. When crushed and combined with melted butter, they create a delectable crust that pairs beautifully with the creamy filling.
Cream Cheese
Cream cheese is a fundamental ingredient in any cheesecake recipe, and it plays a crucial role in achieving the rich texture we desire in our Mini Biscoff Cheesecakes. The creamy, smooth consistency of softened cream cheese forms the base of the filling, allowing it to blend seamlessly with the other components. It is important to ensure that the cream cheese is at room temperature before use, as this will facilitate easy mixing and prevent lumps from forming in the cheesecake filling.
Heavy Whipping Cream
To achieve a light and airy texture in the cheesecake filling, heavy whipping cream is essential. Whipped to soft peaks, the heavy cream adds volume and a delicate touch that balances the richness of the cream cheese. This combination creates a luscious filling that melts in your mouth, making each bite of the Mini Biscoff Cheesecake an indulgent experience.
Powdered Sugar
Powdered sugar, also known as confectioners’ sugar, is used to sweeten the cheesecake filling. Its fine texture allows it to dissolve quickly, ensuring an even sweetness throughout the mixture. Additionally, powdered sugar is less likely to leave a grainy texture compared to granulated sugar, which is especially important in a creamy dessert like cheesecake. A touch of sweetness enhances the flavors of both the Biscoff cookies and the cream cheese, creating a well-balanced dessert.
Vanilla Extract
Vanilla extract is a common ingredient that enhances the overall flavor of many dessert recipes, and it is no different in our Mini Biscoff Cheesecakes. The warm, aromatic notes of vanilla complement the spices in the Biscoff cookies and provide a depth of flavor that elevates the cheesecake filling. A splash of vanilla extract is a simple yet effective way to enrich the taste of this delightful dessert.
Melted Butter
Melted butter plays a crucial role in binding the crushed Biscoff cookies together to form a cohesive crust. The fat in the butter not only helps to hold the crust together but also adds richness and flavor. It is important to use unsalted butter to prevent the crust from becoming overly salty, allowing the sweet and spiced flavors of the Biscoff cookies to shine through.
Preparing the Crust
Creating the perfect crust for your Mini Biscoff Cheesecakes is the first step in this delicious journey. Follow these simple steps to prepare a crust that is both flavorful and easy to work with.
Step 1: Crush the Biscoff Cookies
To start, you will need approximately 16 Biscoff cookies. Place the cookies in a resealable plastic bag and use a rolling pin to crush them into fine crumbs. Alternatively, you can use a food processor to achieve a uniform texture quickly. Aim for a consistency similar to sand—this will ensure that the crust holds together well when combined with the melted butter.
Step 2: Combine with Melted Butter
Once you have your cookie crumbs, transfer them to a mixing bowl and add about 1/4 cup of melted unsalted butter. Use a fork to combine the cookie crumbs and melted butter until the mixture resembles wet sand. The butter should be evenly distributed throughout the crumbs, ensuring that the crust holds together when pressed into the muffin tins.
Step 3: Prepare the Muffin Tins
To make removing the cheesecakes easier once they are set, it’s a good idea to line your muffin tin with cupcake liners. This will prevent sticking and allow for a clean presentation when serving. If you prefer, you can also lightly grease the muffin tin with non-stick spray, but the liners are often the easier option.
Step 4: Press the Mixture into Muffin Tins
Scoop about a tablespoon of the cookie crumb mixture into each muffin liner. Using the back of a tablespoon or your fingers, press the crumbs down firmly to create an even layer across the bottom of each cup. Make sure the crust is packed tightly, as this will help it hold its shape once the cheesecakes are set. Repeat this process until all muffin cups are filled, ensuring that you use all of the crust mixture.
Step 5: Chill the Crust
Now that the crusts are prepared, place the muffin tin in the refrigerator for about 10-15 minutes to allow the butter to set and the crusts to firm up. This step is crucial, as it will help the crust maintain its shape when the cheesecake filling is added.
Crafting the Cheesecake Filling
With the crust chilling, it’s time to turn our attention to the delicious cheesecake filling. Follow these detailed instructions to create a smooth and creamy filling that perfectly complements the Biscoff crust.
Step 1: Soften the Cream Cheese
Before you start mixing, make sure your cream cheese is softened to room temperature. This is essential for achieving a smooth filling. Leave the cream cheese out for about 30 minutes before you begin. If you’re short on time, you can cut the cream cheese into small cubes and microwave it for about 10-15 seconds, but be careful not to melt it.
Step 2: Beat the Cream Cheese
In a large mixing bowl, add the softened cream cheese. Using an electric mixer, beat the cream cheese on medium speed until it is smooth and creamy, typically around 1-2 minutes. Be sure to scrape down the sides of the bowl to incorporate any lumps that may form.
Step 3: Add Powdered Sugar and Vanilla Extract
Once the cream cheese is smooth, gradually add 1/2 cup of powdered sugar and 1 teaspoon of vanilla extract. Continue to mix on low speed until the ingredients are well combined. Once combined, increase the speed to medium and mix for another minute or two until the mixture is fluffy and well-blended.
Step 4: Whip the Heavy Cream
In a separate bowl, pour in 1 cup of heavy whipping cream. Using a clean electric mixer, whip the cream on medium-high speed until soft peaks form. This typically takes about 3-5 minutes. Be careful not to over-whip the cream, as this can lead to a grainy texture.
Step 5: Fold the Whipped Cream into the Cream Cheese Mixture
Once the heavy cream is whipped, gently fold it into the cream cheese mixture using a spatula. Start by adding about one-third of the whipped cream to lighten the mixture, then gradually fold in the remaining whipped cream. Be gentle during this process to maintain the airy texture of the filling. The goal is to combine them without deflating the whipped cream, resulting in a light and fluffy cheesecake filling.
Step 6: Layer the Filling into the Crust
Now that your cheesecake filling is prepared, it’s time to layer it into the crusts. Using a spoon or a piping bag, carefully spoon or pipe the cheesecake filling onto the chilled crusts in each muffin cup. Fill them generously, but leave a little space at the top to avoid overflow. Smooth the tops with a spatula for an even finish.
Step 7: Chill Until Set
After filling the muffin cups, place the entire muffin tin back in the refrigerator. Allow the cheesecakes to chill for at least 4 hours, or overnight if possible. Chilling is essential for the filling to set properly, resulting in a firm yet creamy texture.
By following these steps, you’ll have a solid foundation for your Mini Biscoff Cheesecakes, ready to enjoy or decorate with additional toppings! This recipe not only allows you to indulge in the delightful flavors of Biscoff, but it also showcases the simplicity and ease of no-bake cheesecakes, making them a perfect choice for any occasion.
When it comes to making the perfect mini Biscoff cheesecakes, one of the key elements is mastering the incorporation of powdered sugar. This ingredient is essential for providing the right amount of sweetness without compromising the texture of your cheesecake. To achieve the best results, it’s crucial to sift the powdered sugar before adding it to your cream cheese mixture. Sifting helps eliminate any lumps that could disrupt the creamy texture of your cheesecake. Gradually fold in the sifted powdered sugar, mixing gently to ensure it fully integrates without deflating your whipped cream. This technique will leave your cheesecakes irresistibly sweet and creamy.
Another pivotal step in creating the perfect mini Biscoff cheesecakes is whipping the cream to stiff peaks. This process is vital for achieving a light and airy texture, which will balance the denser cream cheese. Start with cold heavy whipping cream and use an electric mixer to beat it on medium speed. As the cream begins to thicken, add a tablespoon of sugar to help stabilize it. Continue whipping until the cream forms stiff peaks, meaning that when you lift the beater, the peaks hold their shape and do not droop. This whipped cream not only adds volume to your cheesecake filling but also contributes to a delightful mouthfeel that makes each bite melt in your mouth.
To enhance the flavor profile of your mini Biscoff cheesecakes, the addition of Biscoff spread is a game-changer. This deliciously spiced caramelized biscuit spread adds depth and richness that elevates the entire dessert. When incorporating Biscoff spread into your cheesecake mixture, it’s best to warm it slightly in the microwave for about 10-15 seconds to make it more pliable. This will ensure that it mixes evenly with the cream cheese and whipped cream, allowing the warm, spiced notes to infuse throughout the filling. The result is a decadent cheesecake with a distinct flavor that pays homage to the beloved Biscoff cookie.
Assembling the Mini Cheesecakes
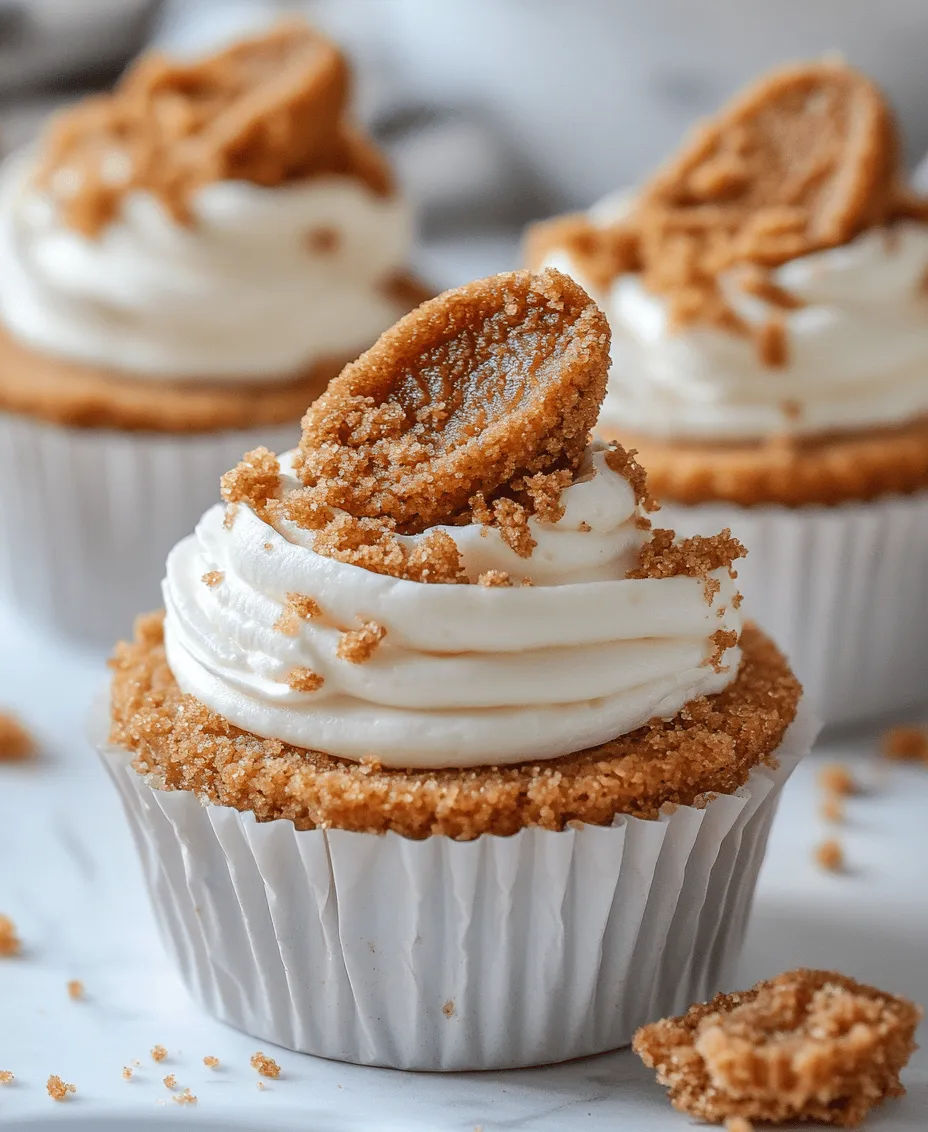
Once your cheesecake filling is prepared, it’s time to assemble these delightful treats. Begin by carefully spooning the cheesecake mixture into each prepared crust. To ensure an even distribution, use a small cookie scoop or a piping bag fitted with a wide tip. This method allows for greater control and helps maintain the integrity of the crust. Fill each crust to the top, leaving a small space if you plan to add a garnish later. For a smooth and even surface, you can gently tap the mini cheesecakes on the counter to release any air bubbles, resulting in a polished finish.
After filling the crusts, the most crucial step is chilling the mini cheesecakes to allow them to set properly. Cover the cheesecakes with plastic wrap and place them in the refrigerator. This chilling process not only helps the filling firm up but also allows the flavors to meld beautifully. For best results, chill the cheesecakes for at least 4 hours, though overnight is ideal. The cool temperature aids in achieving the perfect blend of creamy and firm textures, making for a delightful dessert experience.
Serving Suggestions
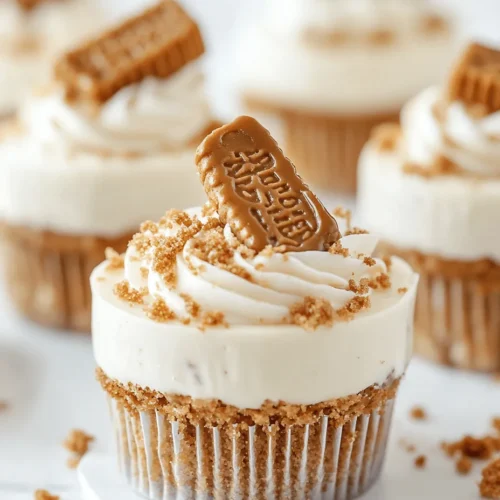
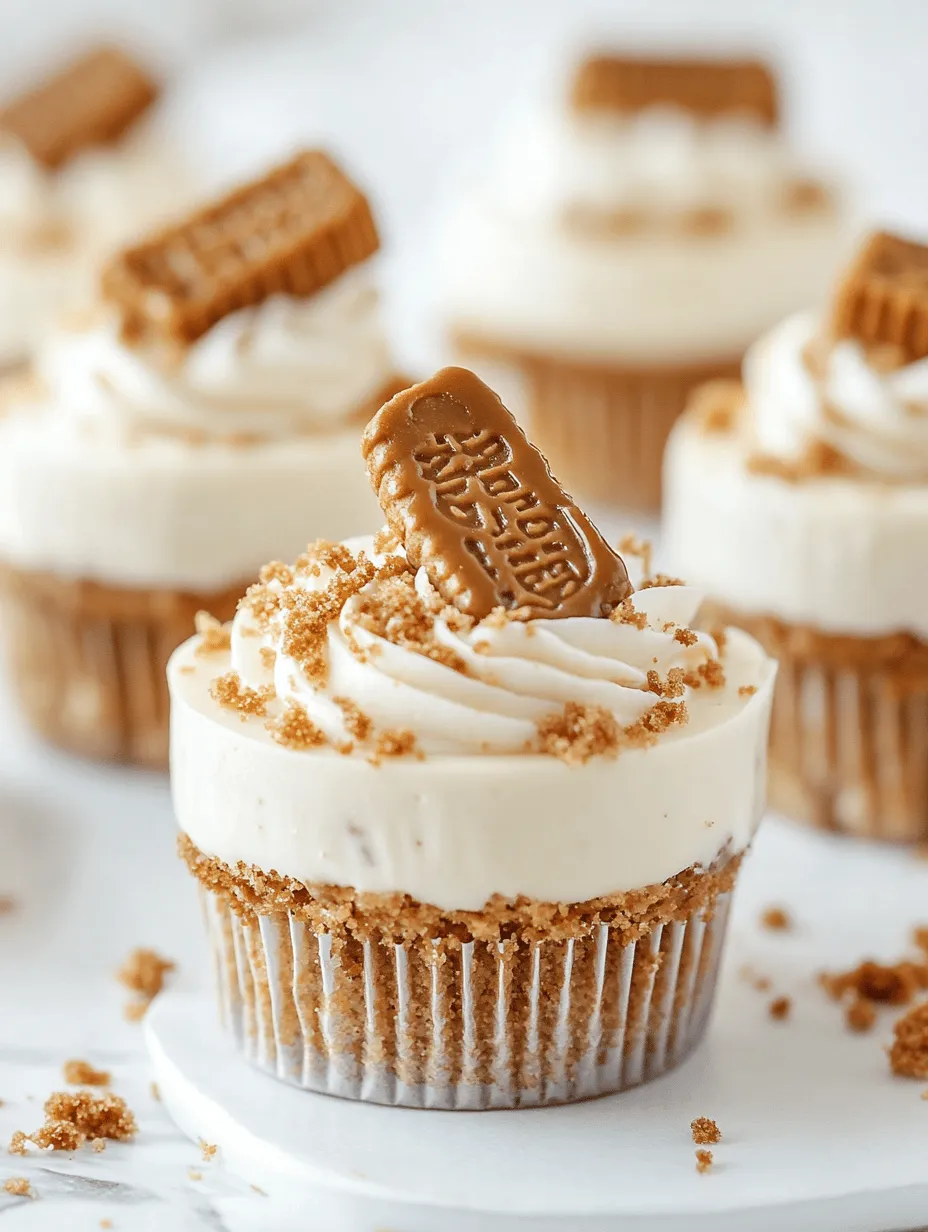
Presentation is key when it comes to serving your mini Biscoff cheesecakes. To enhance their visual appeal, consider garnishing each cheesecake with a drizzle of additional Biscoff spread. A simple melting of the spread in the microwave for a few seconds can create a lovely sauce to drizzle over the top. You can also add a half Biscoff cookie on each cheesecake for an attractive finishing touch. This not only adds texture but also emphasizes the flavor profile of the dessert.
For gatherings or parties, consider placing the mini cheesecakes on a decorative platter and adding fresh fruit, such as raspberries or strawberries, around them. The bright colors of the fruit create a stunning contrast against the creamy cheesecakes, making for an eye-catching display. If you’re looking for an extra touch of elegance, you can even pipe a little whipped cream on top of each cheesecake, adding height and a lightness that invites everyone to take a bite.
Storage and Shelf Life
To keep your mini Biscoff cheesecakes fresh, it’s essential to store them properly. Place any leftover cheesecakes in an airtight container and store them in the refrigerator. When stored correctly, these mini desserts can last up to one week, allowing you to enjoy them over several days. If you want to keep them longer, consider freezing them. To do this, wrap each cheesecake individually in plastic wrap, then place them in a freezer-safe container. When frozen, mini cheesecakes can last for about two months. When you’re ready to enjoy, simply transfer them to the refrigerator to thaw overnight, and they’ll be as delightful as the day they were made.
Conclusion
In summary, mini Biscoff cheesecakes are a true delight, combining the rich, spiced flavors of Biscoff cookies with a creamy, luscious texture that is hard to resist. This recipe offers a simple yet rewarding baking experience, perfect for both novice bakers and seasoned chefs alike. The ease of preparation, coupled with the joy of sharing these treats with family and friends, makes them a must-try.
As you explore this recipe, take your time to incorporate each element thoughtfully, from the perfect incorporation of powdered sugar to the careful chilling process. Your efforts will be rewarded with mini cheesecakes that not only taste amazing but also impress everyone who has the pleasure of indulging in them. So gather your ingredients, roll up your sleeves, and dive into the delightful world of mini Biscoff cheesecakes—you won’t regret it!