
Introduction
When it comes to dessert, few things are as satisfying as a cheesecake. However, traditional cheesecakes often require extensive preparation and baking time, which can be a hassle, especially during the warmer months. Enter the world of no-bake desserts, where indulgence meets simplicity. No bake desserts are not only easy to prepare, but they also offer a delightful way to enjoy your favorite flavors without the need for an oven.
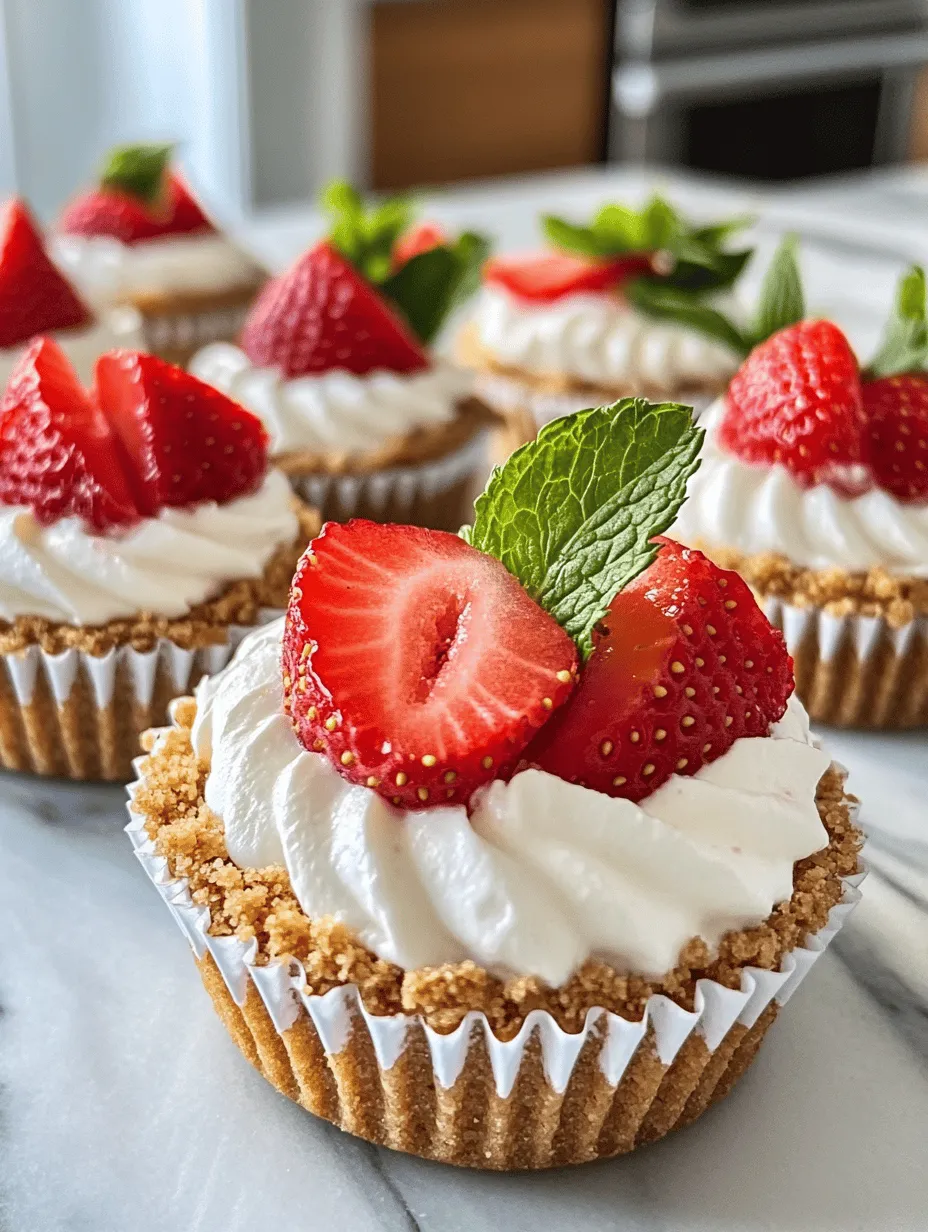
Among the most popular of these are mini cheesecakes, which have gained a dedicated following for their adorable size and versatility. Perfect for gatherings, celebrations, or simply as a personal treat, No Bake Mini Strawberry Cheesecakes take the classic cheesecake concept and elevate it with fresh, fruity flavors. This recipe is a breeze to make, requires no baking, and is sure to impress your guests while satisfying your sweet tooth.
Understanding the Appeal of No Bake Desserts
No bake recipes have seen a surge in popularity for several compelling reasons. First and foremost, they allow for quick preparation, enabling anyone to whip up a delightful dessert in no time at all. With minimal effort and a few simple steps, you can have a scrumptious treat ready to enjoy. This is particularly advantageous for those who may not be comfortable in the kitchen or are pressed for time.
Moreover, no bake desserts eliminate the need for an oven, making them an ideal choice for warm weather. On hot summer days, the last thing anyone wants to do is heat up the house by turning on the oven. Instead, you can enjoy a cool, refreshing dessert that requires nothing more than a refrigerator to set.
The versatility of no bake cheesecakes cannot be understated. They lend themselves well to a wide array of flavors and toppings, allowing you to customize each batch to suit your palate or the theme of your gathering. From classic vanilla to rich chocolate or zesty citrus, the variations are endless. The No Bake Mini Strawberry Cheesecakes, in particular, highlight seasonal freshness and the natural sweetness of strawberries, making them a favorite for any summertime gathering.
Ingredients Breakdown
Creating the perfect No Bake Mini Strawberry Cheesecakes requires a few key ingredients, each playing a vital role in the overall flavor and texture of the dessert.
1. Graham Cracker Crumbs: The foundation of any cheesecake crust, graham cracker crumbs add a delightful crunch and subtle sweetness. They provide the perfect contrast to the creamy filling. For the best results, it’s essential to choose finely crushed crumbs, which can be achieved by using a food processor or placing the crackers in a zip-top bag and using a rolling pin to crush them.
2. Cream Cheese: The star of the cheesecake filling, quality cream cheese is crucial for a rich and creamy texture. Opt for full-fat cream cheese to ensure your mini cheesecakes are decadently smooth. Let the cream cheese sit at room temperature for about 30 minutes before using it to make it easier to blend with the other ingredients.
3. Heavy Whipping Cream: This ingredient adds lightness and fluffiness to the cheesecake filling. Whipping cream incorporates air into the mixture, creating a luscious texture that melts in your mouth. Remember to chill your mixing bowl and beaters before whipping the cream to achieve the best volume.
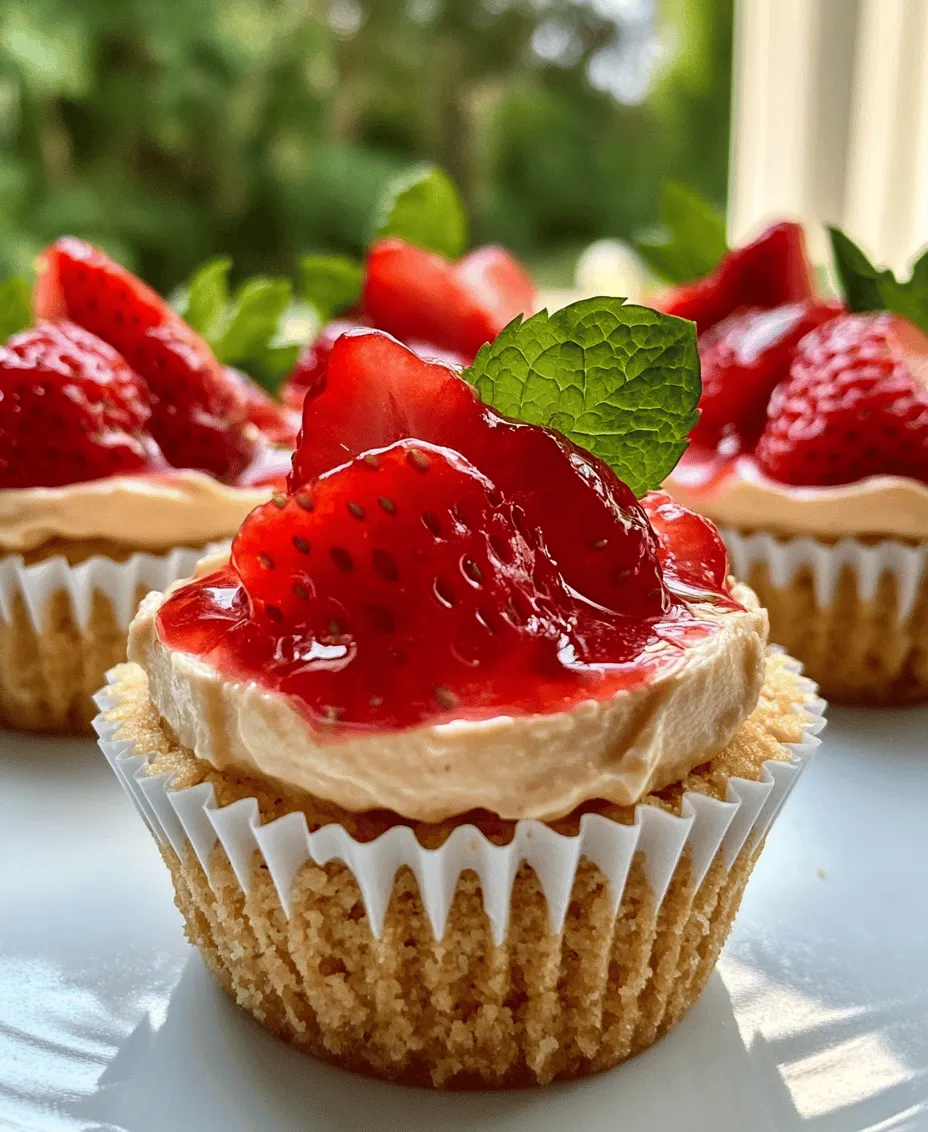
4. Fresh Strawberries: The essence of these mini cheesecakes, fresh strawberries not only add vibrant color but also provide a natural sweetness that complements the cream cheese. Whether you incorporate pureed strawberries into the filling or use them as a topping, they’re a key component of the recipe. For the best flavor, choose ripe, in-season strawberries.
5. Optional Garnishing Ideas: While the mini cheesecakes are delightful on their own, consider adding a few garnishes to elevate their presentation. Fresh mint leaves, a drizzle of chocolate sauce, or even a sprinkle of crushed nuts can enhance both the visual appeal and flavor profile.
Step-by-Step Instructions for Making No Bake Mini Strawberry Cheesecakes
Preparing the Graham Cracker Crust
To begin your no bake mini strawberry cheesecakes, you’ll first need to prepare the graham cracker crust. This step is crucial, as the crust provides the structural support and flavor base for your cheesecakes.
1. Crush the Graham Crackers: Start by measuring out approximately 1 and 1/2 cups of graham cracker crumbs. If using whole graham crackers, crush them in a food processor until you achieve a fine crumb consistency. Alternatively, place the crackers in a zip-top bag and crush them with a rolling pin.
2. Combine with Melted Butter: In a mixing bowl, combine the graham cracker crumbs with 1/4 cup of melted unsalted butter. The melted butter acts as a binding agent, helping the crumbs hold together when pressed into the muffin tins.
3. Add Sugar: To enhance the sweetness of the crust, add in 2 tablespoons of granulated sugar. Mix until all the crumbs are evenly coated with butter and sugar.
4. Press into Muffin Tins: Line a muffin tin with paper liners for easy removal. Using a tablespoon or your fingers, press the graham cracker mixture firmly into the bottom of each muffin liner, creating an even layer. Make sure to compact the crumbs well to form a sturdy crust that won’t crumble when the cheesecakes are served.
5. Chill the Crust: Once the crusts are formed, place the muffin tin in the refrigerator for about 15-20 minutes. This will help the butter solidify, ensuring the crust holds its shape.
Forming the Cheesecake Base
With the crust ready, it’s time to create the creamy cheesecake filling that will take your mini cheesecakes to the next level.
1. Beat the Cream Cheese: In a mixing bowl, beat 8 ounces of softened cream cheese using an electric mixer on medium speed until it becomes smooth and creamy. Take care to scrape down the sides of the bowl to ensure even mixing.
2. Add Sugar and Vanilla: Gradually add in 1/2 cup of powdered sugar and 1 teaspoon of vanilla extract. Continue to beat the mixture until fully incorporated and smooth.
3. Whip the Heavy Cream: In a separate bowl, whip 1 cup of heavy whipping cream until stiff peaks form. This means that when you lift the beaters out of the cream, it should hold its shape rather than droop.
4. Fold Together: Gently fold the whipped cream into the cream cheese mixture using a spatula. Be careful not to deflate the whipped cream, as it provides the cheesecakes with their light and airy texture.
5. Incorporate Fresh Strawberries: If you wish to incorporate strawberries into the filling, you can puree 1/2 cup of fresh strawberries and fold them into the mixture at this point. This will create a beautiful pink hue and enhance the flavor.
6. Fill the Muffin Liners: With the cheesecake filling prepared, spoon the mixture into the chilled crusts, filling each muffin liner to the top. You can use a piping bag for a neater presentation or simply use a spoon.
7. Chill to Set: Once all the liners are filled, return the muffin tin to the refrigerator and allow the cheesecakes to chill for at least 4 hours, or overnight if possible. This setting time is crucial for the flavors to meld and the filling to firm up.
With the crust prepared and the filling set, you’re well on your way to enjoying delightful No Bake Mini Strawberry Cheesecakes. Stay tuned for the final touches, garnishing ideas, and serving suggestions that will make this dessert the star of your next gathering!
Techniques for Packing the Crust Evenly
Creating a solid base for your No Bake Mini Strawberry Cheesecakes is essential for both flavor and structure. Start by using a sturdy material for the crust, such as graham cracker crumbs, crushed cookies, or even oats. To pack the crust evenly, here are some effective techniques:
1. Use the Right Tools: A flat-bottomed measuring cup or a small glass can help you press the crust mixture firmly into the bottom of each cup or mold. This ensures an even layer that will hold together when the cheesecake is served.
2. Distribute Evenly: After pouring the crust mixture into your cups, use your fingers to ensure the crumbs are spread evenly across the bottom and up the sides if desired. This not only provides a uniform surface but also prevents any areas from being too thick or too thin.
3. Press Firmly: With your tool of choice, press down hard. You want the crust to be compacted, which will help it stay intact when you remove the cheesecakes from the cups. If the crust is too loose, it may crumble apart when you try to serve it.
Crafting the Creamy Cheesecake Filling
Now that you have a solid crust, it’s time to focus on crafting the creamy filling that will make your cheesecakes irresistible. The filling is what truly defines a cheesecake, and mastering it is key to achieving that perfect texture and flavor.
Step-by-Step Guide to Beating the Cream Cheese to the Right Consistency
1. Softening the Cream Cheese: Start with room temperature cream cheese. This will allow you to beat it smoothly without lumps. If you forgot to take it out ahead of time, you can microwave it for about 10 seconds to slightly soften it.
2. Beating the Cream Cheese: In a mixing bowl, add your softened cream cheese. Using an electric mixer, beat it on medium speed until it becomes creamy and smooth, usually about 2-3 minutes. This step is crucial as it helps to aerate the cream cheese, contributing to the lightness of the filling.
Importance of Incorporating Powdered Sugar Gradually
When adding powdered sugar, do it gradually to prevent clouds of sugar from flying everywhere and to ensure a smooth incorporation:
1. Add Gradually: With your mixer on low speed, add the powdered sugar a little at a time. This will help the sugar dissolve into the cream cheese without creating a grainy texture.
2. Taste and Adjust: Once all the sugar is incorporated, taste your mixture. If you prefer a sweeter filling, you can add a little more powdered sugar, but be cautious not to overwhelm the cheesecake flavor.
Whipping the Heavy Cream
Achieving the perfect whipped cream is vital for the lightness of your cheesecake filling. Here’s how to do it right:
1. Chill Your Equipment: For best results, chill your mixing bowl and beaters in the fridge for about 10 minutes before whipping the cream. Cold cream whips better and holds its shape longer.
2. Whipping Technique: Pour your heavy cream into the chilled bowl. Using an electric mixer, start on low speed and gradually increase to high. Whip until soft peaks form, then continue until you reach stiff peaks. Stiff peaks are essential as they help the filling maintain its structure.
Explanation of Achieving Stiff Peaks and Its Significance in the Recipe
Stiff peaks mean that when you lift the whisk out of the cream, the peaks stand tall without drooping. This is important for several reasons:
– Stability: The stiffer the whipped cream, the less likely it is to deflate when folded into the cream cheese mixture.
– Lightness: Stiff peaks help create an airy texture in the final cheesecake filling, making it light and fluffy.
Techniques for Gently Folding Whipped Cream into the Cream Cheese Mixture
Folding is a crucial technique that preserves the air you’ve incorporated into the whipped cream. Here’s how to do it:
1. Add Whipped Cream: Start by adding one-third of the whipped cream to the cream cheese mixture. This lightens the mixture and makes it easier to fold in the remaining whipped cream.
2. Use a Rubber Spatula: With a rubber spatula, gently fold the whipped cream into the cream cheese, using a figure-eight motion. Be careful not to overmix, which can deflate the air you’ve whipped into the cream.
3. Repeat: Gradually fold in the remaining whipped cream until just combined. The goal is a homogeneous mixture with a light and fluffy texture.
Incorporating Fresh Strawberries
Fresh strawberries are the star ingredient in this recipe, providing not just flavor but also a beautiful pop of color. Here’s how to incorporate them seamlessly:
1. Prepare the Strawberries: Wash and hull your strawberries. You can slice them thinly or chop them into small pieces, depending on your preference.
2. Best Practices for Folding Fruit: When adding strawberries to the cheesecake filling, gently fold them in with your spatula. This preserves their shape and ensures they are evenly distributed without breaking apart.
Filling the Cups with Cheesecake Mixture
Now that your filling is ready, it’s time to fill your prepared crusts:
1. Use a Spoon or Piping Bag: You can either use a spoon to scoop the filling into each cup or place the mixture in a piping bag for a more precise application.
2. Even Distribution: Fill each cup about three-quarters full, leaving some space at the top for the filling to expand slightly as it chills. Ensure that you distribute the filling evenly among all cups to achieve a uniform appearance.
3. Achieving a Smooth Top: After filling, use the back of a spoon or a spatula to smooth the tops of each cheesecake. This not only looks appealing but also ensures an even layer for garnishing later.
Chilling and Setting the Cheesecakes
Chilling is a crucial step that helps the cheesecakes set properly. Here’s what to do:
1. Cover and Chill: Cover the filled cups with plastic wrap or lids and place them in the refrigerator for at least 4 hours, or overnight if possible. This allows the flavors to meld and the cheesecake to firm up.
2. Flavor Development: Chilling not only helps the cheesecakes set but also enhances the flavors. The longer they chill, the better they taste as the ingredients have time to meld.
Presentation and Serving Suggestions
A well-presented dessert makes a lasting impression. Here are some creative ideas for garnishing and serving your No Bake Mini Strawberry Cheesecakes:
1. Garnish with Fresh Strawberries and Mint Leaves: Top each cheesecake with a slice of fresh strawberry and a sprig of mint for a pop of color and freshness. You can also drizzle a little chocolate or strawberry sauce over the top for added visual appeal.
2. Serving Options: These mini cheesecakes are perfect for various occasions. Serve them at:
– Parties: They make excellent finger desserts that guests can enjoy without the need for plates or utensils.
– Picnics: Their small size makes them easy to transport and serve outdoors.
– Family Desserts: Treat your family to these delightful desserts after dinner; they’re sure to be a hit!
3. Storing Leftovers: If you have any leftovers, cover them tightly with plastic wrap and store them in the refrigerator. They can last up to 3 days, although they are best enjoyed fresh.
Nutritional Information
Understanding the nutritional aspects of your No Bake Mini Strawberry Cheesecakes can help you make informed decisions about serving sizes and ingredients:
1. Overview of Nutritional Aspects: Each mini cheesecake is a delightful combination of creamy filling and a crunchy crust. Depending on your ingredient choices, they can be made lower in sugar or calories.
2. Serving Size and Calorie Content: Generally, each mini cheesecake serves one person and contains approximately 200-250 calories, depending on the specific ingredients and portion sizes used.
3. Highlighting the Use of Fresh Ingredients: Using fresh strawberries not only enhances the flavor but also adds vitamins and antioxidants, making these cheesecakes a healthier dessert option compared to many store-bought alternatives.
Conclusion
In conclusion, No Bake Mini Strawberry Cheesecakes are a delightful and simple dessert perfect for any occasion. With their rich and creamy filling complemented by the freshness of strawberries, they offer a taste of indulgence without the hassle of baking. The techniques outlined in this recipe will help you achieve a perfect cheesecake every time, making it a go-to for family gatherings, parties, or simply a sweet treat after dinner.
We encourage you to try this recipe and experience the joy of creating your own homemade desserts. The versatility of no bake cheesecakes means you can experiment with different flavors and toppings, ensuring that there’s always a new version to enjoy. So grab your ingredients, gather your loved ones, and get ready to impress with these delightful mini cheesecakes!