
Introduction
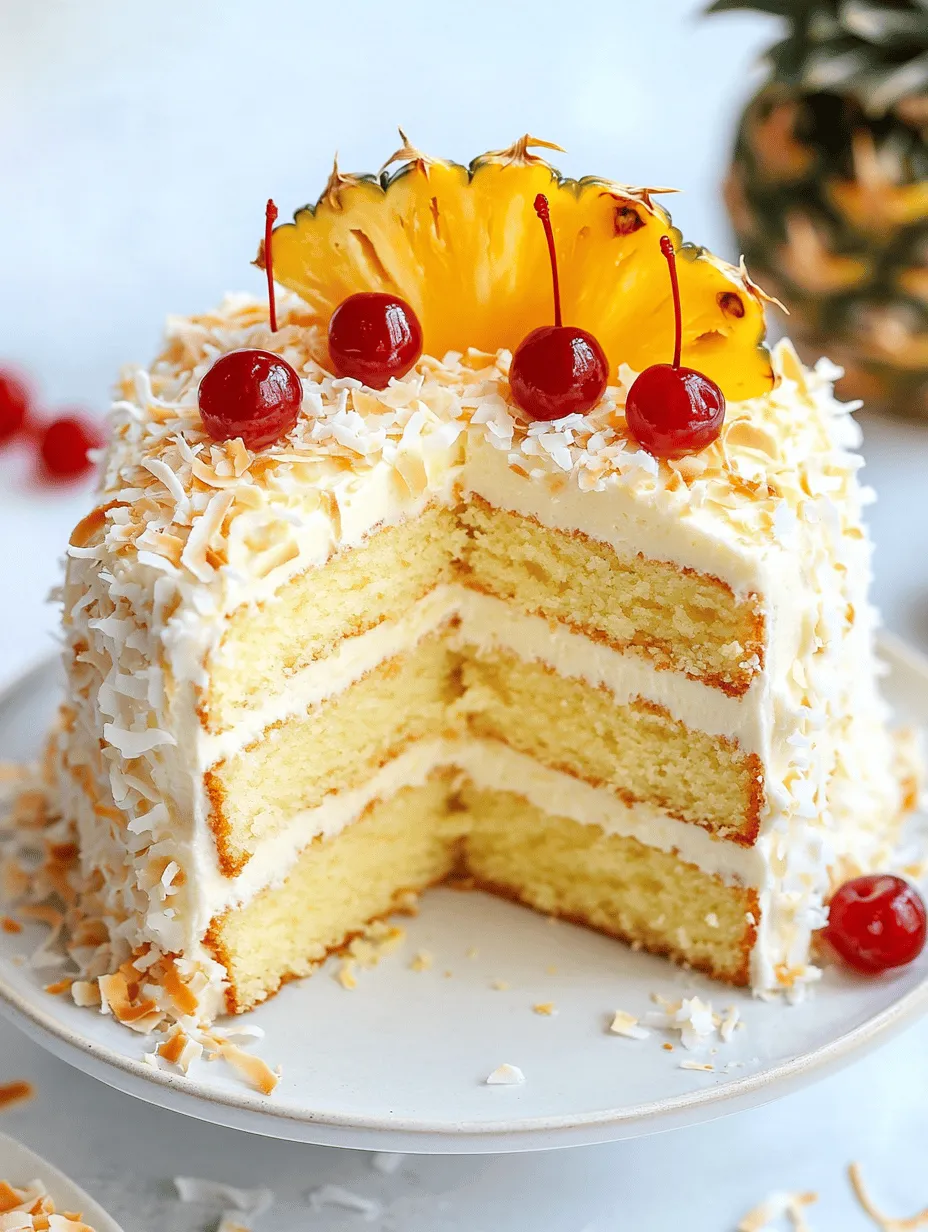
If you’re looking for a show-stopping dessert that captures the essence of tropical paradise, look no further than the Piña Colada Layer Cake. This impressive cake combines the beloved flavors of coconut and pineapple, reminiscent of the classic cocktail. With its fluffy layers and luscious frosting, it’s not just a treat for the palate but also a feast for the eyes, making it a perfect choice for special occasions like birthdays, weddings, or summer gatherings.
Celebration cakes hold a significant place in our traditions, often serving as the centerpiece of our happiest moments. They bring people together and create lasting memories, and what better way to elevate your next celebration than with a Piña Colada Layer Cake? This cake is not only visually stunning, but it also encapsulates the joyful spirit of tropical islands, evoking feelings of sunshine and relaxation. Making this cake at home offers a unique opportunity to infuse your personal touch, allowing you to create a dessert that’s as special as the occasion itself.
The tropical flavors of the Piña Colada Layer Cake are what truly set it apart. Imagine moist layers of vanilla cake infused with pure pineapple juice and shredded coconut, complemented by a rich coconut cream frosting. This cake will whisk you away to a beachside escape, even if you’re enjoying it in your own kitchen. Whether you’re a seasoned baker or a novice looking to impress, the joy of crafting this cake from scratch is a rewarding experience that encourages creativity and celebration.
The Inspiration Behind Piña Colada Layer Cake
The flavor profile of Piña Colada is deeply rooted in tropical cuisine, originating from Puerto Rico in the 1950s. This iconic cocktail melds the sweetness of ripe pineapples with the creamy richness of coconut cream, resulting in a refreshing drink that has become synonymous with beach vacations and sunny days. The Piña Colada’s rise to fame is not just due to its delicious taste; it also embodies a laid-back lifestyle that many aspire to, making it a fitting inspiration for a cake that captures the same spirit.
Layer cakes have long been a staple at gatherings and events, celebrated for their beauty and versatility. They allow for a variety of flavors and textures, showcasing creative designs while offering a generous serving size for guests. The Piña Colada Layer Cake, with its rich tropical flavors, stands out as a unique dessert that brings a taste of the tropics to your table. This cake’s ability to evoke feelings of warmth and joy makes it a favored choice for celebrations, ensuring it will be a hit at any event.
Ingredients Breakdown
Creating the perfect Piña Colada Layer Cake starts with using high-quality ingredients that will ensure the best flavor and texture. The essential components of this cake include all-purpose flour, sugar, baking powder, eggs, coconut milk, crushed pineapple, and shredded coconut. Each ingredient plays a vital role in contributing to the cake’s overall taste and moisture.
1. All-Purpose Flour: This serves as the foundation of the cake, providing structure and stability to the layers.
2. Sugar: Not only does sugar sweeten the cake, but it also helps to create a tender crumb when properly creamed with butter.
3. Baking Powder: This leavening agent ensures that the cake rises nicely, resulting in light and fluffy layers.
4. Eggs: Eggs add richness and moisture, while also helping to bind the ingredients together.
5. Coconut Milk: This ingredient infuses the cake with a creamy coconut flavor and contributes to its moist texture.
6. Crushed Pineapple: Adding crushed pineapple not only enhances the tropical flavor but also keeps the cake moist. Be sure to drain it well to avoid adding excess liquid to the batter.
7. Shredded Coconut: This ingredient adds texture and reinforces the coconut flavor, making each bite delightful.
When it comes to frosting the cake, a coconut cream frosting is the ideal choice. Made with heavy cream, powdered sugar, and coconut extract, this frosting is rich and fluffy, complementing the cake’s layers perfectly. Using high-quality coconut extract will elevate the flavor, making it taste as if you’re enjoying a slice of paradise.
Preparation Steps
Before diving into the cake-making process, it’s crucial to prepare your workspace and gather all your ingredients. Preheating the oven is an essential first step, as this ensures that your cake will bake evenly. Preheat your oven to 350°F (175°C) and prepare your cake pans by greasing and flouring them to prevent sticking.
Now, let’s walk through the step-by-step process to create the cake batter:
1. Mix the Dry Ingredients: In a medium bowl, whisk together the all-purpose flour, baking powder, and a pinch of salt. This step helps to evenly distribute the leavening agent and ensures a consistent texture throughout the cake.
2. Cream the Butter and Sugar: In a large mixing bowl, cream together softened butter and sugar until the mixture is light and fluffy, typically taking about 3-5 minutes. This process incorporates air into the butter, aiding in the cake’s rise and creating a tender crumb.
3. Add the Eggs: Once the butter and sugar are well combined, add the eggs one at a time, mixing well after each addition. This allows the eggs to fully incorporate, contributing to the cake’s structure.
4. Incorporate the Coconut Milk: Slowly mix in the coconut milk, ensuring that it’s fully blended into the batter. The coconut milk will add richness and moisture, enhancing the overall flavor.
5. Combine the Dry and Wet Ingredients: Gradually add the dry ingredient mixture to the wet ingredients, mixing until just combined. Be careful not to overmix, as this can lead to a dense cake texture.
6. Fold in the Pineapple and Coconut: Gently fold in the drained crushed pineapple and shredded coconut using a spatula. This step ensures that the fruit and coconut are evenly distributed throughout the batter, providing bursts of flavor in each slice.
7. Bake the Cake: Divide the batter evenly between the prepared cake pans. Bake in the preheated oven for approximately 25-30 minutes, or until a toothpick inserted into the center comes out clean. Keep an eye on the cakes towards the end of the baking time to avoid overbaking.
8. Check for Doneness: To ensure that your cakes are perfectly baked, look for a golden-brown color and a springy texture. Once done, remove the cakes from the oven and allow them to cool in the pans for about 10 minutes before transferring them to a wire rack to cool completely.
Following these steps will set the foundation for your Piña Colada Layer Cake, ensuring a delightful outcome that will impress your family and friends. Stay tuned for the next part, where we will dive into creating the luscious coconut cream frosting that will elevate this cake to new heights.
Key Techniques for Achieving the Right Texture
Creating a perfect Piña Colada Layer Cake requires an understanding of texture. The goal is a moist, tender crumb that embodies the tropical flavors of pineapple and coconut. Here are some essential techniques to ensure your cake has the right texture:
1. Proper Mixing: When combining your wet and dry ingredients, mix just until incorporated. Overmixing can lead to a dense cake, while undermixing can result in dry spots. Use a spatula or wooden spoon to gently fold your ingredients together.
2. Room Temperature Ingredients: Ensure your eggs, butter, and any dairy are at room temperature. This helps achieve a uniform batter that traps air, leading to a light and fluffy cake.
3. Sifting Dry Ingredients: Sift your flour, baking powder, and other dry ingredients together. This aerates the flour and helps prevent lumps, contributing to a lighter cake.
4. Moisture Management: Incorporate ingredients like crushed pineapple and coconut milk in moderation to maintain moisture without making the batter too wet. Adjust your baking time accordingly as well.
5. Baking Temperature: Bake your cakes at the recommended temperature, typically around 350°F (175°C). An oven thermometer can help ensure accuracy, as even a slight temperature variation can affect the baking outcome.
Variations for Different Frosting Preferences
Frosting is an essential element of your Piña Colada Layer Cake, and there are several variations you can consider based on your taste preferences:
1. Classic Cream Cheese Frosting: A tangy twist that complements the sweetness of the cake. Simply beat together cream cheese, butter, powdered sugar, and a splash of coconut extract for a deliciously creamy finish.
2. Whipped Coconut Cream: For a lighter option, whip coconut cream with a bit of sugar and vanilla. This will add a fluffy texture and enhance the tropical flavor profile.
3. Buttercream Frosting: For a more traditional approach, use a coconut-flavored buttercream. Beat together butter, powdered sugar, and coconut milk until smooth for a rich yet fluffy frosting.
4. Ganache: For a decadent touch, pour a smooth coconut chocolate ganache over the top of your cake. This combination of flavors can elevate your dessert to a new level.
Assembling the Piña Colada Layer Cake
Once your cake layers have cooled completely, it’s time to assemble your Piña Colada Layer Cake. Proper assembly is crucial for achieving a beautiful, balanced cake.
Importance of Cooling the Cake Layers Completely
Cooling your cake layers is essential to prevent melting your frosting. Allow each layer to cool in the pan for about 10 minutes before transferring them to a wire rack. Let them cool completely, which usually takes at least 1 hour. This step ensures that the frosting will adhere well without sliding off.
Step-by-Step Assembly Process
1. Prepare Your Workspace: Make sure you have a clean, flat surface to work on. Gather your cooled cake layers, frosting, and any additional decorations.
2. Level the Cake Layers: If your cake layers have domed tops, use a serrated knife to trim them flat. This ensures even stacking and helps prevent any tilting.
3. First Layer: Place the first layer on your serving platter or a cake stand. Use a spatula to spread a layer of frosting across the top, creating an even surface.
4. Add the Second Layer: Place the second layer gently on top of the first. Repeat the frosting process.
5. Continue Layering: If you have more layers, repeat the process until all layers are stacked.
6. Final Frosting: Once all layers are in place, apply a thin crumb coat of frosting around the entire cake. This helps seal in crumbs and creates a smooth base for the final layer of frosting. Chill the cake for about 30 minutes to set the crumb coat before applying the final layer of frosting.
Layering Frosting Between Cake Layers
When layering frosting, make sure to spread it evenly and allow it to slightly spill over the edges. This creates a beautiful, rustic look. Consider adding a bit of crushed pineapple between layers for an extra burst of flavor and moisture.
Techniques for Frosting the Entire Cake Evenly
To achieve a smooth finish on your frosting:
– Use an offset spatula or a bench scraper to spread the frosting. Start at the top and work your way down the sides.
– For a smooth finish, dip your spatula in hot water, wipe it dry, and use it to smooth out any imperfections.
– Don’t be afraid to rotate your cake stand as you frost to maintain an even application.
Suggestions for Achieving a Professional-Looking Finish
– Decorative Edge: Use a piping bag fitted with a star tip to create decorative borders along the top and bottom edges of your cake.
– Textured Finish: If you prefer a rustic look, use a spatula to create a textured effect on the frosting.
– Chill Before Decorating: Chill your cake for about 30 minutes before adding any decorations to ensure everything holds its shape.
Decoration Techniques
Decorating your Piña Colada Layer Cake is an opportunity to showcase your creativity and enhance its tropical theme. Here are some ideas to get you started:
Ideas for Decorating the Cake to Enhance Its Tropical Theme
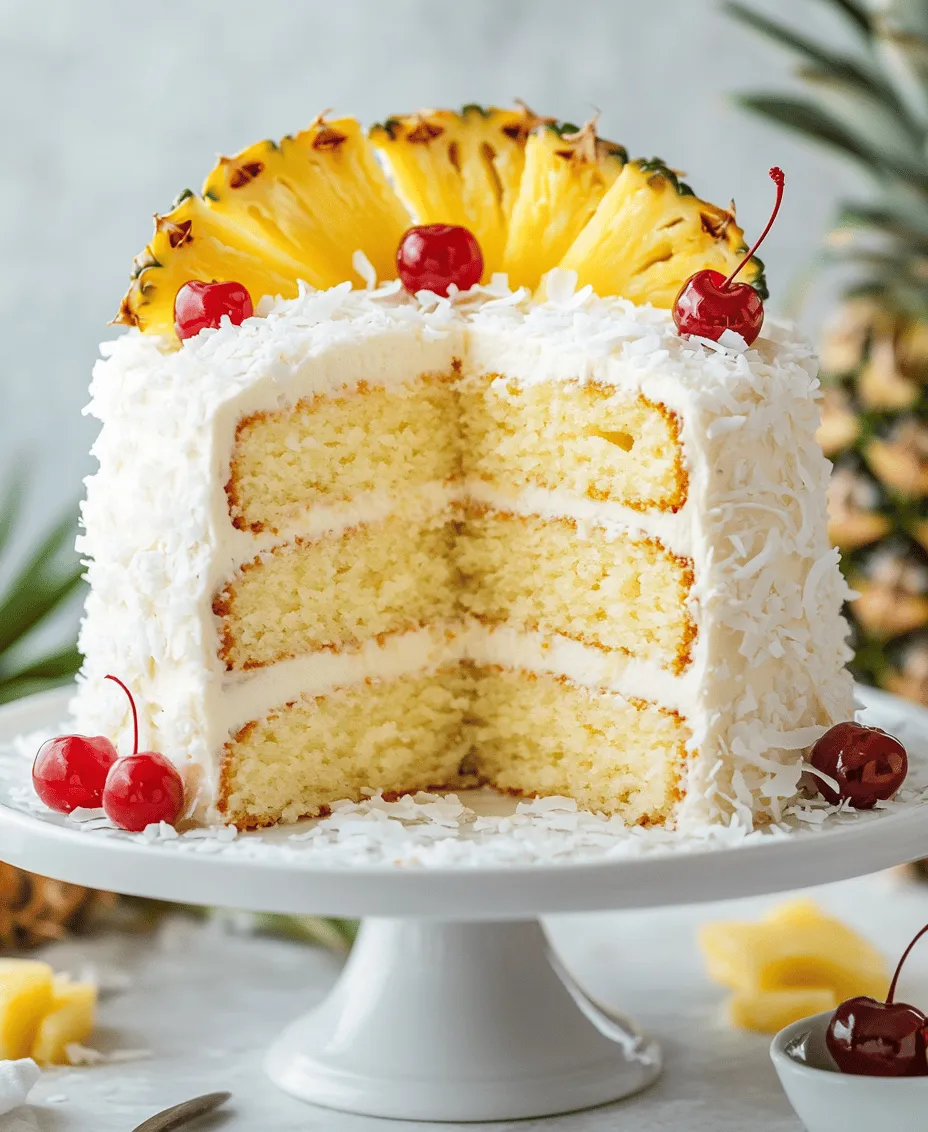
1. Toasted Coconut: Sprinkle toasted coconut flakes over the top and sides of the cake for a delicious crunch and an enhanced coconut flavor. To toast, simply place coconut flakes in a dry skillet over medium heat until golden brown, stirring frequently.
2. Fresh Pineapple Slices: Place fresh pineapple slices or wedges around the top of the cake or use them as a central decoration. This adds a vibrant touch and reinforces the flavor profile.
3. Flowers: Edible flowers, like orchids, can be a stunning addition to your cake. They add color and sophistication, making your cake look appealing for special occasions.
Importance of Presentation in Cake Serving
Presentation is key when serving any dessert, especially a layered cake. A beautifully decorated cake not only tastes divine but also creates a memorable visual impact.
Suggestions for Garnishing with Toasted Coconut, Fresh Pineapple, and Maraschino Cherries
– Final Touch: Top your cake with a few maraschino cherries for a pop of color and a sweet surprise.
– Layering Garnishes: Combine toasted coconut and fresh pineapple on top for a visually appealing and flavor-packed topping.
– Serving Dishes: Use a cake stand or a beautiful platter to elevate your presentation.
Serving Suggestions
The Piña Colada Layer Cake is a delightful dessert perfect for various occasions. Here are some serving suggestions:
Ideal Occasions for Serving the Piña Colada Layer Cake
– Tropical Themed Parties: This cake is a standout at beach or luau-themed gatherings.
– Celebrations: Birthdays, anniversaries, or holidays can be made extra special with this tropical treat.
– Summer Barbecues: A refreshing dessert option that pairs well with grilled foods and summer beverages.
Pairing Ideas with Beverages and Other Desserts
– Beverages: Pair your cake with a Piña Colada cocktail for a themed experience, or serve it alongside a chilled glass of coconut milk or fruity iced tea.
– Dessert Pairing: Consider serving the cake with a scoop of coconut or pineapple sorbet for an additional refreshing element.
Importance of Serving Temperature and Presentation
Serve your Piña Colada Layer Cake chilled for the best flavor and texture. The cold enhances the cake’s tropical flavors and makes it incredibly refreshing. When presenting, make sure to slice neatly to reveal the beautiful layers, showcasing your hard work.
Nutritional Information
Understanding the nutritional aspects of your Piña Colada Layer Cake can help you make informed decisions about serving sizes and ingredients.
Overview of the Nutritional Aspects of the Cake
This cake, while indulgent, can be made with healthier substitutions. The use of crushed pineapple provides natural sweetness and moisture, while coconut can offer healthy fats.
Possible Modifications for Dietary Preferences
– Gluten-Free Options: Substitute all-purpose flour with a gluten-free flour blend to cater to gluten-sensitive individuals.
– Reduced Sugar: Consider using natural sweeteners like honey or maple syrup in place of sugar for a healthier version.
Caloric Breakdown per Serving
On average, a slice of Piña Colada Layer Cake contains around 350-450 calories, depending on the portion size and frosting used. Be mindful of serving sizes if you are watching your caloric intake.
Conclusion
Creating a Piña Colada Layer Cake is not just about baking; it’s about crafting an experience filled with tropical flavors and vibrant decorations. From the first bite of moist cake to the creamy frosting and garnishes, every element works together to create a celebration on a plate.
Don’t hesitate to try your hand at this delightful recipe. Whether you’re celebrating a special occasion or simply treating yourself, your efforts will surely impress family and friends. Share your experiences and variations, and enjoy the process of bringing this beautiful cake to life. The joy of baking is just as significant as the final product, making it a perfect addition to any gathering or celebration.
