

Introduction
Cheese has long been a staple in cuisines around the world, and one of the lesser-known yet incredibly delicious varieties is Quesillo cheese. This rich, creamy cheese hails from Latin America, particularly Nicaragua and parts of Mexico, where it’s cherished not just for its flavor but also for its cultural significance. As a fresh cheese, Quesillo embodies a unique texture and taste that makes it perfect for a variety of dishes, from savory meals to sweet desserts.
The Quesillo Cheese Delight recipe offers an inviting opportunity for those looking to explore the world of homemade cheese. This delightful cheese is not only rewarding to make but also provides a fresh taste that can elevate your culinary creations. In this article, we will embark on a comprehensive journey into the art of making Quesillo cheese at home. From understanding the ingredients to step-by-step instructions, you will find everything you need to create this delicious cheese that can be enjoyed in numerous ways.
Understanding Quesillo Cheese
Definition and Origin
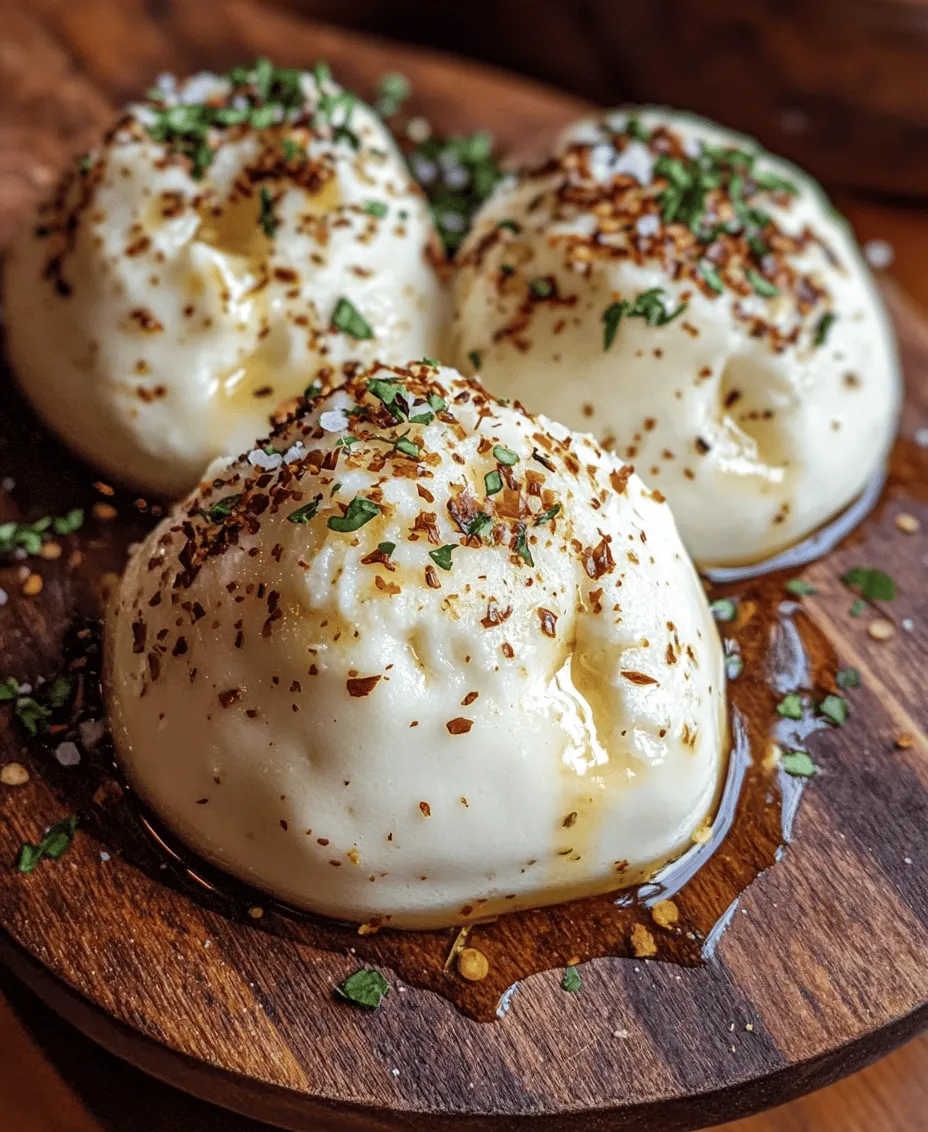
Quesillo cheese, sometimes referred to as “queso de hebra,” is a semi-soft cheese known for its stretchy and fibrous texture. It is made from whole milk and is characterized by its mild flavor, which can be enhanced with various herbs and spices. The cheese is traditionally hand-pulled into strands, resembling a soft mozzarella, and is often used in dishes like quesadillas, tacos, and enchiladas.
Originating from Nicaragua, Quesillo has become an integral part of Central American cuisine. It is often served with a side of pickled vegetables and is a common ingredient in street food, where it’s enjoyed fresh and warm. In addition to Nicaragua, variations of Quesillo can be found in Mexico, where it is celebrated for its versatility and ability to melt beautifully, making it a favorite for cheese lovers.
Cultural Significance and Traditional Uses
In the culinary landscape of Nicaragua, Quesillo cheese holds a special place, often associated with tradition and family gatherings. Many families have their own recipes passed down through generations, making cheese production a cherished activity that brings people together. The cheese is usually sold in local markets, wrapped in a banana leaf, a practice that not only preserves the cheese but also adds a touch of authenticity.
Quesillo is often paired with a variety of foods. It can be used as a topping for tamales, incorporated into cheese-stuffed jalapeños, or melted over grilled meats. Its mild flavor makes it an excellent complement to stronger ingredients, allowing it to shine in both savory and sweet dishes. This adaptability is a testament to why Quesillo has remained popular across different cultures.
Comparison with Other Types of Cheeses
What sets Quesillo apart from other cheeses, such as mozzarella or queso fresco, is its unique texture and preparation method. While mozzarella is also known for its stretchiness, it is typically made using a different process called pasta filata. Quesillo, on the other hand, involves curdling milk with rennet and acids, which gives it a distinctive fibrous quality.
Moreover, unlike hard cheeses that require aging, Quesillo is a fresh cheese that can be prepared and enjoyed the same day. Its mild flavor profile allows for easy pairing with various dishes, making it a versatile ingredient in both traditional and modern recipes.
Ingredient Breakdown
To create the perfect Quesillo Cheese Delight, understanding each ingredient’s role is essential. Let’s dive into the key components of this recipe:
Whole Milk
One of the most critical ingredients in making Quesillo cheese is whole milk, which serves as the base for the cheese. The quality of the milk directly affects the flavor and texture of the final product. When selecting milk, look for high-quality, organic whole milk that is free from additives. The creaminess of whole milk contributes to the rich texture of Quesillo, resulting in a cheese that is both smooth and satisfying.
Rennet
Rennet is a key ingredient used to curdle the milk, transforming it from a liquid state into a solid curd. It can be found in both liquid and powdered forms. The choice between the two often comes down to personal preference and availability. Liquid rennet tends to be easier to measure and work with, while powdered rennet can be more concentrated. Regardless of the form used, rennet is crucial for achieving the right consistency in your cheese.
Sea Salt
Salt is an essential component in cheese making, serving both as a flavor enhancer and a preservative. For Quesillo, the use of sea salt not only enriches the cheese’s taste but also helps to balance the acidity introduced by the vinegar and lime juice. It is important to measure the salt accurately, as too much can overpower the delicate flavors of the cheese.
Vinegar and Lime Juice
Both vinegar and lime juice play vital roles in the curd formation process. They introduce acidity to the milk, aiding in the curdling process alongside rennet. The combination of these two acids not only helps to create the perfect curd texture but also adds a subtle tanginess to the cheese that enhances its overall flavor profile. While some may prefer one acid over the other, combining both can yield a balanced taste that complements the cheese beautifully.
Heavy Cream
Adding heavy cream to the mix introduces an extra layer of richness and creaminess to Quesillo cheese. The cream contributes to the cheese’s mouthfeel, making it more indulgent and flavorful. This ingredient is particularly important if you desire a more decadent version of Quesillo or want to create a cheese that melts beautifully in dishes.
Optional Ingredients
For those looking to personalize their Quesillo, various herbs and spices can be incorporated into the cheese mixture. Popular choices include oregano, cumin, and even crushed red pepper flakes for a hint of heat. Experimenting with these optional ingredients allows you to tailor the flavor profile to your liking, making your Quesillo truly unique.
Step-by-Step Instructions
With a solid understanding of the ingredients, it’s time to get into the nitty-gritty of making Quesillo cheese. Below are the initial steps to guide you through the process.
Preparing the Milk
1. Gather Your Ingredients: Before you begin, ensure that you have all your ingredients and tools ready. You will need a large pot, a thermometer, a slotted spoon, and a cheesecloth or fine strainer.
2. Heat the Milk: Pour the whole milk into the large pot and place it over medium heat. Using a thermometer, monitor the temperature of the milk closely. Aim to heat the milk to around 190°F (88°C), stirring gently to prevent scorching. Stirring consistently can help ensure that the milk heats evenly and does not burn on the bottom of the pot.
3. Remove from Heat: Once the milk has reached the desired temperature, remove it from the heat. Allow it to cool slightly for a couple of minutes, which is crucial for the next step.
Curdling the Milk
1. Add Rennet: While the milk is still warm, add the measured amount of rennet. If using liquid rennet, dilute it in a small amount of cool, non-chlorinated water before adding it to the milk. Stir gently for about 30 seconds to ensure the rennet is evenly distributed.
2. Incorporate Vinegar and Lime Juice: Next, add the vinegar and lime juice to the milk mixture. Stir gently for another 30 seconds. You will notice the milk starting to curdle as the acids work in conjunction with the rennet.
3. Let It Sit: After stirring, cover the pot and let the milk sit undisturbed for about 10-15 minutes. During this time, curds will form, separating from the whey. You will know the curds are ready when they have a clean break, meaning that when you insert a knife into the curd, it separates cleanly.
This initial phase of making Quesillo cheese is crucial, as it sets the foundation for the texture and quality of the final product. The next steps will involve draining the whey and shaping the curds, but for now, focus on achieving the perfect curd consistency.
As we progress through the recipe, you will be guided through each step required to create the delightful Quesillo Cheese Delight, showcasing the joy and satisfaction of making cheese at home. Stay tuned for the continuation, where we will delve deeper into the processes of draining, shaping, and storing your freshly made Quesillo cheese.
Cutting and Heating the Curds
Once your curds have formed, it’s time to cut and heat them, a crucial step that influences the final texture of your Quesillo cheese. Proper cutting of the curds promotes even cooking and allows whey to escape more effectively. Aim for uniform pieces about half an inch in size. You can use a long knife or a curd cutter; whichever tool you choose, ensure it is clean to avoid contamination.
Best Practices for Cutting Curds and Why It Matters
Cutting your curds is not just about aesthetics; it significantly impacts the moisture content and texture of the cheese. Smaller curds will release whey more efficiently, leading to a firmer cheese. Conversely, larger curds retain more moisture, resulting in a softer texture. Consider the end result you desire and adjust your cutting size accordingly.
Explanation of the Heating Process and Its Effects on Curd Texture
After cutting, gently heat the curds to around 105°F (40°C). This heating process further separates the curds from the whey and encourages them to firm up. As you heat, gently stir the curds to ensure even temperature distribution. Being too aggressive can break the curds apart, while insufficient stirring can lead to uneven cooking. The goal is to achieve a delicate balance where the curds become elastic and slightly springy, perfect for molding.
Draining the Curds
Once your curds have reached the desired texture, it’s time to drain them. Proper draining is essential as it affects the moisture level and ultimately the flavor of your Quesillo cheese.
Techniques for Lining the Colander and Pouring Curds and Whey
Prepare a colander by lining it with cheesecloth or a clean kitchen towel. This will help catch the curds while allowing the whey to drain freely. Carefully ladle the curds into the colander, ensuring not to break them up too much during the transfer. Allow the whey to drain for about 10-15 minutes.
Importance of Rinsing and Cooling the Curds
After draining, it’s crucial to rinse the curds under cold water. This step helps to cool them down and halts the cooking process. Additionally, rinsing removes excess whey, which could otherwise make the cheese watery. Rinsing also helps to achieve a milder flavor, which is essential if you plan to add salt or other seasonings later.
Forming the Cheese
With your curds properly drained and cooled, you can now form the cheese.
Step-by-Step on Mixing in Salt and Cream, and Potential Flavor Additions
Begin by placing the cooled curds into a mixing bowl. Sprinkle in salt to taste—generally, about 1-2 teaspoons should suffice, but feel free to adjust based on your preference. If you wish to enhance your Quesillo cheese, consider adding cream for a richer texture or herbs like oregano or thyme for a flavor boost. Gently fold the ingredients into the curds to ensure even distribution without breaking the curds too much.
Instructions for Shaping the Cheese and the Pressing Process
To shape your cheese, transfer the curd mixture to a cheese mold lined with cheesecloth. Press down firmly to eliminate any air pockets and to help the curds adhere to one another. You can use a weight to apply gentle pressure over the top of the mold; this will help the cheese to set properly. Allow the cheese to drain further for about one hour before removing it from the mold.
Chilling and Storing
After pressing, the cheese needs some time in the refrigerator to chill and develop its flavors.
Recommended Chilling Times and Conditions for Optimal Flavor Development
Wrap the Quesillo cheese in wax paper or cheese paper to prevent it from absorbing odors in the fridge. Ideally, let the cheese chill for at least 4 hours, although overnight is preferable for the best flavor development.
Storage Tips
Store your Quesillo cheese in an airtight container if you plan to keep it for more than a few days. It’s best enjoyed fresh, but it can be kept refrigerated for up to two weeks. If you notice any signs of mold, discard the cheese immediately.
Tips for Success
Making Quesillo cheese at home can be rewarding, but there are common pitfalls to avoid.
Common Pitfalls to Avoid When Making Quesillo Cheese
1. Incorrect Temperature: Always monitor the temperature during the curd heating process; too hot can lead to tough cheese.
2. Cutting Too Small or Too Large: Ensure uniformity in curd size for even cooking and draining.
3. Overmixing: When mixing in salt or other ingredients, be gentle to maintain the curd structure.
How to Ensure the Best Flavor and Texture
To achieve optimal flavor, allow your cheese to age for a bit in the refrigerator. The longer it sits, the more the flavors will meld. Additionally, using high-quality milk will significantly enhance taste and texture.
Suggestions for Storage and Serving
When serving, slice your Quesillo cheese and accompany it with crusty bread or fresh fruit. It also pairs wonderfully with a selection of charcuterie, making it a versatile addition to any cheese board.
Flavor Variations and Customizations
Quesillo cheese can be customized to suit your taste preferences.
Ideas for Herb and Spice Combinations to Enhance the Cheese
Experiment with adding fresh herbs like basil or dill for a fresh flavor twist. If you enjoy spicy foods, consider incorporating crushed red pepper flakes or jalapeño for a kick.
Suggestions for Using Quesillo Cheese in Various Dishes or Pairings
Quesillo cheese is incredibly versatile. Use it in quesadillas, on top of tacos, or as a topping for salads. It melts beautifully, making it a fantastic addition to pasta dishes or casseroles. Pair it with fresh fruits like figs or peaches for a delightful contrast to its creamy texture.
Nutritional Information
Quesillo cheese not only delights the palate but also offers several nutritional benefits.
Overview of the Nutritional Benefits of Quesillo Cheese
Quesillo is a good source of protein and calcium, essential for bone health. It contains beneficial fats, making it a satisfying addition to your diet. The nutrients in cheese can help with muscle repair and overall body function.
Potential Uses in a Balanced Diet
Incorporate Quesillo cheese into a balanced diet by using it as a topping for salads or blending it into smoothies for a creamy texture. Use it sparingly in dishes where you want to add flavor without overwhelming calories.
Conclusion
Creating Quesillo cheese at home is a fulfilling culinary journey that allows you to appreciate the art of cheese-making. The process, while detailed, is straightforward, and the rewards are well worth the effort. Experiment with different herbs and spices to make the cheese truly your own, and take pride in serving a product that you crafted with your own hands.
Homemade cheese not only enriches your cooking but also brings a sense of accomplishment and joy to the table. Dive into this delightful project, enjoy the fruits of your labor, and embrace the world of homemade cheese in your culinary explorations.