
Introduction
There’s something undeniably magical about the smell of freshly baked cinnamon rolls wafting through your home. These delightful treats, characterized by their pillowy softness and decadent swirls of cinnamon and sugar, have a special place in the hearts—and stomachs—of many. Homemade cinnamon rolls are more than just a breakfast option; they are a celebration of comfort, warmth, and the joy of shared moments with family and friends. Imagine serving a warm, gooey roll drizzled with creamy icing to your loved ones, and watching their faces light up with delight. This is the essence of homemade cinnamon rolls.
To achieve that perfect balance of flavor and texture in your cinnamon rolls, the quality of your ingredients plays a pivotal role. Each component, from the flour to the spices, contributes to the overall experience. Using high-quality ingredients not only enhances the taste but also ensures that your rolls have the right consistency—light, fluffy, and irresistibly gooey. Whether you’re an experienced baker or a novice in the kitchen, mastering this recipe will undoubtedly elevate your baking game and impress anyone lucky enough to enjoy them.
The History of Cinnamon Rolls
Cinnamon rolls have a rich and varied history that spans centuries and continents. The origin of these delightful pastries can be traced back to ancient times, with early variations appearing in the Nordic countries. The Swedish “kanelbullar” is one of the earliest forms of the cinnamon roll, which gained popularity as a sweet treat enjoyed during coffee breaks, known as “fika.” These soft, twisted rolls are often made with cardamom and are a staple in Swedish bakeries.
As cinnamon rolls journeyed across the globe, they evolved into different forms. In Germany, for instance, the “schnecken” is a beloved version that features a spiral shape and often includes nuts or raisins. The American cinnamon roll, which most people are familiar with today, became popular in the 19th century, thanks in part to the rise of baking powder and yeast. This variation is typically larger, sweeter, and slathered in icing, making it a quintessential comfort food that many associate with brunch gatherings or holiday breakfasts.
The enduring popularity of cinnamon rolls can be attributed to their comforting flavors and textures. They evoke feelings of nostalgia and warmth, often reminding us of family gatherings and special occasions. As we continue to embrace this beloved pastry, the joy of homemade cinnamon rolls remains timeless, making them a cherished recipe for bakers of all ages.
Understanding the Ingredients
To create the best homemade cinnamon rolls, it’s essential to understand the role of each ingredient in the recipe. Here’s a closer look at what goes into these delicious treats:
All-Purpose Flour
All-purpose flour is the backbone of your cinnamon roll dough, providing the necessary structure and stability. The protein content in the flour contributes to gluten development, which is crucial for achieving that soft, chewy texture. When selecting flour, opt for a brand that you trust for consistent results.
Instant Yeast
Instant yeast is a key ingredient that helps your dough rise, creating the light and airy texture that cinnamon rolls are known for. Unlike active dry yeast, instant yeast does not require proofing in water, making it easier to use—simply mix it with your dry ingredients. This yeast also allows for a quicker rise, enabling you to enjoy your cinnamon rolls in less time.
Granulated Sugar
Granulated sugar serves multiple purposes in your cinnamon rolls. Not only does it add sweetness, but it also helps to retain moisture in the dough, ensuring that the rolls remain soft and tender. Additionally, sugar acts as food for the yeast, aiding in the fermentation process and contributing to the overall rise of the dough.
Salt
While it may seem minor, salt plays an important role in enhancing the flavor of your cinnamon rolls. It balances the sweetness and brings out the natural flavors of the other ingredients. Moreover, salt strengthens gluten structure, which helps create a better texture in the finished product.
Ground Cinnamon
The star spice of this recipe, ground cinnamon, is what gives cinnamon rolls their signature flavor and aroma. Its warm, sweet notes are comforting and inviting, making them a beloved addition to this pastry. Freshly ground cinnamon can elevate the taste even further, so consider sourcing high-quality spices for the best results.
Whole Milk
Whole milk adds richness and moisture to the dough, resulting in a tender and flavorful cinnamon roll. The fat content in whole milk contributes to a softer crumb and enhances the overall taste. If you’re looking for a dairy-free option, almond milk or oat milk can be used as substitutes, although they may slightly alter the final texture.
Unsalted Butter
Butter is crucial in both the dough and the filling, providing flavor and a tender texture. In the dough, it adds richness and helps create a flaky, soft crumb. For the filling, butter acts as a binder for the cinnamon and sugar mixture, ensuring that it adheres well to the dough and creates those beautiful swirls.
Eggs
Eggs serve as a binding agent in the dough, enriching the mixture and contributing to its moisture. They also help with the leavening process, creating a light and fluffy roll. When using eggs, ensure they are at room temperature for the best incorporation into the dough.
Brown Sugar
While granulated sugar sweetens the dough, brown sugar adds depth of flavor to the filling. Its molasses content provides a rich, caramel-like taste that complements the cinnamon beautifully. Brown sugar also contributes to a more gooey filling, which is a hallmark of the perfect cinnamon roll.
Powdered Sugar and Vanilla Extract
For the final touch, powdered sugar and vanilla extract come together to create a luscious icing that elevates your cinnamon rolls to new heights. The sweetness of the powdered sugar pairs perfectly with the warmth of the vanilla, creating a creamy topping that ties the entire treat together.
Step-by-Step Instructions
Preparing the Dough
Now that we’ve covered the essential ingredients, let’s dive into the step-by-step instructions for preparing the dough. A well-prepared dough is the foundation of your cinnamon rolls, so it’s essential to follow these steps carefully.
1. Mixing Dry Ingredients: In a large mixing bowl, combine the all-purpose flour, granulated sugar, salt, and instant yeast. Whisk these ingredients together until they are well incorporated. This step ensures that the yeast is evenly distributed throughout the flour, which is vital for consistent rising.
2. Heating the Milk: In a small saucepan, gently heat the whole milk until it’s warm but not boiling—ideally around 110°F (43°C). You can also use a microwave for this step, just be sure to heat it in short bursts to prevent overheating. The warm milk helps activate the yeast, so it’s important to get the temperature right.
3. Combining Wet Ingredients: In a separate bowl, melt the unsalted butter and let it cool slightly. Once the milk is at the right temperature, add the melted butter, along with the eggs. Whisk these wet ingredients together until smooth.
4. Combining Wet and Dry: Pour the wet ingredients into the bowl with the dry ingredients. Using a wooden spoon or a spatula, mix until a rough dough begins to form. It’s okay if the dough seems a bit sticky at this stage; it will come together as you knead it.
Kneading Techniques
Kneading is a crucial step that develops the gluten structure in the dough, giving your cinnamon rolls their delightful chewiness. Here’s how to knead effectively:
1. Flour Your Surface: Lightly flour your work surface to prevent sticking. Turn the dough out onto the floured surface.
2. Begin Kneading: With floured hands, begin to knead the dough by pushing it away from you with the heel of your hand, folding it back over itself, and rotating it a quarter turn. Repeat this motion for about 8-10 minutes.
3. Visual Cues: The dough is ready when it becomes smooth and elastic. It should spring back when gently pressed. If it feels too sticky, you can incorporate a little more flour, but be careful not to add too much, as it can lead to dense rolls.
4. First Rise: Once kneaded, shape the dough into a ball and place it in a lightly greased bowl. Cover it with a clean kitchen towel or plastic wrap and let it rise in a warm, draft-free area until it has doubled in size—approximately 1 to 1.5 hours.
Preparing the Filling
While your dough is rising, you can prepare the filling that will make your cinnamon rolls irresistible.
1. Mixing the Filling Ingredients: In a medium bowl, combine the brown sugar, granulated sugar, and ground cinnamon. Mix these ingredients until they are well blended, ensuring that the cinnamon is evenly distributed throughout the sugar.
2. Melting Butter: Melt additional unsalted butter for the filling. Allow it to cool slightly before using it to ensure it doesn’t cook the sugar mixture when combined.
3. Achieving the Perfect Consistency: The consistency of your filling is important for a gooey texture. Make sure the melted butter is warm but not hot, as this will help the sugar melt slightly when spread on the dough, creating a deliciously gooey center.
4. Gathering Your Tools: Once your dough has completed its first rise, you will be ready to roll it out, spread the filling, and create those iconic swirls. Gather your rolling pin and prepare your workspace.
As you embark on this delicious baking journey, remember that the joy of making homemade cinnamon rolls lies not just in the final product but in the process itself. The warmth of the dough, the fragrant aroma of cinnamon, and the anticipation of sharing these treats with loved ones make the effort worthwhile. Stay tuned for the next part of this article, where we will guide you through rolling, cutting, and baking your cinnamon rolls to perfection.

Rolling Out the Dough
Once your cinnamon roll dough has risen beautifully, it’s time to roll it out. This step is crucial for creating those delightful layers of sweetness within your cinnamon rolls. Start by lightly flouring your work surface to prevent sticking. Using a rolling pin, gently flatten the dough into a rectangle. For the best results, aim for a thickness of about ¼ inch.
Tips for Rolling Dough to the Correct Thickness and Size
– Use a Light Hand: When rolling out the dough, apply light pressure. If the dough begins to spring back, let it rest for a few minutes before continuing. This relaxation allows the gluten to loosen, making it easier to shape.
– Measure Your Rectangle: A standard size for your rolled dough is around 16 inches wide by 12 inches long. Keeping your dimensions consistent will help ensure even baking and filling distribution.
Techniques for Achieving a Tight Roll
To ensure your cinnamon rolls maintain their shape during baking, it’s essential to achieve a tight roll. After spreading the cinnamon-sugar filling generously across the rolled-out dough, start at one long end and roll the dough away from you, keeping it taut as you go. Apply gentle pressure as you roll, and use your fingertips to tuck in any loose edges.
Slicing the Rolls
With your dough rolled tightly into a log, the next step is to slice it into individual rolls. This is where technique can make a significant difference in the final product.
Best Practices for Cutting to Ensure Even Baking
– Use a Sharp Knife: A serrated knife is ideal for cutting through the dough without squishing it. Clean cuts ensure that the layers of filling are preserved, leading to beautifully swirled cinnamon rolls.
– Cutting Technique: Instead of pressing down hard, use a sawing motion to slice the dough. This minimizes the risk of flattening the rolls and helps maintain their shape.
Tools That Can Help Achieve Clean Cuts
If you want to make the process even easier, consider using unflavored dental floss. Slide a piece of floss under the rolled dough, cross the ends over the top, and pull tightly to create a clean cut. This method not only results in perfect slices but also keeps the layers intact.
Second Rise
After slicing the rolls, it’s essential to let them rise again before baking. This step is critical for achieving that light and fluffy texture that everyone loves.
Importance of This Step for Light and Fluffy Rolls
The second rise allows the yeast to continue working, creating air pockets that contribute to the soft, pillowy quality of your cinnamon rolls. Skipping this step can lead to dense rolls, so be patient!
How to Create an Ideal Environment for Rising
For the best results, place your rolls in a warm, draft-free area. You can preheat your oven to the lowest setting for a few minutes, then turn it off and place the rolls inside, covered with a clean kitchen towel. Alternatively, a sunny spot or near a warm stovetop can also work well.
Baking the Rolls
Once your rolls have risen to puffiness, it’s time to bake! Preheat your oven to 350°F (175°C) for optimal results.
Indicators for Knowing When the Rolls Are Done
Keep an eye on your rolls as they bake. They should turn golden brown and puff up beautifully. If you tap the top gently, it should sound hollow. Additionally, if you have a kitchen thermometer, the internal temperature should reach about 190°F (88°C).
The Role of Oven Temperature and Baking Time for Perfect Results
Baking time typically ranges from 20 to 25 minutes, but this can vary based on your oven. Make sure to rotate the pan halfway through to ensure even baking. If the tops brown too quickly, you can cover them loosely with aluminum foil until the time is up.
Preparing the Icing
While your rolls are baking, it’s the perfect time to prepare the icing. A good icing is the crowning glory of any cinnamon roll.
How to Achieve the Right Consistency for Icing
In a mixing bowl, combine powdered sugar with milk or cream. Start with a small amount of liquid and gradually add more until you reach a smooth, drizzle-able consistency. Aim for a thick yet pourable icing that will coat your rolls without running off completely.
Flavor Variations for the Icing
To elevate your icing, consider adding flavorings such as vanilla extract or almond extract. A pinch of cinnamon or a splash of maple syrup can also enhance the overall flavor profile, making your cinnamon rolls even more indulgent.
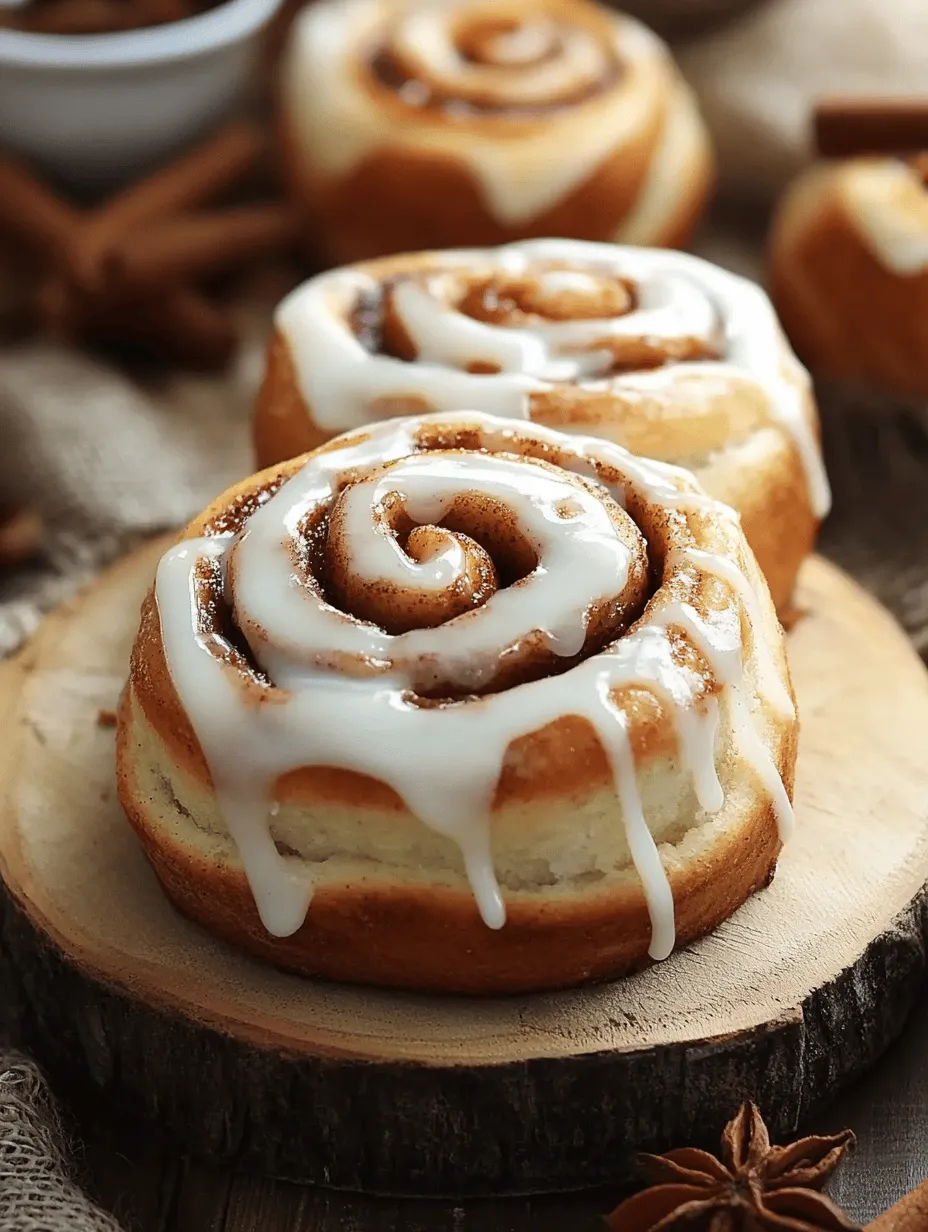
Glazing the Rolls
Once your rolls are out of the oven and slightly cooled, it’s time to glaze them with the icing you prepared.
Timing for Icing Application for Best Results
For the best results, drizzle the icing over the rolls when they are still warm but not scalding hot. This allows the icing to melt slightly into the rolls, creating a delightful glaze. Use a spoon or a piping bag for an aesthetically pleasing presentation.
Serving Suggestions
Cinnamon rolls are a beloved treat that can brighten any occasion. Here are some ideal serving suggestions to consider.
– Ideal Occasions for Enjoying Cinnamon Rolls: These rolls are perfect for breakfast, brunch gatherings, or even as a sweet dessert. They can also make a wonderful addition to holiday celebrations, where they can be served alongside other festive treats.
– Pairing Suggestions: Cinnamon rolls pair beautifully with beverages such as freshly brewed coffee, herbal teas, or a glass of cold milk. The warmth of the rolls combined with a hot drink creates a comforting experience.
– How to Store Leftovers and Reheat for Best Texture: If you have leftover cinnamon rolls, store them in an airtight container at room temperature for up to three days. To reheat, place them in the microwave for about 10-15 seconds or pop them in an oven preheated to 350°F (175°C) for a few minutes. This will help restore their soft texture and warm them up nicely.
Common Mistakes to Avoid
Even experienced bakers can make mistakes that affect the final product. Here are some common pitfalls to watch out for.
– Overworking the Dough and Its Effects: Kneading the dough too much can lead to tough rolls. Aim for a soft, pliable dough that springs back when poked, but avoid overworking it.
– Skipping the Second Rise and Its Impact on Texture: As mentioned earlier, this step is crucial for achieving fluffy rolls. Skipping it can result in dense, chewy cinnamon rolls.
– Using Cold Ingredients and How It Affects the Dough: Ensure that all your ingredients, particularly the butter and milk, are at room temperature. Cold ingredients can hinder the yeast’s ability to rise effectively.
– Not Measuring Ingredients Properly: Baking is a science, and precise measurements are key. Use a kitchen scale for the most accurate results, especially when measuring flour and sugar.
Conclusion
Making homemade cinnamon rolls is not just about enjoying a delicious treat; it’s also about the joy of baking and the satisfaction that comes from creating something special. The aroma of cinnamon and sugar wafting through your kitchen is sure to evoke fond memories and create new ones with loved ones.
Whether you stick to the classic version or experiment with different flavors and fillings, this recipe offers room for creativity. Don’t hesitate to customize it to your liking—adding nuts, raisins, or even chocolate chips can take your cinnamon rolls to the next level.
So gather your ingredients, roll up your sleeves, and get ready to enjoy the delightful experience of baking and sharing these scrumptious cinnamon rolls with friends and family. Happy baking!