Introduction
In the world of desserts, few things evoke nostalgia quite like old-fashioned recipes. They remind us of simpler times, family gatherings, and the comforting embrace of homemade treats. Among these cherished desserts, peanut butter pie stands out as a beloved classic that has captured the hearts and taste buds of many. With its creamy texture and rich, nutty flavor, peanut butter pie is not just a dessert; it’s an experience that brings joy to any occasion, from summer barbecues to holiday feasts.
What makes this peanut butter pie truly special is its simplicity. With a handful of ingredients and straightforward steps, you can create a dessert that feels indulgent yet accessible. Whether you are a seasoned baker or a novice in the kitchen, this pie is sure to impress your family and friends. The delightful combination of flavors and textures makes it a perfect centerpiece for gatherings, and once you take that first bite, it’s hard to resist going back for seconds.
In this article, we will guide you through the process of making the best old-fashioned peanut butter pie. From understanding the key ingredients to mastering the step-by-step instructions, you’ll learn how to create a dessert that is not only delicious but also brings a touch of nostalgia to your table.
Understanding the Ingredients
The success of any recipe lies in its ingredients, and the old-fashioned peanut butter pie is no exception. Each component plays a crucial role in creating the pie’s signature flavor and texture. Here’s a breakdown of the key ingredients that will elevate your peanut butter pie from good to unforgettable:
Graham Cracker Crumbs
The foundation of our peanut butter pie is the crust, made from graham cracker crumbs. These sweet, crunchy crumbs provide the perfect contrast to the creamy filling. Their slight caramel notes enhance the overall flavor profile of the pie, while their texture offers a satisfying crunch that complements the softness of the filling. When preparing your crust, opt for finely crushed graham crackers to ensure an even texture that holds together beautifully.
Unsalted Butter
Unsalted butter is another essential ingredient in our crust. It binds the graham cracker crumbs together and adds richness to the flavor. By using unsalted butter, you have better control over the saltiness of your dessert. This is particularly important in a sweet dish like peanut butter pie, where you want the sweetness to shine through without any overpowering salty notes. The result is a crust that is buttery and flavorful, setting the stage for the creamy filling to come.
Cream Cheese
A key player in the filling, cream cheese contributes to the pie’s rich and creamy consistency. It provides a smooth base that balances the strong flavor of peanut butter, creating a harmonious blend of tastes. When using cream cheese, ensure it is at room temperature for easy mixing. This will help you achieve a lump-free, velvety texture that is crucial for a successful filling.
Creamy Peanut Butter
As the star ingredient of this recipe, creamy peanut butter is what gives the pie its signature flavor. Opt for a high-quality brand that you enjoy eating straight from the jar, as this will directly impact the taste of your pie. The creaminess of the peanut butter is what makes this dessert so indulgent; it envelops your taste buds in a silky, nutty goodness that is simply irresistible. For an extra touch of flavor, consider using natural peanut butter, which often has a deeper and richer taste profile.
Sugar: Powdered and Granulated
In this recipe, both powdered sugar and granulated sugar play important roles in balancing the sweetness. Powdered sugar is used in the filling because it dissolves easily, creating a smooth texture without any gritty residue. Granulated sugar, on the other hand, can be used in the crust or as an optional sweetener in the filling. Together, they ensure that the pie has just the right amount of sweetness, allowing the flavors to shine without being overpowering.
Heavy Whipping Cream
Heavy whipping cream is what provides the lightness and volume to the filling. When whipped to stiff peaks, it adds an airy quality that helps balance the denser components, creating a pie that is both rich and refreshing. The incorporation of whipped cream also gives the pie a luxurious mouthfeel, making each bite a delightful experience.
Vanilla Extract
A splash of vanilla extract enhances the overall flavor of the pie, rounding out the sweetness and adding depth. It’s a small yet impactful addition that elevates the taste profile, making your peanut butter pie even more delicious. Always choose pure vanilla extract for the best flavor, as artificial vanilla can detract from the quality of your dessert.
Optional Garnishes
To take your peanut butter pie to the next level, consider adding some optional garnishes. Chocolate shavings or crushed peanuts can create a beautiful presentation while enhancing the flavor. A drizzle of chocolate sauce or a dollop of whipped cream on top can also add an extra touch of indulgence that will impress your guests.
Step-by-Step Instructions
Now that you have a solid understanding of the ingredients, it’s time to dive into the step-by-step instructions for preparing the best old-fashioned peanut butter pie. Follow this guide closely to ensure your pie turns out perfectly every time.
Preparing the Crust
1. Preheat Your Oven: Start by preheating your oven to 350°F (175°C). This will ensure that your crust bakes evenly and develops a nice golden color.
2. Combine the Ingredients: In a medium mixing bowl, combine 1 ½ cups of graham cracker crumbs with ½ cup of melted unsalted butter. If you like a sweeter crust, you can also add 2 tablespoons of granulated sugar to the mixture. Stir until the crumbs are well-coated and the mixture resembles wet sand.
3. Form the Crust: Press the crumb mixture firmly into the bottom and up the sides of a 9-inch pie dish. Make sure it is evenly distributed, as this will contribute to the overall texture of the pie. Use the bottom of a measuring cup or your fingers to pack it down tightly.
4. Bake the Crust: Place the crust in the preheated oven and bake for 8-10 minutes, or until it is lightly browned and firm to the touch. Keep an eye on it to prevent over-baking, as this can lead to a dry crust. Once done, remove it from the oven and allow it to cool completely while you prepare the filling.
Making the Filling
1. Beat the Cream Cheese: In a large mixing bowl, combine 8 ounces of room temperature cream cheese with 1 cup of creamy peanut butter. Using an electric mixer, beat the two ingredients together on medium speed until they are well combined and smooth.
2. Add the Sugars: Gradually add 1 cup of powdered sugar and ½ cup of granulated sugar to the cream cheese and peanut butter mixture. Beat on low speed until the sugars are incorporated. Then, increase the speed to medium and mix until the filling is smooth and creamy.
3. Whip the Cream: In a separate bowl, pour in 1 cup of heavy whipping cream. Using a clean mixer, whip the cream on medium-high speed until stiff peaks form. This means that when you lift the beaters out of the cream, the peaks should stand upright without collapsing.
4. Fold in the Whipped Cream: Gently fold the whipped cream into the peanut butter mixture. Be careful not to deflate the whipped cream; you want to maintain the lightness in the filling. Use a spatula to carefully incorporate the whipped cream until no streaks remain, and the mixture is uniform.
5. Fill the Crust: Once the filling is ready, pour it into the cooled graham cracker crust, smoothing the top with a spatula. You can create swirls or peaks for a decorative touch.
Refrigeration
6. Chill the Pie: Cover the pie with plastic wrap or aluminum foil and place it in the refrigerator. Allow it to chill for at least 4 hours or overnight if possible. This chilling time is crucial for the pie to set properly, making it easier to slice and serve.
By following these steps, you are well on your way to creating a delicious, nostalgic peanut butter pie that is sure to be a hit at your next gathering. Stay tuned for the next part, where we will explore tips for best results and answer some common questions about this delectable dessert!
Folding the Whipped Cream into the Peanut Butter Mixture
Folding in the whipped cream is a crucial step in achieving a light, airy texture for your peanut butter pie. Begin by taking one-third of the whipped cream and adding it to the peanut butter mixture. Use a rubber spatula to gently stir the two mixtures together, breaking down the whipped cream slightly to help lighten the peanut butter mixture.
Once this is combined, add the remaining whipped cream in two additions. Use a gentle motion, scraping from the bottom of the bowl and folding over the top, rotating the bowl as you go. This technique allows you to incorporate the whipped cream without deflating it. The goal is to maintain the airiness that gives the pie its delightful texture.
Assembling the Pie
Now that your filling is ready, it’s time to assemble the pie. Start by ensuring your cooled pie crust is completely set. If you’ve baked a traditional pie crust, it should have cooled to room temperature. If you’re using a pre-made graham cracker crust, ensure it’s firm and intact.
Pour the peanut butter filling into the center of the crust. Use a spatula to gently spread the filling evenly, making sure to reach the edges. Take your time with this step; a smooth filling will lead to a polished final presentation. To achieve a perfectly smooth top, you can run the back of a spoon or an offset spatula over the surface in a circular motion, creating an even surface.
Chilling the Pie
Chilling the pie is essential for allowing the filling to set properly. Place the assembled pie in the refrigerator and chill for at least 4 hours, though overnight is best if you can wait. This chilling time allows the flavors to meld beautifully and the filling to firm up, making it easier to slice when serving.
The cooling process also enhances the overall flavor, maintaining the balance between the rich peanut butter and the sweetness of the filling. For the best results, aim for a full night of refrigeration, if possible.
Serving the Pie
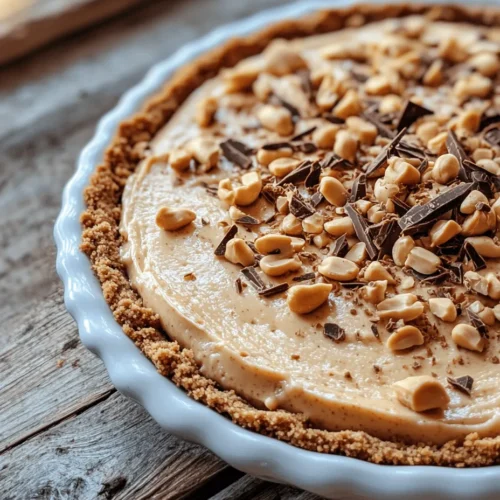
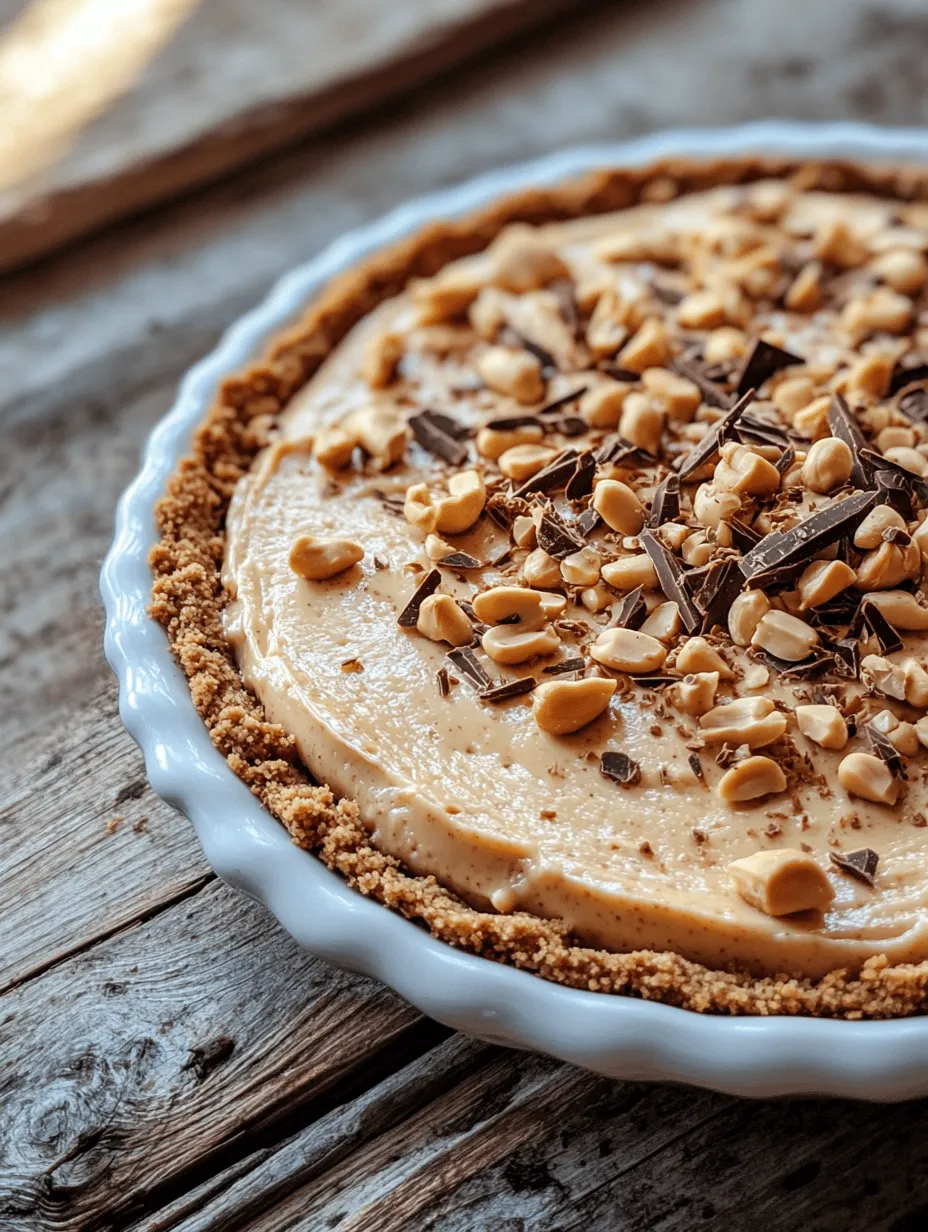
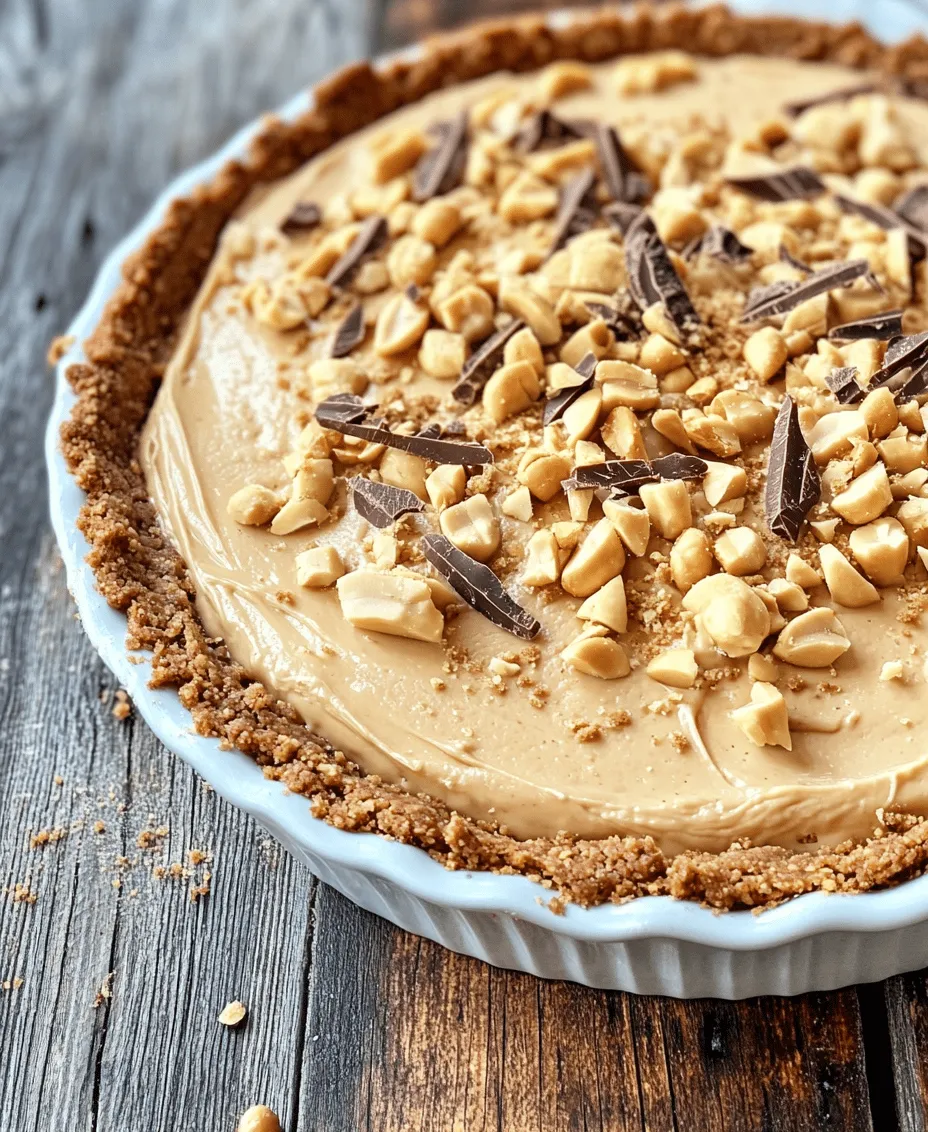
Once your pie has chilled adequately, it’s time to serve it. For an enticing presentation, consider garnishing the top with chocolate shavings or crushed peanuts. Both add a delightful visual appeal and enhance the flavor profile. To create chocolate shavings, use a vegetable peeler on a chocolate bar or block, letting the shavings fall onto the pie. For crushed peanuts, simply chop them coarsely and sprinkle them over the top.
When it comes to portioning the pie, a typical serving size is one slice from a standard 9-inch pie, which should yield about 8 servings. Pair each slice with a dollop of whipped cream on the side for an extra touch of indulgence. This pie also pairs beautifully with a scoop of vanilla or chocolate ice cream, creating a delightful contrast in textures and temperatures.
Nutritional Information
Understanding the nutritional aspects of your peanut butter pie can be helpful, especially if you’re considering serving it to guests with dietary restrictions. A standard slice of this pie (approximately 1/8th of the pie) contains about 300-350 calories, depending on the specific ingredients used. The pie is rich in protein and healthy fats due to the peanut butter, making it a satisfying dessert option.
For those mindful of gluten, consider using a gluten-free graham cracker crust or making a homemade crust using gluten-free flour. If you’re looking to reduce sugar intake, you can substitute granulated sugar with a sugar alternative, adjusting the amount as needed to maintain the sweetness of the filling.
The Nostalgic Appeal of Peanut Butter Pie
Peanut butter pie is not just a dessert; it’s a slice of nostalgia that evokes fond memories of family gatherings and special occasions. This dessert has been a staple in many households, particularly in the United States, where peanut butter is a beloved ingredient. Its origins can be traced back to the early 20th century when peanut butter gained popularity, and creative home cooks began experimenting with it in various desserts.
The cultural significance of peanut butter pie can be seen in its ability to bring people together. Whether it’s a summer barbecue or a holiday gathering, this pie often makes an appearance, sparking joy and conversation among family and friends. Many people have personal stories linked to peanut butter pie, whether it’s a cherished recipe passed down through generations or a new twist on an old favorite that became a hit at family reunions.
Over the years, variations of this pie have emerged, showcasing regional flavors and preferences. For example, in the South, you might find variations that incorporate banana or chocolate, adding new dimensions to the classic recipe. This evolution reflects the adaptability of peanut butter pie, making it a timeless favorite.
Variations and Customizations
One of the great aspects of peanut butter pie is its versatility. You can easily modify the recipe to suit different tastes and dietary needs. For those who love chocolate, consider transforming this into a chocolate peanut butter pie by adding cocoa powder to the filling or drizzling chocolate ganache on top before chilling.
If you want to make it a bit more indulgent, layers of banana or caramel can be added. Simply slice bananas and layer them on the bottom of the crust before pouring in the filling. Caramel sauce can be drizzled over the filling for an extra layer of sweetness.
For a healthier or vegan option, substitute traditional cream cheese with a plant-based cream cheese alternative and use maple syrup or agave nectar instead of sugar. You can also make a crust using almond flour or oats to cater to gluten-free needs.
Conclusion
The Best Old Fashioned Peanut Butter Pie Recipe is not just about creating a delicious dessert; it’s about crafting an experience filled with joy and nostalgia. The simplicity of the recipe allows anyone, from novice bakers to seasoned chefs, to enjoy the process of making something special for their loved ones.
As you embark on making this pie, remember that it’s not just about the final product but the memories created in the kitchen along the way. Sharing this pie with family and friends will undoubtedly bring smiles to their faces and warmth to your gatherings. So grab your ingredients, get mixing, and enjoy the delightful experience of making and sharing this beloved recipe.