

Introduction
In recent years, there has been a remarkable resurgence in the popularity of homemade bread. The allure of fresh, warm bread straight from your oven is hard to resist, and many home bakers are turning to simpler methods that yield delicious results with minimal effort. Among these methods, no-knead bread recipes have taken center stage, offering an easy yet rewarding experience for both novice and seasoned bakers alike.
This article will guide you through the process of creating bakery-style no-knead sandwich bread, which is not only straightforward but also delivers a soft, flavorful loaf perfect for sandwiches, toast, or simply enjoying with butter. The simplicity of this recipe allows anyone to dive into the world of bread-making without the intimidation often associated with traditional kneading techniques. With just a few ingredients and a bit of patience, you’ll be able to enjoy the delightful aroma of freshly baked bread wafting through your home.
The benefits of making no-knead bread are plentiful. This method requires minimal effort, allowing you to mix your dough and set it aside to rise while you attend to other tasks. The long fermentation process enhances the flavor and texture of the bread, resulting in a crusty exterior and a soft, chewy interior. Whether you are a busy parent, a working professional, or someone who simply enjoys the art of baking, this no-knead sandwich bread recipe is designed to fit seamlessly into your lifestyle.
Understanding No-Knead Bread
What is No-Knead Bread?
No-knead bread is a revolutionary approach to bread-making that eliminates the need for traditional kneading techniques. In contrast to classic bread recipes, where dough is vigorously kneaded to develop gluten, no-knead bread relies on a long fermentation period to achieve its desired texture and flavor. By allowing the dough to rest for an extended time, typically overnight, the gluten develops naturally, resulting in a beautifully airy loaf with a delightful chew.
The Science Behind No-Knead Bread
The science of no-knead bread lies in the power of time. When yeast is mixed with flour and water, it begins to consume sugars present in the flour, producing carbon dioxide gas as a byproduct. This gas is what causes the dough to rise. In traditional bread-making, kneading helps to strengthen the gluten network, trapping the gas and creating a structure that supports the rise.
In no-knead recipes, the dough is allowed to ferment for a longer duration, typically 12 to 18 hours. During this time, the yeast continues to work its magic, building flavor and texture without the need for physical manipulation. The slow fermentation process also allows for the development of lactic acid, which contributes to the bread’s complex flavor profile. This means you can enjoy a loaf that is not only easier to make but also boasts a depth of flavor often associated with artisan breads.
Benefits of Making No-Knead Bread
– Ease of Preparation: The no-knead method requires minimal hands-on time, making it accessible for even the busiest of individuals.
– Versatile: You can easily customize the recipe with different flours, add-ins, or toppings, allowing for a variety of flavors.
– Flavorful Results: The long fermentation process enhances the bread’s flavor and texture, often yielding a superior product compared to quick-rise alternatives.
– Less Physical Effort: Say goodbye to the heavy lifting of kneading dough; this method is ideal for those who prefer a lighter approach to baking.
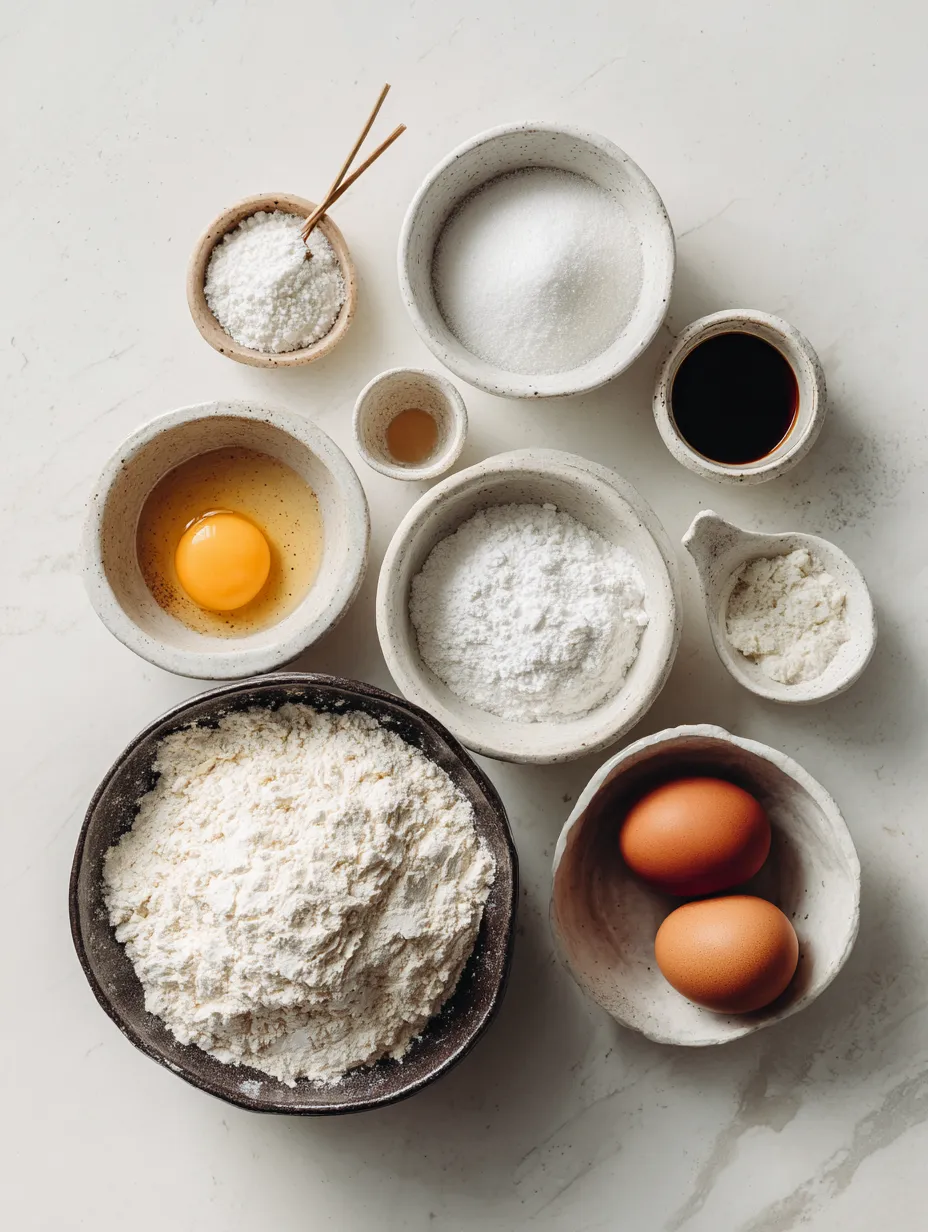
Ingredients Overview
To create your bakery-style no-knead sandwich bread, you will need a handful of simple yet essential ingredients. Each component plays a vital role in the final outcome, ensuring that your bread is flavorful, textured, and satisfying.
All-Purpose Flour
The foundation of your bread, all-purpose flour provides the structure and texture necessary for a successful loaf. It contains a moderate amount of protein, which is crucial for gluten development. You can substitute part of the all-purpose flour with whole wheat flour for added nutrition and a nuttier flavor, but keep in mind that this may alter the texture slightly.
Salt
Salt is a critical ingredient in bread-making. It not only enhances the flavor but also regulates fermentation by controlling yeast activity. Too much salt can hinder the yeast, while too little can lead to overactive fermentation, resulting in undesirable flavors and textures. Aim for around 1-2 teaspoons in your no-knead bread recipe for optimal flavor.
Instant Yeast
Instant yeast is a fast-acting yeast that does not require proofing before adding to the dough. It can be mixed directly with the dry ingredients, making it a convenient choice for no-knead recipes. Instant yeast promotes a steady rise and contributes to the bread’s flavor; it’s a reliable choice for any bread-making endeavor.
Water
Water is essential for hydrating the flour and activating the yeast. The amount of water you use will directly affect the consistency of your dough. For no-knead bread, a wetter dough is generally preferred, as it leads to a lighter texture and larger holes in the crumb. Use lukewarm water to encourage yeast activity, but avoid water that is too hot, as it can kill the yeast.
Honey or Sugar
Adding a touch of honey or sugar to your dough not only enhances its flavor but also aids in the browning of the crust during baking. A small amount goes a long way in providing a subtle sweetness that balances the savory notes of the bread. If you prefer a sugar-free option, you can omit this ingredient without compromising the overall outcome.
Olive Oil (Optional)
While not strictly necessary, a splash of olive oil can enrich your bread, adding a delightful richness and enhancing the flavor. If you choose to include it, use extra virgin olive oil for the best taste. This optional ingredient can also help with the dough’s hydration and contribute to a softer crust.
Tips for Selecting High-Quality Ingredients
– Flour: Look for unbleached all-purpose flour for the best results. Organic options often have a superior flavor.
– Yeast: Ensure your yeast is fresh; expired yeast can lead to poor rising. Store in a cool, dry place or refrigerate for longevity.
– Salt: Choose fine sea salt or kosher salt for even distribution throughout the dough.
– Water: Use filtered or bottled water if your tap water has a strong taste or odor.
Step-by-Step Guide to Making No-Knead Sandwich Bread
Preparation of the Dough
Combining Dry Ingredients
1. Gather Your Ingredients: Measure out 3 cups of all-purpose flour, 1-2 teaspoons of salt, and 1 teaspoon of instant yeast.
2. Whisk Together: In a large mixing bowl, combine the flour, salt, and yeast. Use a whisk to ensure even distribution of the dry ingredients. This step is crucial for preventing clumps of salt or yeast in the dough.
Mixing Wet Ingredients
1. Measure Water: Warm 1 ½ cups of water until it is lukewarm. This temperature is ideal for activating the yeast without killing it.
2. Add Sweetener: If using honey or sugar, dissolve it in the warm water. Stir until fully combined, ensuring no granules remain.
Combining the Mixtures
1. Form the Dough: Pour the warm water mixture into the bowl with the dry ingredients. Using a spatula or wooden spoon, stir until a shaggy dough forms. The dough should be sticky and rough in appearance.
2. Assess Consistency: The dough should be wet and sticky, but if it’s too dry, you can add a splash more water. Avoid over-mixing; just ensure everything is incorporated.
First Rise
1. Cover the Bowl: Once combined, cover the bowl tightly with plastic wrap or a clean kitchen towel. This will help retain moisture and warmth.
2. Find an Optimal Temperature: Place the bowl in a warm, draft-free area of your kitchen. Ideal rising temperatures are between 70°F and 80°F. If your kitchen is cool, consider placing the dough in an oven with the light on to create a warm environment.
3. Duration: Allow the dough to rise for 12 to 18 hours. During this time, you should notice it expanding and developing bubbles on the surface. The dough is ready when it has doubled in size and feels puffy to the touch.
Shaping the Dough
1. Prepare Your Surface: Lightly flour a clean work surface to prevent sticking. Gently turn the dough out onto the floured surface.
2. Shape the Loaf: Using floured hands, gently shape the dough into a rectangle. Fold the top third down to the center, then fold the bottom third up to meet it, creating a rough loaf shape.
3. Final Shaping: Turn the dough seam-side down and gently tuck in the sides to form a tighter loaf. Avoid excessive handling; the goal is to maintain as much air in the dough as possible.
This detailed breakdown serves as your foundation for creating bakery-style no-knead sandwich bread. With the right ingredients, understanding of the process, and a little patience, you’ll be on your way to enjoying the incredible taste of homemade bread that rivals your favorite bakery. Stay tuned for the next steps, where we will move on to the second rise, baking, and enjoying your freshly baked loaf!
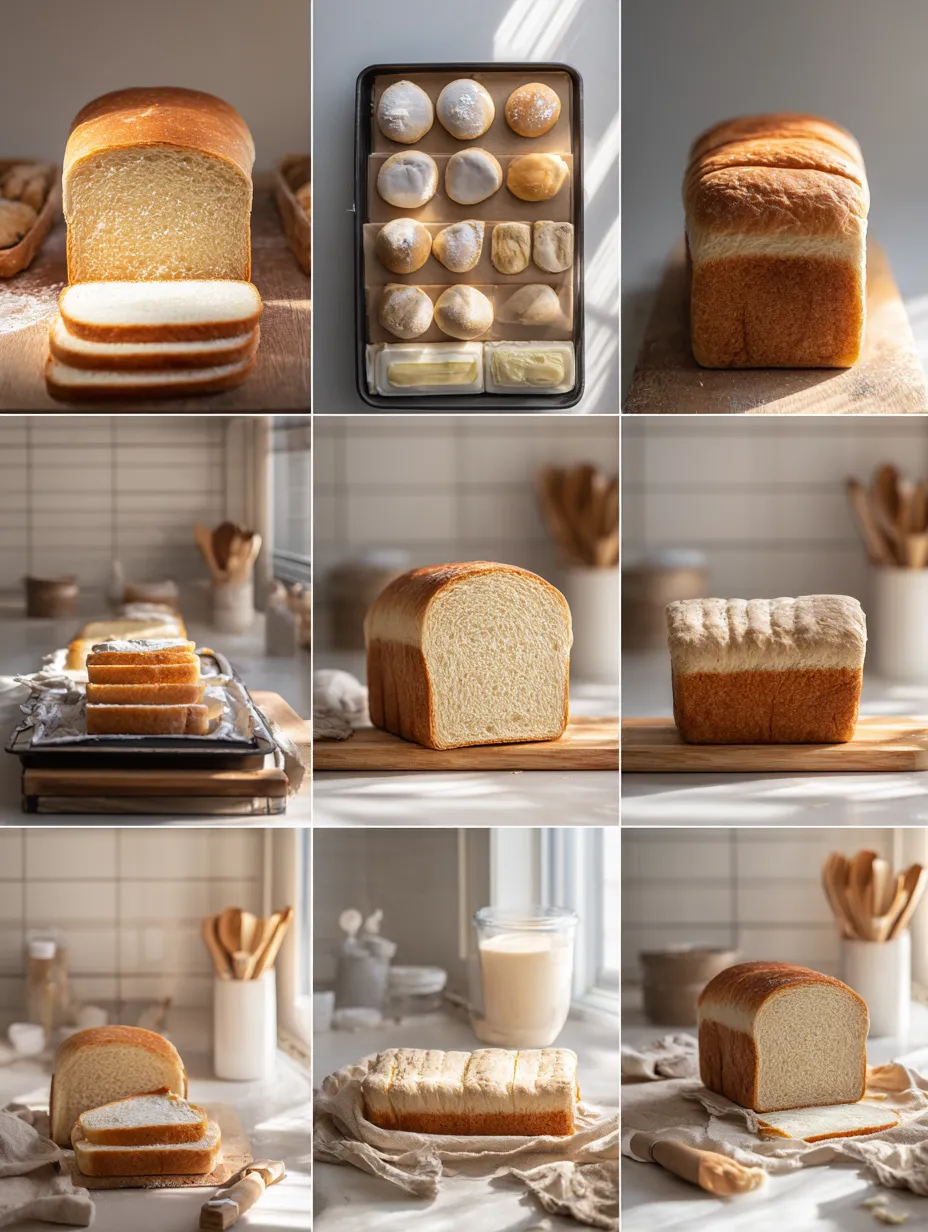
Making bakery-style no-knead sandwich bread at home is a rewarding experience that elevates your culinary skills while providing delicious results. In this section, we will delve into essential techniques for handling wet dough, the significance of the second rise, the baking process, cooling methods, and creative serving suggestions. By the end, you will be fully equipped to bake and enjoy this delightful bread in your own kitchen.
Techniques for Handling Wet Dough and Shaping
Working with wet dough can be daunting, but with the right techniques, you can handle it like a pro. Here’s how to manage your dough without overworking it:
1. Use Wet Hands:
– When handling sticky dough, keep your hands damp. This prevents the dough from sticking to your fingers, allowing you to shape it more easily.
2. Use a Bench Scraper:
– A bench scraper is an invaluable tool for transferring and shaping wet dough. It helps you lift the dough without deflating it, allowing you to maintain its airy structure.
3. Gentle Folding:
– Instead of kneading, use a gentle folding technique. In the bowl, lift the dough from the bottom and fold it over itself. Repeat this a few times to help develop gluten without extensive handling.
4. Shaping the Dough:
– After the initial rise, turn the dough out onto a floured surface. With floured hands, gently shape it into a round or rectangular loaf without deflating it too much. Use the bench scraper to help in this process.
The Second Rise
The second rise, or proofing, is crucial for developing flavor and texture in your bread. Here’s what to focus on:
– Timing: Allow the dough to rise until it has doubled in size, which typically takes 30 to 90 minutes depending on your kitchen temperature.
– Appearance: The dough should look puffy and have a slightly domed shape. A well-risen dough will retain its shape when gently poked, with the indentation slowly springing back.
– Covering: To prevent the dough from drying out, loosely cover it with a clean kitchen towel or plastic wrap during the rise.
Baking Process
Preheating the Oven
Preheating your oven is essential for achieving a perfect loaf. Here’s why:
– Hot Environment: A hot oven promotes an initial burst of steam, creating a crusty exterior while maintaining moisture inside.
– Cast-Iron Pot: Using a cast-iron pot or Dutch oven mimics a professional steam oven, trapping heat and moisture. This is key for that bakery-style crust.
Baking the Bread
Baking your bread perfectly involves several steps:
1. Preheat the Oven:
– Preheat your oven to 450°F (232°C) for at least 30 minutes. If using a cast-iron pot, place it inside to heat as well.
2. Transfer the Dough:
– Place a piece of parchment paper on your work surface. Gently flip the dough onto the parchment, seam side up. Use the bench scraper to assist and avoid deflating the dough.
3. Quickly Cover and Bake:
– Carefully remove the hot pot from the oven. Lift the parchment, with the dough on it, and place it inside the pot. Cover with the lid and return it to the oven.
4. Baking Time:
– Bake covered for 30 minutes. This allows the bread to rise and develop steam. After 30 minutes, remove the lid to allow the crust to brown. Bake for an additional 15-20 minutes or until the crust is golden brown.
Achieving the Perfect Crust
To ensure your bread is perfectly baked, follow these techniques:
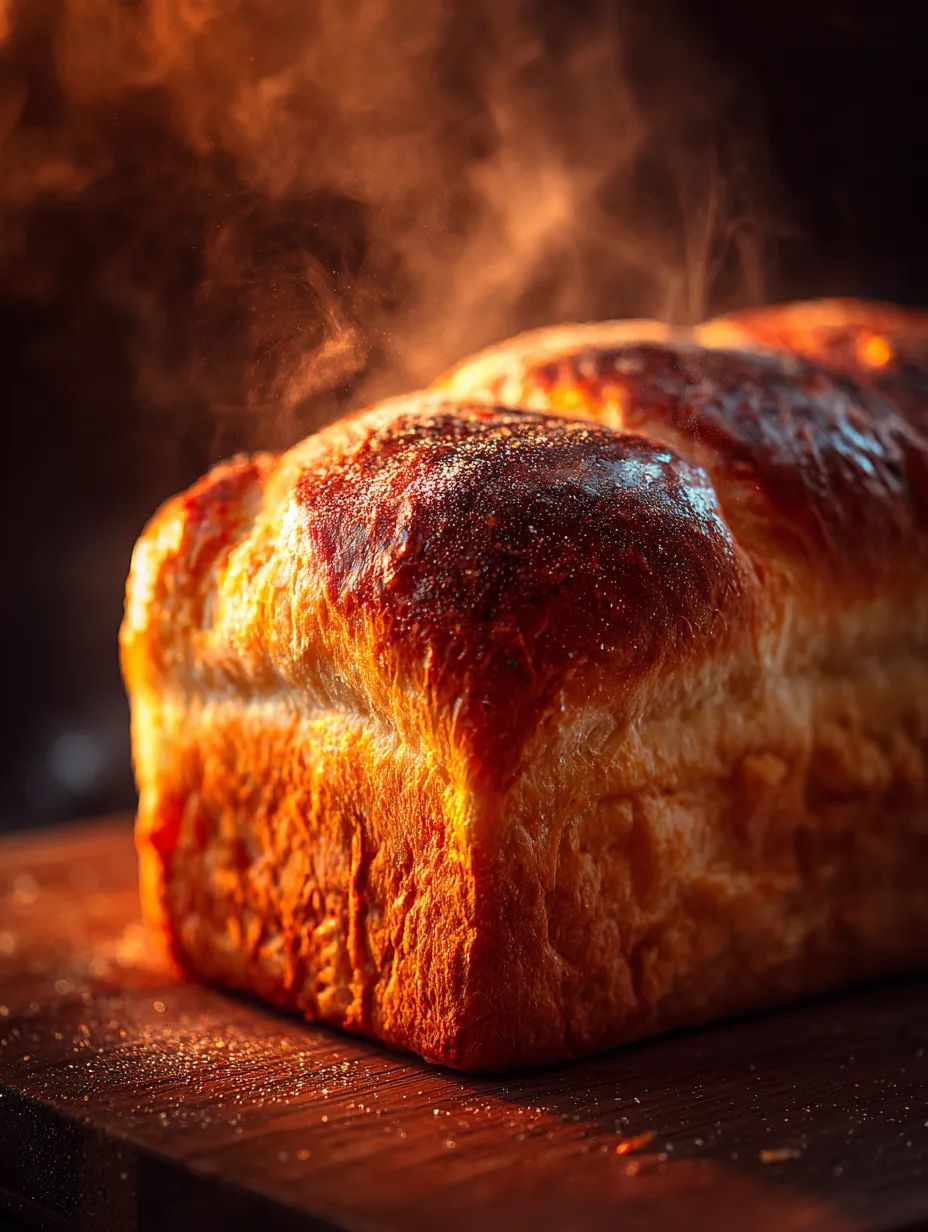
– Visual Cues: The bread should be golden brown on top. A well-baked loaf will also have a slightly darker crust around the edges.
– Sound Test: Gently tap the bottom of the loaf. If it sounds hollow, the bread is done. If not, return it to the oven for a few more minutes.
Cooling and Slicing the Bread
Importance of Letting the Bread Cool
Cooling your bread properly is essential for achieving the right texture and flavor:
– Science Behind Cooling: As bread cools, the steam inside continues to cook the center, setting the crumb. Cutting too early can result in a gummy texture.
– Cooling Method: Place the baked loaf on a wire rack. This allows air to circulate around the bread, preventing a soggy bottom.
Best Practices for Slicing Bread
Achieving even slices of bread can enhance your presentation and make for better sandwiches:
– Use a Serrated Knife: A sharp serrated knife is ideal for slicing bread. It allows you to cut through the crust without squishing the loaf.
– Slice After Cooling: Wait at least 30 minutes after baking to slice your bread. This patience pays off with a better texture.
Serving Suggestions
Creative Ways to Enjoy Bakery-Style No-Knead Sandwich Bread
This bread is versatile and can be enjoyed in various delicious ways:
– Classic Sandwiches: Use your homemade bread to create classic sandwiches with your favorite fillings. Try turkey, avocado, or a classic BLT.
– Toasted Perfection: Toast slices and top them with butter, jam, or avocado. The crispy texture enhances the flavor.
– Pairing with Spreads: Enjoy the bread with various spreads such as hummus, cream cheese, or a savory tapenade.
Ideas for Using Leftover Bread Creatively
If you find yourself with leftover bread, here are some creative ways to use it:
– Croutons: Cut stale bread into cubes, toss with olive oil and seasonings, and bake until crispy for delicious croutons to top salads or soups.
– Breadcrumbs: Process leftover bread into breadcrumbs for use in meatballs, breading, or as a topping for casseroles.
Nutritional Information
Understanding the nutritional aspects of your homemade bread can help you make informed choices:
– Calories and Macronutrients: Each slice of no-knead sandwich bread typically contains around 100-120 calories, with approximately 3-4 grams of protein, 1-2 grams of fat, and 20-22 grams of carbohydrates.
– Health Benefits: Homemade bread often contains fewer preservatives and additives compared to store-bought bread. Additionally, you can control the ingredients, making it possible to use whole grains or add seeds for added nutrition.
Conclusion
Baking bakery-style no-knead sandwich bread at home is a fulfilling endeavor that combines simplicity and flavor. The process is not only about creating something delicious but also about the joy of sharing with family and friends. Whether you choose to make classic sandwiches or experiment with creative toppings, the satisfaction of enjoying homemade bread is unmatched.
Embrace the opportunity to experiment with variations, such as adding herbs, seeds, or whole grains to your dough. As you perfect your technique, remember that baking is an art meant to be shared. Gather your loved ones, invite them into your kitchen, and enjoy the process together. There’s nothing quite like the aroma of freshly baked bread wafting through your home, creating memories that will last a lifetime. Happy baking!
Bakery-Style No-Knead Sandwich Bread
Ingredients
- 3 cups (375g) all-purpose flour
- 1½ teaspoons sea salt
- 1 teaspoon instant yeast
- 1½ cups (360ml) lukewarm water (about 110°F or 43°C)
- 1 tablespoon honey or sugar (for a hint of sweetness)
- 2 tablespoons olive oil (for richness)
- Optional: 1 tablespoon of herbs (like rosemary or thyme) for extra flavor
Instructions
1. Combine Dry Ingredients: In a large mixing bowl, whisk together the flour, sea salt, and instant yeast until evenly combined. If using dried herbs, stir them in now.
2. Mix Wet Ingredients: In a separate bowl, combine lukewarm water and honey (or sugar). Stir until dissolved, then add olive oil.
3. Combine Mixtures: Pour the wet mixture into the dry ingredients. Using a wooden spoon or spatula, mix until a shaggy dough forms. Do not overmix; it should be slightly sticky and lumpy.
4. First Rise: Cover the bowl tightly with plastic wrap or a kitchen towel and let it rise at room temperature for 12 to 18 hours. The dough should have expanded and developed bubbles on the surface.
5. Shape the Dough: After the first rise, turn the dough out onto a lightly floured surface. Gently fold it over on itself a few times to shape it into a rough ball. Using minimal flour, shape it into a loaf.
6. Second Rise: Place the dough seam-side down in a well-greased loaf pan. Cover it lightly with a clean towel and let it rise for another 30 minutes to 1 hour, until it has puffed up.
7. Preheat the Oven: During the last 20 minutes of the second rise, preheat your oven to 375°F (190°C).
8. Bake the Bread: Once preheated, bake the bread in the center of the oven for 30-40 minutes, or until the top is golden brown and sounds hollow when tapped. If you like a crustier bread, you can place an oven-safe dish with water on the bottom rack to create steam during baking.
9. Cool: Remove the bread from the oven and allow it to cool in the pan for 10 minutes. Then, transfer it to a wire rack to cool completely; this helps maintain the crust.
10. Slice & Serve: Once cooled, slice the bread with a serrated knife and enjoy fresh sandwiches, toast, or simply with a pat of butter!
Notes
- Add-ins like nuts, seeds, or cheese can also be incorporated for additional flavor and texture.
- Make sure to use instant yeast for the best results; you may need to adjust rise times if using active dry yeast.