Introduction
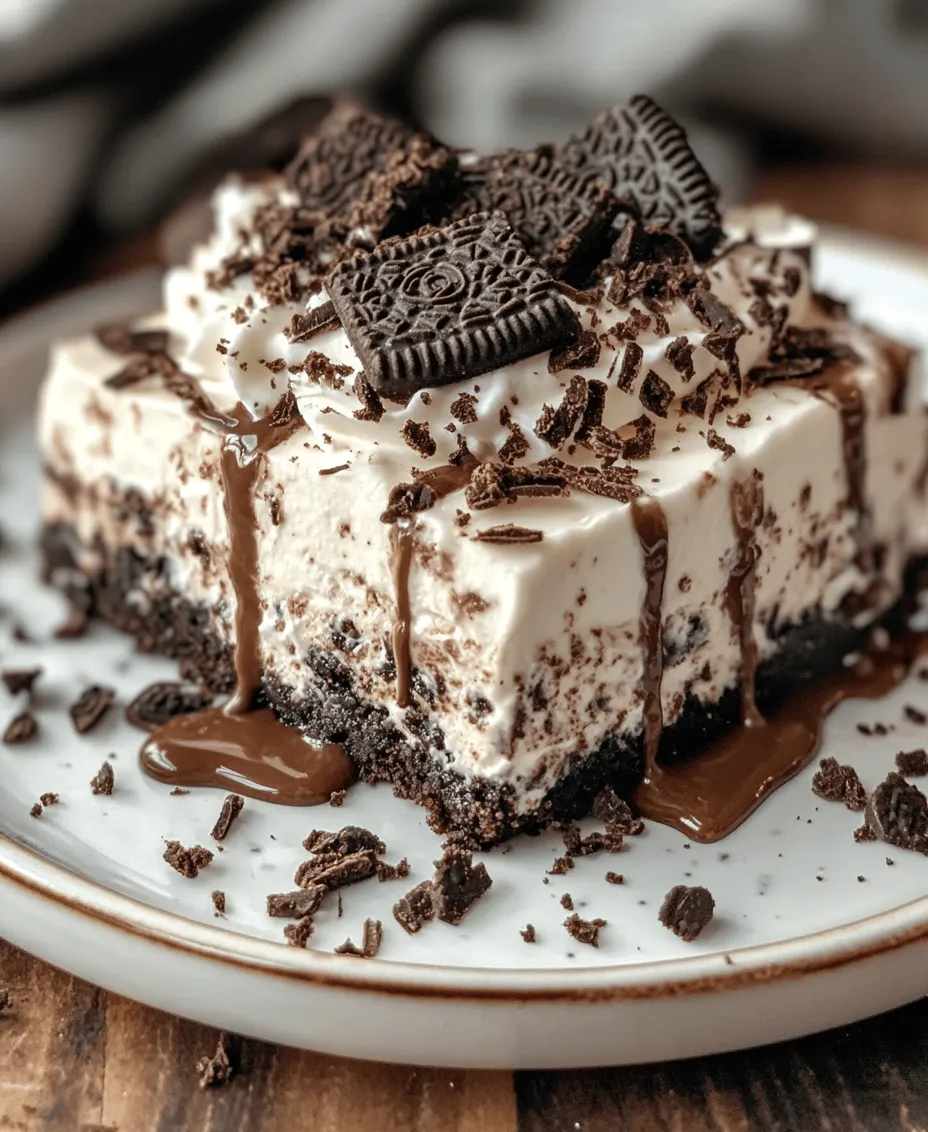
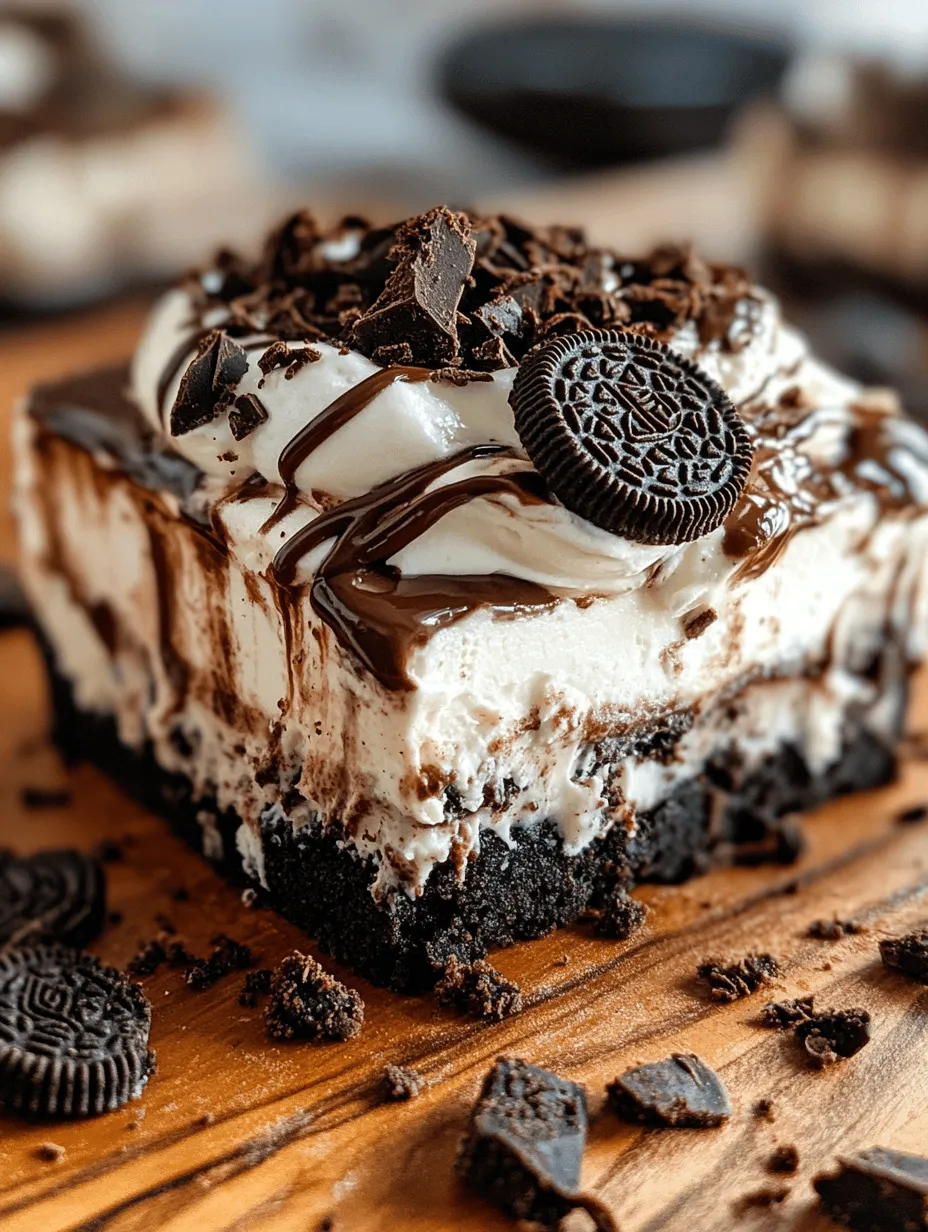
When it comes to desserts that captivate the taste buds, few can rival the irresistible charm of the Oreo Bliss No Bake Delight. This decadent dessert combines the beloved flavors of Oreo cookies with a silky, creamy filling, creating a dessert that’s both rich and satisfying. Ideal for any occasion, this no-bake treat is a crowd-pleaser that simplifies the dessert-making process while delivering on taste and presentation.
One of the primary appeals of this recipe lies in its no-bake nature. For those who find themselves short on time or who prefer to avoid the heat of the oven, this dessert offers a perfect solution. It allows you to whip up something extraordinary without the fuss of traditional baking. This convenience makes it especially appealing to busy home cooks, families, and anyone looking to indulge their sweet tooth without the commitment of a lengthy baking session.
The popularity of Oreos is a testament to their versatility in desserts. Whether crumbled into a crust, blended into a cream filling, or simply enjoyed on their own, these iconic cookies have a unique ability to elevate any sweet dish. The Oreo Bliss No Bake Delight is no exception, showcasing the cookie’s rich chocolate flavor and creamy filling in a way that’s both innovative and indulgent.
Understanding No-Bake Desserts
No-bake desserts are defined by their simplicity: they require no oven, no baking, and often minimal preparation time. This characteristic makes them a favorite among dessert enthusiasts who are looking for quick and easy solutions without sacrificing flavor. The convenience of no-bake recipes is undeniable, as they allow for delicious results without the need for extensive kitchen skills or equipment.
For busy home cooks, no-bake desserts provide an ideal option for entertaining guests, celebrating special occasions, or simply satisfying a sweet craving. They lend themselves well to various events, from birthday parties and family gatherings to potlucks and holiday celebrations. The flexibility of these desserts means they can be made ahead of time, stored in the refrigerator, and served chilled, freeing up valuable time on the day of the event.
The popularity of no-bake desserts continues to rise, especially in a fast-paced world where convenience is key. Their ability to be assembled quickly, paired with the luxury of allowing flavors to meld and develop in the refrigerator, makes them a compelling choice for any dessert lover.
Ingredients Breakdown
Oreo Cookies
At the heart of the Oreo Bliss No Bake Delight are the iconic Oreo cookies. Their distinct flavor and texture play a crucial role in the success of this dessert. The chocolate wafer cookies provide a delightful crunch and a rich cocoa flavor, while the creamy filling adds a hint of sweetness that balances the dessert beautifully. The combination of these elements creates a well-rounded base that is both satisfying and indulgent.
Unsalted Butter
Unsalted butter is essential in this recipe as it acts as a binding agent for the crust. It helps to hold the crushed Oreo cookies together, ensuring that the base maintains its structure and doesn’t crumble when served. The richness of the butter also enhances the overall flavor of the dessert, contributing to its creamy texture.
Cream Cheese
Cream cheese is a key ingredient in creating the luscious filling of the Oreo Bliss No Bake Delight. It adds a smooth and creamy consistency that complements the crunchy cookie base perfectly. The tanginess of the cream cheese balances the sweetness of the other ingredients, resulting in a harmonious flavor profile that is both rich and light.
Powdered Sugar
Powdered sugar serves multiple purposes in this recipe. Not only does it contribute sweetness to the filling, but it also helps to stabilize the cream cheese mixture, ensuring that it holds its shape once chilled. Its fine texture allows for easy incorporation into the filling, creating a smooth and velvety consistency that elevates the overall dessert experience.
Vanilla Extract
A splash of vanilla extract is a simple yet effective way to enhance the flavor of the Oreo Bliss No Bake Delight. It adds depth and warmth to the dessert, complementing the chocolate and cream cheese elements beautifully. Vanilla extract is a staple in many dessert recipes, and in this case, it helps to tie all the flavors together.
Whipped Topping
Whipped topping adds a light and fluffy element to the filling, giving the Oreo Bliss No Bake Delight a delightful texture. It lightens the cream cheese mixture, making it more airy and less dense. This component is crucial for achieving the perfect balance between richness and lightness, making each bite feel indulgent but not overly heavy.
Chocolate Fudge Sauce
For those looking to take their dessert to the next level, an optional layer of chocolate fudge sauce can be added. This rich and gooey topping not only enhances the flavor but also adds an extra layer of decadence. Whether drizzled on top or swirled into the filling, chocolate fudge sauce elevates the dessert experience and makes it even more appealing.
Garnishes
While garnishes may seem like a small detail, they play a significant role in the presentation and overall enjoyment of the Oreo Bliss No Bake Delight. Crushed Oreo cookies, chocolate shavings, or fresh berries can be used to add visual appeal and a burst of flavor. A thoughtfully chosen garnish can transform this dessert into a show-stopping centerpiece for any gathering.
Step-by-Step Instructions
Preparing the Base
To start the Oreo Bliss No Bake Delight, you’ll first need to prepare the cookie crust. Begin by taking a package of Oreo cookies and crushing them into fine crumbs. This can be done using a food processor for a quick and easy option, or by placing the cookies in a resealable plastic bag and using a rolling pin to crush them manually. The goal is to achieve a texture similar to sand, which will help the crust hold together when pressed into the pan.
Once the cookies are crushed, transfer them to a mixing bowl and add melted unsalted butter. The melted butter should be evenly distributed throughout the cookie crumbs to ensure a cohesive mixture. Stir the crumbs and butter together until the mixture resembles wet sand, with all the crumbs coated in butter. This step is crucial for achieving a firm and sturdy base that won’t fall apart when served.
Forming the Crust
With the cookie crumb mixture prepared, it’s time to form the crust. Take a 9×9-inch or 9-inch round pie dish and press the cookie mixture firmly into the bottom and up the sides of the dish. Use the back of a measuring cup or your fingers to compact the crumbs evenly, ensuring that there are no loose areas. A well-formed crust will provide a solid foundation for the cream cheese filling and help maintain the structure of the dessert.
Once the crust is pressed into place, it’s important to chill it for at least 10-15 minutes in the refrigerator. This step allows the butter to set slightly, which helps the crust hold its shape. While the crust is chilling, you can move on to preparing the creamy filling for the Oreo Bliss No Bake Delight, ensuring a smooth and efficient workflow in the kitchen.
Stay tuned for the next part, where we will delve into the delightful process of creating the creamy filling and assembling this no-bake masterpiece!

Making the Cream Cheese Filling
To create a luscious filling for your Oreo Bliss No Bake Delight, begin by ensuring that your cream cheese is at room temperature. This step is crucial for achieving a smooth, creamy texture without lumps. Use a hand mixer or stand mixer to beat the softened cream cheese until it is completely smooth. This process usually takes about 2-3 minutes on medium speed.
Once the cream cheese is fluffy, gradually add in the powdered sugar, mixing on low speed to avoid a sugar cloud. After the sugar is incorporated, increase the mixer speed to medium and blend until the mixture is light and creamy. The sugar not only sweetens the filling but also helps stabilize it, giving your dessert the perfect texture.
Finally, add in the vanilla extract, mixing until well combined. This simple yet effective technique will ensure your filling is not only smooth but also packed with flavor, setting a delicious foundation for the layers to come.
Folding in Whipped Topping
After preparing the cream cheese filling, it’s time to incorporate the whipped topping. Opt for a store-bought whipped topping for convenience or make your own by whipping heavy cream until soft peaks form. If you choose to use homemade whipped cream, be sure to add a tablespoon of powdered sugar during whipping to stabilize it.
When folding in the whipped topping, use a rubber spatula and a gentle folding motion. Start by adding about one-third of the whipped topping into the cream cheese mixture, mixing it in to lighten the cream cheese. This makes it easier to fold in the remaining whipped topping without losing the airiness that gives the filling its light texture. Continue folding until no streaks remain, being careful not to overmix, as this can deflate the fluffy whipped topping.
Layering the Filling
Now that you have your delicious cream cheese filling ready, it’s time to layer it with the crushed Oreo cookies. Begin by preparing your baking dish—an 8×8 square dish works perfectly for this recipe.
Start with a layer of crushed Oreos at the bottom of the dish. Use the back of a spoon or your hands to press the crumbs down firmly, creating a solid base. Next, spoon half of the cream cheese filling over the Oreo crust, spreading it evenly with a spatula.
Repeat the layering process with another layer of crushed Oreos followed by the remaining cream cheese filling. For the top layer, you can add a final sprinkle of crushed Oreos to create a visually appealing finish. This method ensures that each bite of your Oreo Bliss No Bake Delight is balanced with the rich filling and the crunchy Oreo crust.
Chilling the Dessert
One of the most critical steps in making your Oreo Bliss No Bake Delight is chilling it properly. Refrigeration allows the layers to set, ensuring that the dessert holds its shape when cut and served. Cover the baking dish with plastic wrap or aluminum foil to prevent any odors from the fridge from seeping into the dessert.
For the best results, chill the dessert for at least 4 hours, though overnight is even better. This extended chilling time allows the flavors to meld beautifully, enhancing the overall taste of the treat. Patience is key—resist the urge to cut into it too soon!
Serving Suggestions
When it comes to serving your Oreo Bliss No Bake Delight, presentation can elevate the experience. Consider garnishing the top with additional crushed Oreos, chocolate shavings, or colorful sprinkles to add a pop of color and texture.
For a beautiful display, use a sharp knife to cut the dessert into squares. To achieve clean cuts, dip the knife in warm water and wipe it dry before slicing. This will help prevent the layers from sticking to the knife, ensuring a neat presentation.
You can also serve the squares on a decorative plate or tiered serving stand, which adds a touch of elegance, especially for special occasions like birthday parties or holiday gatherings.
Pairing with Beverages
Pairing your Oreo Bliss No Bake Delight with the right beverages can enhance the dessert experience. A classic choice is a cold glass of milk, which complements the creamy filling and chocolatey crust perfectly.
For adults, consider serving it with coffee—whether hot or iced—as the rich, bold flavors of the coffee balance the sweetness of the dessert. Alternatively, dessert wines can be a delightful pairing, with sweet options like Moscato or a rich Port wine enhancing the dessert’s indulgent nature.
Nutritional Information
As delicious as the Oreo Bliss No Bake Delight is, it’s important to be mindful of portion sizes. Each square contains approximately 250 calories, with a mix of carbohydrates, fats, and sugars primarily sourced from the cream cheese, whipped topping, and Oreos.
While indulging in this dessert is a treat, keeping portion control in mind can help you enjoy it without compromising your dietary goals. Consider serving smaller squares for gatherings, allowing everyone to enjoy a taste without overindulging.
Storage and Shelf Life
If you find yourself with leftovers (which is rare, given how delicious this dessert is), proper storage is essential to maintain its freshness. Cover the dish tightly with plastic wrap or transfer the squares to an airtight container.
When stored this way, your Oreo Bliss No Bake Delight will remain fresh for up to 5 days in the refrigerator. However, for optimal taste and texture, it’s best enjoyed within the first couple of days after making. Avoid freezing the dessert, as the texture of the cream cheese filling may become grainy upon thawing.
Conclusion
The Oreo Bliss No Bake Delight is not just a dessert; it’s a celebration of flavors and textures that comes together effortlessly without the need for baking. Its creamy, dreamy filling combined with the crunchy Oreo base makes it a crowd-pleaser for any occasion, from casual family gatherings to festive celebrations.
Whether you’re a seasoned baker or someone who prefers to keep things simple in the kitchen, this recipe offers a delightful treat that caters to all skill levels. With its adaptability and ease of preparation, you can confidently whip up this dessert for birthdays, holidays, or any time you crave a sweet indulgence without the hassle of baking. Get ready to impress your friends and family with this delightful treat that is sure to become a favorite!


