Introduction
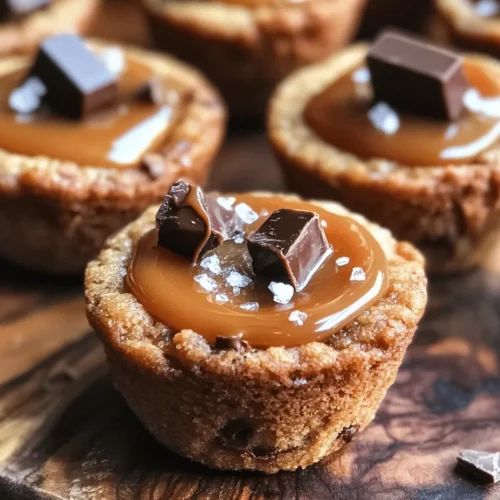
Cookie cups have taken the dessert world by storm, emerging as a delightful and versatile treat that caters to various tastes and occasions. Their small, cup-shaped forms are ideal for holding an array of fillings, from creamy frostings to luscious ganaches. Among the myriad of cookie cup variations, Twix Cookie Cups stand out as a decadent combination of rich chocolate, buttery caramel, and a crispy cookie base.
The magic of Twix Cookie Cups lies in their ability to deliver the beloved flavor profile of the classic Twix candy bar in a fun and shareable format. The ease of preparation makes this recipe a go-to for gatherings, parties, or simply a sweet indulgence at home. With just a few simple steps, you can create these mouthwatering treats that are sure to impress friends and family alike. Whether you’re a seasoned baker or a kitchen novice, Twix Cookie Cups provide a perfect balance of flavor and texture that is hard to resist.
Understanding the Ingredients
To craft the perfect Twix Cookie Cups, it’s essential to understand the role of each ingredient in the recipe. Here’s a breakdown of the key components that contribute to the deliciousness of these cookie cups:
Unsalted Butter
One of the primary ingredients in any cookie recipe is unsalted butter. This ingredient is crucial for flavor and texture, providing a rich, creamy base that enhances the overall taste of the cookie. Using unsalted butter also gives you greater control over the salt content in your recipe, allowing you to adjust accordingly for the perfect balance.
Sugars: Brown Sugar vs. Granulated Sugar
In this recipe, both brown sugar and granulated sugar play significant roles in achieving the ideal texture and flavor. Brown sugar, with its molasses content, adds moisture and a deeper flavor profile, resulting in chewy cookie cups. On the other hand, granulated sugar contributes to the spread and crispiness of the cookies. The harmonious combination of these two sugars creates a delectable balance between chewy and crunchy.
Eggs
Eggs are another critical ingredient in cookie recipes, serving as a binder that holds everything together while adding moisture. For Twix Cookie Cups, it’s essential to add the eggs one at a time during mixing. This method ensures proper emulsification, resulting in a smooth batter that bakes evenly. Additionally, eggs contribute to the overall structure and richness of the cookie cups.
Flour, Baking Soda, and Salt
The foundation of any cookie dough is flour, which provides structure and stability to the cookie cups. In this recipe, all-purpose flour is used, which offers the perfect balance of protein content for creating a tender yet sturdy cookie. Baking soda is a vital leavening agent that helps the cookies rise and develop a light texture. Lastly, a pinch of salt enhances flavor, balancing the sweetness of the sugars and chocolate.
Chocolate Chips and Twix Bars
No Twix Cookie Cup would be complete without chocolate! Semi-sweet chocolate chips are mixed into the dough, providing decadent chocolate flavor in every bite. Additionally, Twix bars, with their signature layers of cookie, caramel, and chocolate, are cut into pieces and added to each cup. This not only enhances the flavor but also creates a delightful surprise when biting into the cookie cup.
Caramel Sauce
Finally, caramel sauce is a key ingredient that elevates Twix Cookie Cups to a new level of indulgence. The gooey caramel adds richness and a touch of sweetness, perfectly complementing the chocolate and cookie elements. Whether you choose to make your own or use store-bought caramel sauce, this ingredient is essential for achieving the authentic Twix flavor and presentation.
Step-by-Step Guide to Making Twix Cookie Cups
Preparing Your Kitchen
Before diving into the baking process, it’s essential to prepare your kitchen. Start by gathering all the ingredients and necessary tools, including mixing bowls, measuring cups, a whisk, a spatula, and a muffin tin.
Preheating the Oven: One of the first steps in baking is to preheat your oven to 350°F (175°C). This ensures that your cookie cups bake evenly and achieve the desired texture.
Preparing the Muffin Tin: As you preheat the oven, prepare your muffin tin by greasing the cups lightly with cooking spray or butter. Alternatively, you can use muffin liners, such as silicone or parchment paper, to make it easier to remove the cookie cups once baked. If using silicone liners, there’s no need for greasing, as they naturally release baked goods.
Creaming the Butter and Sugars
The next step in creating your Twix Cookie Cups involves creaming the butter and sugars together. This step is crucial for achieving the right texture and incorporating air into the mixture.
1. In a large mixing bowl, add the softened unsalted butter along with both brown sugar and granulated sugar.
2. Using a hand mixer or stand mixer, beat the butter and sugars on medium speed until the mixture becomes light and fluffy. This process typically takes about 2-3 minutes. The goal is to incorporate air into the mixture, which will help create tender, airy cookie cups.
3. Tip: To achieve the perfect light and fluffy texture, ensure that your butter is at room temperature before starting. Cold butter won’t cream properly, resulting in denser cookie cups.
Incorporating Eggs and Vanilla
Once your butter and sugars are nicely creamed, it’s time to incorporate the eggs and vanilla extract.
1. Add one egg at a time to the creamed mixture, beating well after each addition. This step is crucial for emulsification, ensuring that the ingredients are well combined and the batter achieves a smooth consistency.
2. Add vanilla extract to the mixture. This ingredient not only enhances the overall flavor but also adds depth to the cookie cups. Mix until fully incorporated.
Mixing Dry Ingredients
With the wet ingredients combined, it’s time to turn your attention to the dry ingredients.
1. In a separate bowl, whisk together the all-purpose flour, baking soda, and salt. This step is vital for ensuring that the leavening agent is evenly distributed throughout the flour, preventing any clumps.
2. Gradually add the dry ingredients to the wet mixture, mixing on low speed until just combined. Be careful not to overmix, as this can lead to tough cookie cups.
3. Tip: For a lump-free batter, consider sifting the flour before mixing it with the other dry ingredients.
As you mix the batter, you will notice it coming together, creating a thick and creamy dough ready for the next steps in crafting your Twix Cookie Cups.
Stay tuned for the continuation of this recipe, where we will explore the exciting process of filling and baking your Twix Cookie Cups to perfection. With the right techniques and attention to detail, you’ll be on your way to creating these irresistible treats that are sure to delight!
Folding in Chocolate Chips and Twix Bars
Once your cookie dough comes together, it’s time to fold in the chocolate chips and Twix bars. This step is crucial for ensuring every bite of your Twix Cookie Cups is packed with flavor and texture. Start by adding your preferred amount of semi-sweet or milk chocolate chips to the dough. Aim for about half a cup, but feel free to adjust based on your taste preferences.
Next, take your Twix bars, chop them into small pieces, and add them to the mix. The combination of chocolate chips and Twix will create a rich and indulgent flavor profile. To ensure an even distribution of these mix-ins throughout the dough, gently fold them in using a spatula or wooden spoon. Be careful not to overmix, as this can lead to tough cookies. Instead, use a gentle motion to incorporate the add-ins evenly without overworking the dough.
For those looking to customize the recipe, consider substituting the chocolate chips with different types of chocolate such as dark chocolate, white chocolate, or even butterscotch chips. Additionally, you can experiment by adding other candies like Snickers, M&M’s, or even peanut butter chips to create your unique twist on the classic Twix Cookie Cup.
Filling the Muffin Tin
Now that your dough is well mixed, it’s time to fill the muffin tin. Preheat your oven to 350°F (175°C) if you haven’t already. Use a non-stick spray or line your muffin tin with paper liners to prevent sticking. When it comes to portioning the dough, a cookie scoop or ice cream scoop can be a lifesaver. Aim for about 2 tablespoons of dough for each muffin cup.
Place the scoops of dough into the prepared muffin tin, ensuring they are evenly spaced apart. Gently press the dough into the bottom of each cup, making sure it’s slightly higher on the sides. This will create a well for the caramel filling. It’s important not to overfill the cups; leaving some space will allow for the dough to expand while baking.
To ensure even baking and prevent overflow, make sure to tap the muffin tin lightly on the counter after filling it. This step helps settle the dough and removes any air pockets, promoting a uniform rise. Avoid filling the cups to the brim, as this can lead to a messy overflow during baking.
Baking the Cookie Cups
With the muffin tin filled, it’s time to bake your Twix Cookie Cups. Place the muffin tin in the preheated oven and set a timer for about 10-12 minutes. It’s essential to monitor the baking time closely, as baking times can vary based on your oven and the size of your cookie cups.
The ideal texture for your cookie cups is soft centers with golden edges. You want the tops to look slightly underbaked, as they will continue to cook while cooling. When the edges turn a light golden brown and the centers look set but still soft, it’s time to take them out of the oven. Allow the cookie cups to cool in the muffin tin for 5-10 minutes before transferring them to a wire rack. This cooling period is critical for the structural integrity of your cookie cups, helping them firm up before you add the caramel filling.
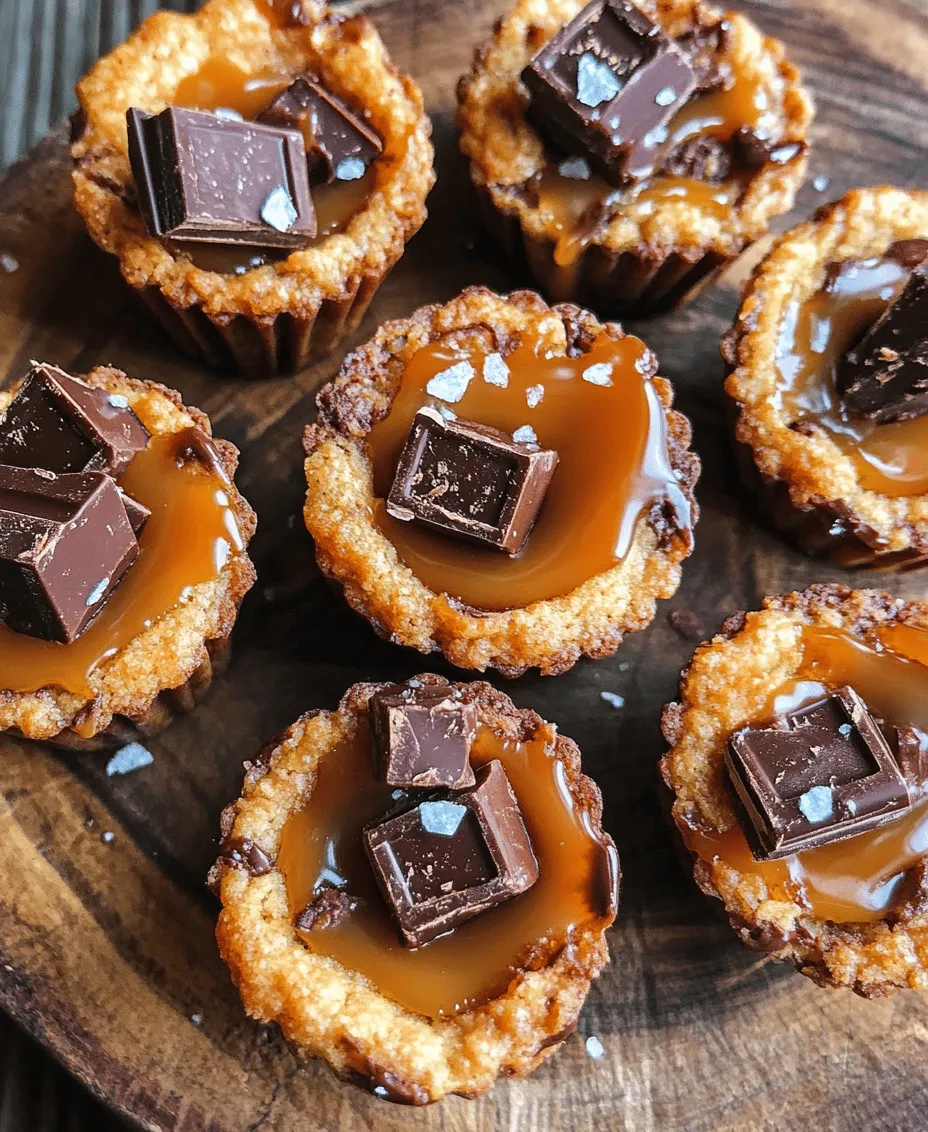
Creating the Caramel Wells
Once your cookie cups have cooled slightly, you can create the wells for the caramel. Using the back of a round measuring spoon or a small cookie cutter, gently press down in the center of each cookie cup to form a well. Be careful not to press too hard, as you don’t want to break through the sides or bottom of the cups.
After forming the wells, it’s time to drizzle the caramel. You can use store-bought caramel sauce for convenience, or make your own if you’re feeling adventurous. To drizzle effectively, place the caramel sauce in a squeeze bottle or a zip-top bag with a corner cut off for easy piping. Fill each well generously with caramel, allowing some to overflow for that indulgent look.
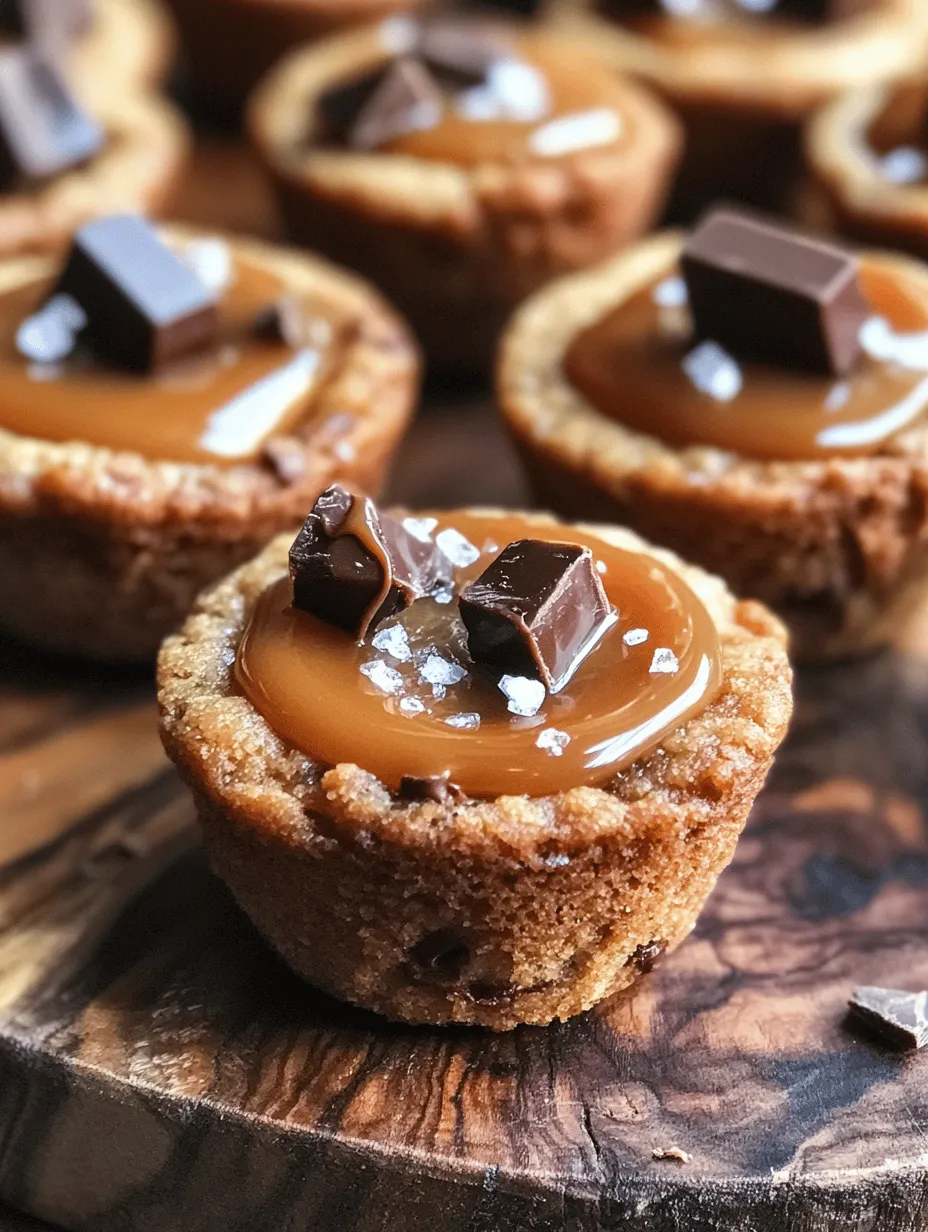
Garnishing with Sea Salt
To elevate the flavors of your Twix Cookie Cups, sprinkle a pinch of flaky sea salt on top of the caramel. The contrast of sweet and salty is a culinary delight that enhances the overall taste experience. The salt cuts through the richness of the caramel and chocolate, making each bite even more satisfying.
If you’re looking for alternative toppings, consider adding crushed nuts like pecans or almonds for added crunch, or a drizzle of melted chocolate for an extra layer of indulgence. You could even add a dollop of whipped cream or a scoop of ice cream on the side for a truly decadent dessert.
Serving Suggestions for Twix Cookie Cups
When it comes to serving your Twix Cookie Cups, presentation can make a big difference. Place the cookie cups on a decorative serving platter or a rustic wooden board for a beautiful display. If you’re hosting a party or event, consider arranging them on tiered stands for an eye-catching centerpiece.
Pair your cookie cups with a glass of cold milk, a warm cup of coffee, or even a scoop of vanilla ice cream. The contrast of the warm cookie with cold ice cream creates a delightful sensory experience. You can also serve them alongside fresh fruit, such as strawberries or raspberries, which can provide a refreshing balance to the sweetness of the cookie cups.
For festive occasions, try decorating the cookie cups with seasonal toppings, like colored sprinkles or themed candies, to fit the theme of your event.
Storing and Reheating Twix Cookie Cups
To maintain the freshness of your Twix Cookie Cups, it’s essential to store them properly. Allow the cookie cups to cool completely before transferring them to an airtight container. They can be stored at room temperature for up to three days or in the refrigerator for up to a week.
If you want to enjoy them later, consider freezing the cookie cups. To do this, place them in a single layer on a baking sheet and freeze until solid. Once frozen, transfer them to a freezer-safe container or zip-top bag, where they can be stored for up to three months. When you’re ready to enjoy, simply thaw them in the refrigerator or at room temperature.
For reheating, place the cookie cups in a preheated oven at 350°F (175°C) for about 5-7 minutes, or until warmed through. This will help restore their soft, gooey texture, making them taste freshly baked.
Conclusion
In conclusion, Twix Cookie Cups are an indulgent treat that combines the beloved flavors of chocolate and caramel in a fun and bite-sized format. With their chewy texture, rich filling, and satisfying crunch, these cookie cups are sure to please both family and friends alike.
Don’t hesitate to experiment with different mix-ins, toppings, and serving options, as the versatility of this recipe allows for plenty of creativity. Whether you’re baking for a special occasion or simply to satisfy your sweet tooth, these homemade treats will evoke nostalgia and satisfaction in every bite. Enjoy the baking process, embrace the joy of creating delicious dessert, and indulge in the delightful results of your efforts. Happy baking!