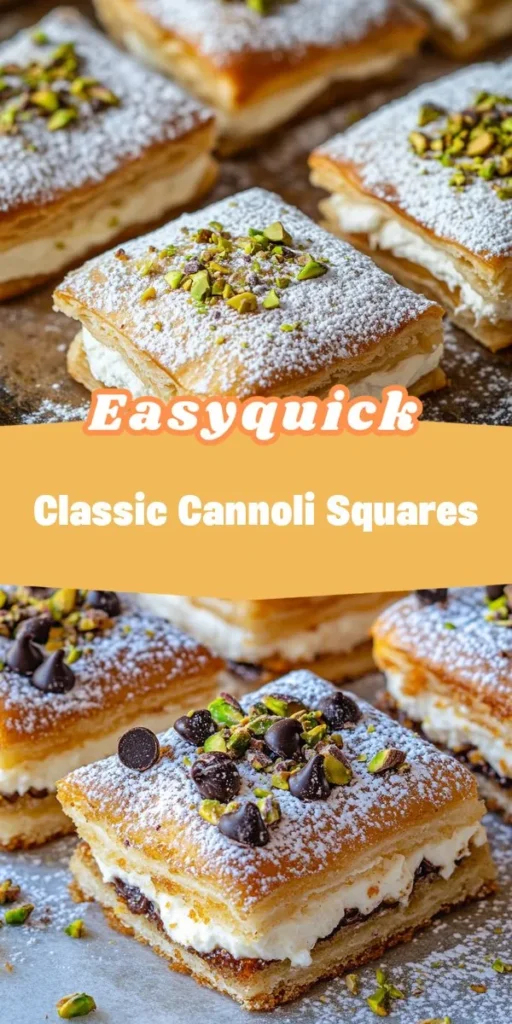
Introduction
Cannoli, a beloved traditional Italian dessert, has captured the hearts (and taste buds) of dessert lovers around the globe. Originating from Sicily, this delectable treat is characterized by its crispy pastry shell filled with a sweet, creamy filling, often made from ricotta cheese. As the culinary landscape evolves, so do our favorite desserts. Enter cannoli squares—a contemporary twist on the classic recipe that simplifies preparation while maintaining the delightful flavors we cherish.
This innovative approach allows home bakers of all skill levels to indulge in the rich, creamy goodness of cannoli without the fuss of making individual shells. In this article, we will explore the history of cannoli, break down the essential ingredients, and guide you through the initial steps of creating your very own Classic Cannoli Squares. With the right quality ingredients and a little love, you’ll find that making this dessert at home is not only achievable but also incredibly rewarding.
Understanding Cannoli and Its Origins
The history of cannoli is as rich as its flavor. While the exact origins are somewhat debated, most historians agree that this delightful dessert dates back to the Arab rule of Sicily in the 9th century. The Arabs introduced sugar and citrus fruits, which laid the groundwork for the sweet treats that Sicilians would eventually create. Cannoli, as we know them today, became popularized in the late 19th century, particularly among the Sicilian nobility who enjoyed them during celebrations and special occasions.
Traditionally, cannoli were made using a dough that was rolled thin and wrapped around metal tubes before being deep-fried to a golden crisp. The filling, typically a blend of ricotta cheese, sugar, and various flavorings, is piped into the cooled shells just before serving to maintain that delightful crunch. Over time, this classic dessert has inspired various adaptations, including cannoli dip, cannoli cake, and, of course, the modern cannoli squares, which allow for a more approachable preparation method.
Cannoli squares maintain the essence of traditional cannoli while offering a convenient and shareable format. Instead of individual servings, the squares are baked in a single pan, making them perfect for gatherings or family dinners. This evolution reflects the desire for delicious desserts that are easy to prepare and serve, without sacrificing the authentic flavors that make cannoli so irresistible.
Ingredients Breakdown for Classic Cannoli Squares
To craft the perfect Classic Cannoli Squares, you’ll want to gather quality ingredients that contribute to the dessert’s creamy texture and rich flavor. Here’s a closer look at the key components:
– Ricotta and Mascarpone: These two cheeses are the stars of the filling. Ricotta provides a light and slightly grainy texture, while mascarpone adds creaminess and richness. Together, they create an indulgent filling that embodies the essence of classic cannoli.
– Powdered Sugar: The sweetness of the filling comes from powdered sugar, which dissolves easily and ensures a smooth texture. The right amount of sugar balances the flavors without overwhelming the delicate taste of the cheeses.
– Vanilla Extract and Ground Cinnamon: These flavor enhancers add depth to the filling. Vanilla extract brings a warm, aromatic sweetness, while ground cinnamon offers a hint of warmth and spice, creating a harmonious blend that complements the creamy filling.
– Mini Chocolate Chips: For those who enjoy a little extra sweetness and texture, mini chocolate chips are a fantastic addition. They provide bursts of chocolate flavor in every bite, making the dessert even more delightful.
– Crescent Roll Dough: This convenient ingredient serves as the base for the cannoli squares. Using crescent roll dough simplifies the process, eliminating the need to prepare and roll out traditional pastry dough. It bakes up flaky and golden, providing a delicious contrast to the creamy filling.
– Pistachios and Orange Zest: As garnishes, chopped pistachios and a sprinkle of orange zest not only enhance the visual appeal of the dessert but also add a layer of flavor. The crunch of pistachios complements the creamy filling, while the citrusy brightness of orange zest elevates the overall taste profile.
Step-by-Step Guide to Making Classic Cannoli Squares
Now that you’re familiar with the history and ingredients of Classic Cannoli Squares, it’s time to dive into the preparation process. Below is a detailed step-by-step guide to help you create this mouthwatering dessert from scratch.
Step 1: Gather Your Ingredients
Before starting, ensure you have all the ingredients measured and ready. This preparation will make the cooking process smoother and more enjoyable. Here’s a quick checklist of what you’ll need:
– 15 ounces of ricotta cheese
– 8 ounces of mascarpone cheese
– 1 cup of powdered sugar
– 1 teaspoon of vanilla extract
– 1 teaspoon of ground cinnamon
– ½ cup of mini chocolate chips
– 2 cans of crescent roll dough
– Chopped pistachios and orange zest for garnish
Step 2: Preheat Your Oven
Preheating the oven is essential for achieving the perfect texture in your cannoli squares. Set your oven to 350°F (175°C) and allow it to fully preheat while you prepare the filling and the dough.
Step 3: Prepare the Filling
In a large mixing bowl, combine the ricotta and mascarpone cheeses. Use a hand mixer or a whisk to blend the cheeses until smooth and creamy. This step is crucial, as it ensures that there are no lumps in your filling.
Once the cheeses are well combined, gradually add the powdered sugar, vanilla extract, and ground cinnamon. Mix until fully incorporated, tasting as you go to ensure the sweetness and flavor are to your liking. After achieving a smooth consistency, gently fold in the mini chocolate chips, distributing them evenly throughout the mixture.
Step 4: Prepare the Dough
Next, it’s time to work with the crescent roll dough. Open the cans of dough and carefully unroll each sheet. You will need to create a base and a top layer for your cannoli squares.
Start by lightly greasing a 9×13-inch baking pan. Lay one sheet of crescent roll dough across the bottom of the pan, pressing the seams together to create a solid base. This will ensure that the filling doesn’t leak during the baking process.
Step 5: Assemble the Cannoli Squares
With the base layer in place, it’s time to spread the creamy filling over the dough. Use a spatula to evenly distribute the filling across the entire surface, making sure to reach the edges. Once the filling is spread out, take the second sheet of crescent roll dough and carefully lay it over the filling. Again, press the seams together to seal in the filling.
Step 6: Bake the Cannoli Squares
Place the assembled pan in the preheated oven and bake for about 25-30 minutes, or until the top layer is golden brown and the filling is set. Keep a close eye on the squares as they bake, as oven temperatures can vary.
Step 7: Cool and Garnish
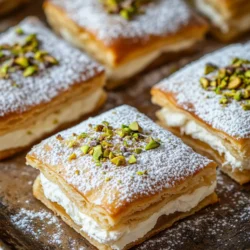
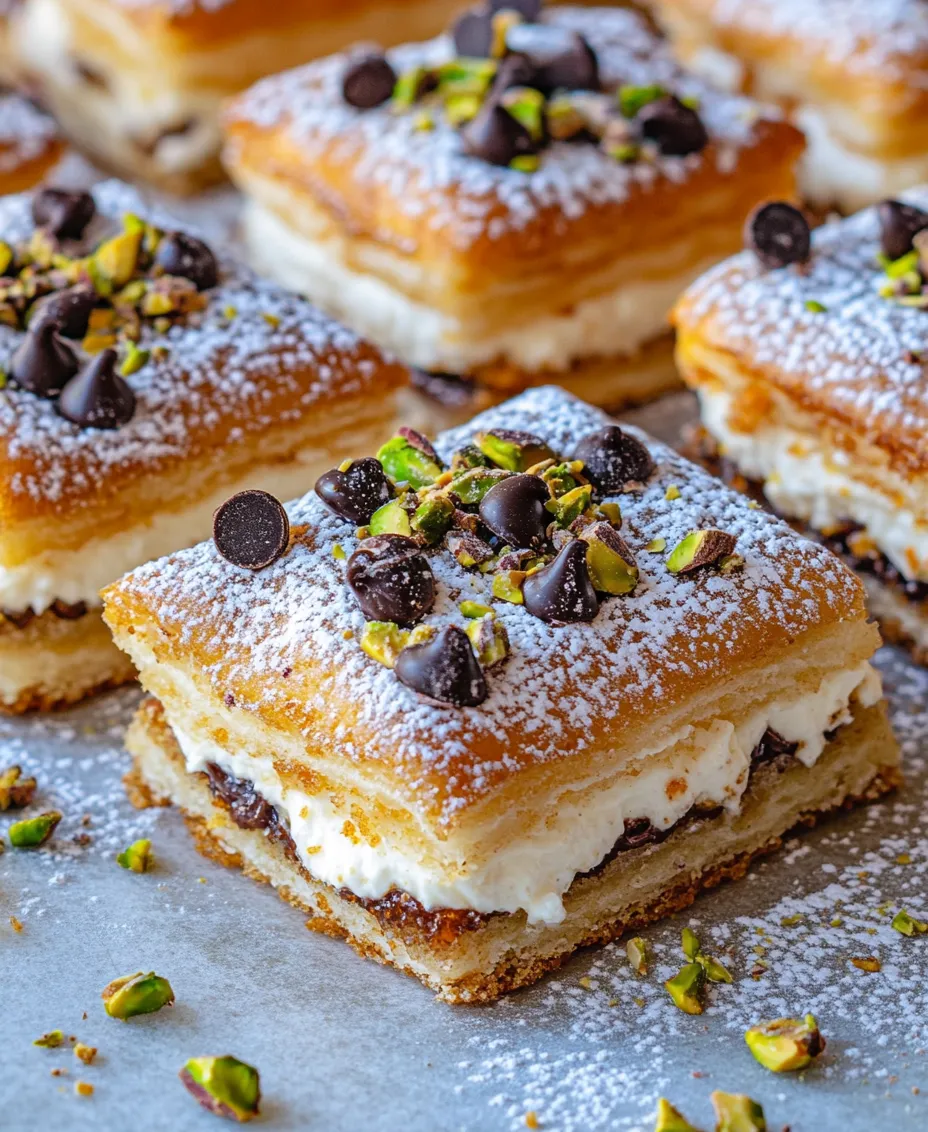
After removing the pan from the oven, allow the cannoli squares to cool completely. This cooling time is essential, as it helps the filling firm up and makes cutting the squares easier. Once cooled, you can garnish the top with chopped pistachios and a sprinkle of orange zest for added flavor and visual appeal.
As you embark on this culinary journey, remember that the joy of homemade desserts lies not only in the final product but also in the process of creating something special. Enjoy the aromatic scents wafting through your kitchen and the anticipation of sharing these delightful Classic Cannoli Squares with family and friends.
Preheat the Oven
Preheating the oven is a crucial step when baking classic cannoli squares, as it ensures that your dough bakes evenly and achieves that perfectly golden-brown crust. Set your oven to 375°F (190°C) and allow it to heat for at least 15 minutes before placing your dough inside. This initial heat helps to activate the baking powder in the crescent roll dough, giving your cannoli squares a light and airy texture. Remember, starting with an adequately preheated oven can mean the difference between a perfectly baked dessert and one that is undercooked or overbaked.
Preparing the Dough
Using crescent roll dough simplifies the process of making cannoli squares while still providing that authentic taste. When handling the dough, keep the following tips in mind:
1. Keep it Cold: Make sure your crescent roll dough is cold before you start. This allows for easier handling and prevents it from becoming too sticky.
2. Avoid Overworking: When unrolling the dough, be gentle. Overworking it can lead to a tough texture. Aim to keep it as intact as possible.
3. Flour the Surface: Lightly flour your work surface and your rolling pin to prevent the dough from sticking. This will make it easier to roll out and shape.
Rolling the Dough
Achieving the perfect thickness is essential for your cannoli squares. Aim for about 1/8 inch thick when rolling out the dough. This thickness allows for a crunchy outer layer while still being soft enough to hold the filling. Here are some techniques to help you:
– Use Even Pressure: Apply consistent pressure while rolling out the dough to ensure an even thickness throughout. Start from the center and roll outwards, rotating the dough occasionally to maintain a rectangular shape.
– Check for Shape: Don’t worry if it’s not a perfect rectangle; the edges will be trimmed later. Just ensure the thickness is uniform to prevent uneven cooking.
Baking the Dough
Once your dough is rolled out, it’s time to bake. Carefully place the rolled dough onto a baking sheet lined with parchment paper. Here’s how to ensure your cannoli squares are baked to perfection:
– Watch for Color: Bake your dough for 12-15 minutes or until it turns a lovely golden brown. Keep an eye on the edges, as they tend to brown faster.
– Cooling Tips: After baking, allow the dough to cool on the baking sheet for about 5 minutes before transferring it to a wire rack. This step helps to maintain the integrity of the baked dough while cooling.
Crafting the Filling
While the dough is cooling, you can prepare the filling, which is the heart of your cannoli squares. Here’s how to make a flavorful and creamy filling:
1. Combine Ingredients: In a large mixing bowl, combine ricotta cheese, powdered sugar, vanilla extract, and a pinch of salt. For an extra depth of flavor, consider adding a dash of cinnamon or a splash of orange zest.
2. Blend Until Smooth: Use a hand mixer or stand mixer on medium speed to blend the ingredients until smooth. Be sure to scrape down the sides of the bowl to incorporate all ingredients well.
3. Fold in Chocolate Chips: Gently fold in mini chocolate chips or chopped pistachios for added texture and flavor. This step adds a delightful crunch and sweetness that complements the creamy filling beautifully.
Assembling the Cannoli Squares
Once your dough has cooled and the filling is ready, it’s time to assemble your cannoli squares. Follow these steps for even distribution:
– Cut the Dough: Take the cooled dough and cut it into equal-sized squares, typically 2×2 inches, but feel free to adjust based on your preference.
– Fill the Squares: Use a piping bag or a spoon to distribute the filling evenly across half of the squares. Don’t overfill; you want just enough to cover the surface without spilling over the edges.
– Top with Another Square: Place another square of dough on top of the filled squares, gently pressing down to create a sandwich effect.
Chilling the Dessert
Chilling is essential for the cannoli squares to set properly. Here’s how to do it effectively:
– Cover and Chill: Cover the assembled squares with plastic wrap or a lid and refrigerate for at least 2 hours. This chilling time allows the filling to firm up and the flavors to meld beautifully.
– Serve Chilled: For the best experience, serve the cannoli squares chilled. This enhances the refreshing qualities of the ricotta filling and makes each bite a delightful experience.
Serving Suggestions and Presentation
When it comes to serving your cannoli squares, presentation plays a significant role in elevating the dessert. Here are some ideas:
– Cutting and Serving: Cut the chilled squares into smaller pieces, making it easier for guests to enjoy. Aim for bite-sized pieces that are easy to handle.
– Garnishing Options: Dust the tops with powdered sugar for a beautiful finish. For an added touch, sprinkle chopped pistachios or mini chocolate chips on top, making for an impressive presentation.
– Pairing Suggestions: Cannoli squares pair wonderfully with coffee, cappuccino, or a sweet dessert wine. Consider serving with a side of fresh berries or a scoop of vanilla ice cream for an extra indulgence.
Nutritional Information and Dietary Considerations
While enjoying these delightful cannoli squares, it’s also essential to be aware of their nutritional content. Here’s a brief overview:
– Nutritional Overview: Each serving (one square) contains approximately 180-220 calories, with around 8-10 grams of fat and 15-20 grams of carbohydrates. The ricotta cheese provides a good source of protein, while the sugar adds sweetness.
– Dietary Substitutions: For those with dietary restrictions, consider using gluten-free crescent roll dough to create a gluten-free version of this dessert. You can substitute low-fat ricotta and sugar alternatives for a lighter approach without sacrificing flavor.
– Balancing Indulgence with Health: It’s essential to enjoy desserts in moderation. Pairing cannoli squares with fresh fruit or a light salad can provide balance and make for a satisfying meal.
Conclusion
Making and sharing classic cannoli squares is not just about enjoying a delicious dessert; it’s about embracing the joy of baking and the traditions that come with it. This recipe, with its simple yet profound flavors, allows anyone, regardless of baking experience, to recreate a beloved Italian treat in their own kitchen.
We encourage you to try this recipe, take your time in each step, and enjoy the process of baking. The satisfaction of sharing these delightful squares with family and friends is truly rewarding. Plus, keeping traditional recipes alive in modern cuisine not only honors our culinary heritage but also brings people together around the table, celebrating the joy of good food and good company. So gather your ingredients, preheat your oven, and let’s make some unforgettable cannoli squares!