Introduction
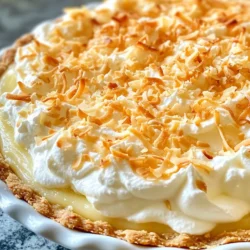
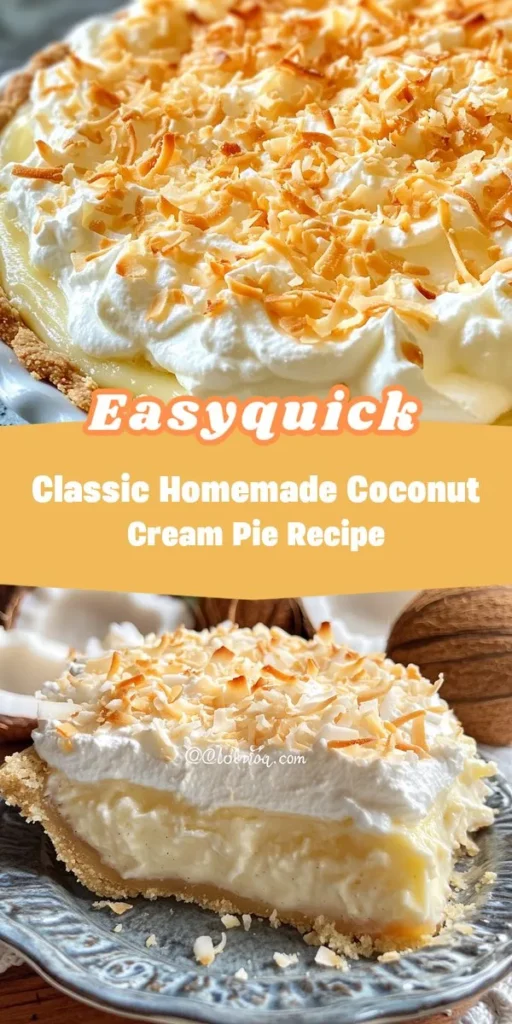
Coconut cream pie is a timeless dessert that brings together the creamy richness of coconut custard and the flakiness of a perfectly baked pie crust. This beloved classic has adorned dessert tables for generations, evoking memories of family gatherings, holiday feasts, and sunny afternoons. While you can find coconut cream pie in bakeries and restaurants, the homemade version surpasses them in flavor and quality. When you make this pie yourself, you have complete control over the ingredients, ensuring that every bite is fresh, creamy, and infused with the delightful taste of coconut.
In this article, we will take a deep dive into crafting the perfect classic coconut cream pie. We will explore the history and origins of this dessert, discuss the key ingredients that contribute to its unique flavor and texture, and provide detailed instructions on preparing both the pie shell and the coconut cream filling. You can expect a step-by-step guide that will empower you to create a dessert that not only impresses your family and friends but also brings a touch of nostalgia to your dining experience.
Understanding Coconut Cream Pie
Coconut cream pie has its roots in the early 19th century when coconut became a popular ingredient in desserts across the United States. This pie marries the flavors of tropical coconut with the comforting essence of a classic cream pie, resulting in a dessert that is both exotic and familiar. Its popularity soared in the mid-20th century, often appearing at family gatherings, potlucks, and holiday celebrations, making it a staple in many American households.
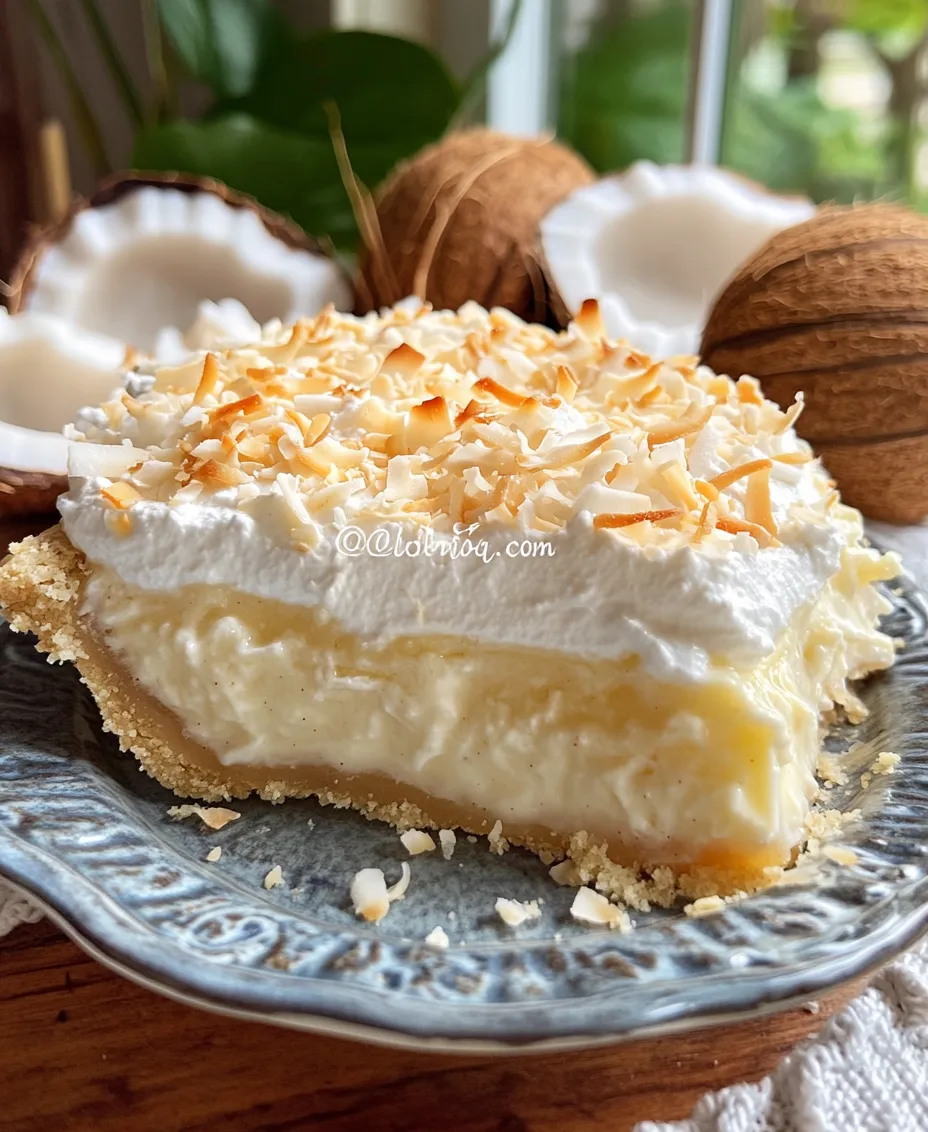
One of the reasons coconut cream pie remains a favorite is its versatility. The coconut flavor is not just a sweet indulgence; it evokes a sense of warmth and nostalgia. The creamy filling, combined with the flaky crust and often topped with whipped cream and additional toasted coconut, makes for a dessert that is both visually appealing and delicious. The flavor profile of coconut is inherently inviting, making it a perfect candidate for not just pies but a variety of desserts, from cakes to cookies.
Key Ingredients for Coconut Cream Pie
To create a coconut cream pie that delights the senses, it is crucial to use high-quality ingredients. Let’s break down the essential components of this classic dessert:
1. Coconut Milk and Shredded Coconut: The heart of any coconut cream pie is, of course, coconut. Using quality coconut milk is vital for a rich and creamy filling. Look for full-fat coconut milk for the best flavor and texture. Additionally, shredded coconut adds both flavor and texture. Opt for unsweetened coconut for a more authentic taste.
2. Pie Shell: The choice between a store-bought and homemade pie shell largely depends on your time and skill level. A store-bought shell can save time but may not have the same flavor and texture as a homemade one. If you opt for homemade, you’ll have the satisfaction of creating a crust that perfectly complements the filling.
3. Egg Yolks and Cornstarch: These ingredients play a crucial role in thickening the coconut cream filling. Egg yolks provide richness, while cornstarch helps achieve the desired creamy consistency. Together, they create a luscious filling that holds its shape when sliced.
4. Sweeteners and Flavorings: The sweetness of your pie can be adjusted according to your taste. Granulated sugar is standard, but alternatives like brown sugar can add a deeper flavor. Additionally, vanilla extract enhances the overall taste, bringing out the coconut’s natural sweetness.
By choosing quality ingredients and understanding their roles in the recipe, you can create a coconut cream pie that stands out in flavor and texture.
Preparing the Pie Shell
Using a Store-Bought Pie Shell
If you’re short on time or new to pie-making, a store-bought pie shell is a convenient option. Here’s how to prepare it:
1. Preheat Your Oven: Preheat your oven to 350°F (175°C).
2. Prepare the Shell: Remove the pie shell from its packaging and place it on a baking sheet for stability.
3. Prick the Bottom: Use a fork to prick the bottom and sides of the shell. This helps prevent bubbling during baking.
4. Blind Bake: To ensure a crispy crust, blind bake the pie shell. Cover the shell with parchment paper and fill it with pie weights or dried beans. Bake for about 15 minutes, then remove the weights and bake for an additional 5-7 minutes until golden brown. Let it cool completely before filling.
Making a Homemade Pie Crust
For those who wish to take the extra step and create a homemade pie crust, here’s a simple, yet effective recipe:
Ingredients:
– 1 1/4 cups all-purpose flour
– 1/4 teaspoon salt
– 1/4 cup unsalted butter, chilled and diced
– 1/4 cup shortening, chilled
– 4-5 tablespoons ice water
Instructions:
1. Combine Dry Ingredients: In a large mixing bowl, combine the flour and salt.
2. Cut in Fats: Add the chilled butter and shortening. Using a pastry cutter or your fingers, work the fats into the flour until the mixture resembles coarse crumbs.
3. Add Water: Gradually add ice water, one tablespoon at a time, mixing until the dough comes together. Be careful not to overwork it.
4. Chill the Dough: Form the dough into a ball, wrap it in plastic wrap, and refrigerate for at least 30 minutes.
5. Roll Out the Dough: On a floured surface, roll out the dough to fit your pie pan. Transfer it to the pan and trim the excess.
6. Prick and Bake: Just like with the store-bought shell, prick the bottom and sides, blind bake, and allow it to cool completely before adding the filling.
Tips for Ensuring a Perfectly Baked Pie Shell
– Keep Ingredients Cold: Ensure your butter and shortening are well-chilled. This helps create a flaky texture.
– Don’t Overwork the Dough: Mix just until combined to avoid a tough pie crust.
– Use Pie Weights: They prevent the crust from puffing up during baking.
– Golden Brown Finish: Bake until the crust is golden brown, which indicates a crisp texture.
Toasting the Coconut
Toasting coconut is a simple yet impactful step that enhances its flavor, adding a delightful nuttiness to your coconut cream pie. Here’s how to toast coconut safely:
Step-by-Step Instructions for Toasting Coconut
1. Preheat Your Oven: Preheat your oven to 350°F (175°C).
2. Spread Coconut on a Baking Sheet: Place shredded coconut in a single layer on a baking sheet. You can use sweetened or unsweetened, depending on your preference.
3. Bake: Place the baking sheet in the oven. Toast the coconut for about 5-10 minutes, stirring every couple of minutes to ensure even browning. Keep a close eye on it, as coconut can go from perfectly toasted to burnt very quickly.
4. Cool: Once golden brown, remove the coconut from the oven and let it cool completely before using it as a topping for your pie.
Crafting the Coconut Cream Filling
Now that your pie shell is prepared and your coconut is toasted, it’s time to create the star of the show: the coconut cream filling. This step will guide you through the process of making a rich and creamy filling that will elevate your coconut cream pie.
Step-by-Step Process for Making the Filling
1. Combine Ingredients: In a medium saucepan, whisk together 1 cup of coconut milk, 1 cup of whole milk, 3/4 cup of granulated sugar, 1/4 cup of cornstarch, and a pinch of salt. Mix well to ensure there are no lumps.
2. Heat the Mixture: Place the saucepan over medium heat. Continuously stir the mixture as it heats, allowing it to thicken. This process usually takes about 5-7 minutes.
3. Add Egg Yolks: In a separate bowl, whisk together 3 large egg yolks. Once the mixture has thickened, gradually add a few spoonfuls of the hot coconut mixture into the egg yolks to temper them. This step prevents the eggs from curdling.
4. Combine and Cook: Pour the tempered egg yolk mixture back into the saucepan. Continue to cook over medium heat, stirring constantly for another 2-3 minutes until thickened.
5. Add Flavorings: Remove the saucepan from heat. Stir in 1 teaspoon of vanilla extract and 1 cup of shredded coconut. Mix until well combined.
6. Cool the Filling: Allow the filling to cool slightly before pouring it into your prepared pie shell. Spread it evenly, smoothing the top with a spatula.
With the pie shell prepared, the coconut toasted, and the filling crafted, you are well on your way to creating a classic homemade coconut cream pie that is sure to impress. Stay tuned for the next part of this article, where we will explore additional tips for perfecting your pie and answer some common questions about coconut cream pie.
The Science Behind Thickening the Mixture with Cornstarch
Cornstarch plays a vital role in achieving the perfect texture for your coconut cream pie filling. When combined with liquids and heated, cornstarch undergoes a process called gelatinization. At approximately 140°F (60°C), the starch granules swell and absorb water, leading to a thickening effect. This is why it’s crucial to mix the cornstarch with sugar and milk before adding it to the heat. By creating a slurry, you ensure that the cornstarch disperses evenly, preventing lumps in your creamy filling. As the mixture continues to cook, it should thicken to a custard-like consistency, forming the luxurious base for your pie.
Techniques for Tempering Egg Yolks to Avoid Curdling
Tempering egg yolks is essential for incorporating them into your warm mixture without curdling. To do this, start by whisking the yolks in a separate bowl. Gradually add a small amount of the hot coconut mixture to the yolks while whisking continuously. This process raises the temperature of the yolks slowly, preventing them from cooking too quickly and forming clumps. Once the yolk mixture is warmed, you can confidently whisk it back into the pot with the rest of the filling. Remember, patience is key—doing it too quickly can lead to scrambled eggs instead of a smooth, creamy filling.
Adding Flavor with Butter and Vanilla Extract: Best Practices
Butter and vanilla extract are crucial for enhancing the flavor of your coconut cream filling. Use high-quality unsalted butter for the best flavor. Adding butter not only enriches the filling but also contributes to a silky mouthfeel. For the vanilla extract, opt for pure rather than imitation for a more robust flavor. Incorporate the butter and vanilla extract into the thickened mixture just after you remove it from the heat. Stirring them in at this point allows the flavors to meld beautifully, creating a decadent and aromatic filling that complements the coconut.
Folding in Toasted Coconut: How to Incorporate for Even Distribution
Toasted coconut is a delightful addition that adds texture and an intensified coconut flavor to your cream pie. Start by toasting shredded coconut in a dry skillet over medium heat, stirring frequently until golden brown. This step enhances the natural sweetness and adds a nutty depth to your filling. Once your filling has been removed from the heat and slightly cooled, gently fold in the toasted coconut with a spatula. Be careful not to over-mix; the goal is to evenly distribute the coconut without deflating your filling. This will ensure that every bite of your pie is packed with delicious coconut flavor.
Assembling the Pie
Instructions for Pouring and Smoothing the Filling
Once your coconut filling is ready, it’s time to assemble the pie. Pour the thickened filling into the pre-baked pie crust, using a spatula to smooth the top into an even layer. Make sure to get into the corners for a neat appearance. This is where the beauty of your pie begins to shine, so take your time for a smooth finish.
Covering Techniques to Prevent Skin Formation
To prevent a skin from forming on the filling as it cools, cover the pie with plastic wrap. However, instead of placing the wrap directly over the pie, press it gently onto the surface of the filling. This barrier will keep the air out and prevent the dreaded skin from forming, ensuring your filling remains velvety smooth.
Importance of Chilling the Pie for Proper Setting
After covering, place the pie in the refrigerator to chill for at least four hours, preferably overnight. Chilling is crucial for the filling to set properly, allowing the cornstarch to fully thicken and the flavors to meld. The cooling process not only enhances texture but also allows the pie to achieve the right consistency, making it easy to slice later.
Time Considerations: Why Waiting is Essential for Flavor Development
While it may be tempting to dive into your freshly made coconut cream pie, patience is essential. Allowing the pie to chill for several hours or overnight enhances the overall flavor. As the pie cools, the coconut, butter, and vanilla flavors develop and deepen, resulting in a more complex and delightful taste experience. This waiting period is not just for texture; it’s a crucial step for achieving the best flavor.
Creating the Whipped Cream Topping
Ingredients Needed for the Whipped Cream
For the perfect whipped cream topping, you will need:
– 1 cup heavy whipping cream
– 2 tablespoons powdered sugar
– 1 teaspoon pure vanilla extract
Using heavy cream is important because it contains a higher fat content, which is essential for creating stable and fluffy whipped cream.
Step-by-Step Instructions for Perfect Whipped Cream
1. Chill Your Equipment: Before whipping, place your mixing bowl and beaters in the refrigerator for about 15 minutes. This helps the cream whip faster and increases volume.
2. Combine Ingredients: In the chilled bowl, add the heavy whipping cream, powdered sugar, and vanilla extract.
3. Whip the Cream: Using an electric mixer, beat the cream on medium-high speed until soft peaks form. This should take about 2-3 minutes. Avoid over-whipping, as this can cause the cream to become grainy and eventually turn into butter.
4. Taste and Adjust: Taste your whipped cream and adjust the sweetness if needed by adding more powdered sugar, mixing gently to combine.
Tips for Achieving the Desired Consistency and Sweetness
For the best results, keep an eye on the cream as you whip it. Soft peaks should hold their shape but still have a slight droop when the beaters are lifted. If you prefer a sweeter topping, feel free to add an extra tablespoon of powdered sugar. For a flavor twist, consider incorporating a hint of coconut extract or even a bit of rum extract for added depth.
Serving Suggestions
How to Slice and Serve the Pie for Optimal Presentation
When it’s time to serve your coconut cream pie, use a sharp knife that has been dipped in hot water and wiped dry. This technique allows for cleaner slices without tearing the crust or filling. Cut into wedges and serve on individual plates for a beautiful presentation.
Creative Ideas for Garnishing: Toasted Coconut and Fresh Coconut Slices
To elevate your pie’s appearance, garnish each slice with a dollop of whipped cream and sprinkle with extra toasted coconut. For an added touch, consider placing a few fresh coconut slices on top or around the pie. This not only enhances the visual appeal but also provides an enticing aroma that complements the coconut flavor.
Pairing Suggestions: Drinks or Dishes that Complement Coconut Cream Pie
Coconut cream pie pairs wonderfully with various beverages. A chilled glass of lemonade or iced tea can refreshingly balance the richness of the pie. For a more decadent option, consider serving it alongside a rich coffee or espresso. If you’re looking for a full meal, this pie makes an excellent conclusion to a tropical-themed dinner featuring grilled fish or chicken dishes infused with citrus flavors.
Coconut Cream Pie Variations
Exploring Alternatives: Vegan Coconut Cream Pie
For those seeking a vegan alternative, consider using coconut milk or almond milk in place of dairy. For the thickening agent, you can replace cornstarch with arrowroot powder, following similar directions for blending it into your filling. Coconut cream can be whipped and sweetened similarly to traditional whipped cream, creating a delicious and cruelty-free version of this classic dessert.
Adding Flavors: Chocolate, Pineapple, or Lime Variations
To add a twist to your coconut cream pie, incorporate different flavors. Swirl in some melted chocolate into the filling for a chocolate coconut cream pie. You can also add crushed pineapple for a tropical flair or a splash of lime juice to introduce a zesty contrast that brightens the overall flavor profile.
Gluten-Free Options and Ingredient Substitutions
If you require a gluten-free option, substitute the traditional pie crust with a gluten-free pre-made crust or create one using ground almonds or gluten-free cookies. Ensure all ingredients, including the cornstarch, are certified gluten-free to avoid any cross-contamination.
Conclusion
Homemade coconut cream pie is a labor of love that rewards you with a luscious, creamy dessert that captivates the palate. The science behind the ingredients and techniques ensures perfect texture and flavor, making it worth the effort. Don’t hesitate to experiment with flavors and variations to make this classic dessert your own. Share this delightful pie with family and friends, creating sweet memories that will last a lifetime. Whether celebrating a special occasion or simply enjoying a slice on a sunny afternoon, coconut cream pie is sure to win hearts and bring smiles to the table.