


Refreshing Homemade Fresh Mint Ice Cream
About This Recipe
Welcome to the delightful world of homemade ice cream, where every scoop tells a story of freshness and flavor. This recipe for homemade fresh mint ice cream is a true celebration of the vibrant, aromatic herb that many of us associate with warm weather and refreshing desserts. Unlike store-bought ice cream, which can often contain artificial flavors and preservatives, making your own allows you to harness the full power of real ingredients. Fresh mint not only brightens the palate but also elevates the entire ice cream experience to something truly special. With the option to customize your creation, you can control the sweetness, texture, and even add your favorite mix-ins.
Imagine a hot summer day, a family gathering, or a special occasion where you can serve this cool, creamy treat that is both refreshing and indulgent. Homemade fresh mint ice cream is the perfect dessert for any occasion or simply to enjoy on a warm afternoon.
Why You’ll Love This
There are countless reasons to fall in love with this homemade fresh mint ice cream. Firstly, you’ll appreciate the rich, creamy texture that only comes from using high-quality ingredients. The combination of heavy cream and whole milk creates an indulgent base that melts beautifully in your mouth.
Secondly, the vibrant flavor of fresh mint revitalizes the palate in ways that artificial mint flavor simply cannot achieve. Each bite is an explosion of freshness, making this ice cream the ultimate refresher on a hot day.
Additionally, for those who crave a touch of sweetness, the option to add mini chocolate chips provides a delightful contrast to the minty freshness. This combination can transform the ice cream into a more decadent treat, perfect for chocolate lovers.
Lastly, making ice cream from scratch is not only satisfying but also a wonderful bonding experience with family and friends. From selecting the freshest mint to the final churning, the process is filled with opportunities for laughter and creativity.
🥗 Ingredient Breakdown
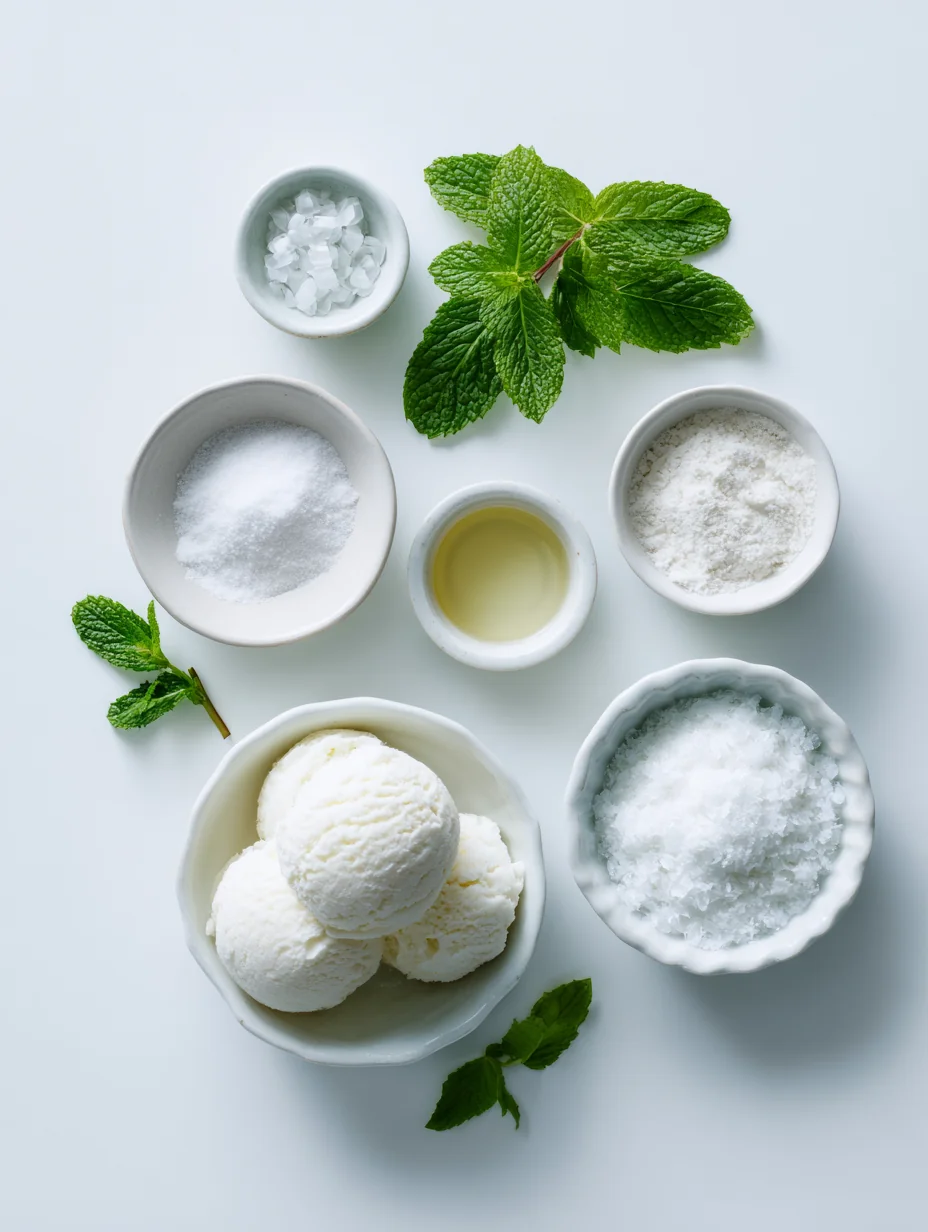
Before diving into the preparation, let’s take a closer look at the essential ingredients that make this homemade fresh mint ice cream so special:
- Heavy Cream: Heavy cream is the backbone of your ice cream, contributing to its rich and creamy texture. With a higher fat content than regular cream, it helps create a smooth and silky mouthfeel that is hard to resist.
- Whole Milk: While heavy cream provides richness, whole milk balances it out, ensuring that the ice cream isn’t too heavy. The combination of these two dairy products creates a perfect balance of creaminess and lightness, making each scoop enjoyable.
- Granulated Sugar: Sugar is essential not only for sweetness but also for texture. It helps to lower the freezing point of the mixture, ensuring that your ice cream remains scoopable straight from the freezer. The right amount of sugar will enhance the natural flavors of the mint and cream without overpowering them.
- Salt: A pinch of salt is a flavor enhancer that brings out the sweetness of the sugar and the freshness of the mint. It’s a small yet critical addition that rounds out the overall flavor profile of your ice cream.
- Pure Vanilla Extract: Vanilla extract is the unsung hero in many ice cream recipes. It adds depth and complexity to the flavor, making it more well-rounded. The warmth of vanilla complements the coolness of mint, enhancing the overall taste.
- Fresh Mint Leaves: The star of the show! Fresh mint leaves are what give this ice cream its vibrant flavor. They infuse the mixture with a refreshing aroma and taste that is unmatched by artificial mint flavoring. Choosing the freshest leaves is key to achieving the best results.
- Egg Yolks: Egg yolks play a pivotal role in creating a creamy, custard-like consistency. They act as a natural emulsifier, helping to bind the ingredients together and provide a rich texture.
- Mini Chocolate Chips (Optional): These little morsels are an optional addition that can take your mint ice cream to the next level. The chocolate chips provide a delightful crunch and a burst of sweetness that pairs beautifully with the cool mint.
Step-by-step Preparation
Now that you have a good understanding of the ingredients, let’s go through the initial steps of preparing your homemade fresh mint ice cream.
Infuse the Mint
1. Start by washing the fresh mint leaves thoroughly to remove any dirt or impurities. Gently pat them dry with a clean kitchen towel or paper towel.
2. Roughly chop the mint leaves to help release their essential oils. You don’t need to be precise; just make sure they’re not whole.
3. In a saucepan, combine 1 cup of heavy cream and 1 cup of whole milk. Add the chopped mint leaves to the mixture.
4. Heat the mixture over medium heat until it begins to steam, but do not let it boil. Stir occasionally to ensure that the mint is evenly distributed throughout the cream and milk.
5. Once the mixture is steaming, remove it from the heat and cover the saucepan. Allow the mint to steep for about 30 minutes. This step is crucial, as it allows the mint to infuse its flavor into the cream base.
Prepare the Base
6. After steeping, strain the mixture through a fine mesh sieve into a clean bowl. Use the back of a spoon to press the mint leaves against the sieve to extract as much flavor as possible. Discard the mint leaves.
7. In a separate bowl, whisk together 4 large egg yolks and 3/4 cup of granulated sugar until the mixture becomes pale and slightly thickened.
Mix the Egg Yolks
8. Gradually add about a cup of the warm mint-infused cream mixture to the egg yolks while continuously whisking. This process, known as tempering, helps to gently raise the temperature of the yolks without scrambling them.
Temper the Egg Yolks
9. Once the yolks are tempered, pour the mixture back into the saucepan with the remaining mint-infused cream. Stir to combine.
Thicken the Base
10. Return the saucepan to the stove over medium heat, stirring constantly with a wooden spoon or heat-resistant spatula. You want to heat the mixture until it thickens enough to coat the back of the spoon. This usually takes about 5-7 minutes. You’ll know it’s ready when you can run your finger through the mixture on the spoon, and it holds its shape without immediately running back together.
Cool the Mixture
11. Once thickened, remove the saucepan from the heat and stir in a pinch of salt and 1 teaspoon of pure vanilla extract. This will enhance the flavor of your ice cream.
12. Pour the mixture into a clean bowl and allow it to cool to room temperature. Once cooled, cover the bowl with plastic wrap and refrigerate for at least 4 hours, or ideally overnight. This chilling process will not only cool the mixture but also enhance the flavors.
Churn the Ice Cream
13. Once the mixture is thoroughly chilled, it’s time to churn your ice cream. If you’re using an ice cream maker, follow the manufacturer’s instructions for churning. If you don’t have an ice cream maker, there are alternative methods available, such as using a freezer-safe container and stirring every 30 minutes until it reaches the desired consistency.
Freeze
14. After churning, transfer the ice cream to a freezer-safe container. If you’re adding mini chocolate chips, fold them in at this stage. Ensure the container is airtight to prevent ice crystals from forming.
15. Freeze for at least 4 hours or until the ice cream is firm enough to scoop.
Component Preparation
As you prepare to make your refreshing homemade fresh mint ice cream, choosing the freshest ingredients is essential. For the mint, look for vibrant green leaves that are not wilted or discolored. Gently wash them under cold water to remove any dirt, and pat them dry carefully. This attention to detail will ensure that your ice cream has the brightest, most aromatic flavor possible.
With these initial steps mastered, you’re well on your way to creating a delicious and refreshing homemade fresh mint ice cream that will impress your family and friends. Stay tuned for Part 2, where we will dive into the final steps and tips for serving your delightful creation.
Refreshing Homemade Fresh Mint Ice Cream: Part 2
Efficiently and Safely Separating Egg Yolks
To create a rich and creamy base for your mint ice cream, you’ll need to separate the egg yolks from the whites. Here’s how to do this efficiently:
1. Choose Fresh Eggs: Fresh eggs are easier to separate, as the yolks hold together better.
2. Prep Your Workspace: Have separate bowls ready-one for the yolks and one for the whites. It’s crucial to ensure that no yolk gets into the whites if you plan to use them later.
3. Crack the Egg: Gently tap the egg on a flat surface to avoid shell fragments. Hold the egg over the bowl and carefully split it in half.
4. Separate the Yolk: Tilt the egg half so that the yolk stays in one half while the whites fall into the bowl. You can also use your fingers to help guide the yolk out of the shell.
5. Repeat: Place the yolk in the other bowl and repeat the process for the remaining eggs.
By following these steps, you can minimize the risk of shell contamination and ensure that your yolks remain intact.
Measuring Ingredients Accurately
Precision in measuring your ingredients is key to achieving the perfect texture and flavor profile for your mint ice cream. Here are some tips:
1. Use a Kitchen Scale: For dry ingredients like sugar, use a scale for the most accurate measurements. A cup of sugar can vary significantly in weight depending on how it’s packed.
2. Liquid Measures: For liquids, use a clear measuring cup with marked measurements and check at eye level to avoid parallax errors.
3. Spoon and Level for Dry Ingredients: When measuring flour or similar dry items, spoon the ingredient into your measuring cup and then level it off with a straight edge. Avoid scooping directly from the container, as this can lead to overpacking.
4. Room Temperature Ingredients: Ensure your eggs and any dairy are at room temperature for better emulsification and smoother texture.
Assembly & Serving Tips
Now that your mint ice cream is ready, it’s time to think about serving.
1. Creative Serving Ideas:
- Serve your homemade mint ice cream in classic waffle cones or sugar cones for a nostalgic touch.
- Consider using colorful bowls for a vibrant presentation. You can also layer it between slices of a warm brownie for a delicious sundae experience.
2. Garnishes:
- Fresh mint leaves can be placed on top for a burst of color and aroma.
- Consider adding chocolate shavings or mini chocolate chips for an extra touch of flavor and texture.
3. Portion Sizes:
- Use an ice cream scoop for perfectly sized servings. Dip the scoop in warm water before scooping to make it easier to serve.
- A standard serving size is typically about half a cup, but feel free to adjust based on your guests’ preferences.
Presentation
The visual appeal of your dish can enhance the overall enjoyment.
1. Colorful Bowls and Unique Cones:
- Use bowls in bright colors or interesting shapes to make your ice cream stand out. You can also try using edible cones like those made from chocolate for a delightful twist.
2. Complementary Desserts:
- Pair your mint ice cream with rich desserts like brownies or a light fruit salad. The contrast between the creamy mint flavor and other textures will elevate the dessert experience.
3. Garnishes for Visual Appeal:
- A sprinkle of crushed nuts or a drizzle of chocolate sauce can add both flavor and beauty to your presentation.
Variations
Once you’ve mastered the basic mint ice cream, you can explore creative variations:
1. Alternative Flavors:
- Consider adding chocolate chips or swirls of fudge for a chocolate mint flavor. You can also infuse the base with other flavors, like vanilla or espresso, for a sophisticated twist.
2. Herb Infusions:
- Experiment with other herbs such as basil or rosemary. Use the same infusion method as with the mint for a unique flavor profile.
3. Vegan Alternatives:
- Substitute heavy cream with coconut milk or almond milk, and use aquafaba or silken tofu as an egg replacement for a dairy-free option.
Storage Guidelines
Proper storage is essential to maintaining the quality of your homemade ice cream:
1. Airtight Container:
- Transfer the ice cream to an airtight container to prevent freezer burn and ice crystals from forming.
2. Ideal Freezing Temperature:
- Store your ice cream at a consistent temperature of 0 degreesF (-18 degreesC) or lower for the best texture and flavor retention.
3. Reviving Hard Ice Cream:
- If your ice cream becomes too hard, let it sit at room temperature for about 5-10 minutes before scooping. This will soften it enough to scoop easily.
FAQ
How long does homemade mint ice cream last in the freezer?
Homemade mint ice cream can last for about 2-3 months in the freezer when stored properly in an airtight container.
Can I make this without an ice cream maker?
Yes! You can make no-churn ice cream by mixing all the ingredients and freezing them in a container, stirring every 30 minutes for the first 2-3 hours to prevent ice crystals.
What can I substitute for heavy cream for a lighter version?
You can use half-and-half or whole milk for a lighter version, although it may affect the creaminess of the final product.
How do I know when the ice cream is done churning?
The ice cream is done when it has thickened significantly and has doubled in volume, holding its shape when you lift the churner.
Is it possible to use dried mint instead of fresh mint?
While you can use dried mint, fresh mint provides a brighter flavor and aroma. If using dried, use about 1/3 the amount, but be aware that the flavor can be more muted.
Conclusion
Making homemade fresh mint ice cream is not only a rewarding endeavor but also a delightful way to enjoy the flavors of summer. Using fresh ingredients elevates the taste and brings a personal touch to this beloved dessert. The process of crafting your own ice cream allows for creativity and experimentation, so don’t hesitate to try different flavors and variations. Enjoy the satisfaction of serving a refreshing treat that you made from scratch, and invite friends and family to join in the fun. Indulge in the joy of homemade ice cream and make it a staple in your dessert repertoire.