
Introduction to Celebration Fruit Tart
There’s something undeniably enchanting about a beautifully crafted fruit tart. As a centerpiece at gatherings, the Celebration Fruit Tart not only tantalizes the taste buds but also captivates the eyes with its vibrant colors and artistic presentation. This culinary masterpiece combines a crisp, buttery crust with a creamy, velvety filling, topped generously with an array of fresh, juicy fruits. Whether it’s a birthday party, a summer picnic, or a holiday feast, this tart shines as a delicious symbol of festivity and celebration.
The allure of a fruit tart lies in its versatility and the way it embodies the essence of seasonal ingredients. The balance of flavors—from the sweet and tangy fruit to the richness of the pastry cream—creates a harmonious experience that appeals to people of all ages. The Celebration Fruit Tart stands out not just for its taste but also for its visual appeal, making it a perfect choice for those who want to impress their guests with a stunning dessert.
In this article, we will explore the components that make up this delightful tart, share step-by-step instructions for crafting the perfect crust and pastry cream, and offer tips to ensure your tart turns out beautifully every time. Let’s dive into the world of the Celebration Fruit Tart and discover how to create this stunning dessert from scratch.
Understanding the Components of the Celebration Fruit Tart
Creating a successful Celebration Fruit Tart requires attention to detail and an understanding of its key components: the crust, the pastry cream, and the fruit topping. Each element plays a crucial role in contributing to the overall flavor and texture of the tart.
Crust: The Foundation of Flavor
The tart crust is the first layer of flavor and texture that sets the stage for the entire dessert. A well-made crust should be crisp and buttery, providing a satisfying contrast to the creamy filling and juicy fruit. The flavor profile of the crust is essential, as it balances the sweetness of the fruits and the richness of the pastry cream.
Importance of Using the Correct Ingredients
To achieve the perfect tart crust, the right ingredients are crucial. Traditional recipes often call for all-purpose flour, unsalted butter, sugar, and a pinch of salt. Using high-quality butter not only enhances the flavor but also contributes to the desired flakiness. Additionally, incorporating a small amount of cornstarch or almond flour can elevate the texture, resulting in a more tender crust.
Tips on Achieving the Perfect Balance of Sweetness and Buttery Richness
When preparing the crust, it’s important to strike a balance between sweetness and richness. The sugar should be just enough to enhance the flavor without overwhelming the palate. A good rule of thumb is to use about ¼ cup of sugar for every 2 cups of flour. This will ensure that the crust complements the sweetness of the fruit topping without competing with it.
Pastry Cream: The Heart of the Tart
Pastry cream, or crème patissière, is the luxurious filling that brings the Celebration Fruit Tart to life. This silky custard serves as the heart of the tart, providing a creamy texture that pairs perfectly with the fresh fruit.
Overview of Ingredients and Their Contributions
The basic ingredients for pastry cream include milk, sugar, egg yolks, cornstarch, and vanilla. Each component plays a vital role in achieving the desired flavor and texture. The milk is the base, providing moisture and creaminess, while the sugar sweetens the mixture. Egg yolks add richness and act as a thickening agent, ensuring a smooth consistency. Cornstarch is essential for stabilizing the cream, preventing it from becoming overly runny. Finally, vanilla extract enhances the overall flavor profile.
Discussion on the Process of Making Pastry Cream and Common Mistakes to Avoid
The process of making pastry cream involves heating the milk and combining it with the egg yolks and sugar mixture. It’s important to temper the egg yolks by gradually adding the hot milk, which helps prevent scrambling. Once combined, the mixture is cooked until thickened, then cooled before use. Common mistakes to avoid include cooking the cream on too high of a heat, which can cause it to curdle, or not whisking constantly, leading to lumps. Achieving a smooth, creamy pastry cream is key to the success of the tart.
Fruit Topping: The Colorful Crown
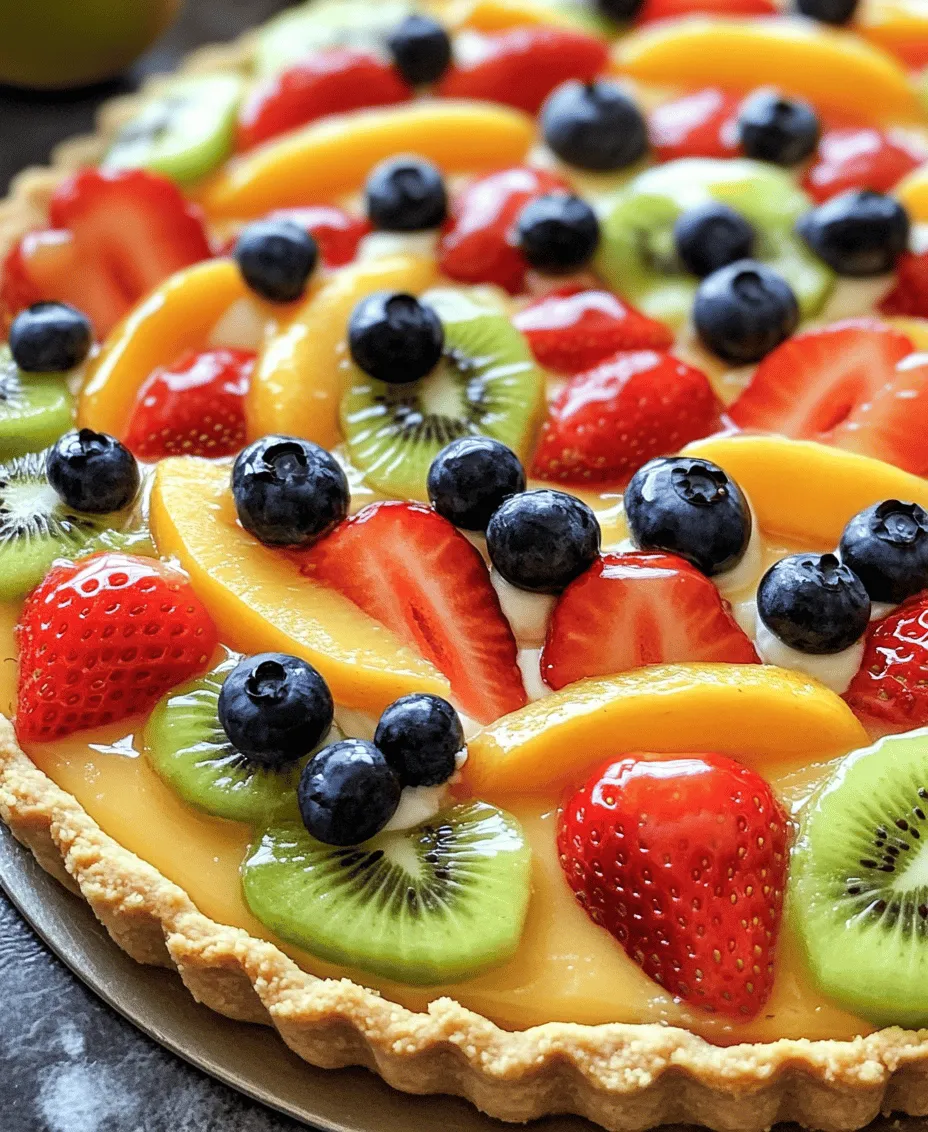
The fruit topping is perhaps the most visually striking aspect of the Celebration Fruit Tart. The selection of fruits not only adds color and vibrancy but also contributes a burst of freshness and flavor.
Introduction to the Selection of Fruits Used in the Recipe
When choosing fruits for your tart, consider using a mix of colors and textures. Classic choices include strawberries, blueberries, kiwi, mango, and raspberries. Each fruit contributes its unique flavor, creating a delightful medley that enhances the overall experience.
Benefits of Using Seasonal Fruits for Freshness and Flavor
Opting for seasonal fruits ensures that you’re using the freshest ingredients available, which is crucial for both taste and presentation. Seasonal fruits are typically more flavorful and vibrant, making your tart even more appealing. For example, summer is the perfect time for strawberries and peaches, while fall brings an abundance of apples and pears.
Suggestions for Alternative Fruits Based on Personal Preference or Availability
Feel free to get creative with your fruit selection! If you have personal favorites or specific fruits that you enjoy, don’t hesitate to swap them in. For instance, if you prefer citrus, thinly sliced oranges or mandarins can add a refreshing twist. If you want to make your tart more tropical, consider using pineapple or passionfruit. The key is to choose fruits that complement each other in flavor and color, creating a beautiful, balanced topping.
Step-by-Step Instructions for Making Celebration Fruit Tart
With a solid understanding of the components of the Celebration Fruit Tart, we can now dive into the step-by-step instructions for crafting this delightful dessert.
Crafting the Perfect Crust
The first step in making your Celebration Fruit Tart is preparing the crust. Here’s how to create a perfectly flaky and delicious tart shell.
Detailed Instructions for Preparing the Crust
1. Gather Your Ingredients: You will need 2 cups of all-purpose flour, ½ cup of powdered sugar, ½ cup of unsalted butter (cold and cut into small cubes), a pinch of salt, and 1 egg yolk.
2. Mix Dry Ingredients: In a large mixing bowl, combine the flour, powdered sugar, and salt. Whisk together until well blended.
3. Incorporate Butter: Add the cold butter cubes to the dry mixture. Using a pastry cutter or your fingertips, work the butter into the flour until the mixture resembles coarse crumbs. Be careful not to overwork the dough, as this can lead to a tough crust.
4. Add Egg Yolk: Create a small well in the center of the mixture and add the egg yolk. Mix until the dough begins to come together. If the dough is too crumbly, you can add a tablespoon of ice water at a time until it holds together.
5. Chill the Dough: Form the dough into a disk, wrap it in plastic wrap, and refrigerate for at least 30 minutes. This chilling period is crucial for allowing the butter to firm up, which helps prevent the crust from shrinking during baking.
Tips on How to Ensure Even Baking and Prevent Shrinking
When rolling out the chilled dough, flour your work surface and rolling pin to prevent sticking. Roll the dough to about ¼ inch thick, then carefully transfer it to a tart pan, pressing it into the edges without stretching. Trim any excess dough and use a fork to poke holes in the bottom to prevent bubbling. To further prevent shrinking, refrigerate the crust for an additional 15-20 minutes before baking.
Importance of Cooling the Crust Before Adding the Filling
Once baked to a golden brown, allow the crust to cool completely before adding the pastry cream. This step is essential, as a warm crust can cause the filling to melt and become runny, compromising the integrity of the tart.
Mastering the Pastry Cream
With the crust prepared and cooled, it’s time to move on to the heart of the tart—the creamy pastry cream. Here’s how to create this essential component.
Ingredients for Pastry Cream
You will need 2 cups of whole milk, ½ cup of granulated sugar, 4 egg yolks, ¼ cup of cornstarch, and 1 tablespoon of vanilla extract.
Step-by-Step Instructions for Making Pastry Cream
1. Heat the Milk: In a medium saucepan, heat the milk over medium heat until it begins to simmer. Do not let it boil.
2. Combine Egg Yolks and Sugar: In a separate bowl, whisk together the egg yolks and granulated sugar until pale and slightly thickened.
3. Add Cornstarch: Whisk in the cornstarch until fully combined and smooth.
4. Temper the Egg Mixture: Slowly pour about half of the hot milk into the egg mixture while whisking constantly. This process tempers the eggs, preventing them from scrambling.
5. Combine and Cook: Pour the tempered egg mixture back into the saucepan with the remaining milk. Cook over medium heat, whisking constantly, until the mixture thickens and begins to bubble. This should take about 3-5 minutes.
6. Add Vanilla: Once thickened, remove from heat and stir in the vanilla extract. For an extra smooth texture, you can strain the pastry cream through a fine-mesh sieve to remove any lumps.
7. Cool the Cream: Transfer the pastry cream to a bowl, cover with plastic wrap (pressing it directly onto the surface to prevent a skin from forming), and allow it to cool to room temperature before refrigerating until ready to use.
In the next part of this article, we will continue with the detailed process of assembling the tart and adding the colorful fruit topping that makes this dessert truly special. Stay tuned for more tips and tricks to ensure your Celebration Fruit Tart is a show-stopping success!
Step-by-Step Guide to Making Smooth and Creamy Pastry Cream
Creating the perfect pastry cream is a crucial step in assembling your Celebration Fruit Tart. This creamy filling not only adds flavor but also serves as a delicious base for your vibrant fruits. Follow these steps to ensure your pastry cream is smooth and luscious.
Ingredients for Pastry Cream:
– 2 cups whole milk
– 1/2 cup granulated sugar
– 4 large egg yolks
– 1/4 cup cornstarch
– 2 tablespoons unsalted butter
– 1 teaspoon pure vanilla extract
– A pinch of salt
Instructions to Prepare Pastry Cream:
1. Heat the Milk: In a medium saucepan over medium heat, combine the milk, half of the sugar (1/4 cup), and a pinch of salt. Stir occasionally until the mixture is just about to boil—steam should be rising, but do not let it boil.
2. Whisk Egg Yolks and Sugar: In a separate bowl, whisk together the egg yolks and the remaining sugar (1/4 cup) until the mixture is pale and slightly thickened. This step is essential as it helps to dissolve the sugar and aerate the yolks.
3. Add Cornstarch: Sift the cornstarch into the egg mixture and whisk until smooth. This will ensure there are no lumps and will help thicken the cream.
4. Temper the Eggs: Once the milk is heated, gradually pour a small amount of the hot milk into the egg mixture while continuously whisking. This process, known as tempering, helps prevent the eggs from scrambling.
5. Combine Mixtures: Pour the tempered egg mixture back into the saucepan with the remaining milk. Cook over medium heat, stirring constantly with a wooden spoon or silicone spatula. This is where the thickening happens—continue stirring until the mixture reaches a boil and thickens significantly, about 2-3 minutes.
6. Finish with Butter and Vanilla: Remove the saucepan from heat and stir in the butter and vanilla extract. Mix until the butter is fully melted and incorporated, resulting in a rich and creamy pastry cream.
7. Cool and Strain: Transfer the pastry cream to a bowl, cover with plastic wrap directly on the surface to prevent a skin from forming, and let it cool at room temperature. Once cool, you can store it in the refrigerator until you’re ready to assemble the tart.
Key Cooking Techniques for Thickening the Cream and Achieving the Right Texture
The key to achieving the right texture in your pastry cream lies in careful attention during cooking. Here are some essential techniques to keep in mind:
– Consistent Stirring: Stirring continuously while cooking ensures even heating and prevents the cream from sticking to the bottom of the saucepan. This is crucial for avoiding burnt spots and lumps.
– Monitoring Heat: Keep the heat at medium to ensure the cream doesn’t cook too quickly. Cooking it too fast can lead to a grainy texture, while cooking it too slowly may cause it to remain runny.
– Using a Thermometer: If you want precision, using a thermometer can help. The cream should reach about 180°F (82°C) to properly thicken.
– Straining: If you notice any lumps or if you’re concerned about texture, pass the cream through a fine-mesh sieve before cooling. This will yield an ultra-smooth pastry cream.
Suggestions for Flavor Variations
To give your pastry cream a unique twist, consider these flavor variations:
– Citrus Zest: Add the zest of a lemon, lime, or orange to the milk while heating for a fresh, zesty flavor.
– Almond Extract: Incorporate a few drops of almond extract along with the vanilla for a delightful nutty touch.
– Chocolate: For a chocolate pastry cream, add 4 ounces of finely chopped dark chocolate to the hot cream and whisk until melted and smooth.
Assembling the Tart
Now that you have your delicious pastry cream ready, it’s time to assemble the tart. The assembly process is where your creativity shines.
Guidelines for Spreading the Pastry Cream Evenly Over the Crust
1. Prepare the Crust: Make sure your tart crust is fully cooled before adding the pastry cream. A warm crust can cause the cream to melt and become runny.
2. Spreading Technique: Use a spatula or the back of a spoon to distribute the pastry cream evenly across the tart shell. Start from the center and work your way outwards, ensuring an even layer.
3. Leveling the Cream: Once spread, gently tap the tart on the counter to settle the cream and eliminate any air bubbles.
Creative Tips for Arranging the Fruits for Visual Appeal
1. Color Coordination: Use fruits with varying colors for an eye-catching display. Strawberries, blueberries, kiwi, and mango create a beautiful palette.
2. Shape Considerations: Cut fruits into different shapes—slices, wedges, or cubes—to add texture and interest.
3. Overlapping Fruits: Arrange the fruits in overlapping circles or patterns, starting from the outer edge and working inwards. This technique creates a lush, full appearance.
4. Finishing Touches: Consider adding edible flowers or mint leaves to enhance the visual appeal and create a more sophisticated look.
Importance of Letting the Tart Set Before Serving
Once you’ve assembled your tart, it’s essential to let it set in the refrigerator for at least 2 hours. This allows the flavors to meld and the cream to firm up, ensuring that every slice holds its shape beautifully when served.
Glazing the Tart: Adding the Finishing Touch
A glossy glaze not only enhances the appearance of your tart but also helps preserve the freshness of the fruits.
Explanation of the Glazing Process and Its Purpose
The glaze acts as a protective layer over the fruit, preventing oxidation and maintaining vibrant colors. It also adds a subtle sweetness that complements the tart’s flavors.
Step-by-Step Instructions for Preparing and Applying the Apricot Glaze
1. Ingredients:
– 1/2 cup apricot preserves
– 2 tablespoons water
2. Prepare the Glaze: In a small saucepan over low heat, combine the apricot preserves and water. Stir until the preserves melt and the mixture is smooth.
3. Strain the Glaze: For a silky finish, strain the glaze through a fine-mesh sieve to remove any chunks.
4. Applying the Glaze: Using a pastry brush, gently brush the glaze over the arranged fruits. Be careful not to disturb the fruits as you apply the glaze.
5. Final Touches: Return the tart to the refrigerator for another 30 minutes to set the glaze before serving.
Suggestions for Alternative Glazes
– Fruit Preserves: Other fruit preserves, such as raspberry or strawberry, can be substituted for apricot for different flavor profiles.
– Gelatin Glaze: For a firmer glaze, dissolve unflavored gelatin in water and mix it with fruit juice or preserves. Heat gently until dissolved, then apply to the tart.
Serving Suggestions and Pairing Ideas
When it comes to serving your Celebration Fruit Tart, presentation and pairing can elevate the experience.
Ideal Occasions for Celebration Fruit Tart
This tart is perfect for various occasions, including:
– Birthday Parties: A festive dessert centerpiece that appeals to both kids and adults.
– Graduation Celebrations: A refreshing and colorful treat to celebrate achievements.
– Holiday Gatherings: A light option amidst rich holiday desserts.
– Brunch Buffets: A stunning addition to any brunch spread, complementing savory dishes.
Ideas for Serving the Tart as Part of a Dessert Table or Buffet
– Slice and Serve: Cut the tart into wedges for easy serving. Arrange on a beautiful platter alongside other desserts for a colorful dessert table.
– Mini Tarts: Consider making mini versions of the tart in tartlet pans for individual servings—perfect for parties!
Tips for Pairing the Tart with Beverages
– Sparkling Wines: The tart’s sweetness pairs wonderfully with a light sparkling wine or champagne, enhancing the celebratory feel.
– Iced Teas: Refreshing iced teas, whether sweetened or herbal, can be a great non-alcoholic accompaniment, balancing the sweetness of the tart.
Storage and Shelf Life
To keep your Celebration Fruit Tart fresh for as long as possible, here are some storage tips:
– Refrigeration: Store the tart in the refrigerator, covered with plastic wrap, to maintain freshness. It’s best enjoyed within 2-3 days for optimal flavor and texture.
– Avoid Freezing: While you can freeze the tart crust, it’s not recommended to freeze the assembled tart as fruits can become mushy upon thawing.
– Reheating: If you need to reheat the tart crust, place it in a preheated oven at 350°F (175°C) for about 5-10 minutes. Avoid reheating the pastry cream or fruits.
Conclusion: Celebrating with Celebration Fruit Tart
Creating a Celebration Fruit Tart is a joyous culinary endeavor that yields a stunning and delicious dessert. From the buttery crust to the smooth pastry cream and the vibrant fruits, every bite celebrates the flavors of fresh ingredients and the art of baking. This tart is not just a treat but a centerpiece for gatherings, encouraging laughter, conversation, and sweet memories shared among loved ones.
As you embrace the simple pleasures of baking, remember that the joy of sharing homemade desserts is what truly elevates any occasion. So gather your friends and family, slice into your beautiful Celebration Fruit Tart, and make unforgettable moments around the table. Happy baking!