Follow Me On Pinterest!


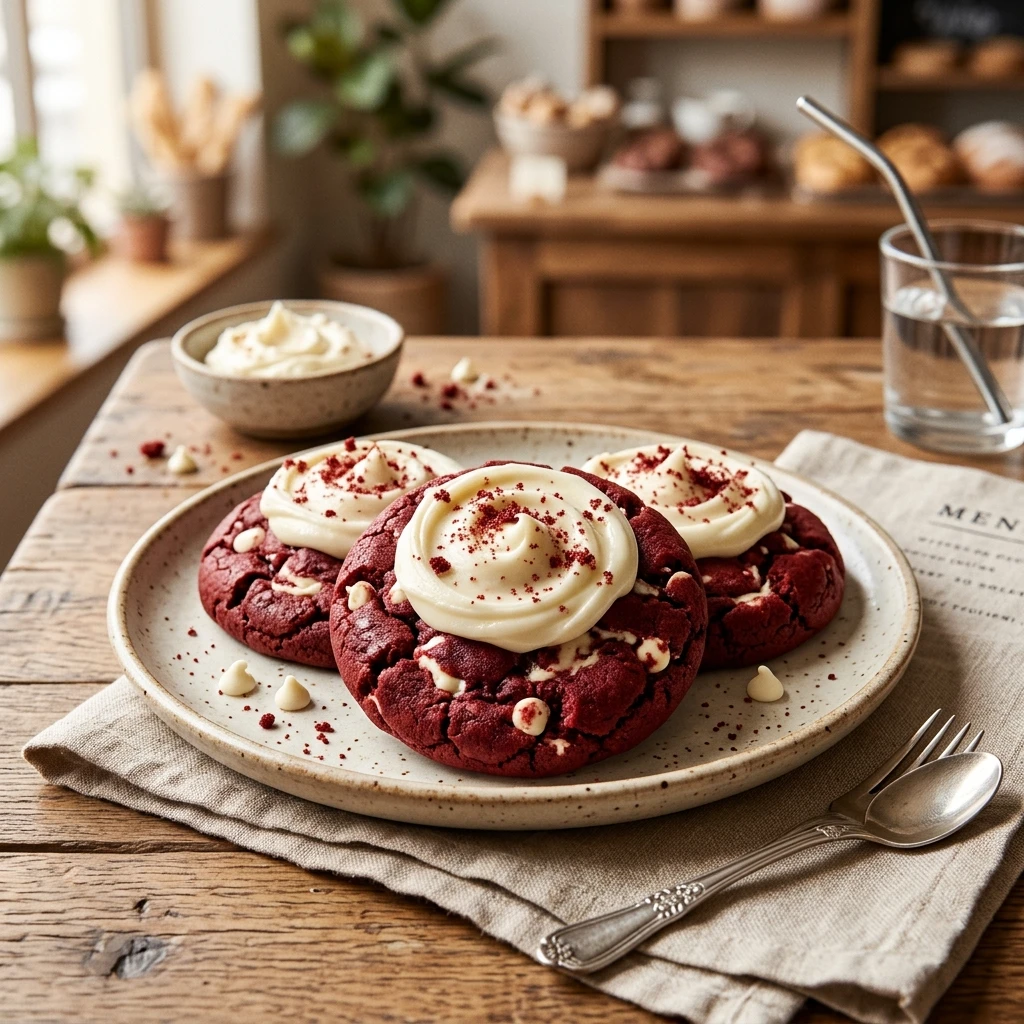
Imagine biting into a cookie that captures the soul of a classic cake while maintaining the irresistible texture of a premium bakery treat. These Chewy Red Velvet Cookies are more than just a dessert; they are a decadent experience. With their vibrant crimson hue, subtle cocoa undertones, and a hidden heart of tangy cream cheese frosting, they strike the perfect balance between sophisticated and comforting. Whether you are baking for a holiday, a special Valentine’s Day surprise, or simply craving something more luxurious than a standard chocolate chip cookie, this recipe delivers that professional bakery finish right in your own kitchen.
Recipe Information
- Prep Time: 20 minutes
- Cook Time: 10 minutes
- Total Time: 30 minutes
- Servings: 18 cookies
- Difficulty: Medium
Nutrition values
- Calories: 245 kcal
- Protein: 3g
- Carbs: 32g
Why Make This Chewy Red Velvet Cookies Cream Cheese Bakery
You should make these cookies because they offer a texture profile that is impossible to resist. Unlike thin, crispy cookies, these stay thick and soft thanks to the precise ratio of brown sugar and cocoa. The hidden cream cheese center provides a “wow” factor that impresses guests and creates a flavor contrast that cuts through the sweetness of the dough. Plus, red velvet is naturally festive, making these the ultimate crowd-pleaser for parties and gift boxes.
Ingredients
- 1/2 cup unsalted butter, softened
- 3/4 cup brown sugar, packed
- 1/4 cup granulated sugar
- 1 large egg, room temperature
- 1 tsp vanilla extract
- 1 tbsp red food coloring (gel preferred)
- 1 1/2 cups all-purpose flour
- 3 tbsp unsweetened cocoa powder
- 1/2 tsp baking soda
- 1/4 tsp salt
- 4 oz cream cheese, chilled and cut into 18 small cubes
- 1/2 cup powdered sugar (for the filling)
Directions
Step 1: Preparing the Cream Cheese Filling
In a small bowl, whip the chilled cream cheese and powdered sugar together until smooth. Scoop small teaspoons of the mixture onto a parchment-lined tray. Place the tray in the freezer for at least 15 minutes. Freezing the centers makes them much easier to handle when you are stuffing the cookie dough later.
Step 2: Mixing the Red Velvet Dough
Cream the softened butter, brown sugar, and granulated sugar in a large bowl until light and fluffy. Beat in the egg, vanilla extract, and red food coloring until the color is uniform and vibrant. In a separate bowl, whisk together the flour, cocoa powder, baking soda, and salt. Gradually add the dry ingredients to the wet mixture, stirring until a soft dough forms. Do not overmix, or the cookies will lose their chewy texture.
Step 3: Stuffing and Shaping
Preheat your oven to 350°F (175°C). Take a tablespoon of cookie dough and flatten it in your palm. Retrieve the frozen cream cheese balls from the freezer. Place one cream cheese cube in the center of the dough and wrap the edges around it until the filling is completely sealed. Roll the dough into a smooth ball and place it on a baking sheet lined with parchment paper, spacing them 2 inches apart.
Step 4: Baking and Cooling
Bake the cookies for 10 to 12 minutes. The edges should be set, but the centers should still look slightly soft. Avoid overbaking, as the cookies will continue to firm up as they cool on the hot pan. Let them rest on the baking sheet for 5 minutes before transferring them to a wire rack to cool completely. This ensures the cream cheese center sets perfectly.
Expert Tips for Perfect Chewy Red Velvet Cookies Cream Cheese Bakery
To achieve that signature bakery look, use gel food coloring instead of liquid drops; it provides a more intense color without altering the moisture levels of the dough. Always chill your cream cheese filling thoroughly, otherwise, it might leak out during the baking process. For the chewiest results, ensure your butter is soft but not melted. Finally, if you want a professional touch, press a few white chocolate chips into the tops of the cookies immediately after they come out of the oven.
Delicious Variations
If you want to mix things up, try rolling the dough balls in granulated sugar or powdered sugar before baking to create a “crinkle” effect. You can also add half a cup of white chocolate chips directly into the dough for extra sweetness. For a nutty crunch, finely chopped pecans pair beautifully with the cocoa and cream cheese flavors. If you prefer a sandwich-style cookie, bake the cookies flat without the filling and pipe the cream cheese frosting between two cooled cookies instead.
Frequently Asked Questions
What does red velvet actually taste like?
Red velvet is a unique flavor that combines mild cocoa with a slight tang from the cream cheese and a hint of vanilla. It is not quite a chocolate cookie, but it has more depth than a plain sugar cookie.
Can I use liquid food coloring instead of gel?
Yes, you can, but you will need to use more of it to get a deep red color. Be careful, as adding too much liquid can make the dough sticky and difficult to handle.
How do I store these cookies?
Because of the cream cheese filling, these cookies should be stored in an airtight container in the refrigerator. They will stay fresh for up to 5 days. You can let them come to room temperature for 10 minutes before eating.
Can I freeze the dough?
Absolutely! You can freeze the stuffed, unbaked dough balls for up to 3 months. When you are ready to bake, just add 2 extra minutes to the baking time directly from frozen.
Why did my cookies spread too much?
This usually happens if the butter was too warm or if the dough wasn’t chilled. If your kitchen is very warm, try chilling the rolled dough balls in the fridge for 20 minutes before putting them in the oven.
Conclusion
Mastering the Chewy Red Velvet Cookie is a rewarding journey for any home baker. These cookies bring the elegance of a boutique bakery into your kitchen with their striking appearance and decadent stuffed centers. By following the steps to freeze the filling and using quality cocoa, you ensure a professional result every single time. Share them with friends, serve them at your next gathering, or keep a batch in the fridge for a personal indulgence. No matter how you enjoy them, these cookies are destined to become a new favorite in your baking repertoire.


Chewy Red Velvet Cookies Cream Cheese Bakery
- Total Time: 30 minutes
- Diet: Vegetarian
Ingredients
Scale
- 1/2 cup unsalted butter, softened
- 3/4 cup brown sugar, packed
- 1/4 cup granulated sugar
- 1 large egg, room temperature
- 1 tsp vanilla extract
- 1 tbsp red food coloring (gel preferred)
- 1 1/2 cups all-purpose flour
- 3 tbsp unsweetened cocoa powder
- 1/2 tsp baking soda
- 1/4 tsp salt
- 4 oz cream cheese, chilled and cut into 18 small cubes
- 1/2 cup powdered sugar (for the filling)
Instructions
- In a small bowl, whip the chilled cream cheese and powdered sugar together until smooth. Scoop small teaspoons of the mixture onto a parchment-lined tray. Place the tray in the freezer for at least 15 minutes. Freezing the centers makes them much easier to handle when you are stuffing the cookie dough later.
- Cream the softened butter, brown sugar, and granulated sugar in a large bowl until light and fluffy. Beat in the egg, vanilla extract, and red food coloring until the color is uniform and vibrant. In a separate bowl, whisk together the flour, cocoa powder, baking soda, and salt. Gradually add the dry ingredients to the wet mixture, stirring until a soft dough forms. Do not overmix, or the cookies will lose their chewy texture.
- Preheat your oven to 350°F (175°C). Take a tablespoon of cookie dough and flatten it in your palm. Retrieve the frozen cream cheese balls from the freezer. Place one cream cheese cube in the center of the dough and wrap the edges around it until the filling is completely sealed. Roll the dough into a smooth ball and place it on a baking sheet lined with parchment paper, spacing them 2 inches apart.
- Bake the cookies for 10 to 12 minutes. The edges should be set, but the centers should still look slightly soft. Avoid overbaking, as the cookies will continue to firm up as they cool on the hot pan. Let them rest on the baking sheet for 5 minutes before transferring them to a wire rack to cool completely. This ensures the cream cheese center sets perfectly.
- Cook Time: 30 minutes