
Indulging in a warm, gooey dessert is one of life’s simple pleasures, and few things can rival the experience of a freshly baked Chocolate Hazelnut Skillet Cookie. Combining the rich, decadent flavors of chocolate and the nutty essence of hazelnuts, this skillet cookie is not just a treat; it’s an experience. Whether you’re hosting a gathering or simply satisfying a sweet craving after a long day, this recipe is a delightful twist on traditional cookies. The beauty of a skillet cookie lies in its simplicity and the ease with which it can be prepared, making it an accessible option for bakers of all skill levels.
In this article, we will guide you through the journey of creating the ultimate Chocolate Hazelnut Skillet Cookie. From understanding the unique ingredients that contribute to its deliciousness to providing a step-by-step preparation guide, we will ensure that your baking experience is both enjoyable and successful. So, let’s dive into the world of flavors that await!
Understanding the Ingredients
Before we embark on the preparation of this delectable dessert, it’s essential to understand the role of each ingredient. Each component contributes not only to the flavor but also to the texture and overall experience of the skillet cookie. Here’s a closer look at the ingredients that make this recipe truly special:
All-Purpose Flour
At the heart of any cookie recipe, including our Chocolate Hazelnut Skillet Cookie, is all-purpose flour. This versatile ingredient provides the structure needed to support the cookie while allowing it to maintain a soft and chewy texture. The gluten in the flour helps to create a stable foundation, ensuring that the cookie holds its shape during baking. When measuring flour, it’s important to avoid packing it into the measuring cup, as this can lead to dense cookies. Instead, spoon the flour into the cup and level it off with a knife for accurate measurement.
Baking Soda and Salt
Baking soda is a crucial leavening agent that helps the cookie rise and achieve a desirable texture. It reacts with the acids in other ingredients, creating carbon dioxide bubbles that make the cookie light and fluffy. On the other hand, salt is often an underrated ingredient in baking. While it doesn’t contribute to the rise of the cookie, it enhances the flavors and balances the sweetness, making each bite more enjoyable.
Unsalted Butter
Butter is a key player in the flavor and moisture of our skillet cookie. It adds richness and depth, contributing to that melt-in-your-mouth experience we all crave in a cookie. Unsalted butter is preferred in baking as it allows for better control over the overall saltiness of the dish. When using butter, it’s best to allow it to come to room temperature before creaming it with sugar, as this will help achieve the perfect creamy consistency.
Sugars: Brown and Granulated
In this recipe, both brown sugar and granulated sugar are used, each providing distinct qualities to the cookie. Granulated sugar contributes to the overall sweetness and helps the cookie spread during baking. In contrast, brown sugar, which contains molasses, adds moisture and a hint of caramel flavor, resulting in a chewier texture. The combination of both sugars creates a well-rounded sweetness that enhances the overall flavor profile of the skillet cookie.
Eggs
Eggs play a vital role in binding the ingredients together while also adding richness. They help to create a tender texture in the cookie, ensuring that it doesn’t become too dry. For this recipe, we typically use one large egg, which is sufficient to achieve the desired consistency. If you’re looking for an egg substitute, unsweetened applesauce or a flaxseed mixture can be used as alternatives.
Vanilla Extract
Vanilla extract is often regarded as the secret ingredient in many dessert recipes, and for good reason. Its aromatic qualities elevate the overall flavor profile, adding a warm, inviting note to the cookie. Using pure vanilla extract is recommended for the best taste, as it is more potent and flavorful compared to imitation vanilla.
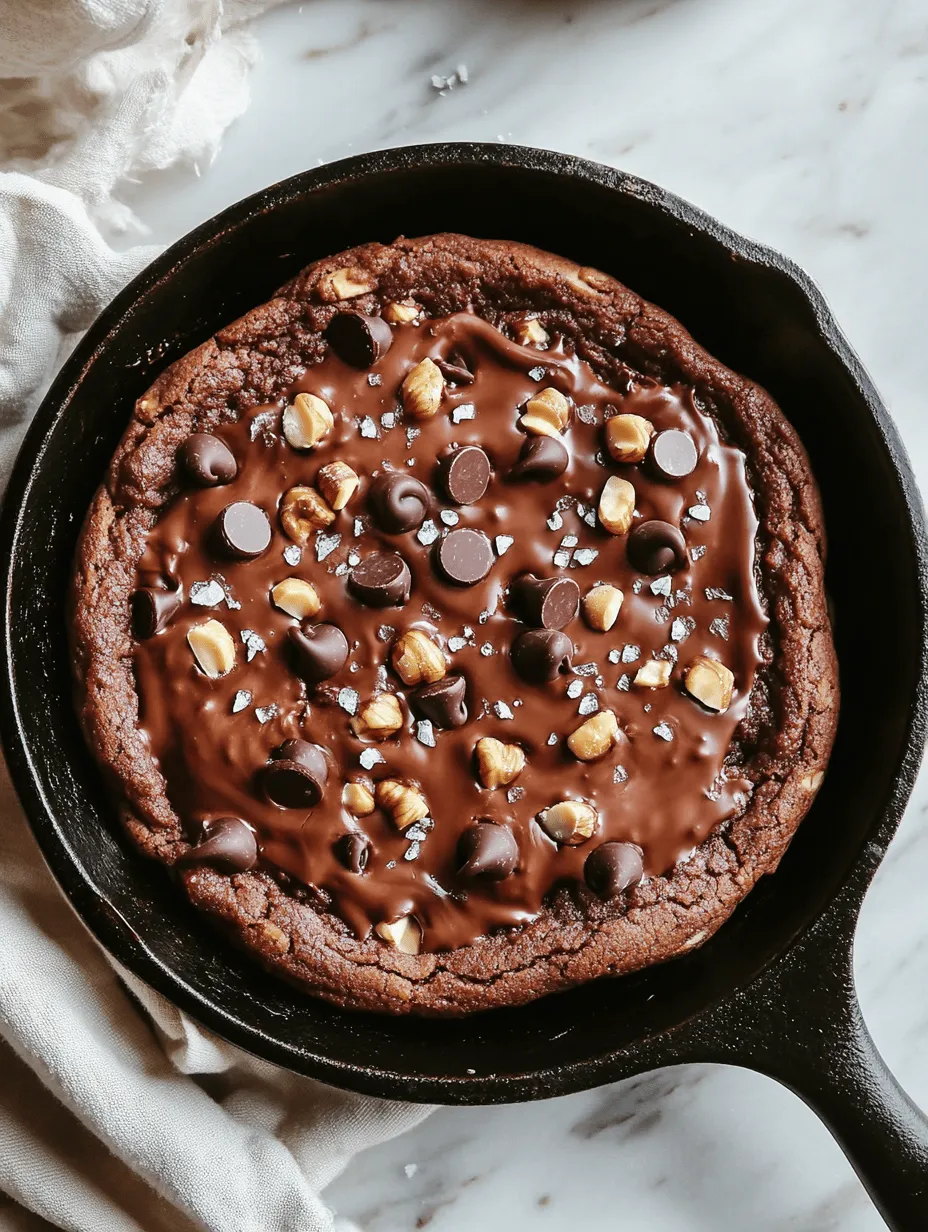
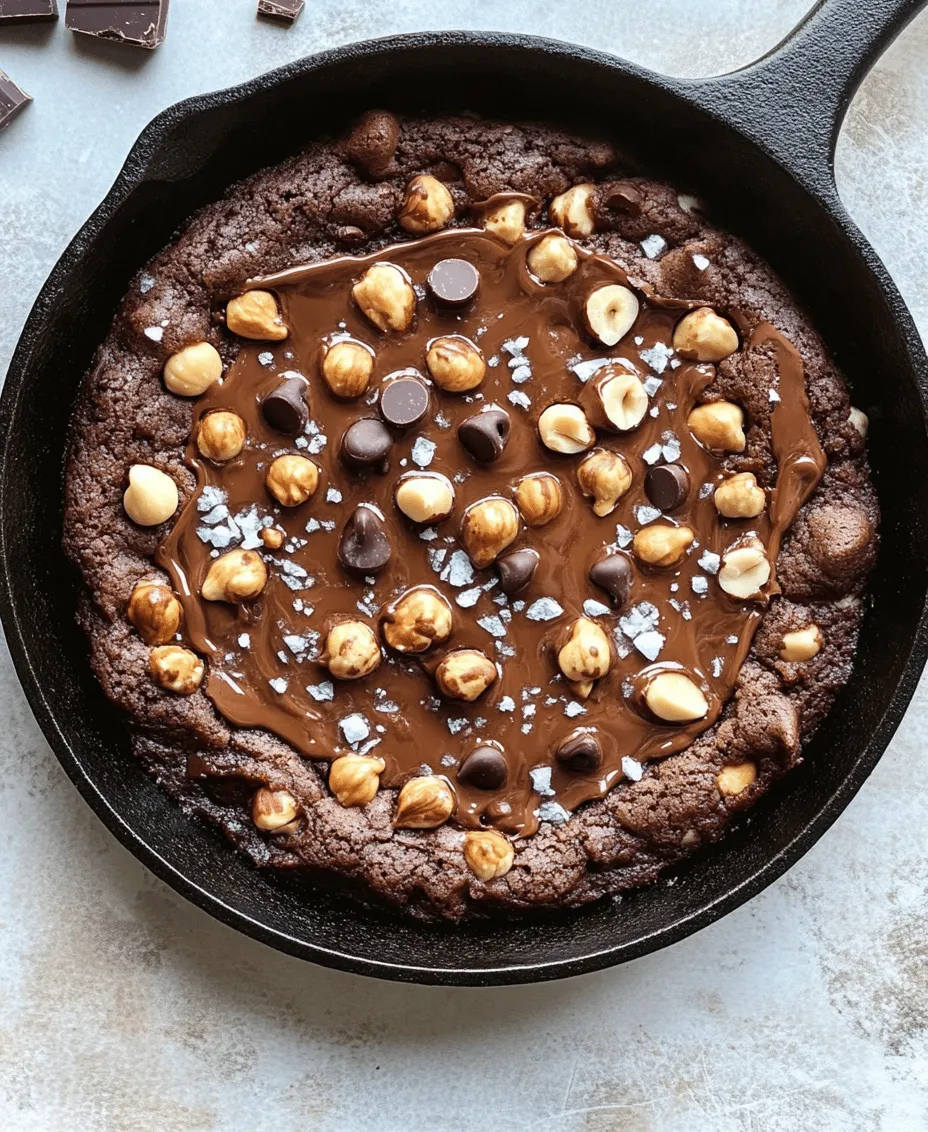
Chocolate Hazelnut Spread
The star of our Chocolate Hazelnut Skillet Cookie is undoubtedly the chocolate hazelnut spread. This creamy concoction not only adds a rich chocolate flavor but also introduces a luxurious texture that melts beautifully into the cookie. It brings a unique nutty sweetness that pairs perfectly with the other ingredients, creating a harmonious blend of flavors.
Chocolate Chips and Chopped Hazelnuts
For that extra burst of flavor and texture, we incorporate both chocolate chips and chopped hazelnuts into the batter. The chocolate chips provide pockets of gooey chocolate goodness, while the chopped hazelnuts add a delightful crunch and nutty flavor that complements the hazelnut spread. Together, they create a dynamic contrast, making each bite of the skillet cookie a delightful experience.
Sea Salt
Finally, a sprinkle of sea salt before baking elevates the flavors of the cookie to new heights. It enhances the sweetness and brings out the richness of the chocolate and hazelnuts, creating a balanced and satisfying dessert. The slight crunch of the salt also adds a wonderful textural element to the warm, gooey cookie.
Preparation Steps
Now that we’ve explored the ingredients and their roles in our Chocolate Hazelnut Skillet Cookie, it’s time to dive into the preparation steps. This easy-to-follow guide will ensure that you create a delicious and visually appealing dessert that is sure to impress.
Preheating the Oven
The first step in any baking endeavor is preheating the oven. For our skillet cookie, we recommend setting the oven to 350°F (175°C). Preheating allows for even cooking and ensures that the cookie bakes properly from the start, resulting in a beautifully golden crust and a soft interior.
Mixing Dry Ingredients
While the oven is preheating, you can start preparing the dry ingredients. In a medium mixing bowl, combine the all-purpose flour, baking soda, and salt. Whisk these ingredients together until they are evenly distributed. This step is crucial as it ensures that the leavening agent (baking soda) is thoroughly mixed with the flour and salt, preventing any pockets of baking soda from forming in the cookie. Once combined, set the bowl aside and move on to the next step.
Creating the Butter and Sugar Mixture
In a large mixing bowl, use an electric mixer to cream together the softened unsalted butter, granulated sugar, and brown sugar until the mixture is light and fluffy. This process typically takes about 2-3 minutes. The goal is to incorporate air into the mixture, which will help the cookie rise while baking. Make sure to scrape down the sides of the bowl periodically to ensure that all ingredients are well combined. The result should be a smooth, creamy mixture that has a light color and a fluffy texture.
Incorporating Wet Ingredients
Once you have achieved the perfect butter and sugar mixture, it’s time to add the wet ingredients. Start by adding the egg and vanilla extract to the bowl. Mix on low speed until just combined. Be careful not to overmix at this stage, as it can lead to a tough cookie. After the wet ingredients are fully incorporated, gradually add the dry ingredient mixture to the bowl. Mix on low speed until the flour is just combined, and be sure to scrape down the sides of the bowl as needed.
With the base of the cookie ready, you can now fold in the chocolate hazelnut spread, chocolate chips, and chopped hazelnuts. Use a spatula to gently mix these ingredients into the dough, ensuring an even distribution of flavors and textures throughout.
By following these initial steps, you are already well on your way to creating a mouthwatering Chocolate Hazelnut Skillet Cookie that will satisfy any sweet tooth. In the next section, we will continue with the preparation process, guiding you through the final steps to bring this delightful dessert to life. Stay tuned for more tips and techniques that will elevate your baking experience!
Best Practices for Mixing Eggs and Vanilla into the Batter
When it comes to creating the perfect Chocolate Hazelnut Skillet Cookie, the way you incorporate eggs and vanilla into your batter is crucial. Begin by cracking the eggs into a mixing bowl. Ensure that your eggs are at room temperature, as this allows for better emulsification. Whisk the eggs gently until they are well combined, showing a uniform yellow color.
Next, add in the vanilla extract. A good rule of thumb is to use one teaspoon of pure vanilla extract for every egg. This ratio ensures that the vanilla flavor shines through without overwhelming the cookie. To combine the eggs and vanilla, use a gentle folding motion, ensuring that air is incorporated but not overmixing the mixture. The goal is to achieve a smooth mixture without any visible streaks of egg or vanilla.
Combining Dry and Wet Ingredients
Once your eggs and vanilla are well mixed, it’s time to combine your dry and wet ingredients. First, sift together your dry ingredients—this typically includes all-purpose flour, baking soda, baking powder, and salt. Sifting not only removes lumps but also aerates the flour, leading to a lighter texture in your cookie.
When combining wet and dry ingredients, add the dry mixture to the wet mixture in increments. Start with one-third of the dry ingredients, folding them into the wet mixture using a spatula. This gentle folding motion helps to prevent overmixing and ensures that the flour is incorporated without developing the gluten too much. Continue adding the dry ingredients in batches until everything is just combined. A few flour streaks are acceptable; overmixing at this stage can lead to a tough cookie.
Folding in Add-ins
Now it’s time to fold in your chocolate chips and chopped hazelnuts. This step is crucial for evenly distributing these delicious add-ins throughout the batter. Use a spatula to gently lift and turn the batter over itself, ensuring that the chocolate and hazelnuts are evenly dispersed. The key here is to be gentle; overmixing can lead to a dense cookie.
To ensure even distribution, you can also sprinkle the chocolate chips and hazelnuts in as you fold in the last of the dry ingredients. This will help them integrate into the batter more uniformly.
Preparing the Skillet
Choosing the right skillet is important for achieving that perfect cookie. A cast-iron skillet is ideal due to its ability to retain heat evenly, which contributes to a perfectly baked cookie. Before adding your batter, make sure the skillet is well greased—this will prevent sticking and allow for easy removal once the cookie has cooled.
Once greased, scoop your cookie dough into the skillet. Using a spatula, spread the dough evenly across the bottom of the skillet. Aim for a uniform thickness to ensure even baking. If you want a thicker cookie, you can mound the dough slightly in the center; it will spread during baking.
Baking the Cookie
Preheat your oven to 350°F (175°C) to ensure that it reaches the optimal baking temperature before you place your cookie inside. Bake your Chocolate Hazelnut Skillet Cookie for approximately 25-30 minutes. Keep an eye on it during the last few minutes of baking. You’ll want to look for a golden-brown edge with a soft center. A toothpick inserted in the center should come out with a few moist crumbs but not wet batter.
Cooling and Serving
Once your cookie is baked to perfection, remove it from the oven and let it cool in the skillet for about 10-15 minutes. This resting time allows the cookie to set up a bit more, making it easier to slice.
For serving, consider presenting the skillet directly on the table for a rustic look. Use a large spoon or spatula to cut into wedges, allowing guests to serve themselves. To elevate the presentation, you can dust the top with powdered sugar, or add a scoop of ice cream directly on top of the warm cookie for a delightful melting effect.
The Science of Baking
Understanding the chemistry involved in baking can greatly enhance your skills.
The Maillard Reaction
One of the key processes in baking is the Maillard reaction, which occurs when sugars and proteins react under heat. This reaction not only enhances the flavor but also contributes to the color of your cookie. It’s this process that gives your Chocolate Hazelnut Skillet Cookie its beautiful golden-brown finish and rich, complex flavors.
The Role of Gluten
When flour is mixed with liquid, gluten—an elastic protein—begins to form. In cookies, a tender texture is desired, so it’s important to minimize gluten development. This is why gentle mixing techniques are recommended; they help keep the cookie soft and chewy.
The Importance of Temperature
Ingredient temperature also plays a vital role in the final product. Room temperature eggs and butter mix more easily, creating a uniform batter that bakes evenly. Cold ingredients can lead to uneven baking and a denser texture.
Creative Serving Suggestions
Elevate your Chocolate Hazelnut Skillet Cookie experience with these creative serving ideas:
Pairing with Ice Cream
A warm skillet cookie pairs beautifully with a scoop of vanilla bean ice cream. The creaminess of the ice cream contrasts perfectly with the rich chocolate and nutty flavors of the cookie. For an added twist, try pairing it with hazelnut ice cream to enhance the cookie’s natural flavors.
Drizzling Chocolate or Caramel Sauce
Take indulgence to the next level by drizzling warm chocolate or caramel sauce over the cookie before serving. This not only adds an extra layer of flavor but also creates a visually appealing presentation.
Serving with Fresh Berries
Adding a side of fresh berries can provide a refreshing contrast to the rich flavors of the cookie. Raspberries or strawberries work particularly well, offering a bright, tart flavor that balances the sweetness.
Presentation Ideas for Gatherings
For parties or family gatherings, consider serving your skillet cookie with a variety of toppings on the side. Set out bowls of whipped cream, extra chocolate chips, chopped hazelnuts, and fresh fruits, allowing guests to customize their servings. This interactive element can make dessert even more enjoyable.
Conclusion
In conclusion, the Chocolate Hazelnut Skillet Cookie is a delectable dessert that combines simple ingredients with a touch of creativity. This recipe not only offers a deliciously rich taste but also encourages experimentation in the kitchen. Whether enjoyed warm straight from the skillet or dressed up with a scoop of ice cream, this dessert is sure to impress. Embrace the joy of baking and share the love of homemade sweets with your friends and family. With each bite, you’ll experience the perfect blend of chocolate, hazelnut, and buttery goodness. Happy baking!
