Introduction
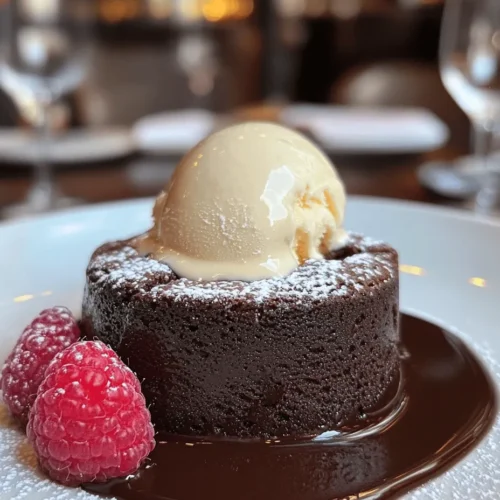
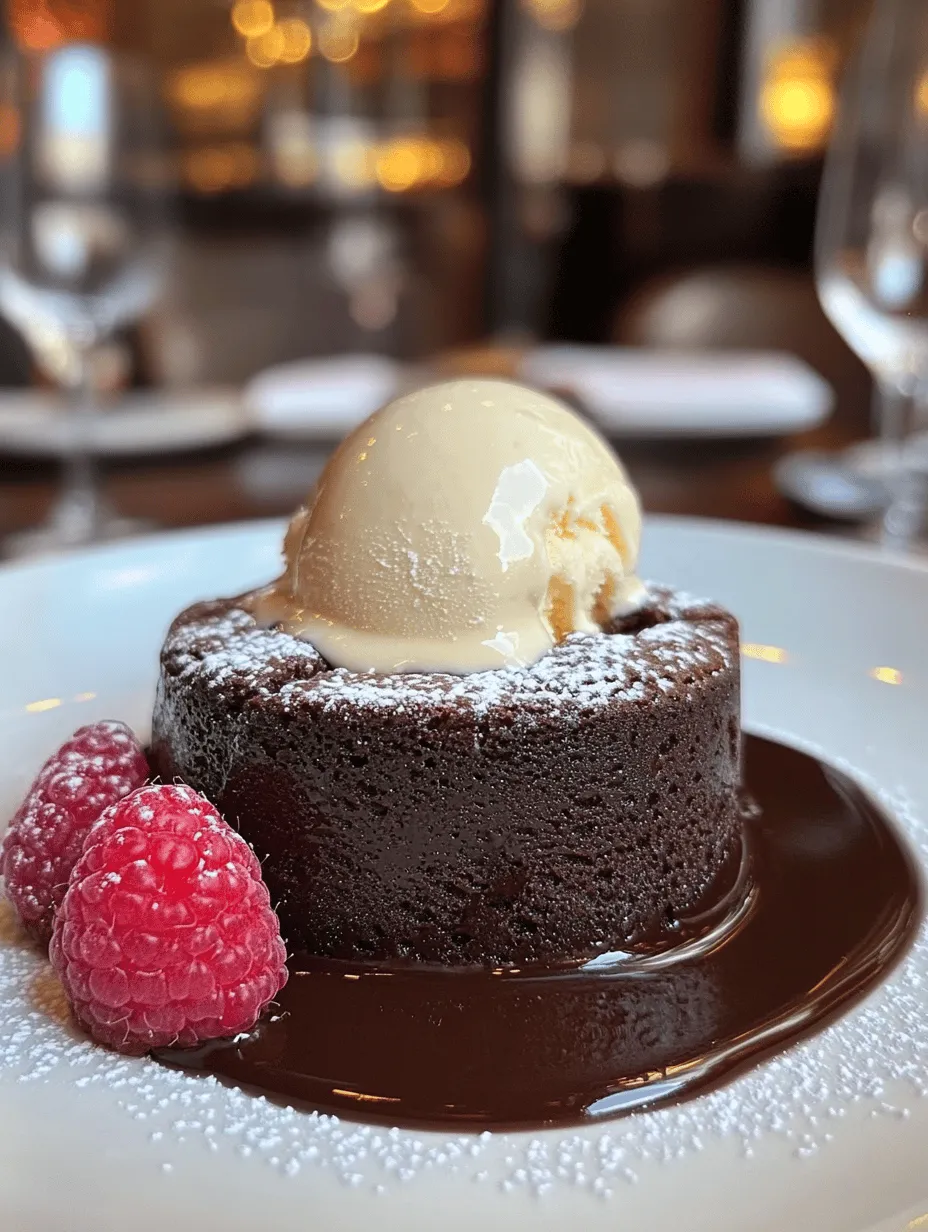
There’s something undeniably enchanting about a perfectly baked chocolate lava cake. As you cut into the warm, delicate shell, rich, molten chocolate flows out, creating a decadent pool that beckons for a scoop of vanilla ice cream or a dollop of whipped cream. This dessert is not just a treat; it’s an experience—one that evokes memories of romantic dinners, celebratory occasions, or cozy nights spent with loved ones.
Homemade desserts, like chocolate lava cake, play a pivotal role in creating memorable experiences. They allow us to connect with those we cherish, share our culinary skills, and indulge in a little self-love. The beauty of making chocolate lava cake at home is its simplicity paired with elegance. With just a few quality ingredients and straightforward steps, you can elevate any gathering or quiet evening into something truly special.
In this article, we will explore the allure of chocolate lava cake, its rich history, essential ingredients, and the step-by-step instructions to create this mouthwatering dessert in your own kitchen.
Understanding Chocolate Lava Cake
Definition and Characteristics of Chocolate Lava Cake
Chocolate lava cake, also known as molten chocolate cake or chocolate fondant, is a dessert that features a rich chocolate cake with a gooey, molten center. The exterior is typically firm, while the interior remains soft and liquid, providing a delightful contrast in textures. It is often served warm, allowing the chocolate to flow freely when cut, creating a visually stunning presentation that captivates dessert enthusiasts.
The key characteristics of a chocolate lava cake include its:
– Molten Center: The signature ooze of warm chocolate that flows out when the cake is cut.
– Delicate Shell: A light, airy outer crust that encases the rich filling.
– Quick Baking Time: Typically, these cakes are baked for only 12 to 15 minutes, making them an ideal choice for last-minute dessert preparations.
Historical Background and Origin of the Dessert
The origins of chocolate lava cake can be traced back to the late 1980s in the United States. Chef Jean-Georges Vongerichten is often credited with popularizing this delightful dessert after he accidentally undercooked a chocolate cake, resulting in a molten center. This serendipitous moment led to the creation of a dish that would soon captivate dessert menus across the globe.
The dessert gained further fame in the 1990s, becoming a staple in fine dining establishments and home kitchens alike. Its elegant appearance and rich flavor made it an instant favorite, making chocolate lava cake synonymous with indulgence and luxury.
Popular Variations and Adaptations Around the World
While the classic chocolate lava cake is beloved in its original form, various adaptations have emerged, showcasing different flavors and ingredients. Some popular variations include:
– White Chocolate Lava Cake: Made with white chocolate for a lighter twist, this version offers a sweet, creamy flavor profile that appeals to those who prefer something less intense than dark chocolate.
– Nutty Lava Cake: Incorporating nut butters like almond or hazelnut adds a delightful depth of flavor and texture to the molten center.
– Flavored Lava Cake: Infusing flavors like raspberry, espresso, or orange zest can create a unique twist on the traditional recipe, allowing for creative exploration in the kitchen.
– Gluten-Free Lava Cake: Using alternative flours like almond flour or coconut flour makes it possible for those with dietary restrictions to enjoy this delectable dessert.
These adaptations demonstrate the versatility of chocolate lava cake, allowing it to cater to a wide range of palates and preferences.
Essential Ingredients for Chocolate Lava Cake
To create a perfect chocolate lava cake, it’s crucial to understand the role of each ingredient. Quality matters, and every component contributes to the overall texture and flavor of the dessert. Below is a detailed overview of the key ingredients used in this recipe:
Unsalted Butter
The foundation of any good cake, unsalted butter is essential for achieving the right texture and flavor. Using high-quality butter ensures a rich taste. It’s important to allow the butter to come to room temperature to facilitate easy blending with the sugar, ensuring a smooth batter. Unsalted butter is recommended to give you better control over the salt content in the recipe.
Semi-Sweet Chocolate Chips
Chocolate is the star ingredient of this dessert, and using the right type is crucial. Semi-sweet chocolate chips offer a perfect balance of sweetness and richness. Brands like Ghirardelli, Guittard, or Callebaut are excellent choices known for their high cocoa content and smooth melting properties. For a more intense flavor, consider using dark chocolate with a cocoa percentage of 60% or higher.
Powdered Sugar
Also known as confectioners’ sugar, powdered sugar is used to sweeten the batter while contributing to the cake’s light texture. It dissolves easily, preventing any gritty texture in the final product. The fine powder also helps achieve a glossy finish, making your lava cake visually appealing.
Eggs and Egg Yolks
Eggs play a pivotal role in creating the lava effect. The combination of whole eggs and additional egg yolks contributes to a rich, custard-like consistency in the center while providing structure to the cake. The proteins in the eggs help the cake rise and maintain its shape during baking. For best results, use large eggs at room temperature.
Vanilla Extract
Adding vanilla extract enhances the overall flavor profile of the dessert. It provides warmth and depth, beautifully complementing the chocolate. Opt for pure vanilla extract over imitation for a more authentic taste.
All-Purpose Flour
All-purpose flour is used to give structure to the cake while balancing its richness. The right amount ensures that the dessert retains its gooey center without being overly dense. It’s important not to overmix the batter after adding the flour, as this can lead to a tougher texture.
Salt
A pinch of salt is essential for flavor enhancement. It helps to elevate the sweetness of the chocolate and balances the richness of the cake. Salt acts as a flavor enhancer, bringing out the best in each ingredient.
Cocoa Powder
Cocoa powder is often used to dust the ramekins, preventing the cakes from sticking and enhancing the chocolate flavor. Make sure to use unsweetened cocoa powder for the best results. It provides an additional layer of chocolate taste without adding extra sweetness.
Optional Garnishes
While the chocolate lava cake is delicious on its own, garnishes can elevate its presentation and flavor. Some popular options include:
– Fresh Berries: Strawberries, raspberries, or blueberries add a refreshing contrast to the rich chocolate.
– Whipped Cream: A dollop of lightly sweetened whipped cream creates a creamy pairing and enhances the indulgence.
– Ice Cream: Vanilla or coffee ice cream makes for a classic accompaniment, melting slightly into the warm chocolate.
– Mint Leaves: A sprig of fresh mint adds a pop of color and a hint of freshness.
These garnishes not only enhance the visual appeal of the dessert but also complement its rich flavors, making the chocolate lava cake a truly memorable experience.
Step-by-Step Instructions for Making Chocolate Lava Cake
Now that you have a solid understanding of the ingredients, let’s dive into the step-by-step instructions for making a decadent chocolate lava cake. Follow these guidelines to ensure your dessert turns out perfect every time:
Step 1: Preheat the Oven
Preheat your oven to 425°F (220°C). This high temperature is essential for achieving the perfect balance between a firm exterior and a molten interior.
Step 2: Prepare the Ramekins
Greasing the ramekins is crucial to prevent the cakes from sticking. Use unsalted butter to coat the insides of each ramekin thoroughly. Then, dust with cocoa powder, shaking out any excess. This step will ensure that your cakes release easily, maintaining their shape.
Step 3: Melt the Butter and Chocolate
In a heatproof bowl, combine the unsalted butter and semi-sweet chocolate chips. Set the bowl over a pot of simmering water (double boiler method), stirring frequently until melted and smooth. Alternatively, you can melt the butter and chocolate in the microwave in short bursts, stirring in between to prevent overheating.
Step 4: Whisk in Sugar and Eggs
Once the chocolate mixture has cooled slightly, whisk in the powdered sugar until well combined. Next, add the eggs and egg yolks, mixing until the batter is smooth and glossy. Incorporating the eggs thoroughly is essential for achieving the desired texture.
Step 5: Add Vanilla and Flour
Stir in the vanilla extract, followed by the all-purpose flour and a pinch of salt. Mix gently until just combined—be careful not to overmix, as this can lead to a denser texture.
Step 6: Fill the Ramekins
Divide the batter evenly among the prepared ramekins, filling each about two-thirds full. This allows space for the cakes to rise without overflowing during baking.
Step 7: Bake
Place the filled ramekins on a baking sheet and transfer them to your preheated oven. Bake for 12 to 14 minutes, or until the edges are set but the center is still soft. Keep a close eye on the cakes to ensure they don’t overbake, as this will result in a less gooey center.
Step 8: Cool Slightly
Once baked, remove the ramekins from the oven and let them cool for about 1 minute. This brief resting period makes it easier to release the cakes from the ramekins without breaking apart.
Step 9: Unmold and Serve
Carefully run a knife around the edges of the ramekins to loosen the cakes. Invert each ramekin onto a plate and gently lift it off, allowing the cake to fall onto the plate. Serve immediately while still warm, garnished with your choice of optional toppings.
With these steps, you’ll be well on your way to creating a stunning chocolate lava cake that will impress your family and friends. The combination of rich chocolate and molten goodness is sure to satisfy any sweet tooth! As you embark on this culinary adventure, prepare to indulge in one of the most beloved desserts in the world.
Detailed Preparation Process
Creating the perfect chocolate lava cake requires precision, patience, and a touch of culinary artistry. Below, we will explore each step in detail to ensure your lava cake turns out flawlessly every time.
Preheating the Oven: Importance of Temperature Accuracy
Before you start mixing your ingredients, it’s crucial to preheat your oven to 425°F (220°C). Preheating is not merely a suggestion; it’s an essential step in baking, especially for a dish like lava cake that relies on precise timing and temperature. An accurately preheated oven ensures even cooking and helps achieve that gooey center that everyone loves. Use an oven thermometer to verify the temperature, as some ovens may display inaccurate readings.
Greasing and Preparing Ramekins: Techniques for Optimal Baking
Next, prepare your ramekins to prevent the cake from sticking. Generously grease each ramekin with unsalted butter, making sure to cover the bottom and sides thoroughly. After greasing, dust the inside of each ramekin with cocoa powder instead of flour. This not only adds a rich chocolate flavor but also creates a non-stick surface that is essential for the easy release of your lava cakes. Tap out any excess cocoa powder to avoid clumping at the bottom.
Melting Chocolate and Butter: Tips for Perfect Consistency
Now, let’s move on to melting the chocolate and butter. Chop 6 ounces of high-quality dark chocolate into small pieces and place it into a heatproof bowl along with ½ cup (1 stick) of unsalted butter. For the best results, use a double boiler method—set the bowl over a pot of simmering water, ensuring the bottom of the bowl does not touch the water. Stir gently until both the chocolate and butter are completely melted and combined. This method provides a controlled temperature that prevents the chocolate from seizing or becoming grainy.
If you prefer using a microwave, melt the chocolate and butter in short bursts of 20 seconds, stirring in between until fully melted. Ensure you keep a close eye on it to prevent overheating.
Mixing the Batter: Importance of Not Overmixing
Once the chocolate and butter mixture is smooth, allow it to cool slightly before mixing in the remaining ingredients. In a separate bowl, whisk together 2 large eggs, 2 large egg yolks, and ½ cup of granulated sugar until the mixture is light and frothy. Gently pour the melted chocolate mixture into the egg mixture, stirring just until combined. Add ½ cup of all-purpose flour and a pinch of salt, mixing only until the flour disappears. Overmixing the batter can lead to a dense texture, which is the opposite of what we want. The key is to keep it light and airy for that perfect lava flow.
Baking Time and Temperature: Achieving the Perfect Lava Center
Pour the batter evenly into your prepared ramekins, filling them about ¾ full. Place the ramekins on a baking sheet for easy handling and to catch any drips. Bake in the preheated oven for 12 to 14 minutes. Baking time is critical; underbaking will lead to runny centers, while overbaking will result in a dry cake without the signature lava effect.
To determine if your lava cakes are ready, look for the edges that should be set while the center remains soft and slightly jiggly. The tops should also appear slightly puffed and cracked. This visual cue is crucial; if the tops are firm and dry, you’ve likely overbaked them.
Visual Cues to Look For During Baking
Keep an eye on your cakes through the oven window. As they bake, they will rise and form a slight dome. When the tops crack and the edges are firm, it’s time to take them out. If you’re unsure, remember that it’s better to err on the side of underbaking, as you can always return them to the oven for a minute or two if necessary.
Serving Suggestions and Pairings
Once your chocolate lava cakes have cooled for a couple of minutes, it’s time to serve them. Presentation can elevate this dessert to a new level.
The Role of Vanilla Ice Cream: Complementing the Warm Lava Cake
A classic accompaniment for chocolate lava cake is a scoop of vanilla ice cream. The cold, creamy texture of the ice cream contrasts beautifully with the warm, molten chocolate, creating a delightful sensory experience. The vanilla flavor also enhances the chocolate, allowing the rich taste to shine through.
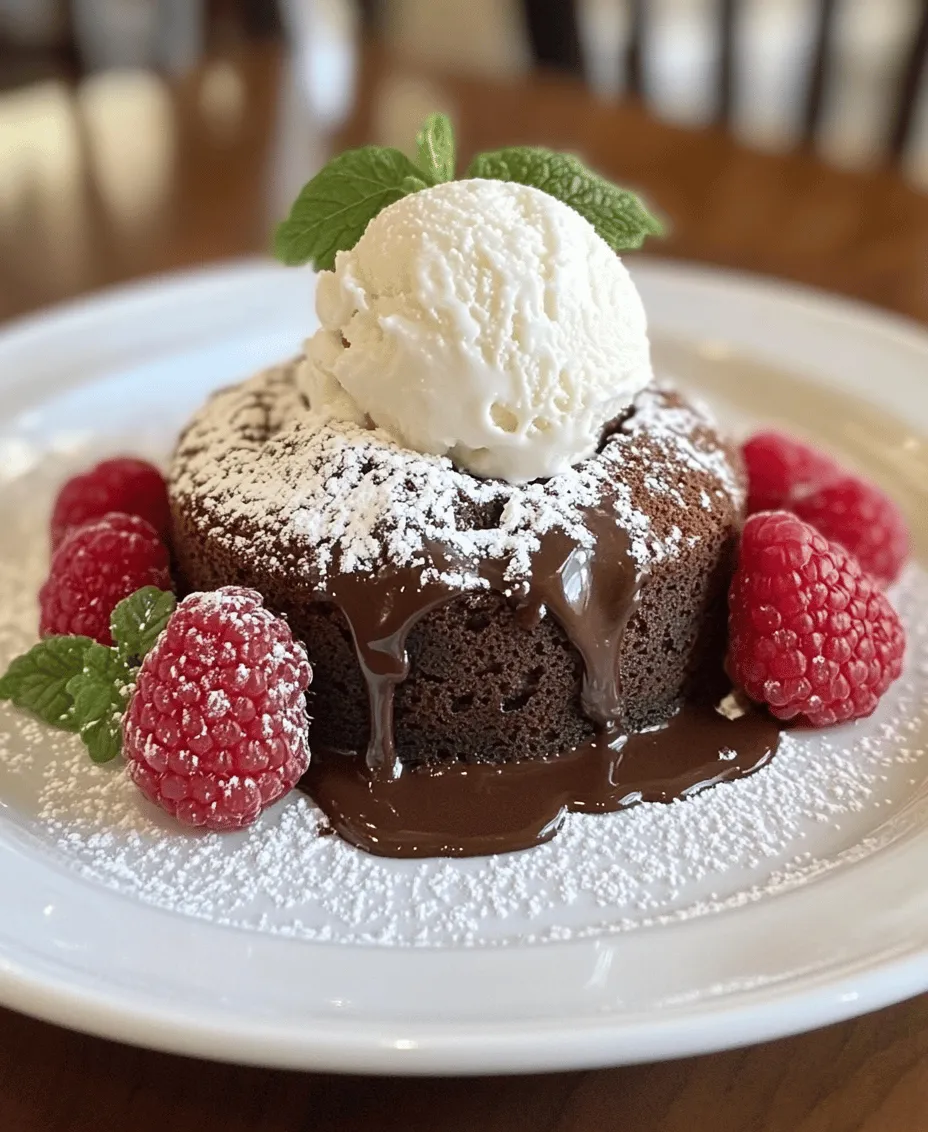
Creative Garnishing Ideas: Using Fresh Raspberries and Other Fruits
For a pop of color and freshness, consider garnishing your lava cakes with fresh berries like raspberries, strawberries, or blueberries. Their tartness complements the sweetness of the chocolate perfectly. A sprinkle of powdered sugar or a drizzle of chocolate sauce can also add an elegant touch. For a more gourmet presentation, consider using edible flowers or mint leaves for an eye-catching finish.
Presentation Tips: How to Elevate the Dessert Experience
To elevate the dessert experience, serve the lava cakes on a decorative plate. You can create a chocolate sauce drizzle on the plate for an artistic flair. Alternatively, placing the ramekin atop a small circular piece of parchment paper can create a clean and sophisticated look. Remember, the first impression matters, so take a moment to make your dessert visually appealing.
Common Mistakes to Avoid
Even the most seasoned bakers can make mistakes. Here are some common pitfalls to watch out for when making chocolate lava cake.
Overbaking the Lava Cake: Identifying the Perfect Baking Time
One of the most common errors is overbaking. Remember, the key to a perfect lava cake is a gooey center. If you notice that your cakes are puffed up and firm to the touch, they’ve likely been in the oven too long. Always rely on visual cues and adjust your baking time as needed.
Not Using Enough Cocoa Powder for Greasing: Risks of Sticking
Another mistake is not using enough cocoa powder to grease the ramekins. If you skip this step or skimp on the cocoa, you risk the cakes sticking to the sides, making them difficult to remove. Ensure a generous coating for a smooth release.
Substituting Ingredients: When is it Okay, and When to Stick to the Recipe?
While creativity in the kitchen is essential, be cautious about substituting key ingredients in this recipe. For instance, replacing the chocolate with a lower-quality product can lead to a less flavorful cake. However, you can experiment with different types of chocolate (dark, semi-sweet, or even white) for unique flavors. Just remember that consistency is crucial to achieving the desired lava effect.
Storage and Reheating Tips
If you find yourself with leftover lava cakes, proper storage and reheating are vital for preserving their deliciousness.
How to Store Leftover Lava Cakes: Best Practices for Maintaining Texture
To store leftover lava cakes, allow them to cool completely before placing them in an airtight container. You can keep them at room temperature for a day or refrigerate them for up to three days. Avoid freezing them, as this can alter the texture and affect the gooey center.
Reheating Methods: Ensuring the Lava Center Remains Gooey
When it comes time to enjoy your leftover cakes, reheating is key. Preheat your oven to 350°F (175°C) and place the ramekins on a baking sheet. Heat for about 8-10 minutes or until warmed through. You can also use the microwave for a quicker option, but be cautious not to overheat, as this can cook the center. Heat in 10-15 second intervals until just warmed.
Conclusion
Creating a homemade chocolate lava cake is not just about indulging in a rich dessert; it’s about the joy and satisfaction of crafting something that delights the senses. The process involves careful attention to detail, from melting chocolate to perfecting the baking time.
Don’t be afraid to experiment with flavors and presentations. Try adding different spices, extracts, or even a hint of espresso to the batter. You can also play with the garnishes, using seasonal fruits or flavored sauces to give your lava cake a personal touch.
In the end, chocolate lava cake remains a timeless dessert that has the power to impress friends and family alike. Its warm, gooey center and rich chocolate flavor make it a favorite for special occasions or a simple weeknight treat. As you embrace the art of baking, remember that the journey is just as satisfying as the delicious outcome. Enjoy every moment in the kitchen, and let your creativity shine!