Introduction
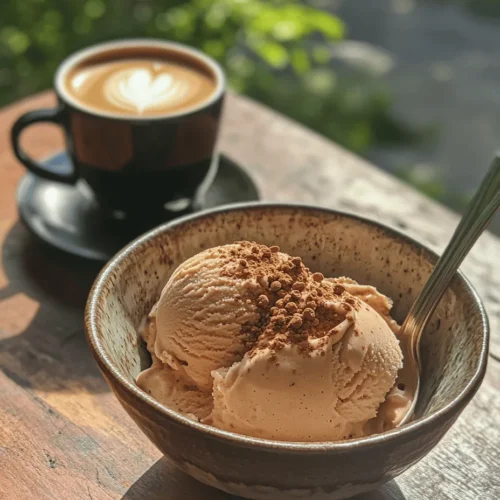
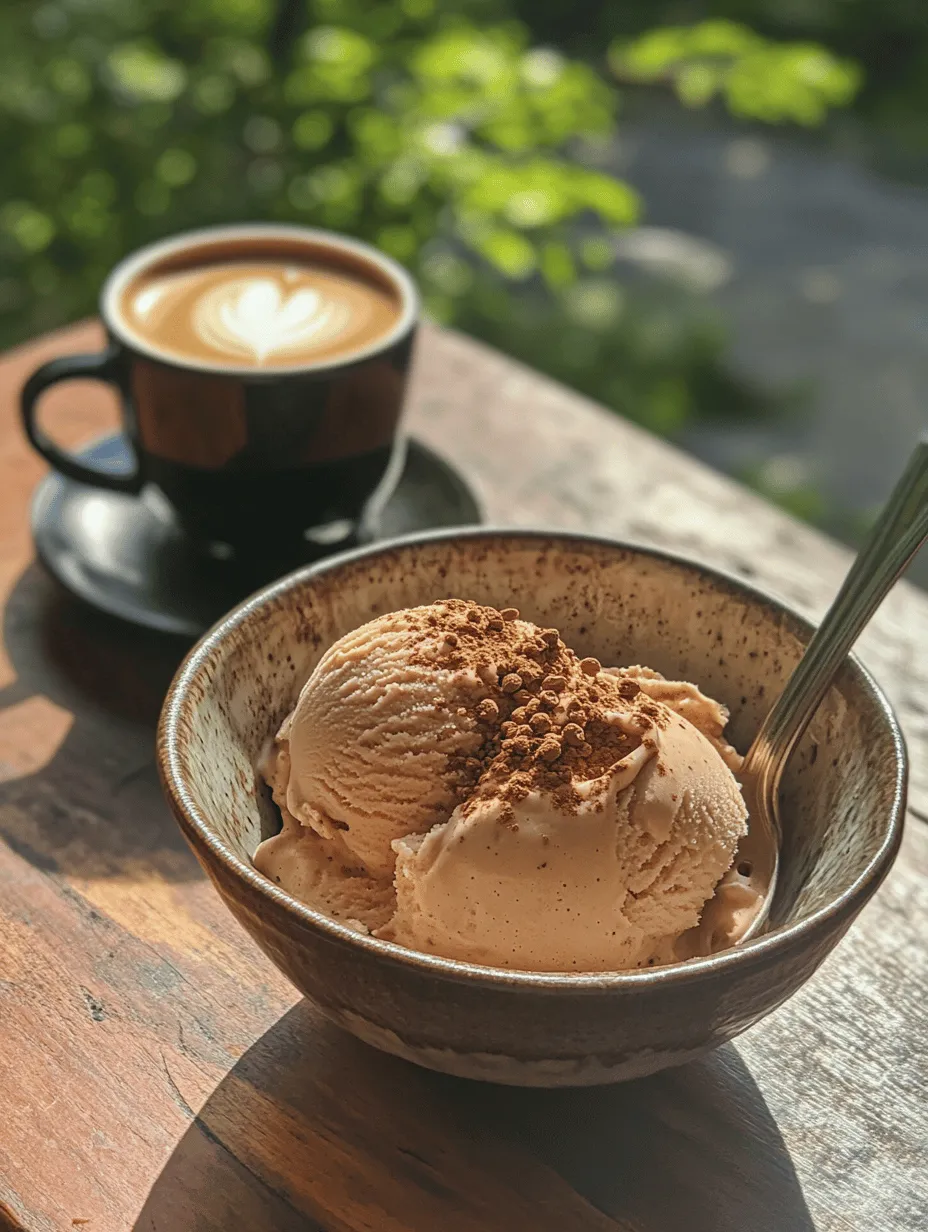
The warm months of summer often bring a yearning for something cool and refreshing, and what better way to indulge than with a scoop of homemade ice cream? There’s something uniquely satisfying about crafting your own frozen treats from scratch, especially when you can customize flavors that excite your palate. Among the many delightful options, creamy dreamy coffee ice cream stands out as a luxurious choice, perfect for coffee lovers and dessert enthusiasts alike.
Homemade ice cream allows you to control every element of the ingredient list, ensuring that you are using only the finest components for maximum flavor. The richness of the cream, the boldness of the coffee, and just the right amount of sweetness come together to create a treat that is not only decadent but also deeply satisfying. This recipe for creamy dreamy coffee ice cream promises to elevate your dessert game, providing a rich, velvety experience that is sure to impress family and friends during those warm evenings.
As you embark on this culinary adventure, you’ll learn how to blend quality ingredients into a luscious mixture that can be churned into creamy perfection. So, let’s dive into the essential components of this delightful coffee ice cream and get started on your journey to homemade bliss!
Understanding the Ingredients
To create the perfect creamy dreamy coffee ice cream, it’s crucial to understand the role of each ingredient and how they contribute to the final product. Here’s a breakdown:
Heavy Cream
Heavy cream is the cornerstone of any great ice cream recipe. Its high fat content—typically around 36%—is what gives ice cream its rich and creamy texture. When whipped, it forms soft peaks that add air to the mixture, resulting in a light yet indulgent dessert. The creaminess it imparts is unparalleled, making it essential for achieving the luxurious mouthfeel that characterizes this coffee ice cream.
Whole Milk
While heavy cream provides richness, whole milk plays a critical role in balancing that creaminess with a lighter texture. The fats in whole milk help create a smoother consistency while also diluting the richness of the cream. This balance is vital, as it prevents the ice cream from being overly heavy, allowing each spoonful to feel indulgent yet refreshing.
Granulated Sugar
Sugar is not just a sweetener; it also contributes to the texture of the ice cream. Granulated sugar helps to inhibit the formation of ice crystals, ensuring that your final product is smooth and creamy rather than grainy. The sweetness it provides is essential to counteract the bitterness of the coffee, creating a harmonious flavor profile that is both satisfying and delightful.
Strong Brewed Coffee
The star of this recipe is, of course, the strong brewed coffee. The flavor of the coffee is what will define this ice cream, so it’s important to choose a coffee that you genuinely enjoy. A bold roast will yield a more pronounced coffee flavor, while a lighter roast may result in a milder taste. The amount of coffee used can be adjusted according to your preference, but be prepared for the rich aroma and taste that will permeate your ice cream.
Vanilla Extract
While coffee is the primary flavor, vanilla extract elevates the overall flavor profile of the ice cream. It adds depth and complexity, enhancing the sweetness and creating a more rounded taste. The warm, aromatic notes of vanilla pair beautifully with coffee, making it a perfect complement in this recipe.
Instant Coffee Granules
For the true coffee enthusiasts, adding instant coffee granules can amplify the coffee flavor in your ice cream. These granules dissolve easily and provide an additional layer of richness, making each bite a coffee lover’s dream. They can be adjusted based on how strong you want the coffee flavor to be, allowing you to personalize your dessert to your liking.
Pinch of Salt
A pinch of salt may seem trivial, but it plays a crucial role in flavor enhancement. Salt helps to balance the sweetness and brings out the natural flavors of the ingredients. It enhances the overall taste, ensuring that the coffee and cream are at the forefront of your ice cream experience.
With a clear understanding of the ingredients, you can appreciate how each component contributes to the final product. Now, let’s move on to the step-by-step instructions for preparing your creamy dreamy coffee ice cream.
Step-by-Step Instructions
Creating your own creamy dreamy coffee ice cream is a straightforward process that involves a few simple steps. Follow along to ensure your ice cream turns out perfectly!
Step 1: Gather Your Ingredients
Before you begin, make sure you have all your ingredients measured and ready to go. This will streamline the process and prevent any last-minute scrambles. Here’s what you’ll need:
– 2 cups heavy cream
– 1 cup whole milk
– 3/4 cup granulated sugar
– 1 cup strong brewed coffee, cooled
– 1 teaspoon pure vanilla extract
– 1-2 tablespoons instant coffee granules (optional, to taste)
– A pinch of salt
Step 2: Whisk the Cream and Milk
In a large mixing bowl, combine the heavy cream and whole milk. Use a whisk to blend them together until well mixed. This step is crucial as it ensures that the cream and milk are fully incorporated before adding any additional ingredients. The creaminess of the mixture will set the foundation for your ice cream.
Step 3: Add the Sugar and Salt
To the cream and milk mixture, add the granulated sugar and a pinch of salt. Whisk vigorously until the sugar is completely dissolved. This step is essential, as undissolved sugar can lead to a grainy texture in your ice cream. Take your time to ensure that there are no sugar granules left; this will help create a silky smooth ice cream base.
Step 4: Incorporate the Brewed Coffee and Vanilla
Once the sugar has dissolved, pour in the cooled strong brewed coffee and the vanilla extract. Continue whisking until everything is fully combined. The coffee will impart its rich flavor, and the vanilla will add that essential layer of complexity. If you’re using instant coffee granules, add them at this stage as well. Whisk until they are fully dissolved into the mixture.
Step 5: Churn the Mixture
Now that your ice cream base is ready, it’s time to churn it! Pour the mixture into your ice cream maker, following the manufacturer’s instructions. Churning incorporates air into the ice cream, creating a light and creamy texture. Depending on your ice cream maker, this process usually takes about 20-30 minutes.
While churning, keep an eye on the mixture as it thickens. You want to achieve a soft-serve consistency, which means it should be thick enough to hold its shape but still soft enough to scoop easily.
Step 6: Freeze the Ice Cream
Once your ice cream has reached the desired consistency, transfer it to an airtight container. Smooth the top with a spatula and press a piece of parchment paper directly against the surface to prevent ice crystals from forming. Seal the container with a lid and place it in the freezer for at least 4 hours or until it is firm.
This final freezing step is essential as it allows the flavors to meld together and the texture to solidify. When you’re ready to indulge, simply scoop out a serving and enjoy the rich, creamy goodness of your homemade coffee ice cream.
As you can see, making creamy dreamy coffee ice cream at home is a delightful process that rewards you with a delicious treat. With the right ingredients and proper techniques, you can create a dessert that rivals your favorite coffee shop creations. Stay tuned for more tips and tricks to ensure your ice cream turns out perfectly every time!
Proper Storage Methods for Homemade Ice Cream
Once you’ve created your delicious creamy dreamy coffee ice cream, proper storage is essential for preserving its texture and flavor. Homemade ice cream lacks the preservatives found in store-bought varieties, making it more susceptible to freezer burn and changes in texture over time. Here are some effective storage methods to keep your ice cream fresh and enjoyable:
1. Use an Airtight Container: After churning, transfer your ice cream to a clean, airtight container. This will help prevent the formation of ice crystals and protect it from absorbing any odors in the freezer. Opt for containers made from materials that insulate well, such as glass or thick plastic.
2. Cover the Surface: For added protection, press a piece of parchment paper or plastic wrap directly onto the surface of the ice cream before sealing the container. This will minimize air exposure and further reduce the risk of ice crystal formation.
3. Maintain Freezer Temperature: Store your ice cream in the coldest part of the freezer, ideally at a temperature of 0°F (-18°C) or lower. Avoid storing it in the door, as this area experiences fluctuating temperatures each time the door opens.
4. Serve with Care: When serving, use a clean scoop or spoon to avoid introducing bacteria that could spoil your ice cream. If you notice any ice crystals forming on the surface, don’t worry; they can be scraped away gently.
By following these storage tips, you can enjoy your homemade coffee ice cream for up to two weeks, maintaining its creamy consistency and delightful flavor.
The Science Behind Ice Cream Making
Creating the perfect ice cream is as much an art as it is a science. Understanding the underlying processes can enhance your ice cream-making skills and lead to a superior product.
Explanation of the Churning Process and How It Affects Texture
Churning is a crucial step in ice cream production. As the mixture is churned, it incorporates air, which plays a vital role in determining the final texture. The process also helps break up ice crystals as they form, leading to a smoother and creamier consistency. Ideally, the ice cream should be churned until it reaches a soft, fluffy texture before being transferred to the freezer for further hardening. The goal is to achieve a balance between air incorporation and the mixture’s density, creating a light yet rich ice cream.
Importance of Temperature in Achieving the Perfect Scoop
Temperature control is critical in ice cream making. The ice cream base must be chilled adequately before churning to ensure efficient freezing and smooth texture. Once you remove the ice cream from the freezer, allow it to sit at room temperature for a few minutes to soften slightly. This softening period makes it easier to scoop without compromising the ice cream’s integrity.
How Air Incorporation Impacts Creaminess and Volume
The incorporation of air during churning, known as overrun, is what gives ice cream its lightness and volume. A well-aerated ice cream will yield a creamier mouthfeel, while insufficient air can result in a dense and heavy product. Striking the right balance is key; too much air can make the ice cream feel insubstantial, while too little can lead to an overly hard texture. Aim for a happy medium, and your ice cream will be a delightful treat.
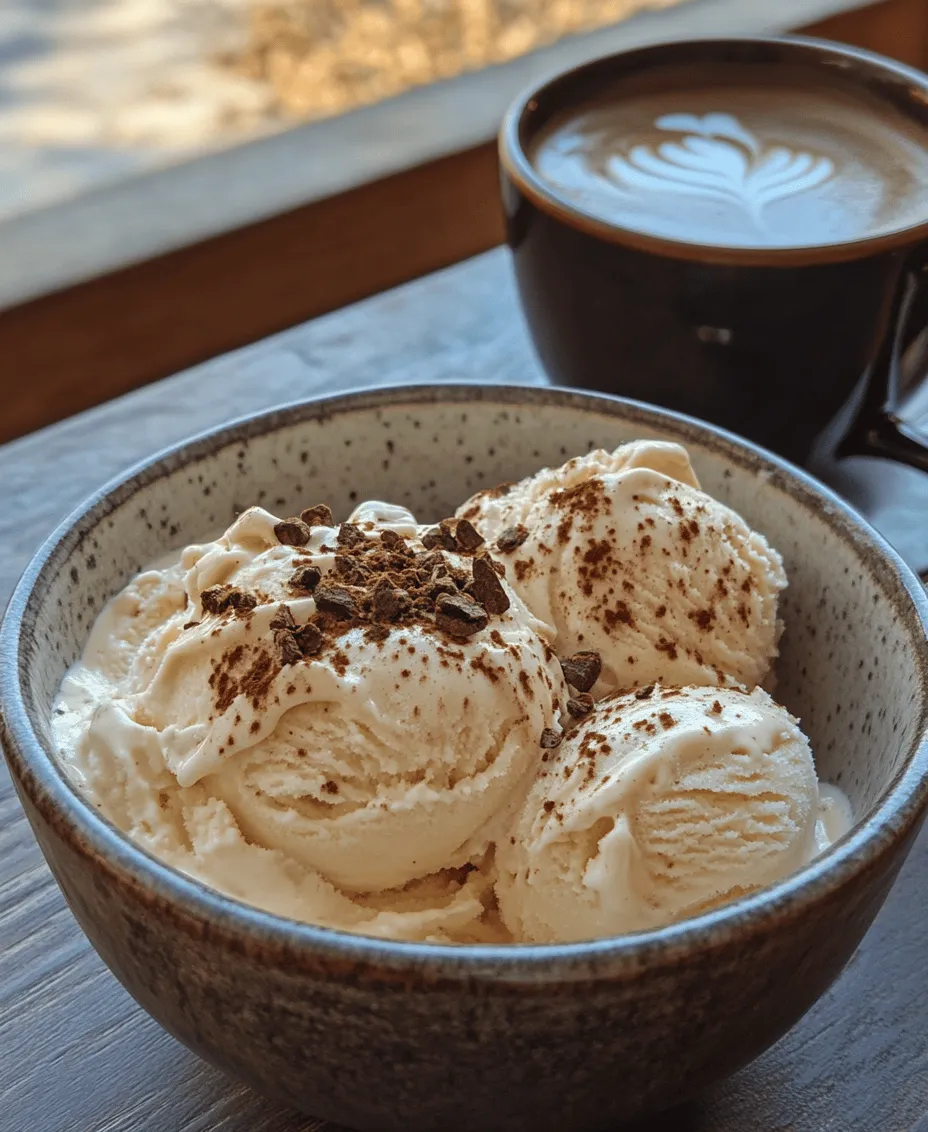
Flavor Variations and Customizations
One of the best aspects of making homemade coffee ice cream is the ability to customize flavors to suit your preferences. Here are some exciting variations and mix-ins to consider:
Exploring Different Coffee Types and Blends for Flavor Variation
The coffee you choose will significantly affect the flavor profile of your ice cream. Experiment with different types of coffee beans, such as espresso, cold brew, or even flavored coffees like hazelnut or mocha. You can also try blending different coffee roasts for a unique taste experience. The key is to choose high-quality coffee, as its flavor will be prominent in the final product.
Adding Mix-Ins: Chocolate Chips, Nuts, or Caramel Swirls
To add texture and complexity to your ice cream, consider incorporating mix-ins. Some popular options include:
– Chocolate Chips: Whether you prefer dark, milk, or white chocolate, adding chocolate chips or chunks will enhance the richness of your coffee ice cream.
– Nuts: Chopped walnuts, almonds, or hazelnuts can introduce a delightful crunch and complement the coffee flavor beautifully.
– Caramel Swirls: For a sweet contrast, drizzle in some caramel sauce during the final minutes of churning or fold it in after churning for a decadent swirl.
Suggestions for Pairing Flavors: Desserts and Toppings
Your coffee ice cream can be the star of the show or a complementary element in a dessert. Consider pairing it with:
– Cakes: Serve a scoop alongside a slice of chocolate cake or a rich tiramisu for a delightful dessert experience.
– Pies: Coffee ice cream pairs beautifully with desserts like pecan pie or apple pie, enhancing their flavors.
– Pastries: Enjoy your ice cream with croissants, Danish, or even a warm brownie.
Serving Suggestions
Presenting your creamy dreamy coffee ice cream can elevate the experience for you and your guests. Here are some creative serving ideas:
Creative Ways to Serve Coffee Ice Cream
– Ice Cream Sundae: Create a coffee ice cream sundae by layering your ice cream in a glass with whipped cream, chocolate sauce, and crushed nuts for a visually appealing dessert.
– Affogato: For a simple yet elegant dessert, pour a shot of hot espresso over a scoop of coffee ice cream. The combination of hot and cold creates a delightful contrast.
– Milkshake: Blend a generous scoop of your coffee ice cream with milk for a luxurious milkshake, perfect for hot summer days.
Pairing with Desserts: Cakes, Pies, or Pastries
Your coffee ice cream can enhance many desserts. Try serving it with:
– Chocolate Cake: The richness of chocolate cake combined with the coffee flavor creates a heavenly pairing.
– Fruit Pies: The acidity of fruit pies, such as cherry or berry, balances beautifully with the creamy sweetness of coffee ice cream.
– Pastries: Flaky pastries, especially those filled with chocolate or nuts, pair wonderfully, making for an indulgent treat.
Suggested Toppings: Whipped Cream, Chocolate Sauce, or Sprinkles
Enhance your ice cream with delicious toppings:
– Whipped Cream: A dollop of freshly whipped cream adds lightness and an elegant touch.
– Chocolate Sauce: Drizzle over your ice cream for an indulgent chocolatey finish.
– Sprinkles: A sprinkle of colorful toppings can make your dessert visually appealing and fun.
Nutritional Information
When indulging in homemade coffee ice cream, it’s helpful to consider the nutritional profile. Here’s a breakdown of the average calories and nutritional values per serving:
– Calories: Approximately 200-300 calories per serving, depending on the specific ingredients used.
– Fat: 10-15 grams of fat, primarily from the cream and egg yolks.
– Sugar: Around 15-20 grams of sugar, which can vary based on added sweeteners or mix-ins.
– Protein: 3-4 grams of protein from the cream and eggs.
While coffee ice cream is certainly a treat, it’s important to balance indulgence with nutrition. Enjoying it in moderation allows you to savor the flavors without compromising your health goals.
Conclusion
Homemade creamy dreamy coffee ice cream is not just a dessert; it’s an experience that brings joy and satisfaction. The process of making it from scratch, experimenting with flavors, and sharing it with loved ones creates lasting memories. Whether you choose to indulge in a classic version or explore exciting variations, the joy of crafting your ice cream is unparalleled.
So, roll up your sleeves, gather your ingredients, and let your creativity flow in the kitchen. As you explore different flavors and combinations, remember that the key to great ice cream is not just the recipe but the love and passion you pour into it. Enjoy the delightful process of making and sharing your homemade treats, and savor every creamy scoop of your coffee ice cream.