Introduction
Chickpeas, also known as garbanzo beans, have become a staple in kitchens around the world. This humble legume is not only incredibly versatile but also a powerhouse of nutrition. Whether you’re looking for a crunchy snack, a hearty addition to salads, or a key ingredient in savory stews, chickpeas have got you covered. The recipe for Deliciously Crunchy Chickpeas is a delightful way to enjoy this nutritious legume as a satisfying snack.
In today’s health-conscious world, there’s a growing trend towards homemade snacks, and for good reason. Homemade snacks allow you to control the ingredients, ensuring that you enjoy something wholesome and free from preservatives and artificial additives. Plus, making your own snacks can be a fun and creative endeavor! By preparing Deliciously Crunchy Chickpeas at home, you can indulge in a snack that is not only delicious but also packed with health benefits.
Join us as we embark on an engaging exploration of this recipe that promises to elevate your snacking experience. With a few simple ingredients and straightforward steps, you’ll be well on your way to creating a crunchy treat that both you and your family will love.
Understanding Chickpeas
Nutritional Benefits of Chickpeas
Chickpeas are not just a trendy food item; they are a nutritional powerhouse that offers a plethora of health benefits. First and foremost, chickpeas are high in protein and dietary fiber, making them an excellent option for those looking to maintain a balanced diet. A single serving of chickpeas can provide a significant amount of protein, which is essential for muscle repair and growth.
Additionally, chickpeas are rich in vitamins and minerals, including folate, iron, magnesium, and B vitamins. These nutrients are crucial for maintaining overall health, supporting energy levels, and promoting good digestion. What’s more, chickpeas are low in calories, making them a perfect guilt-free snack choice that can help curb hunger without compromising your dietary goals.
Versatility in Cooking
One of the most appealing aspects of chickpeas is their versatility in cooking. They can be incorporated into a variety of dishes, ranging from salads and soups to hearty stews and hummus. In vegetarian and vegan diets, chickpeas serve as a vital source of protein, helping to create fulfilling meals that satisfy even the heartiest of appetites. The ability to adapt to various flavors and cuisines has contributed to their popularity in many cultures around the world.
Whether you’re tossing them into a salad for added texture, blending them into a creamy dip, or roasting them for a crunchy snack, chickpeas can easily fit into any meal plan. Their neutral flavor allows them to absorb spices and seasonings beautifully, making them a blank canvas for culinary creativity.
Ingredients Breakdown
Essential Ingredients for Crunchy Chickpeas
When it comes to creating Deliciously Crunchy Chickpeas, the ingredient list is simple yet effective. Let’s break down the essential components that make this snack a winner.
– Chickpeas: As the star ingredient, chickpeas are the foundation of this recipe. For best results, you can use canned chickpeas, which are convenient and already cooked. Just remember to rinse and drain them thoroughly to remove excess salt and starch. Alternatively, if you’re feeling adventurous, you can use dried chickpeas, which will need to be soaked and cooked before roasting.
– Olive Oil: This ingredient plays a crucial role in achieving the perfect crunch. Olive oil not only enhances the flavor but also helps to crisp up the chickpeas during baking. It’s important to use a good quality extra virgin olive oil to maximize the taste and health benefits.
Spices and Seasonings
The magic of Deliciously Crunchy Chickpeas lies in the spices and seasonings that elevate their flavor profile. Here’s a closer look at the key spices you’ll want to include:
– Garlic Powder: This aromatic seasoning provides depth and enhances the overall flavor of the chickpeas. Its robust profile complements the nuttiness of the legumes beautifully.
– Smoked Paprika: For a touch of smokiness, smoked paprika is a fantastic addition. It adds a warm, rich flavor that pairs well with the chickpeas and makes them even more irresistible.
– Cumin: Known for its earthy notes, cumin introduces a warm, slightly nutty flavor that balances the other spices. This spice is commonly used in various cuisines, making it a familiar and comforting addition.
– Salt and Black Pepper: These classic seasonings are essential for bringing all the flavors together. A pinch of salt enhances the natural taste of the chickpeas, while black pepper adds a subtle kick.
– Nutritional Yeast: For those looking to add a cheesy flavor without dairy, nutritional yeast is an excellent choice. It brings a savory, umami taste that makes the chickpeas even more delicious.
– Cayenne Pepper: If you enjoy a bit of heat, cayenne pepper is a fantastic optional ingredient. Adjust the amount according to your spice preference for a delightful kick.
Optional Ingredients and Customization
One of the best things about this recipe is its flexibility. While the above spices create a well-rounded flavor, feel free to get creative! You can experiment with other spices such as turmeric for an anti-inflammatory boost, or even add a sprinkle of cinnamon for a unique, sweet twist.
Consider using different types of oil, like avocado oil or coconut oil, to impart distinct flavors. You can also add a drizzle of balsamic vinegar or a splash of lemon juice for an extra zing before roasting. The options for customization are endless, allowing you to tailor the recipe to suit your taste preferences perfectly.
Preparation Steps
Preheating the Oven
Before diving into the preparation of your chickpeas, the first step is to preheat the oven to 400°F (200°C). Preheating is crucial for optimal baking, as it ensures that the chickpeas cook evenly and develop that desired crunchy texture. An adequately heated oven will help achieve a perfect golden-brown color and maximize crispness.
Preparing the Chickpeas
Once the oven is preheated, it’s time to prepare the chickpeas. If you’re using canned chickpeas, start by opening the can and draining the liquid. Rinse them under cold water in a colander to remove any excess sodium and starch. This rinse helps in achieving a crispier texture when baked.
If you’re opting for dried chickpeas, make sure to soak them overnight in water. After soaking, drain and rinse them, then boil them in fresh water until they are tender but not mushy. Once cooked, drain them well, and you’re ready to proceed with the recipe.
Next, it’s important to remove the skins from the chickpeas. This step is optional, but peeling the skins can make a significant difference in achieving that delightful crunch. To do this, simply pinch each chickpea between your fingers; the skin should slip off easily. This extra step not only enhances the texture but also allows for better seasoning adherence.
Now that your chickpeas are prepped and ready to go, you’ll combine them with olive oil and your chosen spices to create a flavorful coating. The next steps will guide you through the process of mixing, seasoning, and baking your chickpeas to perfection.
Stay tuned for the detailed instructions that will help you turn these simple ingredients into a crunchy, flavorful snack that’s bound to become a favorite in your household!
Techniques for Drying Chickpeas Effectively
To achieve the ultimate crunchiness in your chickpeas, the first step is to ensure they are properly dried. If you’re using canned chickpeas, drain them and rinse under cold water to remove excess sodium and preservatives. After rinsing, pat them dry with a clean kitchen towel or paper towels. The goal is to remove as much moisture as possible, as any lingering water can prevent the chickpeas from crisping up during baking.
For dried chickpeas, the same principle applies. After soaking them overnight, be sure to drain and rinse thoroughly. You can speed up the drying process by spreading the chickpeas out on a clean kitchen towel or a baking sheet and allowing them to sit for about 30 minutes. The drier the chickpeas, the crunchier they will become once baked.
Seasoning Techniques
Seasoning your chickpeas is where you can get creative and tailor the flavors to your liking. A simple blend of olive oil, salt, and pepper can enhance their natural nuttiness, but the possibilities are endless. Popular options include garlic powder, paprika, cumin, or even a touch of cayenne for heat.
To achieve an even coating of seasoning, it’s essential to toss the chickpeas in a bowl with the oil and spices before baking. Start with about one tablespoon of olive oil for one can of chickpeas. This amount will help the spices adhere to the chickpeas without making them greasy. Use your hands to mix the chickpeas, ensuring each one is thoroughly coated with the oil and spices.
Importance of Tossing and Mixing
Tossing and mixing the chickpeas not only helps distribute the seasoning evenly, but it also ensures that they cook uniformly. If some chickpeas are left unseasoned or clumped together, they may not crisp up as well as the others. Once you have a good mixture, spread them out in a single layer on your baking sheet.
Arranging for Baking
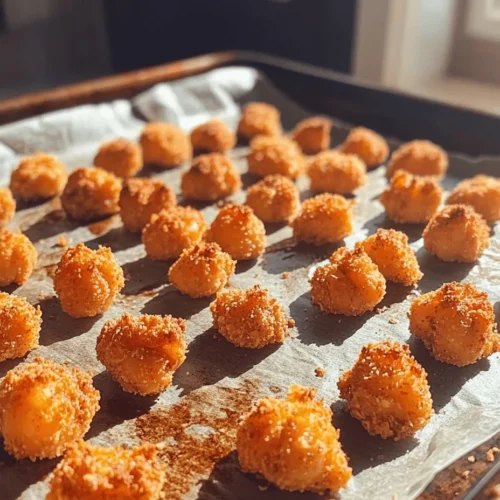
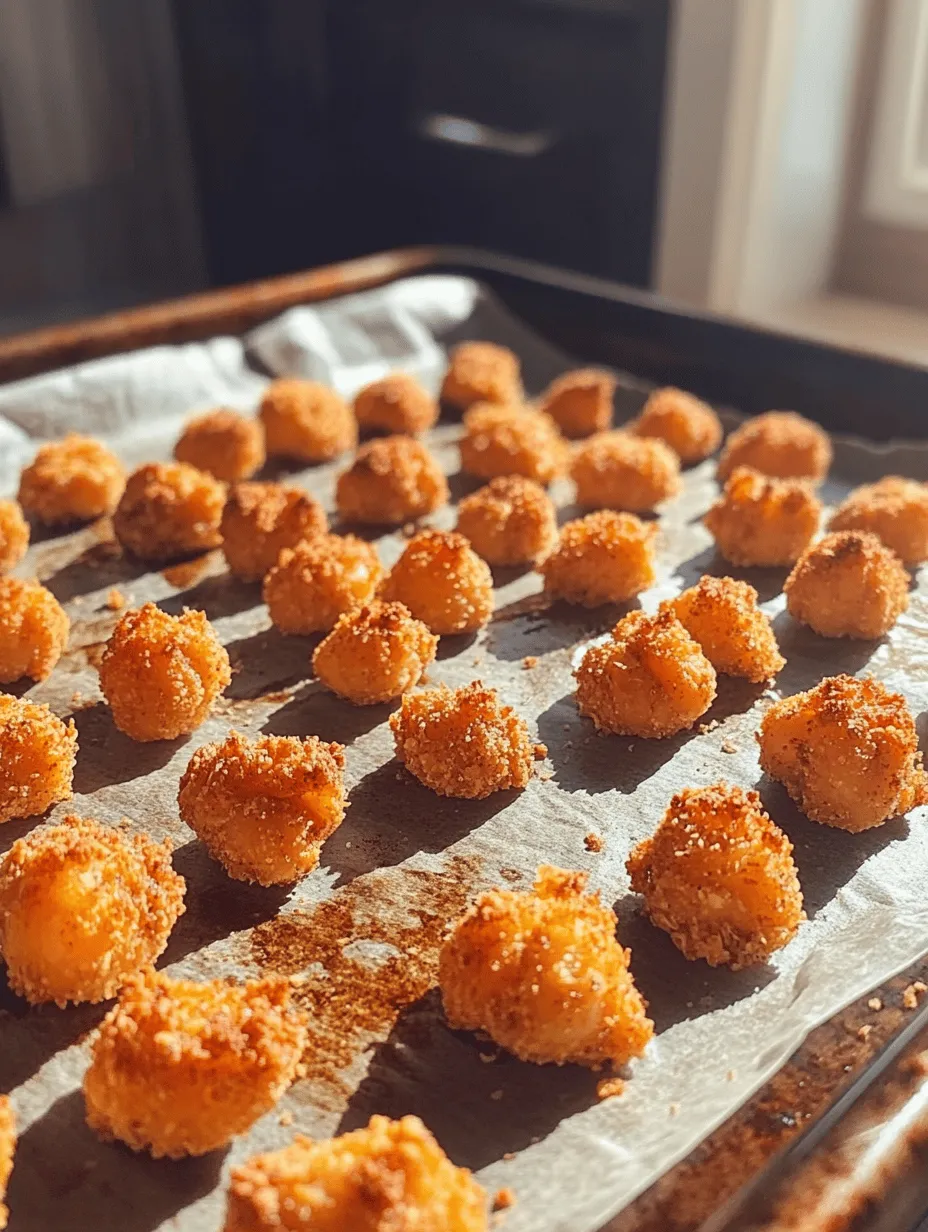
Proper arrangement of the chickpeas on your baking sheet is crucial for achieving that delightful crunch. Spread the chickpeas evenly across the sheet, ensuring they are not overlapping. This allows for maximum airflow around each chickpea, which is essential for even cooking and crisping.
Using parchment paper is highly recommended for easy cleanup. It prevents sticking and allows for even heat distribution, which is vital for achieving an optimal texture. Simply line your baking sheet with parchment before arranging your chickpeas.
The Baking Process
Baking Time and Temperature
Preheat your oven to 400°F (200°C). This temperature is ideal for roasting chickpeas because it allows them to cook through while developing a crispy exterior. Generally, you will want to bake the chickpeas for about 25 to 30 minutes. However, the exact time may vary depending on your oven and the moisture content of the chickpeas.
Monitoring the Chickpeas
To ensure even cooking, it’s important to stir the chickpeas halfway through the baking time. This will help them brown uniformly and prevent any from burning. Use a spatula to turn them gently, taking care not to crush them.
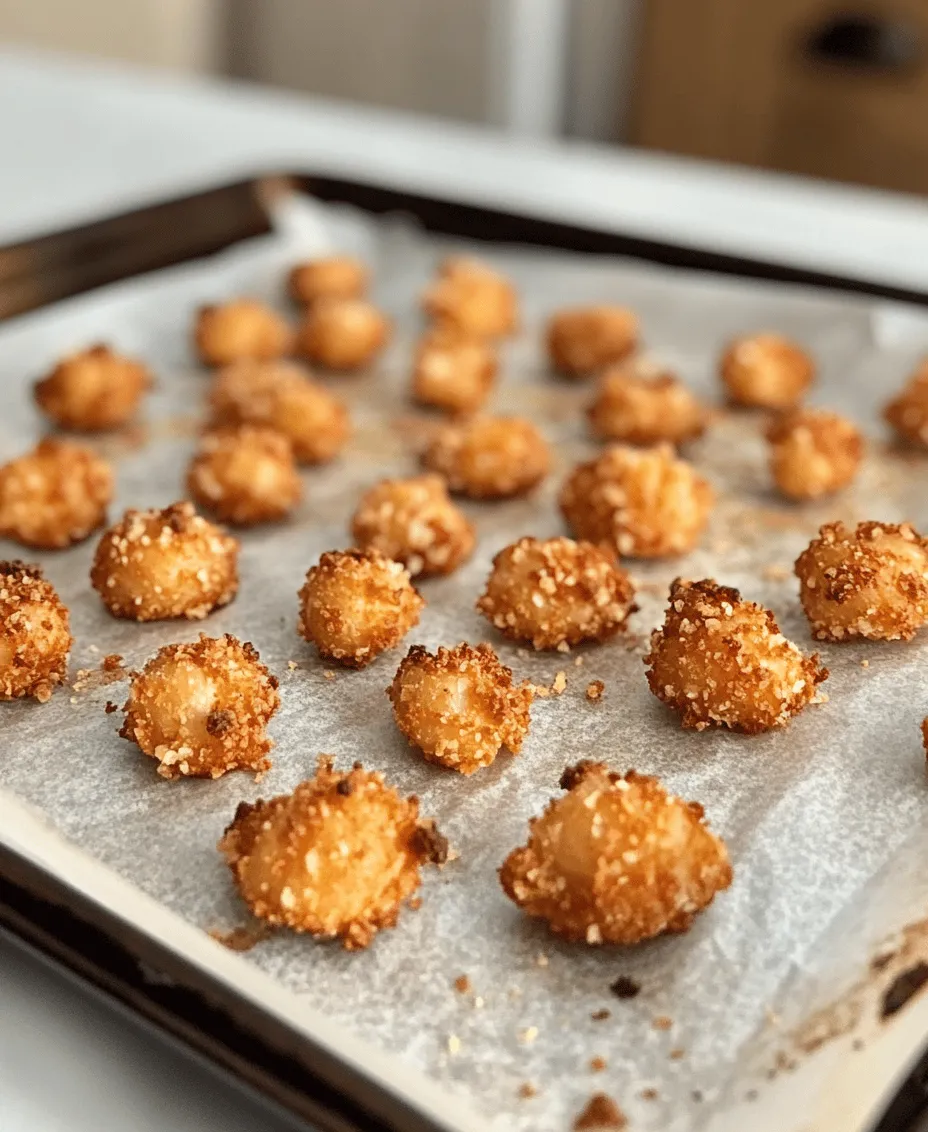
Watch for visual cues to determine when your chickpeas are done. They should be golden brown and have a crispy texture. If they still feel slightly soft when you take them out, you can return them to the oven for an additional 5-10 minutes, but be cautious not to overbake them, as they can become hard.
Cooling and Serving Suggestions
Cooling Tips
Once your chickpeas are out of the oven, allow them to cool on the baking sheet for at least 10 minutes. This cooling period is crucial for achieving maximum crunchiness. As they cool, they will continue to harden, giving you that satisfying crunch you desire.
Enjoying Your Chickpeas
Your deliciously crunchy chickpeas can be enjoyed in various ways. Serve them as a healthy snack on their own or as a topping for salads, adding texture and flavor to your greens. They also make for an excellent party appetizer; simply place them in a bowl and watch them disappear!
For added variety, consider seasoning them with different spice blends for different occasions. A hint of cinnamon and sugar can transform them into a sweet treat, while a blend of herbs can make them a perfect complement to Mediterranean dishes.
Storage Recommendations
To keep your chickpeas crunchy, store them in an airtight container at room temperature. If stored properly, they can last for up to a week. Avoid refrigerating them, as this may introduce moisture and affect their texture. If you notice any softness after a few days, you can pop them back in the oven for a few minutes to restore their crunch.
Health Benefits of Homemade Snacks
Comparison of Homemade vs. Store-Bought Snacks
Making your own chickpeas at home not only guarantees freshness but also allows you to control the ingredients. Store-bought snacks often contain preservatives, unhealthy additives, and excessive sodium, which are easily avoided when you make your snacks from scratch.
The Emotional and Psychological Benefits of Healthy Snacking
Creating your own snacks can also have a positive impact on your mood. The act of cooking can be therapeutic, and savoring a healthy, homemade snack can lead to feelings of satisfaction and accomplishment. Engaging in mindful cooking practices allows you to appreciate the ingredients and the time spent preparing your food.
Healthy snacking encourages you to be more conscious of your food choices, promoting a better relationship with what you eat. By choosing whole, natural ingredients, you can enjoy the benefits of nourishing your body while indulging in a satisfying treat.
Conclusion
Deliciously crunchy chickpeas are not just a snack; they are a versatile addition to your culinary repertoire. With their satisfying crunch and the ability to be customized with various seasonings, they can be enjoyed in numerous ways. Making your own snacks at home opens the door to healthier eating habits, allowing you to control the ingredients and flavors while avoiding preservatives.
I encourage you to try making these crunchy chickpeas at home. Not only will you enjoy the process, but you’ll also be rewarded with a delicious and nutritious snack that you can feel good about. Embrace the joy of homemade snacks and savor the delightful crunch of your own deliciously crunchy chickpeas!