Introduction
If you’re searching for a dessert that combines fun, nostalgia, and simplicity, look no further than the delightful No Bake Dirt Cake. This whimsical treat is a favorite at parties, family gatherings, and children’s birthday celebrations, making it a go-to dessert for anyone looking to add a touch of creativity to their culinary repertoire. The appeal of Dirt Cake lies not only in its playful presentation but also in its effortless preparation and the use of ingredients that are typically found in most kitchens.
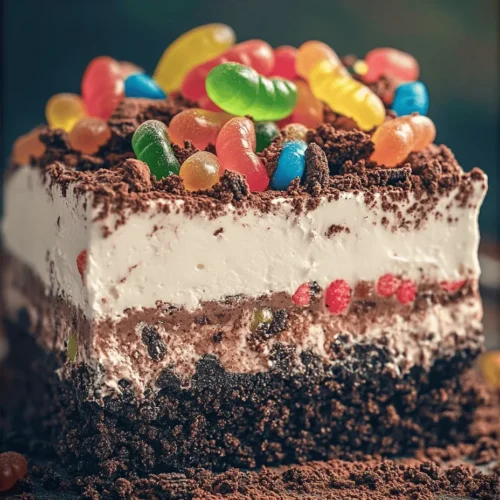
Imagine digging into a dessert that looks like a pot of dirt but tastes like a rich blend of chocolatey goodness, creamy textures, and just the right amount of sweetness. The No Bake Dirt Cake is not just a dessert; it’s an experience that invites everyone to enjoy the process of assembling and serving it. Whether you’re a seasoned baker or a novice in the kitchen, this recipe promises to be an enjoyable adventure that requires minimal time and effort.
Understanding the No Bake Concept
In the world of desserts, “no bake” recipes are a category that has gained immense popularity, primarily due to their convenience and versatility. But what does “no bake” actually mean? Simply put, it refers to recipes that do not require any baking in the oven. Instead, these desserts are typically assembled and chilled in the refrigerator until they reach the desired consistency.
The benefits of no bake desserts are numerous. For starters, they save time, allowing you to whip up a delicious treat in a fraction of the time it would take to bake something from scratch. Additionally, no bake recipes are perfect for hot weather; they keep your kitchen cool and comfortable since there’s no need to preheat the oven. This makes them an excellent choice for summer parties or any occasion where you want to minimize kitchen heat.
Another fantastic aspect of no bake recipes is their versatility. You can customize them to suit your taste preferences or dietary needs, swapping out ingredients as necessary to create your own unique twist on a classic dessert. The No Bake Dirt Cake exemplifies this adaptability, allowing you to experiment with different flavors, textures, and presentation styles while still delivering the same fun experience.
Ingredient Breakdown
To create the delightful No Bake Dirt Cake, you will need a few key ingredients that each contribute to its signature flavor and texture. Let’s break down these ingredients to understand their roles in this delicious dessert:
Oreo Cookies
Oreo cookies are the star of the show when it comes to the crust of the Dirt Cake. Their rich chocolate flavor and crunchy texture provide the perfect foundation for this dessert. Not only do they add a delightful taste, but their deep color also contributes to the visual appeal of the finished product, mimicking the look of dirt. The combination of cocoa and cream filling creates a flavor profile that is beloved by many, making Oreos a perfect choice for this fun treat.
Unsalted Butter
Using unsalted butter is crucial in achieving the right balance of flavor in your Dirt Cake. Salted butter can alter the taste and may lead to an overly salty crust. Unsalted butter allows for better control over the flavor profile while ensuring that the sweetness of the dessert shines through. It also enhances the overall richness of the crust, helping to bind the crushed Oreo cookies together perfectly.
Cream Cheese
Cream cheese plays a vital role in creating the luxurious, creamy layer that gives the Dirt Cake its signature texture. This ingredient adds richness and depth of flavor, making the dessert more indulgent. When combined with powdered sugar and vanilla extract, cream cheese transforms into a luscious filling that complements the chocolatey crust beautifully.
Powdered Sugar
In this recipe, powdered sugar is preferred over granulated sugar due to its fine texture, which helps achieve a smooth and creamy consistency in the filling. It dissolves easily and blends seamlessly with the cream cheese, creating a velvety layer that enhances the overall mouthfeel of the dessert. Additionally, the sweetness of powdered sugar helps balance the flavors, making each bite irresistibly delicious.
Vanilla Extract
Vanilla extract is a staple in many dessert recipes, and for good reason. In the No Bake Dirt Cake, it enhances the overall flavor, adding a warm and inviting aroma that complements the chocolate and cream cheese. The subtle notes of vanilla elevate the dessert, making it more complex and enjoyable.
Whipped Topping
Whipped topping, whether store-bought or homemade, adds a light, airy texture to the Dirt Cake. It helps to balance the richness of the cream cheese and creates a more layered experience as you dig into the dessert. If you prefer a homemade version, you can whip heavy cream with a bit of powdered sugar to achieve a similar effect. Whipped topping is essential for achieving that fluffy, dessert-like quality that makes the Dirt Cake so delightful.
Chocolate Pudding
Chocolate pudding is another key ingredient that contributes to the overall taste and texture of the Dirt Cake. Using prepared chocolate pudding ensures that the dessert has a rich and creamy layer that pairs perfectly with the other components. It adds depth and enhances the chocolate flavor, making the cake even more indulgent.
Gummy Worms
No Dirt Cake would be complete without the addition of gummy worms! These playful candies serve as the perfect decoration, adding a fun factor and visual appeal that delights both children and adults alike. They not only enhance the presentation but also contribute to the whimsical spirit of this dessert.
Sweetened Cocoa Powder or Crushed Cookies
To create the signature “dirt” effect, sweetened cocoa powder or crushed cookies are sprinkled on top of the Dirt Cake. This finishing touch not only adds visual interest but also reinforces the chocolatey theme of the dessert. The cocoa powder or crushed cookies provide a delightful crunch that contrasts with the creamy layers beneath, making each bite a delightful experience.
Step-by-Step Instructions
Now that we’ve covered the essential ingredients, let’s dive into the preparation of the No Bake Dirt Cake. This section will guide you through the initial steps to create this fun and delicious dessert.
Preparing the Oreo Crust
1. Crushing the Cookies: Start by taking a package of Oreo cookies and placing them in a food processor. Pulse the cookies until they are finely crushed, resembling sand. If you don’t have a food processor, you can place the cookies in a zip-top bag and crush them with a rolling pin or your hands. Aim for a consistent crumb size to ensure even distribution in the crust.
2. Mixing with Butter: In a medium bowl, melt ½ cup of unsalted butter in the microwave or on the stovetop until completely liquid. Once melted, pour the crushed Oreo cookies into the bowl with the butter. Stir the mixture until the cookies are fully coated in butter, creating a moist and crumbly texture.
3. Achieving the Ideal Texture: The crust mixture should hold together when pressed. If it feels too dry, add a small amount of melted butter until you reach the desired consistency.
4. Pressing into the Pan: Next, prepare a 9×13 inch baking dish or a similar-sized container. Pour the Oreo mixture into the dish, spreading it evenly across the bottom. Use the back of a measuring cup or your fingers to firmly press the crust down, ensuring it is compact and even. This step is essential to prevent the crust from crumbling when you serve the cake later.
Creating the Cream Cheese Layer
1. Mixing the Cream Cheese: In a large mixing bowl, take 8 ounces of softened cream cheese. Using a hand mixer or a stand mixer, beat the cream cheese until it is smooth and creamy, ensuring there are no lumps.
2. Adding the Sugar and Vanilla: Gradually add 1 cup of powdered sugar to the cream cheese, mixing until well combined. Then, add 1 teaspoon of vanilla extract and continue to mix until the mixture is smooth and fluffy.
3. Incorporating Whipped Topping: Gently fold in 8 ounces of whipped topping into the cream cheese mixture. Use a spatula to combine, being careful not to deflate the whipped topping too much. The goal is to achieve a light and airy filling that will sit atop the Oreo crust.
4. Layering the Filling: Once the cream cheese mixture is ready, pour it over the prepared Oreo crust, spreading it evenly with a spatula.
By following these steps, you’ll have successfully created the base layers of your No Bake Dirt Cake. The next section of the recipe will cover how to layer the chocolate pudding and finish the dessert with its fun decorations. Stay tuned for the continuation of this delightful recipe!
Importance of Folding in Whipped Topping Correctly for a Light Texture
The key to a successful no-bake dirt cake lies in the texture, which is largely influenced by how you incorporate the whipped topping. Folding is a gentle technique that helps maintain the airiness of the whipped cream, ensuring that your cake remains light and fluffy. To achieve the perfect consistency, scoop a portion of the whipped topping into the pudding mixture and gently stir using a spatula. This method allows you to blend the two without deflating the whipped cream. Repeat this process, gradually incorporating the remaining whipped topping, until the mixture is uniform in color and texture.
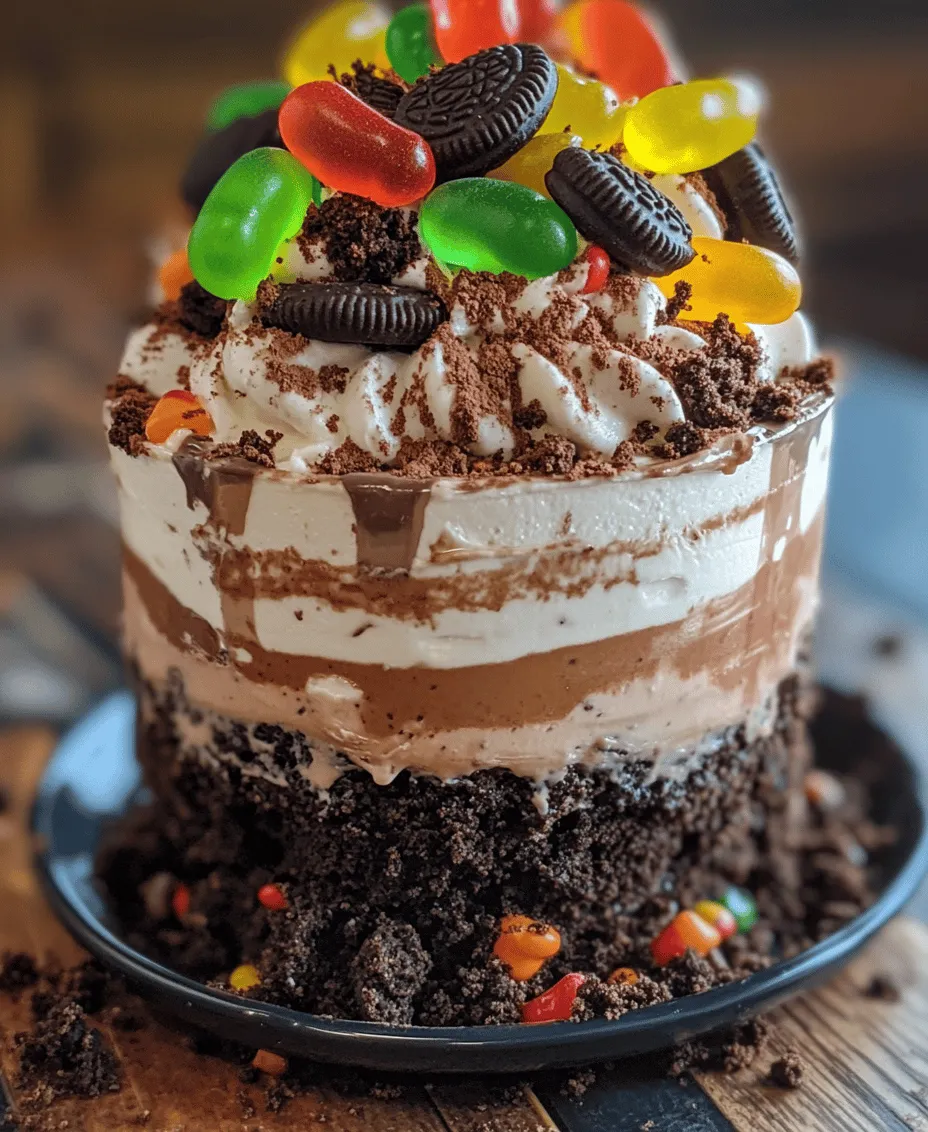
Assembling the Layers
Once your pudding and whipped topping mixture is prepared, it’s time to assemble the layers of the dirt cake. Proper layering is critical to avoid mixing the distinct layers, which contributes to the cake’s visual appeal and taste.
1. Layering Techniques: Begin by selecting a clear dish or trifle bowl to showcase the layers. Start with a layer of the pudding mixture at the bottom. Use the back of a spoon or a spatula to spread it evenly across the base. To prevent the layers from mixing, it’s essential to work gently and avoid pressing down too hard.
2. Spreading Pudding Evenly: After laying down the first layer of pudding, let it settle before adding the next layer. This can be done by allowing the pudding to sit for a few moments, giving it a chance to firm up slightly. When adding the next layer, a clean, smooth motion will help maintain the separation between layers.
Adding the Dirt Layer
Now comes the fun part—adding the “dirt” layer that gives this cake its unique look.
1. Techniques for Sprinkling Cocoa Powder or Crushed Cookies: If you’re using cocoa powder, sift it lightly over the top layer of pudding to create an even coating. For crushed cookies, you can use a food processor to achieve a fine consistency. This will help mimic the look of dirt. Sprinkle it generously to cover the surface completely.
2. Visual Tips for Achieving a Realistic ‘Dirt’ Look: To enhance the ‘dirt’ effect, consider mixing in some cookie crumbs with the cocoa powder. This adds texture and depth, making the cake visually appealing and realistic. You can also use crushed chocolate sandwich cookies for a darker, more authentic dirt look.
Garnishing with Gummy Worms
The finishing touch to your delightful no-bake dirt cake is the garnish. Gummy worms add a playful element that makes this dessert perfect for children and adults alike.
1. Suggestions for Creatively Placing Gummy Worms: When placing the gummy worms, allow some to partially hang over the edge of the dish, as if they’re crawling out of the dirt. This playful presentation can elicit smiles and excitement from your guests. Consider varying the placement to create a whimsical effect.
Chilling and Serving the Dirt Cake
Chilling is an essential step in the preparation of your dirt cake, as it allows the flavors to meld together and the cake to set properly.
1. Importance of Chilling for Flavor Melding and Texture Setting: Refrigeration lets the layers firm up, ensuring that each slice holds its shape when served. This also enhances the flavor, allowing the ingredients to blend beautifully.
2. Recommendations for Refrigeration Time: Ideally, you should chill the dirt cake for at least 4 hours, but overnight is even better. This extended chilling time not only improves the texture but also deepens the flavors.
3. Serving Suggestions: When it’s time to serve, cut the cake into portions using a sharp knife. For a fun presentation, you can serve slices in individual cups, topped with additional gummy worms or a sprinkle of cookie crumbs for added flair.
Nutritional Information
Understanding the nutritional content of your dirt cake can help you make informed choices, especially when serving guests with dietary restrictions.
1. Overview of Nutritional Aspects: A typical serving of dirt cake contains calories from the pudding, whipped topping, and cookies. While it’s a delicious treat, it’s also important to be mindful of portion sizes.
2. Discussion of Potential Allergens: Common allergens in this recipe include dairy and gluten. For those with gluten sensitivities, opt for gluten-free cookies. If you need a dairy-free alternative, consider using coconut whipped cream and dairy-free pudding.
Variations and Customizations
One of the best aspects of the dirt cake is its versatility. Here are some ideas for variations and customizations:
1. Suggestions for Alternative Flavors: You can easily swap out the vanilla pudding for chocolate or butterscotch pudding to create a different flavor profile. Additionally, try using different types of cookies, such as Oreos, chocolate wafer cookies, or even graham crackers.
2. Ideas for Seasonal Decorations or Themes: For a festive twist, consider incorporating seasonal themes. For Halloween, add candy pumpkins or skeletons. For a birthday party, use colorful sprinkles or themed gummy candies.
3. Discussing How to Make This Dessert Vegan or Gluten-Free: To make a vegan version, replace the pudding with a plant-based alternative and use dairy-free whipped topping. For gluten-free options, ensure that all cookies and pudding mixes are certified gluten-free.
Common Questions and Troubleshooting
As with any recipe, you may encounter some common questions or issues. Here are some troubleshooting tips:
1. Addressing Frequently Asked Questions: If your crust isn’t setting as expected, it may need additional chilling time. Ensure that the mixture is well-combined and that you’re not overloading the layers.
2. Solutions to Common Issues: If you notice that your layers are mixing, try using a spatula to gently guide the layers apart during assembly. If your dirt layer appears too light, add more crushed cookies or cocoa powder for a richer look.
Conclusion
The Delightful No Bake Dirt Cake is not just a dessert; it’s an experience that brings joy and creativity to any gathering. Its ease of preparation makes it a favorite for family-friendly occasions, and the potential for customization ensures it can fit any theme or preference.
Whether you’re enjoying it at a birthday party, a picnic, or simply as a sweet treat at home, this dessert is sure to impress. So grab your ingredients, get the family involved, and create something delightful that everyone will love!