
Introduction
There’s something undeniably nostalgic about Hostess Cupcakes that evokes fond childhood memories for many. The rich chocolate cake, the creamy filling, and the glossy ganache topping create a delightful treat that has been a favorite for generations. However, while the store-bought version has its charm, making these delicious cupcakes at home brings a new level of joy and satisfaction. Not only do homemade treats allow for a personal touch, but they also ensure freshness and quality ingredients, making every bite even more delightful.
In this article, we’ll explore an easy recipe for homemade Hostess Cupcakes that captures all the beloved flavors of the classic treat. This straightforward approach is perfect for both novice bakers and seasoned chefs alike, ensuring that anyone can create these delightful cupcakes with ease. Prepare to impress your family and friends with your baking skills while enjoying the process of creating something special from scratch.
Understanding Hostess Cupcakes
A Brief History of Hostess Cupcakes
Hostess Cupcakes first graced store shelves in the 1910s and quickly became an American icon. Created by the Continental Baking Company, these snacks were initially marketed as a convenient, on-the-go dessert that appealed to busy families. Their unique combination of chocolate cake, creamy filling, and signature swirl on top became an instant hit, leading to a lasting cultural impact that resonates even today.
Over the years, Hostess Cupcakes have evolved, but their essence remains unchanged. They symbolize comfort and indulgence—a sweet escape from the everyday hustle and bustle. Whether enjoyed as an after-school snack or a late-night treat, these cupcakes have a special place in many hearts.
Store-Bought vs. Homemade
While there’s no denying the convenience of grabbing a box of Hostess Cupcakes from the grocery store, making them at home elevates the experience. Homemade cupcakes offer several advantages that store-bought versions simply cannot match. First and foremost, you have complete control over the ingredients, allowing you to select high-quality materials and customize flavors to suit your preferences.
Additionally, homemade cupcakes tend to be fresher and more flavorful. The simple act of baking in your own kitchen brings out the aromas and tastes that can only come from freshly baked goods. And let’s not forget the joy of sharing homemade treats with family and friends; the love and effort put into each cupcake can be tasted in every bite.
Ingredients Breakdown
To create your own Easy Homemade Hostess Cupcakes, it’s essential to understand the role of each ingredient in achieving the perfect texture and flavor. Here is a breakdown of the key ingredients you’ll need:
Flour
Flour forms the backbone of the cupcake, providing structure and density. For this recipe, all-purpose flour works best, as it strikes a perfect balance between tenderness and strength, ensuring your cupcakes rise beautifully without being overly dense.
Sugar
Sugar is not just a sweetener; it plays a crucial role in moisture retention. It helps create a tender crumb and enhances the overall flavor profile of the cupcake. Using granulated sugar will provide the sweetness needed, while also helping to caramelize the edges during baking for a lovely golden hue.
Cocoa Powder
The star of the show in any chocolate cupcake recipe is cocoa powder. It imparts a deep, rich chocolate flavor that is essential for replicating the classic Hostess Cupcake. Opt for unsweetened cocoa powder to maintain control over the sweetness of the final product.
Buttermilk
Buttermilk is a key ingredient that contributes to the cupcake’s tenderness and moisture. The acidity in buttermilk reacts with the baking soda, creating a light and fluffy texture. If you don’t have buttermilk on hand, you can easily make a substitute by mixing milk with a bit of vinegar or lemon juice.
Vegetable Oil
Using vegetable oil instead of butter in this recipe ensures maximum moisture. Oil creates a tender crumb, keeping the cupcakes soft and delicious. It also helps the cupcakes stay fresh longer, which is a significant advantage for homemade treats.
Eggs
Eggs are essential for binding the ingredients together and providing structure to the cupcakes. They also help with aeration, trapping air in the batter to create that light, fluffy texture we all love.
Chocolate Ganache
Finally, the chocolate ganache is what takes these cupcakes to the next level. It serves as a luscious topping that adds richness and visual appeal. By using high-quality chocolate and cream, you can create a decadent ganache that perfectly complements the chocolate cupcake beneath.
Step-by-Step Guide to Easy Homemade Hostess Cupcakes
Prepping the Kitchen and Tools
Before diving into the baking process, it’s crucial to prepare your kitchen and gather the necessary tools. Having everything ready will make the process smoother and more enjoyable.
1. Preheat your oven: Set your oven to 350°F (175°C) to ensure it’s at the right temperature when you’re ready to bake.
2. Gather your tools: You’ll need mixing bowls, measuring cups, a whisk or electric mixer, a cupcake pan, and cupcake liners. Make sure to have a cooling rack on hand for the baked cupcakes.
3. Room temperature ingredients: For best results, ensure that your eggs and buttermilk are at room temperature. This helps create a smoother batter and results in better texture.
Preparing the Cupcake Batter
Now it’s time to create the cupcake batter. Follow these detailed instructions for a perfect blend of flavors and textures.
1. Mix the dry ingredients: In a large mixing bowl, combine the all-purpose flour, unsweetened cocoa powder, baking soda, and salt. Whisk these together until well combined. This step ensures even distribution of the leavening agents and cocoa powder throughout the flour.
2. Combine the wet ingredients: In another bowl, whisk together the vegetable oil, granulated sugar, eggs, and buttermilk. Beat until the mixture is smooth and creamy. The oil and sugar will combine to create a mixture that looks slightly thickened.
3. Incorporate the dry ingredients: Gradually add the dry mixture to the wet ingredients, stirring gently with a spatula or wooden spoon. Mix until just combined; be careful not to overmix, as this can lead to dense cupcakes.
4. Add boiling water: Here’s the secret to achieving that moist, tender crumb: carefully stir in the boiling water. This step will thin out the batter slightly but will help create a soft texture once baked.
5. Fill the cupcake liners: Line your cupcake pan with liners and fill each cup about two-thirds full with batter. This allows room for the cupcakes to rise without overflowing.
Baking the Cupcakes
Once your batter is ready and your cupcake pan is filled, it’s time to bake!
1. Bake: Place the cupcake pan in the preheated oven and bake for 18-20 minutes. The cupcakes are done when a toothpick inserted into the center comes out clean or with a few moist crumbs attached.
2. Cool the cupcakes: After baking, remove the pan from the oven and let it cool for about 5 minutes. Then, carefully transfer the cupcakes to a cooling rack to cool completely before adding the ganache.
This initial phase of your Easy Homemade Hostess Cupcakes sets the stage for the next steps, where we will delve into creating the creamy filling and luscious ganache that will crown these delightful treats. Stay tuned for the next part of this delicious baking journey!
Optimal Baking Tips
Baking is both an art and a science, and achieving the perfect homemade Hostess Cupcakes starts with understanding your oven. Preheat your oven to 350°F (175°C) to ensure that the cupcakes rise evenly. Oven temperature can vary, so using an oven thermometer is a good practice to confirm accuracy. Once your oven is preheated, it’s time to bake. The baking time will typically range from 18 to 22 minutes, but for best results, start checking for doneness at the 18-minute mark. Insert a toothpick into the center of a cupcake; if it comes out clean or with a few moist crumbs, your cupcakes are ready.
One crucial step that’s often overlooked is allowing the cupcakes to cool completely before filling them. This is essential, as warm cupcakes can lead to a melted filling or an overly moist center. Place the baked cupcakes on a wire rack and allow them to cool for at least 30 minutes. This cooling period not only prepares your cupcakes for filling but also enhances their flavor through the resting process.
Crafting the Cream Filling
Now that your cupcakes are cool, it’s time to create the signature cream filling that makes Hostess Cupcakes so delightful. This filling is light, sweet, and creamy, providing that classic contrast to the rich chocolate cake. For the filling, you will need the following ingredients:
– 1 cup marshmallow fluff
– 1/2 cup unsalted butter, softened
– 1 cup powdered sugar
– 1 teaspoon vanilla extract
– A pinch of salt
In a mixing bowl, combine the softened butter and marshmallow fluff. Beat them together using a mixer until they are light and fluffy. Gradually add in the powdered sugar, mixing until fully incorporated. Finally, add the vanilla extract and a pinch of salt, and mix until the filling is smooth and creamy. The consistency is key: it should be thick enough to hold its shape but soft enough to pipe easily.
Tips for Achieving the Perfect Piping Consistency
Getting the right piping consistency for your filling is essential for a neat presentation. If your mixture is too thick, add a tablespoon of milk or cream to loosen it. Conversely, if it’s too runny, add a little more powdered sugar until you achieve the desired texture. Once your filling is ready, transfer it to a piping bag fitted with a round tip, which will allow you to fill the cupcakes evenly.
Filling the Cupcakes
The next step is to fill your cupcakes. Start by cutting a cone-shaped section from the top of each cupcake. To do this, use a sharp knife to make a small cut in the center of the cupcake, approximately 1 inch deep. Remove the top gently, and you’ll have a small cone of cake that can be set aside (you can eat these as a baker’s treat!). Fill the hollowed cupcake with the cream filling, ensuring that you pipe in enough to fill the cupcake generously. By using this technique, you can ensure that every bite is filled with that delicious cream.
To replace the top, simply put the cone back on the cupcake. This not only keeps the filling intact but also gives your cupcakes a lovely dome shape.
Making the Chocolate Ganache
No Hostess Cupcake is complete without a decadent chocolate ganache topping. The ganache is what gives the cupcakes their signature shine and rich flavor. To create the ganache, you will need:
– 1 cup semi-sweet chocolate chips
– 1/2 cup heavy cream
Start by heating the heavy cream in a small saucepan over medium heat until it just begins to simmer. Remove it from the heat and pour it over the chocolate chips in a heatproof bowl. Let it sit for about 5 minutes; this resting period is crucial as it allows the chocolate to melt gently. After five minutes, whisk the mixture until it is smooth and glossy.
Importance of Letting the Ganache Sit Before Whisking to Achieve a Smooth Texture
Allow the ganache to cool slightly before using it to dip your cupcakes. This resting time helps the ganache thicken, making it easier to achieve a smooth and even coating. If you want a thicker ganache, let it cool for a longer period.
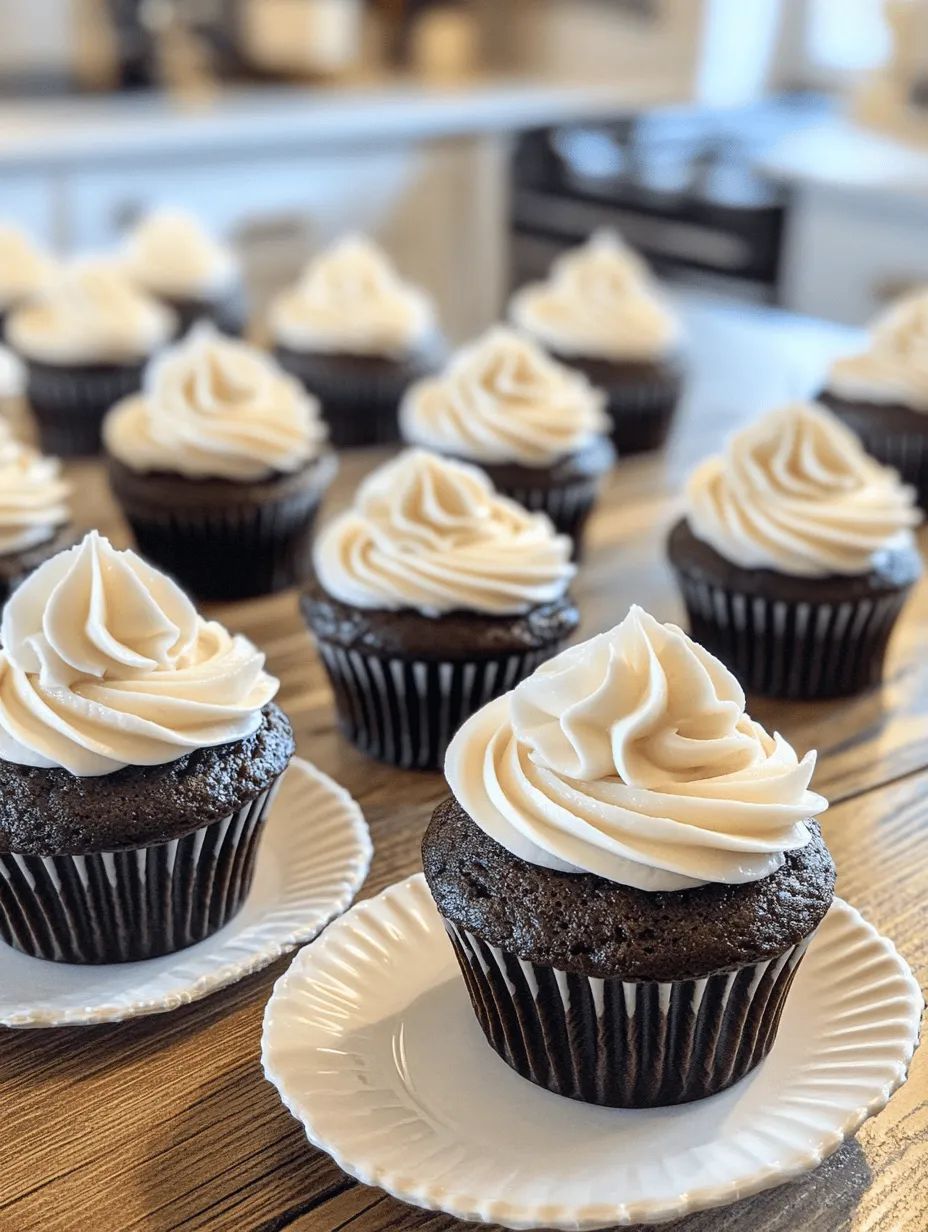
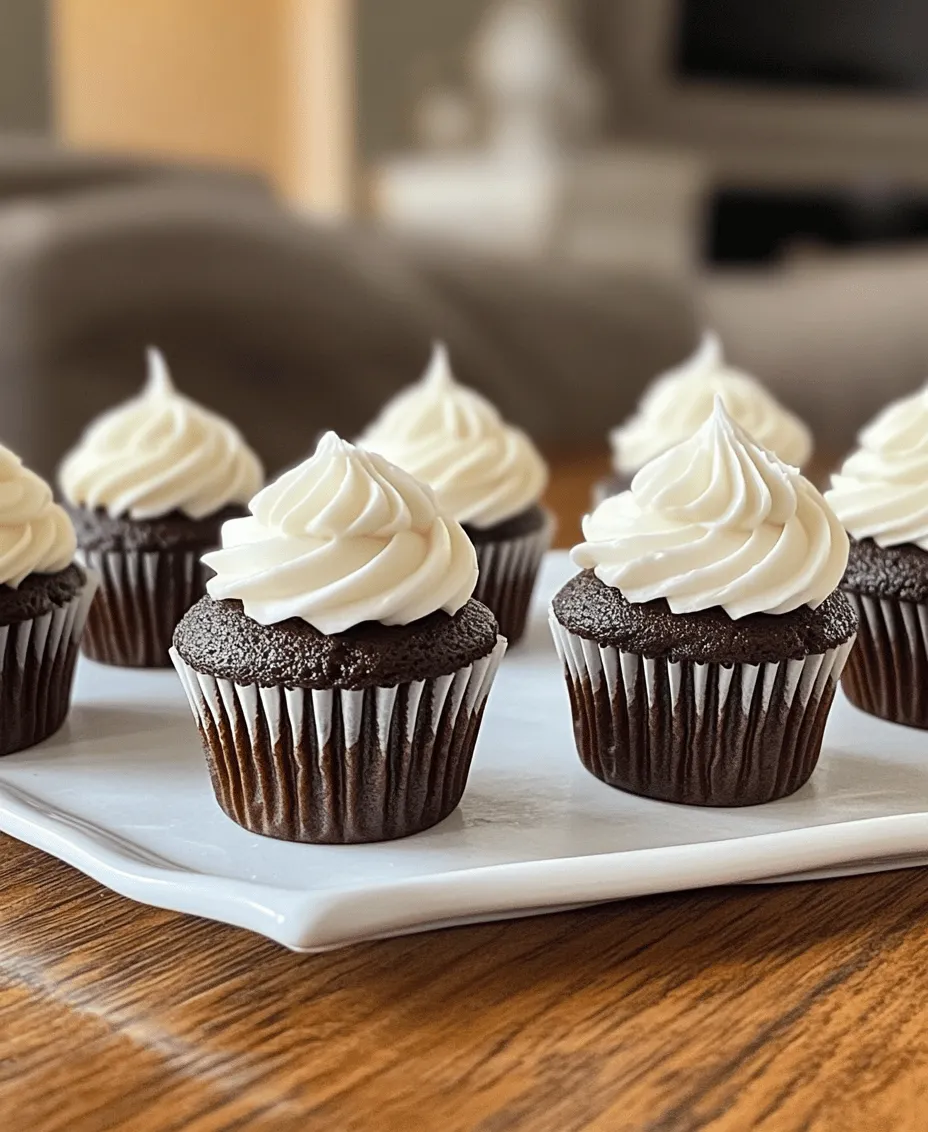
Decorating the Cupcakes
To decorate your cupcakes, dip the top of each filled cupcake into the ganache, making sure to coat it evenly. Hold the cupcake upside down for a few seconds, allowing the excess ganache to drip off. This process not only creates a beautiful finish but also ensures that the ganache sets nicely.
For an authentic touch, you can also pipe a squiggle of white frosting on top of the ganache. To achieve this, use a simple buttercream frosting recipe—just mix together 1 cup of unsalted butter, 4 cups of powdered sugar, 2 tablespoons of milk, and a teaspoon of vanilla extract. Once your frosting is ready, fill a piping bag fitted with a small round tip and create a decorative swirl on top of each cupcake.
Serving Suggestions
Homemade Hostess Cupcakes are perfect for a variety of occasions. Whether it’s a birthday party, a picnic, or a casual get-together, these cupcakes are sure to impress. They’re not just a treat; they’re a conversation starter!
For added enjoyment, consider pairing these cupcakes with beverages that complement their rich chocolate flavor. A glass of cold milk is a classic choice, but they also pair well with hot coffee or a sweet dessert wine for an adult gathering.
Storage Tips
To keep your homemade Hostess Cupcakes fresh, proper storage is essential. If you plan to enjoy them within a few days, you can store the cupcakes in an airtight container at room temperature. They will stay fresh for up to two days. If you need to store them for a longer period, placing them in the refrigerator can extend their shelf life to about a week. Just be aware that refrigeration may slightly alter the texture of the ganache.
For longer storage, consider freezing your cupcakes. To do this, wrap each cupcake tightly in plastic wrap and place them in a freezer-safe container. They can last up to three months in the freezer. When you’re ready to indulge, simply thaw them in the refrigerator overnight and enjoy!
Nutritional Information
For those mindful of their dietary intake, it’s helpful to know the nutritional content of each homemade Hostess Cupcake. On average, one cupcake contains approximately:
– Calories: 350
– Total Fat: 18g
– Saturated Fat: 10g
– Sugar: 30g
– Protein: 3g
While these numbers may vary based on specific ingredients and portion sizes, it’s clear that these cupcakes are a decadent treat. They contain butter and sugar, which contribute to the calorie count. However, the joy of indulging in a homemade dessert can be worth the occasional splurge!
Conclusion
Making homemade Hostess Cupcakes is not just about following a recipe; it’s about the joy of baking and the satisfaction of creating a delightful treat from scratch. With this easy recipe, you’re not only replicating a beloved classic, but you’re also elevating your baking skills and impressing those around you.
So gather your ingredients, follow the steps, and embark on this delicious baking adventure. You’ll find that the process is just as enjoyable as the final result. Homemade treats bring a special charm to any occasion, creating sweet memories that last a lifetime. Whether shared with friends or enjoyed as a personal indulgence, these cupcakes are sure to become a cherished part of your baking repertoire. Enjoy the process and the delicious outcomes that come from your kitchen!
