Introduction
If you’re looking for a dessert that combines nostalgia with simplicity, the Easy No Bake Banana Split Cake is the perfect choice. This delightful treat captures the essence of the classic banana split, transforming it into a layered cake that requires no baking—making it ideal for busy schedules or warm summer days when you want to keep the oven off. With its creamy textures, fruity flavors, and crunchy elements, this dessert not only pleases the palate but also evokes fond memories of childhood ice cream shops and family gatherings.
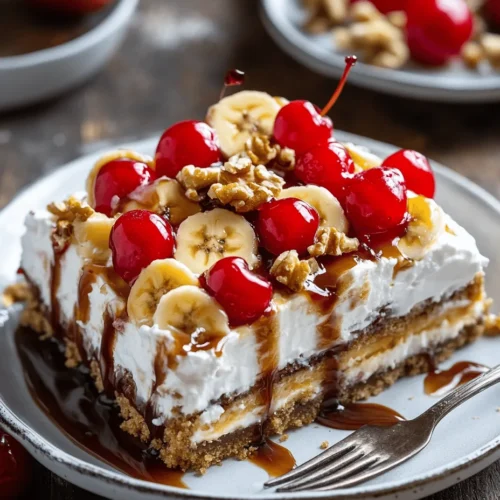
The appeal of this no-bake banana split cake lies in its versatility and ease of preparation. Whether you’re hosting a summer barbecue, celebrating a birthday, or simply craving something sweet, this dessert is sure to impress. Imagine digging into a slice that showcases luscious layers of cream cheese, whipped topping, fresh bananas, and a crumbly graham cracker crust. The combination of textures and flavors is simply irresistible, making it a go-to recipe for dessert lovers of all ages.
In this article, we will guide you through every step of creating this delicious banana split cake, from understanding the ingredients that make it so special to crafting the perfect crust and layering your fruits for maximum flavor. Get ready to impress your family and friends with this delightful dessert!
Understanding the Ingredients
Before diving into the preparation of the Easy No Bake Banana Split Cake, it’s essential to familiarize yourself with the key components of the recipe. Each ingredient plays a vital role in achieving the desired flavor and texture, ensuring that your cake turns out perfectly every time.
Key Components
1. Graham Crackers: The foundation of the cake, graham crackers serve as the base for the crust. Their sweet, slightly nutty flavor complements the other ingredients beautifully. You can also experiment with different flavored graham crackers, such as chocolate or cinnamon, to add a unique twist.
2. Butter: This ingredient is crucial for binding the graham cracker crust together. The rich fat content in butter not only helps to achieve the right consistency but also adds a delicious richness that enhances the overall flavor.
3. Sugar: A touch of granulated sugar sweetens the crust and balances the flavors. It’s essential for achieving a crust that is both firm and sweet.
4. Cream Cheese: The star of the filling, cream cheese adds creaminess and tang to the dessert. It provides a rich texture that contrasts beautifully with the lighter whipped topping.
5. Whipped Topping: This ingredient lightens the cream cheese filling, creating a fluffy texture that is delightful to eat. You can opt for store-bought whipped topping for convenience or whip fresh cream at home for a more decadent option.
6. Bananas: Fresh bananas are the quintessential fruit in this dessert, lending natural sweetness and a soft texture that pairs perfectly with the cream layers.
7. Pineapple: Crushed pineapple adds a juicy burst of flavor and a touch of acidity, which balances the richness of the cream cheese and whipped topping.
8. Strawberries: Fresh strawberries offer a vibrant color and a sweet-tart taste, enhancing the overall aesthetic and flavor profile of the cake.
Versatility of Ingredients
One of the fantastic aspects of this recipe is its versatility. While the classic combination of bananas, pineapples, and strawberries is undoubtedly delicious, feel free to get creative with your fruit choices. For instance, you can substitute the strawberries with blueberries for a different flavor or add some chopped nuts for an extra crunch. The beauty of the Easy No Bake Banana Split Cake is that it can be adapted to suit your preferences or whatever fruits are in season.
Creating the Perfect Crust
The crust is an essential component of the Easy No Bake Banana Split Cake—it provides structure and a delicious base for the creamy layers above. Here’s how to create the perfect graham cracker crust that is firm yet crumbly.
Ingredients for the Crust
– 1 ½ cups of graham cracker crumbs
– ½ cup unsalted butter, melted
– ¼ cup granulated sugar
Step-by-Step Instructions
1. Crush the Graham Crackers: Start by crushing the graham crackers into fine crumbs. You can do this using a food processor for efficiency or by placing the crackers in a zip-top bag and crushing them with a rolling pin. Aim for a fine crumb texture to ensure a smooth crust.
2. Mix Ingredients: In a medium mixing bowl, combine the graham cracker crumbs and granulated sugar. Pour the melted butter over the crumb mixture and stir until everything is well combined. The mixture should resemble wet sand and hold together when pressed.
3. Press the Mixture into the Pan: Choose a 9×13 inch baking dish for your cake. Transfer the crumb mixture into the dish and use the back of a measuring cup or your fingers to firmly press it down into an even layer. Make sure to create a solid base that extends slightly up the sides of the dish.
4. Chill the Crust: To ensure your crust holds its shape, place the baking dish in the refrigerator for about 30 minutes. This will allow the butter to firm up, making the crust easier to cut once the cake is assembled.
Tips for Achieving the Right Consistency
– Butter Temperature: Make sure the butter is fully melted before mixing it with the graham cracker crumbs. This helps to evenly distribute the fat, ensuring the crust binds together properly.
– Firmness: Don’t skip the chilling step! Allowing the crust to firm up in the refrigerator is critical to achieving a sturdy base for your banana split cake.
– Adjusting Sweetness: If you prefer a sweeter crust, you can increase the sugar slightly. Keep in mind that the sweetness of the filling and fruit will also contribute to the overall flavor.
Crafting the Cream Cheese Layer
Once your crust is prepped and chilled, it’s time to focus on the creamy filling that makes this dessert so irresistible. The cream cheese layer is rich, smooth, and perfectly complements the fruity flavors in the cake.
Ingredients for the Cream Cheese Layer
– 8 oz cream cheese, softened
– 1 cup powdered sugar
– 1 teaspoon vanilla extract
– 1 cup whipped topping (store-bought or homemade)
Step-by-Step Guide
1. Soften the Cream Cheese: Before starting, ensure that your cream cheese is softened to room temperature. This will make it easier to blend and create a smooth filling. You can leave it out for about 30 minutes or microwave it for about 10 seconds—just be careful not to melt it.
2. Combine Cream Cheese and Sugar: In a large mixing bowl, beat the softened cream cheese with an electric mixer until it’s creamy and smooth. Gradually add in the powdered sugar and vanilla extract, continuing to mix until fully incorporated. The mixture should be lump-free and velvety.
3. Fold in the Whipped Topping: Gently fold the whipped topping into the cream cheese mixture using a spatula. Be careful not to overmix, as you want to maintain the light and airy texture that the whipped topping provides.
4. Taste and Adjust: Before layering the cream cheese filling onto the crust, taste the mixture. If you prefer a sweeter filling, feel free to add more powdered sugar to suit your preference.
Tips for Achieving a Smooth and Airy Texture
– Mixing Technique: Use a gentle folding motion when incorporating the whipped topping to avoid deflating the mixture. This will help retain the lightness of the filling.
– Room Temperature Ingredients: Ensure all your ingredients are at room temperature before mixing. This helps them blend together more easily, resulting in a smoother filling.
– Variations: For added flavor, consider mixing in a tablespoon of cocoa powder for a chocolate cream cheese layer or adding a hint of lemon zest for a refreshing citrus twist.
Layering the Fruit for Maximum Flavor
The final touch in creating your Easy No Bake Banana Split Cake is the fruit layer. The selection and arrangement of the fruit not only enhance the taste but also add visual appeal to your dessert.
Importance of Fruit Selection
Fresh, ripe fruit is key to achieving the best flavor in your banana split cake. Choose bananas that are firm yet slightly yellow, as overripe bananas can become mushy and lose their texture in the cake. For strawberries, select vibrant red ones that are sweet and juicy. The crushed pineapple should be well-drained to prevent excess moisture from making the cake soggy.
Preparing the Fruit
1. Bananas: Peel and slice the bananas into even rounds. Aim for about ½ inch thick slices to ensure they hold their shape when layered.
2. Strawberries: Remove the stems and slice the strawberries into halves or quarters, depending on their size. This will make them easier to arrange and eat.
3. Pineapple: If using canned crushed pineapple, make sure to drain it thoroughly to avoid any excess liquid. If using fresh pineapple, chop it into small pieces.
Arranging the Layers
Now comes the fun part—layering your fruit! Here’s how to do it:
1. Spread the Cream Cheese Layer: Once your cream cheese filling is ready, spread it evenly over the chilled graham cracker crust.
2. Add the Bananas: Begin by layering the banana slices over the cream cheese filling. Arrange them in a single layer for an even distribution of flavor.
3. Layer with Pineapple: Next, sprinkle the drained crushed pineapple over the bananas, ensuring that it covers the entire layer.
4. Top with Strawberries: Finally, arrange the sliced strawberries on top of the pineapple layer. This colorful arrangement not only looks enticing but also offers a delightful mix of flavors with each bite.
5. Final Chill: Once all the layers are assembled, cover the dish with plastic wrap and refrigerate the cake for at least two hours—preferably longer. This allows the flavors to meld together and the cake to set properly.
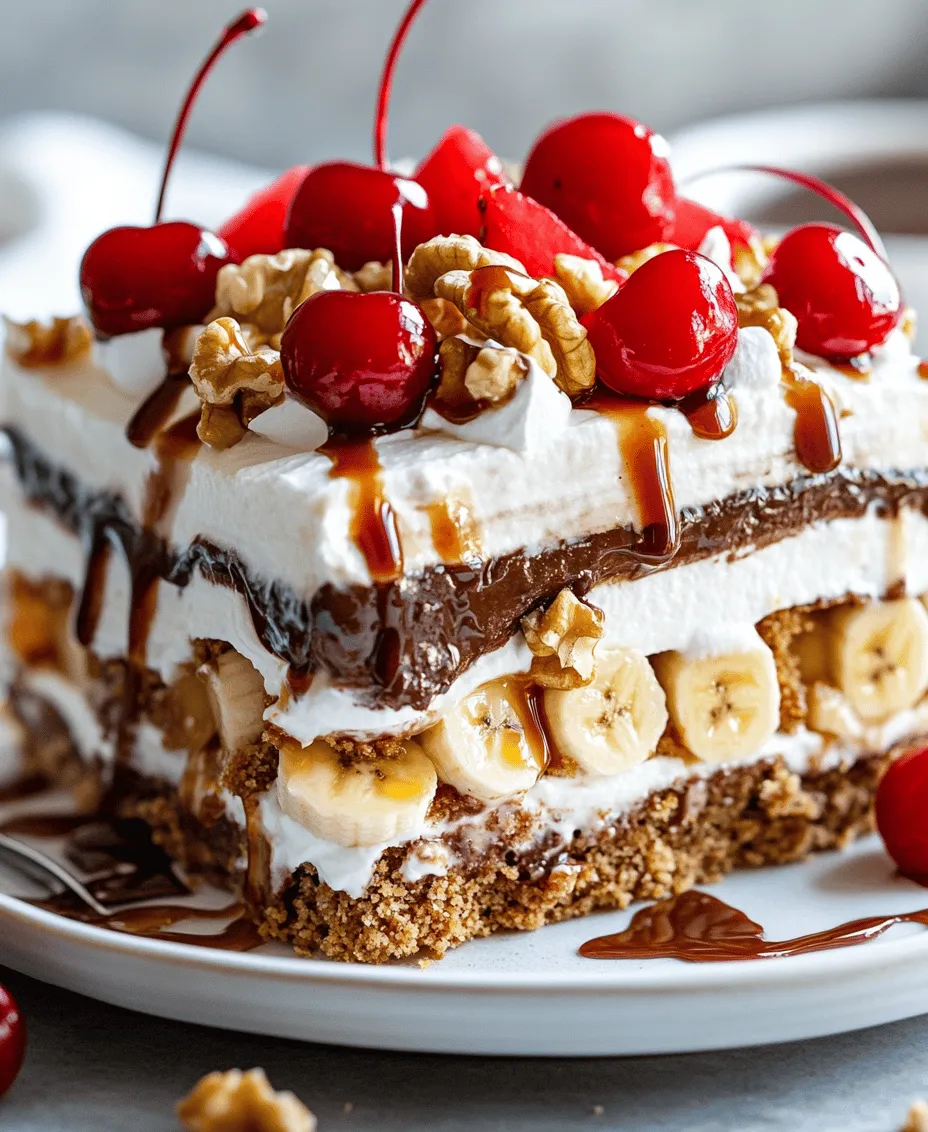
By following these steps, you’ll create a beautifully layered Easy No Bake Banana Split Cake that’s sure to be a hit at any gathering. The combination of creamy filling, crunchy crust, and fresh fruit creates a symphony of flavors and textures that will leave your guests wanting more. Stay tuned for the next part, where we’ll explore tips for serving and customizing your dessert for various occasions!
Tips for Even Distribution of Fruits for Balanced Flavors
Achieving a perfect balance of flavors in your Easy No Bake Banana Split Cake starts with the careful distribution of fruits. When layering your fruits, it’s essential to evenly space them throughout the cake to ensure that every slice is bursting with flavor. Slice your bananas thinly to maximize their surface area and allow them to intermingle with the creamy layers of whipped topping and pudding.
To create a harmonious blend of tastes, consider using a combination of strawberries, pineapples, and bananas in each layer. Instead of just placing the fruit in a pile, spread them out evenly across the surface of the cake. This method ensures that each bite contains a delightful mix of fruity freshness, creamy richness, and the sweetness of the cake.
Adding the Crunch: Nuts and Sauces
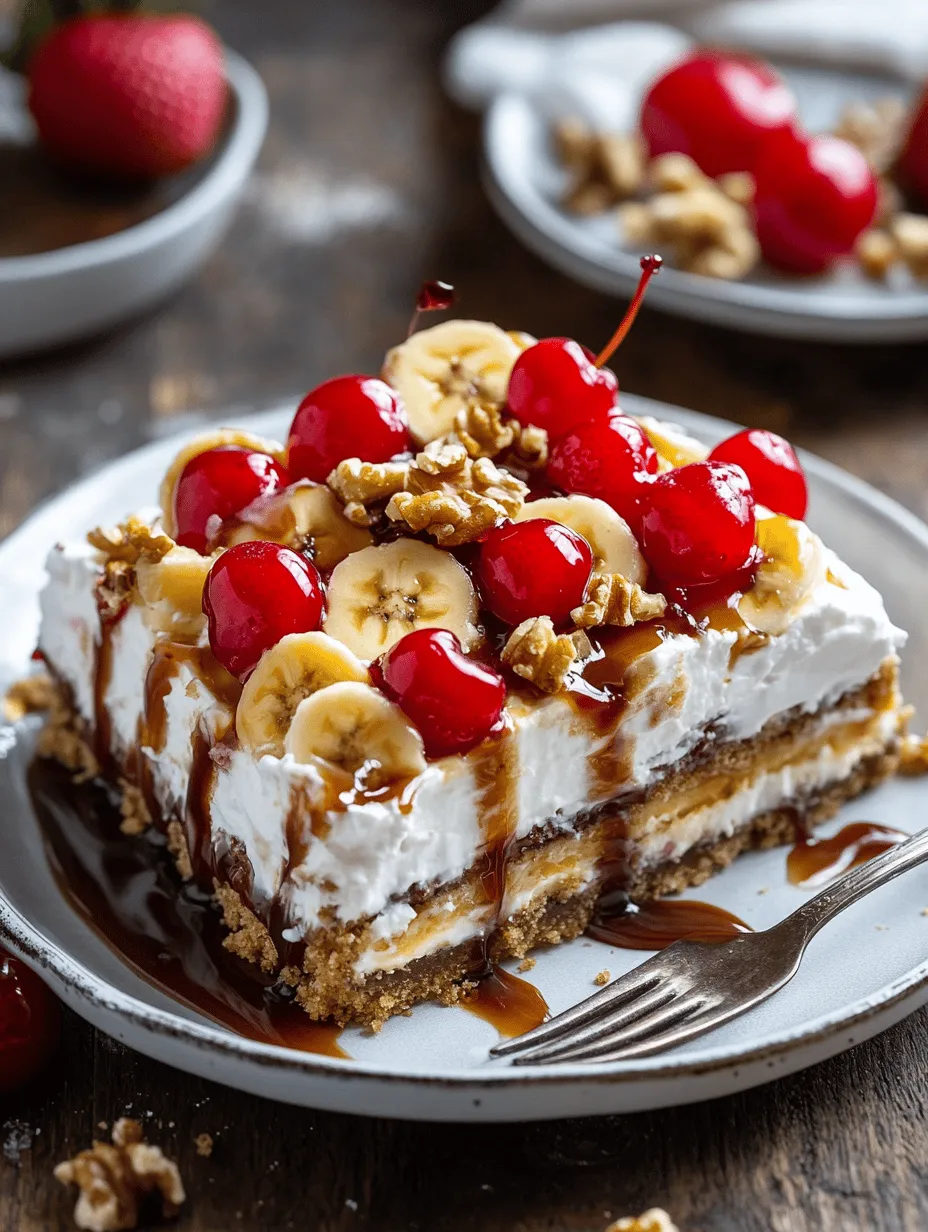
One of the delightful aspects of a banana split cake is the texture contrast provided by nuts. If you want to elevate the flavor and texture of your dessert, consider adding chopped walnuts or pecans to your layers. These nuts not only provide a satisfying crunch but also enhance the overall flavor profile of the cake. Their natural oils contribute a richness that balances the sweetness of the fruits and whipped topping.
In addition to nuts, the importance of chocolate and caramel sauces cannot be overstated. These indulgent toppings provide a rich finish that ties all the elements of the cake together. Drizzling chocolate sauce over the top before serving adds a luxurious touch, while caramel sauce complements the sweetness of the bananas and enhances the dessert’s overall appeal. Feel free to experiment with the amounts of each sauce to find the perfect balance that suits your taste.
Final Touch: The Topping
The final layer of whipped topping is crucial for both flavor and presentation. To spread this layer evenly, use an offset spatula or the back of a spoon to gently smooth the topping over the cake. Ensure that it covers the entire surface, filling in any gaps left by the fruits and nuts. This not only adds to the creaminess of the dessert but also serves as a blank canvas for your finishing touches.
Aesthetics play a significant role in dessert presentation, especially for a visually appealing cake like this one. To elevate its look, consider garnishing with maraschino cherries placed strategically on top, along with drizzles of chocolate and caramel sauces. You can also sprinkle some of the chopped nuts over the top for added texture and a finished look that’s sure to impress your guests.
Chilling: The Key to Flavor Development
After assembling your Easy No Bake Banana Split Cake, the chilling process is critical for allowing the flavors to meld together beautifully. Place the assembled cake in the refrigerator for at least 4 hours, although overnight chilling is ideal. This time allows the components to set firmly, making it easier to slice and serve while enhancing the overall flavor as the ingredients marry together.
The science behind chilling desserts lies in the way flavors develop and intensify when given time. The cool environment helps the layers firm up, allowing the creamy filling to thicken and the fruits to soften slightly, creating a luscious texture. For optimal results, aim for a chilling time of at least 4-6 hours to ensure that your cake achieves the perfect consistency and flavor profile.
Serving Suggestions and Presentation Ideas
When it comes to serving your Easy No Bake Banana Split Cake, creativity can turn a simple dessert into a stunning centerpiece. For an eye-catching presentation, consider cutting the cake into squares and placing them on decorative dessert plates. You can serve individual portions with a dollop of extra whipped cream on top and a sprinkle of nuts for added flair.
Pair your banana split cake with refreshing beverages such as iced tea, lemonade, or a scoop of vanilla ice cream to complement its flavors. If you’re hosting a gathering or celebration, think about presenting the cake on a tiered dessert stand or a beautiful platter, surrounded by fresh fruit or additional toppings. This not only enhances the visual appeal but also encourages guests to help themselves, making it a fun and interactive experience.
For themed parties or casual gatherings, you could even customize your banana split cake by incorporating seasonal fruits or toppings. During the summer, fresh berries can add a delightful twist, while in the fall, spiced nuts or pumpkin-flavored whipped cream can create a festive variation.
Conclusion
The Easy No Bake Banana Split Cake is more than just a dessert; it’s a nostalgic treat that brings joy and simplicity to any occasion. With its layers of creamy pudding, fresh fruits, and crunchy nuts, this cake is an inviting blend of flavors and textures that appeals to both young and old alike. Whether you’re celebrating a birthday, hosting a summer barbecue, or simply enjoying a sweet indulgence at home, this recipe is sure to impress.
Encouraging you to try this delightful recipe, it’s clear that the process of creating this cake is just as enjoyable as savoring its delicious layers. With minimal effort and maximum flavor, you can create a dessert that not only looks beautiful but also tastes incredible. So gather your ingredients, follow the steps, and enjoy the delicious journey of making and sharing this Easy No Bake Banana Split Cake with friends and family.