Follow Me On Pinterest!


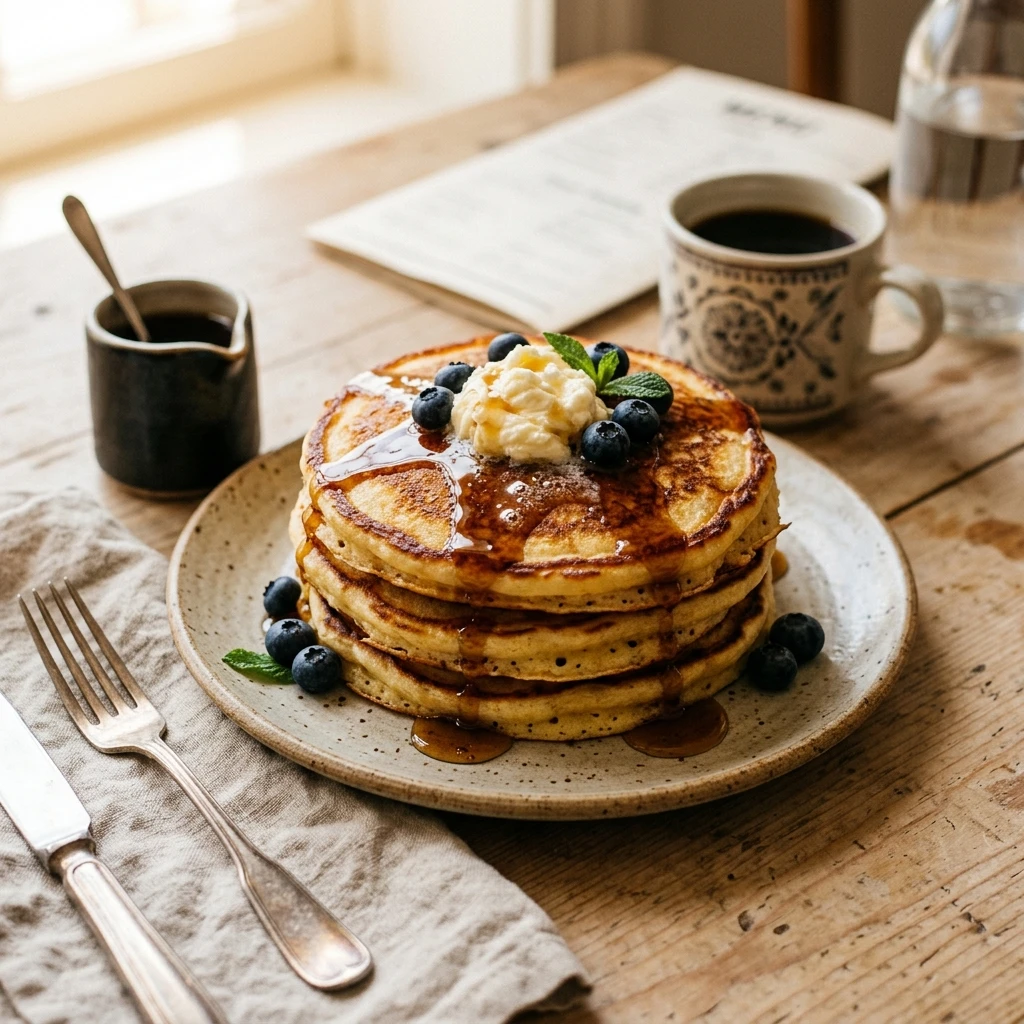
There is nothing quite like waking up to the smell of fresh pancakes sizzling on a hot griddle. We have all chased that specific diner-style perfection: a stack so tall and fluffy it practically wobbles, but with those addictive, lacy, golden-brown crispy edges that crackle under your fork. Most home recipes deliver on fluffiness but fall short on the texture. This recipe changes that. By using a specific combination of leavening agents and a classic cast-iron technique, you can recreate that nostalgic restaurant experience right in your own kitchen. Get your maple syrup ready, because these are the only pancakes you will ever want to make again.
Recipe Information
- Prep Time: 10 minutes
- Cook Time: 15 minutes
- Total Time: 25 minutes
- Servings: 4 servings (makes about 8-10 pancakes)
- Difficulty: Easy
Nutrition values
- Calories: 345 kcal
- Protein: 9g
- Carbs: 48g
Why Make This Fluffy Buttermilk Pancakes With Crispy Edges Diner Style
These pancakes offer the ultimate contrast in textures. The buttermilk reacts with baking soda to create a light, airy interior that melts in your mouth. Meanwhile, the secret to the crispy edges lies in the “fry-top” method used by professional short-order cooks. Unlike dry-pan methods, we use a generous amount of butter or oil to create a thin, crunchy perimeter around every single pancake. They are hearty enough to hold up to a lake of syrup but light enough that you will definitely want a second stack.
Ingredients
- 2 cups all-purpose flour
- 3 tablespoons granulated sugar
- 1 ½ teaspoons baking powder
- 1 teaspoon baking soda
- ½ teaspoon salt
- 2 cups cold buttermilk (full fat preferred)
- 1 large egg
- 4 tablespoons unsalted butter, melted and cooled slightly
- 1 teaspoon pure vanilla extract
- 3-4 tablespoons vegetable oil or clarified butter (for the pan)
Directions
Step 1: Mix the Dry Ingredients
In a large mixing bowl, whisk together the all-purpose flour, sugar, baking powder, baking soda, and salt. Whisking the dry ingredients thoroughly ensures that the leavening agents are evenly distributed, which prevents huge air pockets or flat spots in your pancakes.
Step 2: Combine the Wet Ingredients
In a separate medium bowl or a large measuring cup, whisk the buttermilk, egg, and vanilla extract until smooth. Slowly pour in the melted butter while whisking constantly to prevent the egg from scrambling or the butter from clumping into beads.
Step 3: The Gentle Fold
Pour the wet mixture into the dry ingredients. Use a spatula to gently fold the mixture together. Stop as soon as the flour streaks disappear. The batter should be thick and lumpy; overmixing at this stage will make the pancakes tough instead of fluffy.
Step 4: Heat and Oil the Pan
Place a large cast-iron skillet or non-stick griddle over medium heat. Add a tablespoon of vegetable oil or clarified butter. You want enough fat to coat the bottom of the pan entirely—this is the secret to those crispy, lacy edges.
Step 5: The Perfect Pour
Once the oil is shimmering but not smoking, scoop about 1/3 cup of batter per pancake onto the hot surface. Do not crowd the pan; leave space for the edges to crisp up. Let them cook for about 2 to 3 minutes until bubbles form on the surface and the edges look set and golden.
Step 6: Flip and Finish
Slide a thin spatula under the pancake and flip it in one quick motion. Cook the second side for another 1 to 2 minutes until it is browned and the center is cooked through. Repeat with the remaining batter, adding more oil to the pan as needed for each new batch.
Step 7: Plating
Transfer the hot pancakes to a plate. Serve immediately with a generous knob of salted butter and warm maple syrup. For the full diner experience, serve with a side of crispy bacon or hash browns.
Expert Tips for Perfect Fluffy Buttermilk Pancakes With Crispy Edges Diner Style
To get the best results, always use fresh buttermilk rather than a milk-and-vinegar substitute; the thickness of real buttermilk is vital for the structure. Let your batter rest for 5 minutes before cooking to allow the flour to hydrate and the bubbles to activate. If you want the crispiest edges possible, use a cast-iron skillet. It retains heat better than thin aluminum pans, creating a more consistent “fry” on the pancake exterior. Finally, resist the urge to press down on the pancakes with your spatula after flipping—you will squeeze out all the air you worked so hard to incorporate!
Delicious Variations
- Blueberry Burst: Drop fresh blueberries onto the wet batter immediately after pouring it into the pan.
- Chocolate Chip: Add mini chocolate chips to the batter for a sweet, melty treat.
- Lemon Poppy Seed: Whisk in the zest of one lemon and a tablespoon of poppy seeds to the dry ingredients.
- Cinnamon Swirl: Mix a little brown sugar and cinnamon with a dash of melted butter and drizzle it over the pancake while the first side cooks.
Frequently Asked Questions
Why are my pancakes flat?
Your baking powder or baking soda might be expired. These ingredients lose their potency over time. Also, make sure you aren’t overmixing the batter, which can deflate the air bubbles.
Can I use a buttermilk substitute?
In a pinch, you can mix 1 cup of milk with 1 tablespoon of lemon juice and let it sit for 5 minutes. However, real buttermilk is much thicker and will produce a fluffier, more flavorful pancake.
How do I get the edges crispy without burning the center?
The key is temperature control. Use medium heat and plenty of oil. If the edges are burning before the bubbles appear on top, turn the heat down slightly. The oil “frys” the perimeter while the internal steam cooks the middle.
Can I freeze these pancakes?
Yes! Let them cool completely, then stack them with parchment paper in between. Place them in a freezer-safe bag. Reheat in a toaster or oven to maintain the crispy edges.
What is the best oil for cooking pancakes?
Vegetable oil, canola oil, or clarified butter (ghee) are best because they have high smoke points. Regular butter can burn quickly and turn bitter before the pancakes are finished.
Conclusion
Mastering the diner-style pancake is a skill every home cook should have in their back pocket. By focusing on the reaction between buttermilk and leavening agents, and not being afraid of a little oil in the pan, you can create a breakfast that rivals any professional kitchen. These Fluffy Buttermilk Pancakes With Crispy Edges are sure to become a weekend staple in your household. Serve them hot, keep the syrup flowing, and enjoy the perfect crunch in every bite!
Fluffy Buttermilk Pancakes With Crispy Edges Diner Style
- Total Time: 25 minutes
- Diet: Vegetarian
Ingredients
Scale
- 2 cups all-purpose flour
- 3 tablespoons granulated sugar
- 1 ½ teaspoons baking powder
- 1 teaspoon baking soda
- ½ teaspoon salt
- 2 cups cold buttermilk (full fat preferred)
- 1 large egg
- 4 tablespoons unsalted butter, melted and cooled slightly
- 1 teaspoon pure vanilla extract
- 3–4 tablespoons vegetable oil or clarified butter (for the pan)
Instructions
- In a large mixing bowl, whisk together the all-purpose flour, sugar, baking powder, baking soda, and salt. Whisking the dry ingredients thoroughly ensures that the leavening agents are evenly distributed, which prevents huge air pockets or flat spots in your pancakes.
- In a separate medium bowl or a large measuring cup, whisk the buttermilk, egg, and vanilla extract until smooth. Slowly pour in the melted butter while whisking constantly to prevent the egg from scrambling or the butter from clumping into beads.
- Pour the wet mixture into the dry ingredients. Use a spatula to gently fold the mixture together. Stop as soon as the flour streaks disappear. The batter should be thick and lumpy; overmixing at this stage will make the pancakes tough instead of fluffy.
- Place a large cast-iron skillet or non-stick griddle over medium heat. Add a tablespoon of vegetable oil or clarified butter. You want enough fat to coat the bottom of the pan entirely—this is the secret to those crispy, lacy edges.
- Once the oil is shimmering but not smoking, scoop about 1/3 cup of batter per pancake onto the hot surface. Do not crowd the pan; leave space for the edges to crisp up. Let them cook for about 2 to 3 minutes until bubbles form on the surface and the edges look set and golden.
- Slide a thin spatula under the pancake and flip it in one quick motion. Cook the second side for another 1 to 2 minutes until it is browned and the center is cooked through. Repeat with the remaining batter, adding more oil to the pan as needed for each new batch.
- Transfer the hot pancakes to a plate. Serve immediately with a generous knob of salted butter and warm maple syrup. For the full diner experience, serve with a side of crispy bacon or hash browns.
- Cook Time: 25 minutes