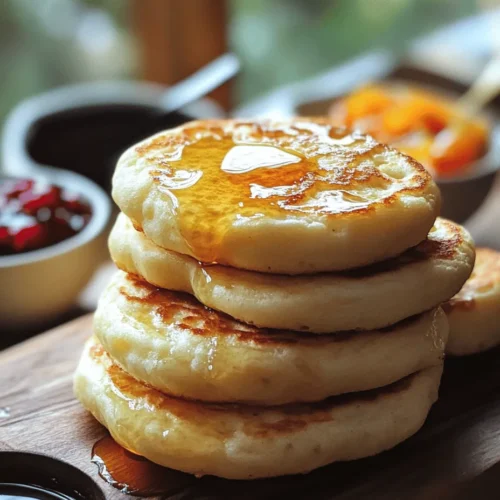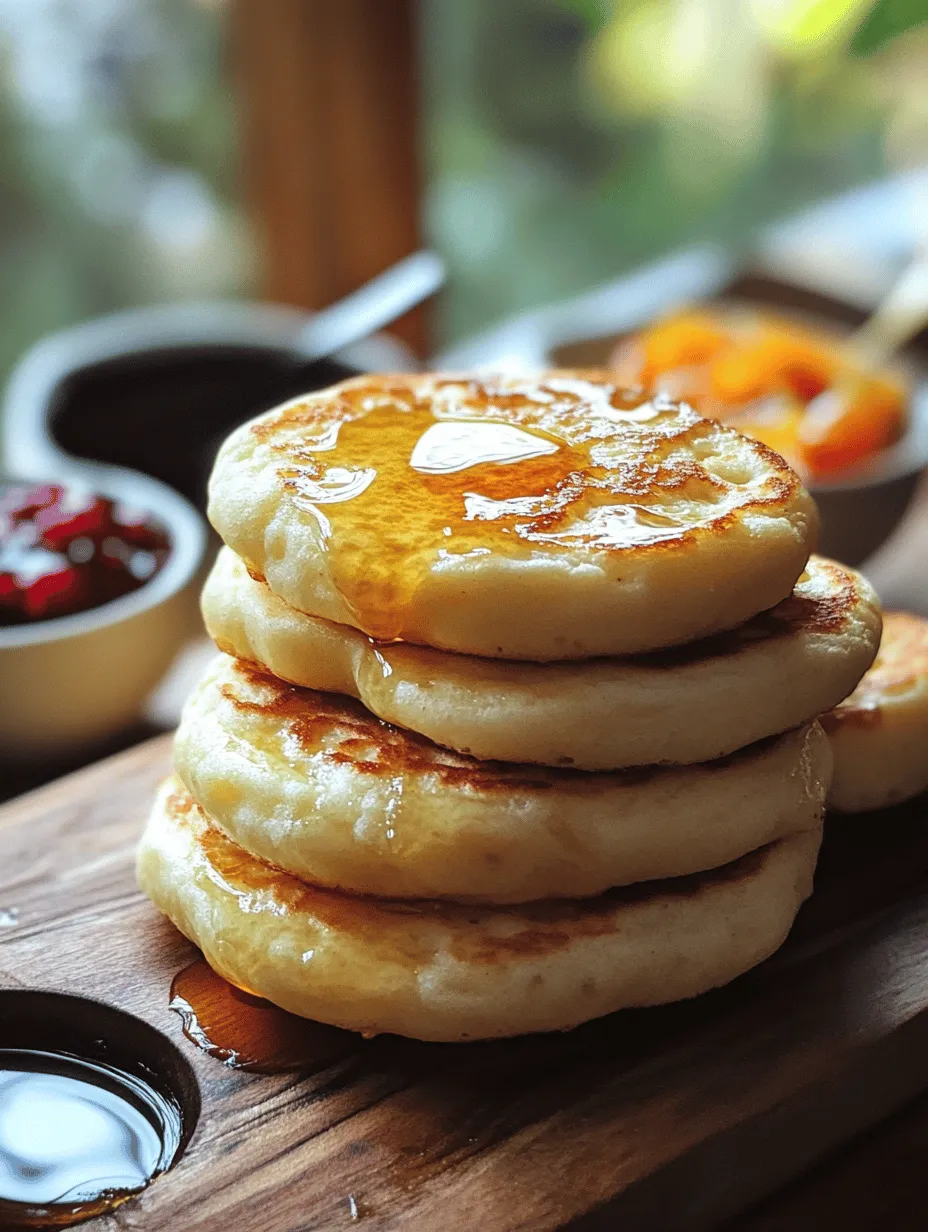
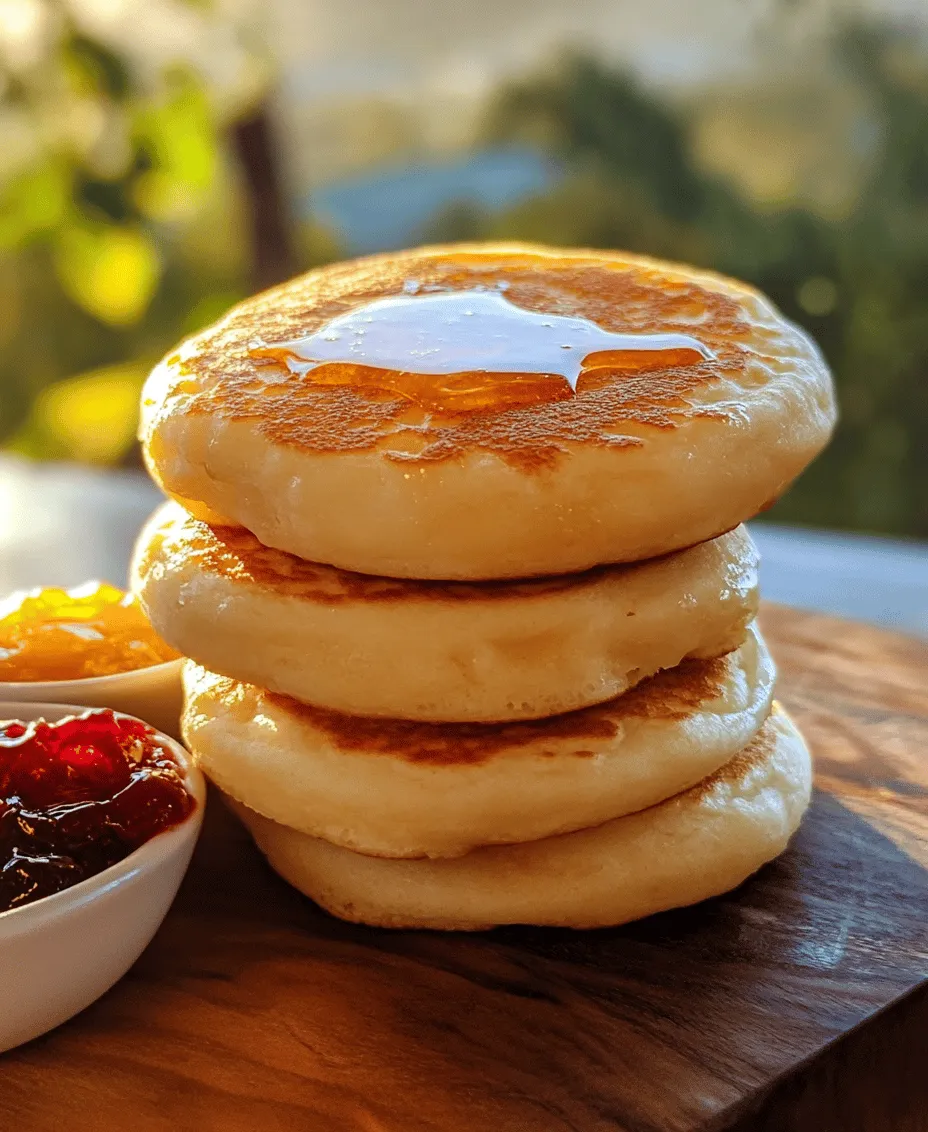
The world of breakfast treats is filled with delightful options, but few can rival the charm and comfort of crumpets. These soft, round delicacies, with their unique texture and inviting aroma, are a quintessential British delight that has captured the hearts—and taste buds—of food enthusiasts around the globe. In this article, we will embark on a culinary adventure, exploring the delightful recipe for fluffy crumpets. We will guide you step-by-step through the process, uncover the science behind their delightful texture, and provide tips to help you achieve the perfect crumpet every time. Whether you enjoy them with a generous spread of butter, a drizzle of honey, or topped with your favorite jam, homemade crumpets promise to elevate any breakfast or tea time experience.
Understanding Crumpets: A Brief History
To truly appreciate crumpets, one must delve into their fascinating history. Crumpets trace their origins back to the British Isles, with evidence suggesting they have been enjoyed for several centuries. The earliest mentions of crumpets date back to the 17th century, where they were referred to as “crompid cakes.” Traditionally, crumpets were made on a griddle or a hot stone, resulting in their signature round shape and characteristic texture.
Over time, crumpets evolved from a simple peasant food into a beloved staple in British households. They became more refined and were often enjoyed as a delicacy during tea time, served alongside clotted cream and jam. The rise of industrialization and advancements in baking technology in the 19th century further popularized crumpets, making them widely accessible as packaged goods in bakeries across the UK. Today, crumpets continue to be a cherished part of British culture, often seen as a comforting treat that evokes nostalgia and warmth.
The Science of Crumpets: Why They Are So Fluffy
What makes crumpets so irresistibly fluffy? The secret lies in the careful selection and combination of ingredients, along with a specific cooking technique. The fluffiness of crumpets can be attributed to the unique fermentation process that occurs during their preparation.
At the heart of this process is yeast, which serves as a leavening agent. When combined with warm liquids, yeast activates, producing carbon dioxide gas. This gas forms air pockets within the dough, resulting in the light, airy texture that crumpets are known for. The addition of baking soda further enhances this leavening effect, creating additional bubbles that contribute to the overall fluffiness of the final product.
Moreover, the gluten in all-purpose flour plays a crucial role in providing structure. When mixed and kneaded, gluten strands develop, giving crumpets their signature chewy texture while still allowing them to rise. The warmth of the liquids used in the recipe is also essential, as it encourages yeast activation and promotes better fermentation.
Understanding this science not only helps us appreciate the art of crumpet-making but also empowers us to replicate the process in our own kitchens, ensuring we achieve that perfect fluffy delight every time.
Ingredients Breakdown for Fluffy Delightful Crumpets
Before we dive into the step-by-step guide to making crumpets, let’s take a closer look at the key ingredients that contribute to their unique flavor and texture. Each element plays a vital role in the overall success of the recipe.
– All-Purpose Flour: This versatile flour is the backbone of our crumpet recipe. It provides the necessary structure and texture, allowing the crumpets to rise while still maintaining a delightful chewiness. The balance of protein in all-purpose flour ensures that gluten develops adequately, contributing to the fluffy interior we seek.
– Warm Milk and Water: The combination of warm milk and water serves several purposes. The warmth is crucial for activating the yeast, as it creates an ideal environment for fermentation. Additionally, the milk adds richness and flavor, enhancing the overall taste of the crumpets.
– Sugar and Salt: Sugar plays a dual role in our crumpet recipe. It acts as food for the yeast, ensuring robust fermentation, while also enhancing the flavor of the crumpets. Salt, on the other hand, is essential for balancing flavors and controlling yeast activity, preventing it from fermenting too quickly.
– Instant Yeast: The convenience of instant yeast cannot be overstated. Unlike active dry yeast, it does not require proofing, making it a quick and effective leavening agent. Instant yeast ensures that our crumpets rise beautifully without the need for lengthy waiting periods.
– Baking Soda and Optional Baking Powder: Baking soda is a critical ingredient in our crumpet recipe, as it helps create those delightful air pockets. When combined with the acidity of the milk, it activates and releases carbon dioxide, resulting in a lighter texture. Some recipes also call for a small amount of baking powder, which can provide an additional lift.
– Melted Butter: While not mandatory, melted butter adds flavor and richness to the crumpets. It also helps to grease the cooking surface, preventing the crumpets from sticking and ensuring easy removal once cooked.
Step-by-Step Guide to Making Fluffy Delightful Crumpets
Now that we understand the ingredients and their roles, let’s get started on making our fluffy delightful crumpets! This step-by-step guide will walk you through the entire process, making it easy for even novice cooks to create this delicious treat.
Step 1: Gather Your Ingredients and Equipment
Before you begin, make sure you have all the necessary ingredients and equipment on hand. You will need:
– 2 cups all-purpose flour
– 1 cup warm milk (about 110°F or 43°C)
– 1 cup warm water (about 110°F or 43°C)
– 2 tablespoons sugar
– 1 teaspoon salt
– 2 teaspoons instant yeast
– 1 teaspoon baking soda
– 1 tablespoon melted butter (plus more for greasing)
– Crumpet rings or metal cookie cutters
Having everything prepared will streamline the process and ensure you don’t miss any steps along the way.
Step 2: Mix the Dry Ingredients
In a large mixing bowl, combine the all-purpose flour, sugar, salt, instant yeast, and baking soda. Whisk the dry ingredients together until they are thoroughly mixed. This step is crucial, as it ensures that the yeast and leavening agents are evenly distributed throughout the flour, promoting uniform rising during cooking.
Step 3: Combine the Wet Ingredients
In a separate bowl or measuring jug, mix together the warm milk and warm water. The temperature of the liquids should be around 110°F (43°C)—warm to the touch but not hot. If the liquids are too hot, they can kill the yeast, while liquids that are too cold will not activate it effectively.
Step 4: Create the Batter
Make a well in the center of the dry ingredients, then pour in the warm milk and water mixture. Using a whisk, gently combine the wet and dry ingredients until a smooth batter forms. Avoid over-mixing, as this can lead to tough crumpets. You want the batter to be thick but pourable, similar to pancake batter in consistency.
Step 5: Let the Batter Rise
Cover the bowl with a clean kitchen towel or plastic wrap and place it in a warm, draft-free area. Allow the batter to rise for about 30 minutes to an hour, or until it has doubled in size. This fermentation process is essential for developing flavor and texture, as the yeast will produce carbon dioxide, creating air pockets in the batter.
Once the batter has risen, you are ready to start cooking your crumpets!
Conclusion
Now that you have been introduced to the world of crumpets, their rich history, and the science behind their fluffy texture, you’re well on your way to mastering this British classic. From understanding the importance of each ingredient to following the detailed steps in the preparation process, you’re equipped with the knowledge needed to create your own delightful crumpets at home. In the next part of this article, we will delve into the cooking techniques required to achieve that perfect golden-brown crust and the best ways to serve and enjoy your homemade crumpets. Stay tuned for more delicious insights and tips!
Mixing the Dry Ingredients
The foundation of any good crumpet lies within the careful mixing of the dry ingredients. For your Fluffy Delightful Crumpets, you will primarily need all-purpose flour, baking powder, and a pinch of salt. Proper mixing is crucial as it ensures that the leavening agents, like baking powder, are evenly distributed throughout the flour. This uniformity is essential to achieve that airy texture characteristic of crumpets.
Begin by sifting the flour and baking powder into a large mixing bowl. Sifting not only breaks up any clumps in the flour but also incorporates air, which helps in creating a light batter. Add the salt at this stage; it enhances flavor while also contributing to the overall structure of the crumpets. Use a whisk or fork to gently stir these dry ingredients together, ensuring an even mixture without overworking the flour, which can lead to denser crumpets.
Combining Wet Ingredients
Next, let’s focus on the wet ingredients. This part of the recipe is where temperature and moisture levels play a crucial role in the final product. For our crumpets, you’ll be using warm milk and water, which should ideally be at a temperature between 100°F to 110°F (37°C to 43°C). This warmth activates the yeast, leading to a better rise and fluffiness.
In a separate bowl, combine the warm milk and water, and gently whisk in the yeast. Allow the mixture to sit for about 5-10 minutes until it becomes frothy, indicating that the yeast is alive and ready to work its magic. This frothiness is a good sign of a successful fermentation process, which will contribute significantly to the airy texture of your crumpets.
Creating the Batter
Once your dry and wet ingredients are prepared, it’s time to create the batter. Pour the frothy yeast mixture into the bowl containing the dry ingredients. Stir gently with a wooden spoon or spatula until just combined. The goal here is to mix until no dry flour remains visible, but avoid overmixing, as this can lead to tough crumpets.
The consistency of the batter should be thick but pourable, resembling a pancake batter. If your batter appears too thick, add a little extra warm water or milk until the desired consistency is achieved. Aim for a smooth and lump-free texture, as this will help ensure even cooking and a delightful mouthfeel.
Allowing the Batter to Rise
After combining the ingredients, it’s crucial to allow the batter to rise. Cover the bowl with a clean kitchen towel or plastic wrap and place it in a warm, draft-free area. The batter should rest for about 30 to 60 minutes, allowing it to ferment and develop flavor. This rising time is essential; it activates the yeast, which will produce carbon dioxide, causing the batter to expand and become light and airy.
During this period, you might notice bubbles forming on the surface, which is a positive sign that the fermentation process is working. The longer you allow it to rise, the more pronounced the flavor will be, but be cautious not to let it rise too long, as it can lead to over-fermentation.
Preheating and Greasing the Griddle
While your batter is rising, it’s important to prepare the cooking surface. Preheat a griddle or a non-stick frying pan over medium heat. You want a consistent temperature across the surface to ensure even cooking. To test if the griddle is ready, sprinkle a few drops of water onto the surface; if they sizzle and evaporate, it’s time to start cooking.
Once preheated, lightly grease the surface with a bit of oil or butter. If you’re using metal crumpet rings, place them on the griddle and grease the inside to prevent sticking. This step is essential for achieving a beautiful shape and for easy removal after cooking.
Cooking Techniques
Cooking crumpets is an art that requires attention to detail. Pour the batter into the prepared crumpet rings, filling them about halfway to allow for expansion. You should see bubbles forming on the surface of the batter as they cook. This bubbling indicates that the crumpets are rising properly.
Cook the crumpets for approximately 5-7 minutes on the first side. You’ll know they are ready to flip when the tops have set, and the edges begin to look dry. Carefully remove the rings (if using) and flip the crumpets using a spatula. Cook for another 2-3 minutes on the other side until golden brown.
This method of cooking ensures that the crumpets develop a lovely golden crust while remaining fluffy inside. If you find that they are browning too quickly, lower the heat to ensure they cook through without burning.
Flipping and Finishing
As you cook, pay attention to visual cues. The tops of the crumpets should be covered with small holes, which is a good indication of when it’s time to flip. If your crumpets are not forming these holes, it might be a sign they need more time to cook on the first side.
Once flipped, allow them to cook until they turn a light golden brown. The crumpets should feel firm to the touch but still have a slight give when pressed. Remove them from the griddle and place them on a wire rack to cool slightly. This step prevents them from becoming soggy and helps maintain their delightful texture.
Keeping Crumpets Warm
If you’re making a large batch of crumpets, keeping them warm without drying out is important. Preheat your oven to a low temperature (about 200°F or 93°C) and place the cooked crumpets on a baking sheet lined with parchment paper. Cover them with a clean kitchen towel to keep the warmth in while you continue cooking the remaining batches.
This method ensures that your crumpets retain their fluffy texture and stay warm for serving.
Serving Suggestions for Crumpets
Crumpets are incredibly versatile and can be enjoyed in many ways. Here are some delightful serving suggestions:
Traditional Toppings
Classic toppings for crumpets include a generous spread of butter that melts into the holes, followed by sweet jams or honey. Strawberry jam, raspberry preserves, or even a rich, homemade lemon curd can elevate your crumpet experience. The combination of warm butter and sweet toppings creates a comforting treat that is hard to resist.
Unique Flavor Combinations
For those looking to try something different, consider unique flavor combinations. Top your crumpets with cream cheese and smoked salmon for a savory twist, or try ricotta cheese with fresh berries and a drizzle of honey for a delightful breakfast option. You can also experiment with avocado, feta cheese, and chili flakes for a trendy brunch dish. The possibilities are endless, and this versatility is part of what makes crumpets so enjoyable.
Pairing Crumpets with Beverages
Crumpets pair wonderfully with a variety of beverages. A strong cup of English breakfast tea or Earl Grey complements the slight sweetness of the crumpets beautifully. Alternatively, a rich coffee or espresso can balance the flavors, making for a delightful afternoon snack. If you’re feeling adventurous, consider pairing crumpets with a glass of warm spiced apple cider for a cozy fall treat.
Storing and Reheating Leftover Crumpets
If you find yourself with leftover crumpets, storing them properly is essential for maintaining their delightful fluffiness. Allow the crumpets to cool completely before storing them. Place them in an airtight container or a resealable bag. They can be stored at room temperature for up to a day, but for longer freshness, keep them in the refrigerator for up to a week.
To reheat, place the crumpets in a toaster or under the broiler for just a couple of minutes. This method will help restore their original texture and warmth, making them an enjoyable treat even after a few days.
Conclusion: Enjoying Your Fluffy Delightful Crumpets
Creating Fluffy Delightful Crumpets at home is not just about making a delicious treat; it’s about the joy of sharing something special with friends and family. The process of mixing, rising, and cooking these crumpets is a rewarding experience that leads to a delightful result.
As you experiment with different toppings and flavor combinations, you’ll discover your personal favorites and perhaps even create new traditions around this classic dish. The satisfaction of mastering the art of crumpet-making will bring a sense of accomplishment, and enjoying them fresh from the griddle is an experience that is both comforting and fulfilling.
So, gather your ingredients, follow the steps, and soon you’ll be relishing the joy of homemade crumpets – a treat that embodies warmth, creativity, and delightful flavors.