Heavenly Vanilla Cream Filled Caramel Recipe

WANT TO SAVE THIS RECIPE?

Introduction

Caramel desserts have an undeniable charm that captivates dessert lovers around the world. The rich, buttery sweetness, paired with a hint of complexity, makes it a favorite in many culinary traditions. Among the myriad of caramel creations, the Heavenly Vanilla Cream Filled Caramel stands out as a truly indulgent treat. This recipe beautifully marries the luscious, velvety texture of vanilla cream with the deep, rich flavors of caramel, creating a dessert that is as delightful to the palate as it is to the eye.

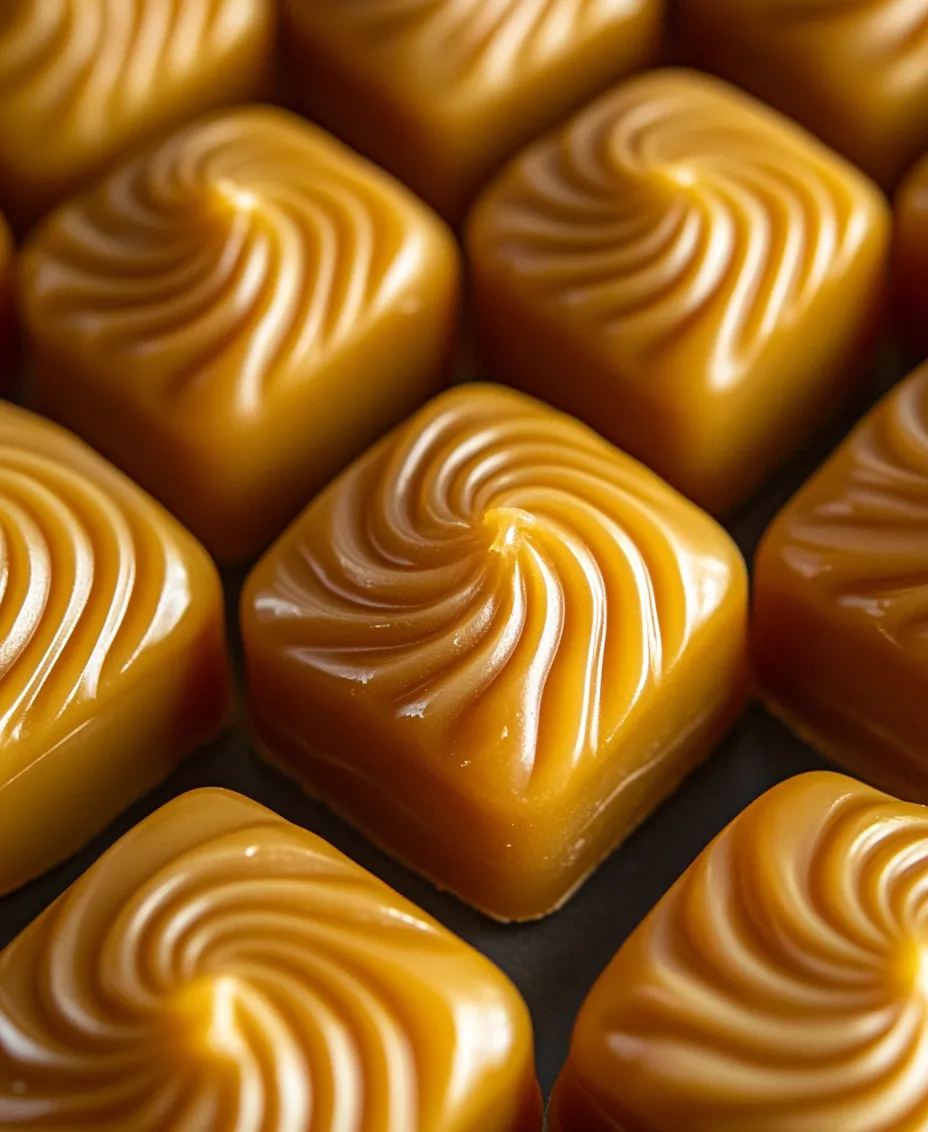
Imagine sinking your teeth into a silky caramel shell, only to be rewarded with the smooth, creamy surprise of vanilla filling inside. The combination of sweet and salty, along with the contrasting textures, makes this dessert not just a treat, but an experience. In this article, you will discover how to create this heavenly delight at home, with easy-to-follow instructions and tips for perfecting your caramel and filling.

Understanding the Ingredients

Creating the perfect Heavenly Vanilla Cream Filled Caramel starts with understanding the key ingredients that contribute to its delightful taste and texture. Each element plays a crucial role in achieving the final product. Let’s delve into the individual components that will elevate your dessert.

Granulated Sugar

The star of the show in any caramel recipe is granulated sugar. The transformation of granulated sugar into caramel is a magical process known as caramelization. When heated, sugar melts and undergoes a chemical change, turning into a rich golden syrup. This process is delicate; the sugar must be monitored closely to avoid burning. The right caramelization brings out deep, complex flavors that contribute to the overall richness of the dessert.

Unsalted Butter

Unsalted butter is essential in this recipe, as it adds both creaminess and flavor. The fat in butter helps to create a smooth and luscious texture in the caramel, enhancing its mouthfeel. Moreover, using unsalted butter allows you to control the saltiness of the dish, ensuring that the sweetness of the caramel shines without being overpowered.

Heavy Cream

Heavy cream is another critical ingredient that enriches the caramel. When added to the hot sugar, it creates a smooth, velvety consistency that is both luxurious and comforting. The addition of heavy cream also helps balance the sweetness of the sugar, resulting in a more rounded flavor profile. Its high fat content makes it ideal for achieving that rich texture that is so desirable in desserts.

Sea Salt

While caramel is inherently sweet, a touch of sea salt is vital for balance. Salt enhances flavors and cuts through the sweetness, making each bite more enjoyable. The contrast between the sweet caramel and the subtle saltiness creates a depth of flavor that elevates the whole dessert. It’s important to use high-quality sea salt, as it will dissolve well and provide a pleasant flavor without being overwhelming.

Pure Vanilla Extract and Vanilla Bean Paste

Vanilla is the essence that ties this dessert together. Using pure vanilla extract adds a warm, sweet aroma and flavor to the cream filling. For an even more intense vanilla experience, vanilla bean paste can be utilized. This paste contains the seeds of the vanilla bean, providing specks of vanilla throughout the filling, which not only enhances the taste but also adds a visual appeal. Both forms of vanilla can be used interchangeably, depending on your preference and availability.

Powdered Sugar and Cream Cheese

To create a smooth and creamy filling, powdered sugar and cream cheese are combined. Powdered sugar dissolves easily, allowing for a silky texture, while cream cheese provides a slight tanginess that balances the sweetness of the caramel. Together, they create a filling that is both rich and light, perfect for complementing the caramel shell.

Heavy Whipping Cream

Finally, heavy whipping cream is essential for achieving a light and airy texture in the vanilla cream filling. When whipped, it incorporates air, giving the filling a fluffy consistency that contrasts beautifully with the dense caramel. This ingredient is crucial for ensuring that the filling doesn’t weigh down the dessert but rather enhances its overall enjoyment.

Importance of Using Quality Ingredients

For a dessert as decadent as Heavenly Vanilla Cream Filled Caramel, the quality of ingredients cannot be overstated. Using high-quality, fresh ingredients will yield the best flavors and textures. Organic sugar, real vanilla extract, and fresh dairy products not only elevate the taste but also contribute to the overall integrity of the dish. When you invest in quality ingredients, you ensure that your dessert is a memorable experience for anyone who tastes it.

The Art of Making Caramel

Creating caramel is both an art and a science. Understanding the caramelization process and following precise steps will help you achieve the perfect caramel for your dessert. Here’s a breakdown of the crucial steps involved in making caramel, along with tips to avoid common pitfalls.

Explanation of the Caramelization Process

Caramelization begins when sugar is heated. As the temperature rises, the sugar molecules break down and re-form into new compounds that create the distinct caramel flavor. This transformation typically occurs around 320°F (160°C), and as the sugar melts and thickens, it begins to take on a golden hue.

The Science Behind Melting Sugar

As sugar heats, it goes through several stages: it starts as granulated, then melts into a syrup, and finally changes color to a light golden brown. The heat must be evenly distributed to prevent hot spots that can cause the sugar to burn. Stirring gently can help, but it’s essential to avoid over-stirring, which can introduce air bubbles and cause the mixture to crystallize.

Common Mistakes to Avoid While Making Caramel

When making caramel, several common mistakes can hinder the process:

1. Not monitoring the heat: Too high a heat can lead to burning sugar, while too low can result in a lengthy process that yields uneven results.

2. Using moisture: Introducing water or other liquids can cause the sugar to crystallize, leading to a grainy texture.

3. Over-stirring: Stirring too much can create air bubbles and lead to crystallization.

4. Not using a candy thermometer: Relying on visual cues alone can be misleading. A candy thermometer can help ensure precision.

Step-by-Step Instructions for Caramel Preparation

1. Prepare your tools: Gather a heavy-bottomed saucepan, a wooden spoon or heat-resistant spatula, and a candy thermometer. This equipment will help you manage the caramelization process effectively.

2. Measure the sugar: Use granulated sugar and measure the required amount based on your recipe.

3. Heat the sugar: Place the sugar in the saucepan over medium heat. Allow it to melt without stirring. You can gently swirl the pan to help the sugar melt evenly.

4. Watch for color change: As the sugar melts, keep an eye on the color. It will start to turn from clear to a light amber, and then to a rich golden brown. This is the ideal stage for flavor development.

5. Add the butter: Once the caramel reaches the desired color, carefully add the unsalted butter. The mixture will bubble up; this is normal. Stir gently until the butter is fully melted and combined.

6. Incorporate the cream: Remove the saucepan from the heat and slowly pour in the heavy cream. Again, expect bubbling! Stir until smooth.

7. Add sea salt: Finally, mix in the sea salt to balance the sweetness. Taste and adjust if necessary.

Visual Cues for Recognizing the Right Stage of Caramelization

The visual cues during the caramelization process are crucial indicators of readiness:

Light amber: At this stage, the caramel is sweet with a slight nuttiness. It’s ideal for desserts that require a milder flavor.

Golden brown: This is the sweet spot for rich caramel. It has a deep flavor with a hint of bitterness, perfect for filling.

Dark brown: While some desserts may call for this stage, be cautious as it can quickly turn bitter.

Tips on How to Safely Handle Hot Caramel

Working with hot caramel requires caution. Here are some safety tips:

Use long sleeves and heat-resistant gloves: This protects your skin from splatters.

Keep a bowl of ice water nearby: In case of burns, cool the area immediately.

Always pour caramel away from you: To avoid any splashes that may cause burns.

With these steps and precautions in place, you will be well on your way to mastering the art of caramel. The next step will be to craft the delicious vanilla cream filling that complements your caramel perfectly.

Caramel desserts have an undeniable charm that captivates dessert lovers around the world. The rich, buttery sweetness, paired with a hint of complexity, makes it a favorite in many culinary traditions. Among the myriad of caramel creations, the <strong>Heavenly Vanilla Cream Filled Caramel</strong> stands out as a truly indulgent treat. This recipe beautifully marries the luscious, velvety texture of vanilla cream with the deep, rich flavors of caramel, creating a dessert that is as delightful to the palate as it is to the eye.” /></p>
</p>
<h3>Step-by-Step Guide for Preparing the Filling</h3>
</p>
<p>To create the heavenly filling for your vanilla cream-filled caramels, start by gathering the following ingredients: cream cheese, powdered sugar, vanilla extract, and heavy cream. The process is straightforward, but attention to detail is key for achieving that rich, creamy texture.</p>
</p>
<p>1. <strong>Prepare the Cream Cheese Mixture</strong>: In a large mixing bowl, place 8 ounces of softened cream cheese. Using a hand mixer on medium speed, beat the cream cheese until it is completely smooth. This step is crucial because any lumps in the cream cheese will result in a less-than-perfect filling.</p>
</p>
<p>2. <strong>Incorporate the Sugar and Vanilla</strong>: Gradually add 1 cup of powdered sugar and 1 teaspoon of pure vanilla extract to the cream cheese. Mix on low speed until the sugar is incorporated and then increase to medium speed. Beat until the mixture is fluffy and well combined, about 2-3 minutes. The sugar not only sweetens the filling but also contributes to its texture.</p>
</p>
<p>3. <strong>Whip the Heavy Cream</strong>: In a separate bowl, pour in 1 cup of heavy cream. Using a clean whisk or hand mixer, whip the cream on medium-high speed until soft peaks form. This means that when you lift the whisk or mixer, the cream should hold a peak but still have a slight droop. Be careful not to over-whip it, as this can lead to a grainy texture.</p>
</p>
<p>4. <strong>Folding the Whipped Cream</strong>: Gently fold the whipped cream into the cream cheese mixture. To do this, use a spatula to lift the mixture from the bottom and fold it over the whipped cream. Rotate the bowl as you go to ensure even incorporation. The goal is to maintain the lightness of the whipped cream while blending it with the cream cheese.</p>
</p>
<p>5. <strong>Chill the Filling</strong>: Once your filling is well combined, cover the bowl with plastic wrap and refrigerate it for at least 30 minutes. Chilling the filling not only helps it firm up but also allows the flavors to meld together, enhancing the overall taste of your caramel treats.</p>
</p>
<h3>Assembling the Heavenly Treats</h3>
</p>
<p>With the filling prepared, it’s time to assemble your heavenly caramel creations. The assembly process is where your treats start to take shape, so follow these steps for the best results.</p>
</p>
<p>1. <strong>Prepare Your Mold or Cupcake Liners</strong>: If you’re using silicone molds, ensure they are clean and dry. Silicone molds are great for this recipe because they allow for easy removal of the finished caramels. Alternatively, if using cupcake liners, place them in a muffin tin for added support.</p>
</p>
<p>2. <strong>Layering the Flavors</strong>: Start by pouring a thin layer of your caramel sauce into the bottom of each mold or liner. This layer will serve as the base for your treats. Allow the caramel to slightly cool but not set completely before adding the cream filling.</p>
</p>
<p>3. <strong>Adding the Cream Filling</strong>: After the caramel has cooled, use a piping bag or a spoon to add a generous dollop of the chilled cream filling on top of the caramel layer. Ensure that you leave some space at the top of the mold for the final layer of caramel.</p>
</p>
<p>4. <strong>Final Layer of Caramel</strong>: Once the cream filling is in place, pour another layer of caramel sauce on top to fully encapsulate the filling. This creates a beautiful layered effect and keeps the cream filling safe and sound.</p>
</p>
<p>5. <strong>Chilling the Assembled Treats</strong>: After you have filled all your molds, transfer them to the refrigerator. Allow them to chill for at least 2 hours or until the caramel is fully set. This step is crucial for achieving the right texture and ensuring that your treats hold their shape.</p>
</p>
<h3>Chilling and Setting the Caramels</h3>
</p>
<p>The chilling process is vital for your caramels, as it allows them to set properly while enhancing the flavors.</p>
</p>
<p>1. <strong>Expectations During the Setting Phase</strong>: As your caramels chill, the layers will firm up and the flavors will develop. You’ll notice that the outer caramel layer becomes more solid while the filling remains creamy yet structured.</p>
</p>
<p>2. <strong>Removing Caramels from Molds</strong>: Once the chilling time is complete, it’s time to remove your caramels from the molds. If using silicone molds, gently push from the bottom to release each caramel. If you’re using cupcake liners, simply peel them away carefully to avoid damaging the caramel.</p>
</p>
<p>3. <strong>Tips for Easy Removal</strong>: If you encounter difficulty removing the caramels, a gentle twist or slight pressure around the edges can help. Ensure that the caramels are chilled completely before attempting to remove them, as this will make the process smoother.</p>
</p>
<h3>Serving Suggestions and Variations</h3>
</p>
<p>Your heavenly vanilla cream-filled caramels are now ready to impress your guests. Here are some ideas to enhance presentation and pair these delightful treats with beverages.</p>
</p>
<p>1. <strong>Garnishing Ideas</strong>: To make your caramels even more enticing, consider garnishing them with a sprinkle of sea salt flakes, which will enhance the sweet and salty flavor profile. Drizzling melted chocolate over the top can also add a luxurious touch.</p>
</p>
<p>2. <strong>Beverage Pairings</strong>: These caramels pair beautifully with a variety of beverages. Consider serving them alongside a rich cup of coffee or a delicate tea for a perfect afternoon treat. For those looking to indulge further, dessert wines or sweet sparkling wines complement the caramel’s richness.</p>
</p>
<p>3. <strong>Flavor Variations</strong>: While the vanilla cream filling is delightful, you can easily switch things up. Try infusing the cream filling with flavors like chocolate, matcha, or fruit purees for a unique twist. Adjust the type of caramel used as well—dark chocolate caramel, salted caramel, or even a spiced caramel can create exciting new flavor profiles.</p>
</p>
<h3>Nutritional Information and Serving Size</h3>
</p>
<p>When indulging in these heavenly treats, it’s useful to be aware of their nutritional content.</p>
</p>
<p>1. <strong>Approximate Nutritional Information</strong>: Each caramel filled with cream is approximately 150-200 calories, depending on the amount of filling and caramel used. They contain a balance of sugars, fats, and a bit of protein from the cream and cream cheese.</p>
</p>
<p>2. <strong>Portion Control</strong>: Given their rich flavor, these treats are best enjoyed in moderation. A serving size of one or two caramels is perfect for satisfying your sweet tooth without overindulging. They also make excellent gifts or shared treats for gatherings, allowing everyone to enjoy a taste.</p>
</p>
<h3>Conclusion</h3>
</p>
<p>Creating heavenly vanilla cream-filled caramels is an enjoyable experience that combines the art of candy-making with the joy of dessert crafting. With each step, from preparing the filling to assembling and chilling, you can see the transformation of simple ingredients into a delightful treat that impresses friends and family alike.</p>
</p>
<p>As you experiment with the recipe, feel free to make it your own by incorporating different flavors or garnishes. The joy of homemade desserts lies not only in their taste but also in the memories created while preparing them. So roll up your sleeves, gather your ingredients, and enjoy the process of crafting these delightful caramels that are sure to become a favorite in your home.</p>
</div>

Caramel desserts have an undeniable charm that captivates dessert lovers around the world. The rich, buttery sweetness, paired with a hint of complexity, makes it a favorite in many culinary traditions. Among the myriad of caramel creations, the Heavenly Vanilla Cream Filled Caramel stands out as a truly indulgent treat. This recipe beautifully marries the luscious, velvety texture of vanilla cream with the deep, rich flavors of caramel, creating a dessert that is as delightful to the palate as it is to the eye.

Vanilla Cream Filled Caramel

Looking for sweet treat ideas that can be whipped up in a flash? These Heavenly Vanilla Cream Filled Caramels are perfect for any occasion, taking only 30 minutes to prepare! Impress your guests with this delightful dessert thats sure to be a hit at your next gathering or cozy night in. DessertIdeas SweetTreats QuickDesserts CaramelDelight Afterka HomemadeGoodness 30MinuteDessert

Ingredients
  

1 cup granulated sugar

1/4 cup unsalted butter

1/2 cup heavy cream

1 teaspoon sea salt

1 teaspoon pure vanilla extract

1 cup powdered sugar

1/4 cup cream cheese, softened

1/4 cup heavy whipping cream, chilled

1 teaspoon vanilla bean paste (or additional vanilla extract)

A pinch of salt, to taste

Instructions
 

Make the Caramel:

    - In a medium saucepan over medium heat, add the granulated sugar. Stir gently with a wooden spoon or a silicone spatula as it begins to melt.

      - Once the sugar starts melting, continue to stir until it all melts evenly and turns a golden amber color. Be careful not to burn it.

        - Remove from heat and quickly stir in the butter until melted and incorporated.

          - Slowly whisk in the heavy cream (it will bubble up), then return to low heat and stir until smooth. Add sea salt and set aside to cool slightly.

            Prepare the Vanilla Cream Filling:

              - In a mixing bowl, beat the cream cheese until smooth.

                - Gradually add the powdered sugar, mixing until well combined and creamy.

                  - In another bowl, beat the chilled heavy whipping cream until soft peaks form.

                    - Gently fold the whipped cream into the cream cheese mixture until fully combined.

                      - Stir in the vanilla bean paste and a pinch of salt. Chill in the refrigerator for about 15-20 minutes.

                        Assemble the Caramel Treats:

                          - Once the caramel has cooled slightly but is still pourable, drizzle a small amount into the bottom of silicone molds or cupcake liners (about 1/4 of the mold).

                            - Using a piping bag or a spoon, fill each one with the vanilla cream filling until nearly full, leaving some space for more caramel on top.

                              - Top each filled mold with another drizzle of the warm caramel.

                                Chill and Serve:

                                  - Place the filled molds in the fridge for at least 2 hours to set.

                                    - Once set, pop them out of the molds and enjoy your heavenly vanilla cream filled caramels!

                                      Prep Time: 30 minutes | Total Time: 2 hours 30 minutes | Servings: 12 pieces

                                        WANT TO SAVE THIS RECIPE?

                                        Leave a Comment

                                        Recipe Rating