Introduction
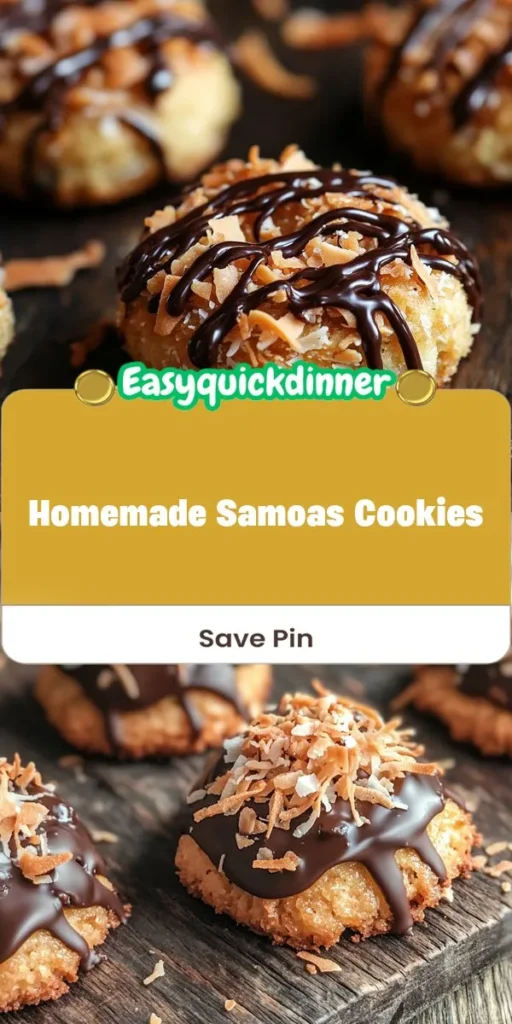
Samoas cookies, also known as Caramel deLites, are a beloved classic within the realm of Girl Scout cookies. Their irresistible combination of flavors—rich, buttery cookie base, a luscious caramel-coconut topping, and a decadent chocolate drizzle—has made them a favorite treat among cookie enthusiasts and dessert lovers alike. While store-bought versions have their charm, making Samoas cookies at home elevates the experience to a whole new level. Not only do you gain the satisfaction of crafting these delectable delights from scratch, but you also have the freedom to customize the ingredients to your liking, ensuring a fresher, more authentic taste.
In this recipe, we will guide you through the process of creating these irresistible cookies that boast a perfect balance of crunchiness and chewiness. The layers of flavor and texture in homemade Samoas cookies are truly something special, making them an ideal treat for any occasion—whether it’s a cozy weekend with family, a holiday gathering, or simply a sweet indulgence for yourself. Let’s dive into the world of Samoas cookies and discover how to recreate this cherished treat in your own kitchen.
Understanding Samoas Cookies
The history of Samoas cookies dates back to the mid-20th century when the Girl Scouts of America began producing them as part of their annual fundraising efforts. Originally created by two different bakeries, these cookies have evolved over the years, but their core components have remained the same. The name “Samoas” is believed to derive from the tropical feel of the cookies, evoking images of coconut palms swaying in the breeze. The combination of coconut, caramel, and chocolate has captured the hearts of many, leading to their widespread popularity across the United States and beyond.
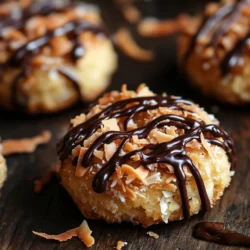
At the heart of every Samoas cookie is a trio of unique components that contribute to its signature taste. First, there’s the cookie base, which is buttery and slightly crisp, providing the perfect foundation for the luscious toppings. Next comes the star of the show: a rich layer of caramel infused with toasted shredded coconut, creating a chewy texture that’s both satisfying and indulgent. Finally, a generous drizzle of smooth chocolate adds a touch of decadence, tying all the flavors together.
The cultural significance of Samoas cookies extends beyond just being a tasty treat. They represent community, collaboration, and the spirit of giving, as proceeds from Girl Scout cookie sales help fund various programs and initiatives for young girls. This makes each cookie not just a delicious bite but a symbol of empowerment and support for future generations.
Ingredients Breakdown
To create the perfect homemade Samoas cookies, it’s essential to understand each ingredient’s role and significance in the recipe. Below is a detailed description of the ingredients needed for this delightful treat.
Cookie Base Ingredients
1. Unsalted Butter: The foundation of the cookie base, unsalted butter provides a rich flavor and tender texture. By using unsalted butter, you can control the amount of salt in your cookies, ensuring a balanced taste. Make sure to use butter at room temperature for optimal creaming.
2. Granulated Sugar: Sugar not only sweetens the cookies but also contributes to their texture. When creamed with butter, granulated sugar helps incorporate air into the dough, leading to a light and fluffy cookie base.
3. Brown Sugar: Brown sugar adds moisture and a hint of caramel flavor, enhancing the overall taste of the cookies. Its slight acidity helps to create a chewy texture, making the cookie base perfectly balanced.
4. All-Purpose Flour: The backbone of any cookie recipe, all-purpose flour provides structure. It’s crucial to measure the flour accurately to avoid dense cookies. Spoon the flour into your measuring cup and level it off with a knife for best results.
5. Baking Powder: This leavening agent ensures that your cookies rise properly while baking, resulting in a tender and airy texture.
6. Salt: A small amount of salt enhances the sweetness of the cookies and balances the flavors, making each bite more enjoyable.
7. Vanilla Extract: Adding a splash of vanilla extract elevates the flavor profile, providing a warm and inviting aroma that complements the other ingredients beautifully.
Caramel Coconut Layer Ingredients
1. Caramel Candies: The core element of the caramel coconut layer, these candies melt down beautifully and create that gooey, rich topping that we all love. You can find individually wrapped caramels in most grocery stores, or you can make your own if you’re feeling adventurous.
2. Heavy Cream: Adding heavy cream to the melted caramel helps create a smooth and creamy consistency, ensuring that the topping adheres well to the cookie base.
3. Toasted Shredded Coconut: Toasted coconut adds depth of flavor and texture to the cookies. The toasting process enhances the nuttiness of the coconut while providing a satisfying chew. You can easily toast shredded coconut on a baking sheet in the oven until golden brown.
Chocolate Drizzle Ingredients
1. Semisweet Chocolate Chips: Semisweet chocolate is the preferred choice for the drizzle, providing a perfect balance of sweetness and richness. The melting quality of chocolate chips makes them ideal for creating a smooth drizzle over the cookies.
2. Coconut Oil: Adding a small amount of coconut oil when melting the chocolate helps achieve a smooth consistency, making it easier to drizzle over the cookies. Additionally, it adds a hint of coconut flavor that ties all the components together.
Step-by-Step Guide to Making Samoas Cookies
Preparing the Cookie Base
1. Creaming the Butter and Sugars: Begin by preheating your oven to 350°F (175°C). In a large mixing bowl, combine the room temperature unsalted butter, granulated sugar, and brown sugar. Using an electric mixer, cream them together on medium speed until the mixture is light and fluffy. This process typically takes about 2-3 minutes. Proper creaming is essential; it incorporates air into the dough, resulting in a tender cookie.
2. Adding Dry Ingredients: In a separate bowl, whisk together the all-purpose flour, baking powder, and salt. Gradually add this dry mixture to the creamed butter and sugars, mixing on low speed until just combined. Be careful not to overmix, as this can lead to tough cookies.
3. Incorporating Vanilla: Once the dough is formed, add in the vanilla extract and mix just until incorporated. The dough should be soft but not sticky.
Shaping and Baking the Cookies
1. Rolling the Dough: Divide the dough into two equal portions for easier handling. Roll each portion into a log shape, about 1-1.5 inches in diameter. Wrap the logs in plastic wrap and refrigerate for at least 30 minutes. Chilling the dough allows it to firm up, making it easier to slice.
2. Slicing the Cookies: After chilling, remove the dough logs from the refrigerator and slice them into ¼-inch thick rounds. As you slice each cookie, use your thumb to press a small indentation in the center of each round to create a well for the caramel-coconut layer.
3. Baking the Cookies: Place the sliced cookies on a parchment-lined baking sheet, spacing them about 2 inches apart. Bake in the preheated oven for 10-12 minutes or until the edges are lightly golden. Remove from the oven and let the cookies cool on the baking sheet for a few minutes before transferring them to a wire rack to cool completely.
Stay tuned for the next part, where we will delve into creating the caramel-coconut layer and finishing off these delicious homemade Samoas cookies with a luscious chocolate drizzle!
Baking Tips for Achieving the Perfect Golden Edge
When it comes to baking your homemade Samoas cookies, achieving that perfect golden edge is crucial for both taste and presentation. Here are some essential tips to consider:
1. Preheat Your Oven: Always preheat your oven before placing your cookies inside. This ensures even baking and helps achieve that golden edge. Set your oven to 350°F (175°C), and give it at least 15-20 minutes to reach the right temperature.
2. Use the Right Baking Sheet: Opt for a light-colored baking sheet for even heat distribution. Dark sheets can cause the bottoms of the cookies to burn before the tops are properly browned.
3. Monitor Baking Time: Keep a close eye on your cookies while they bake. The edges should start to turn golden brown while the centers may look slightly underbaked. This is perfect, as they will continue to cook once removed from the oven.
4. Cooling Racks: After baking, transfer your cookies to a wire rack to cool. This prevents them from steaming and becoming soggy, ensuring that lovely crisp edge remains.
Preparing the Caramel Coconut Layer
The caramel coconut layer is the signature element of Samoas cookies. Here’s how to prepare it perfectly:
1. Gather Your Ingredients: You’ll need sweetened shredded coconut, caramel candies, and heavy cream. The quality of these ingredients can significantly affect the final taste, so choose fresh, high-quality products.
2. Toast the Coconut: Before mixing it with the caramel, toast your shredded coconut in the oven or on the stovetop. Spread it evenly on a baking sheet and bake at 350°F (175°C) for 5-7 minutes until golden brown, or toast it in a skillet over medium heat, stirring frequently to prevent burning.
3. Melt the Caramel: In a saucepan, combine the caramel candies and heavy cream over low heat. Stir continuously until the mixture is completely melted and smooth. This gentle heating prevents the caramel from burning and ensures a creamy consistency.
Best Practices for Melting Caramel and Incorporating Cream
To successfully melt caramel and incorporate cream, follow these steps:
1. Use a Heavy-Bottomed Pan: A thick pan will distribute heat evenly, reducing the risk of burning the caramel.
2. Low Heat is Key: Always melt caramel over low to medium-low heat. High heat can cause the sugar to seize, leading to a grainy texture.
3. Stir Constantly: As the caramel begins to melt, stir continuously to maintain a smooth consistency. Once the caramel is fully melted, gradually add the heavy cream while stirring to create a silky caramel sauce.
Ensuring Even Distribution of Toasted Coconut
Once your caramel is smooth, it’s time to incorporate the toasted coconut:
1. Mix Thoroughly: Once the caramel is melted and combined with cream, remove it from the heat and immediately fold in the toasted coconut. Use a spatula to ensure the coconut is evenly coated in the caramel.
2. Avoid Clumping: If the coconut seems to clump together, gently separate it with your spatula while mixing. An even distribution is crucial for the texture and taste in each bite.
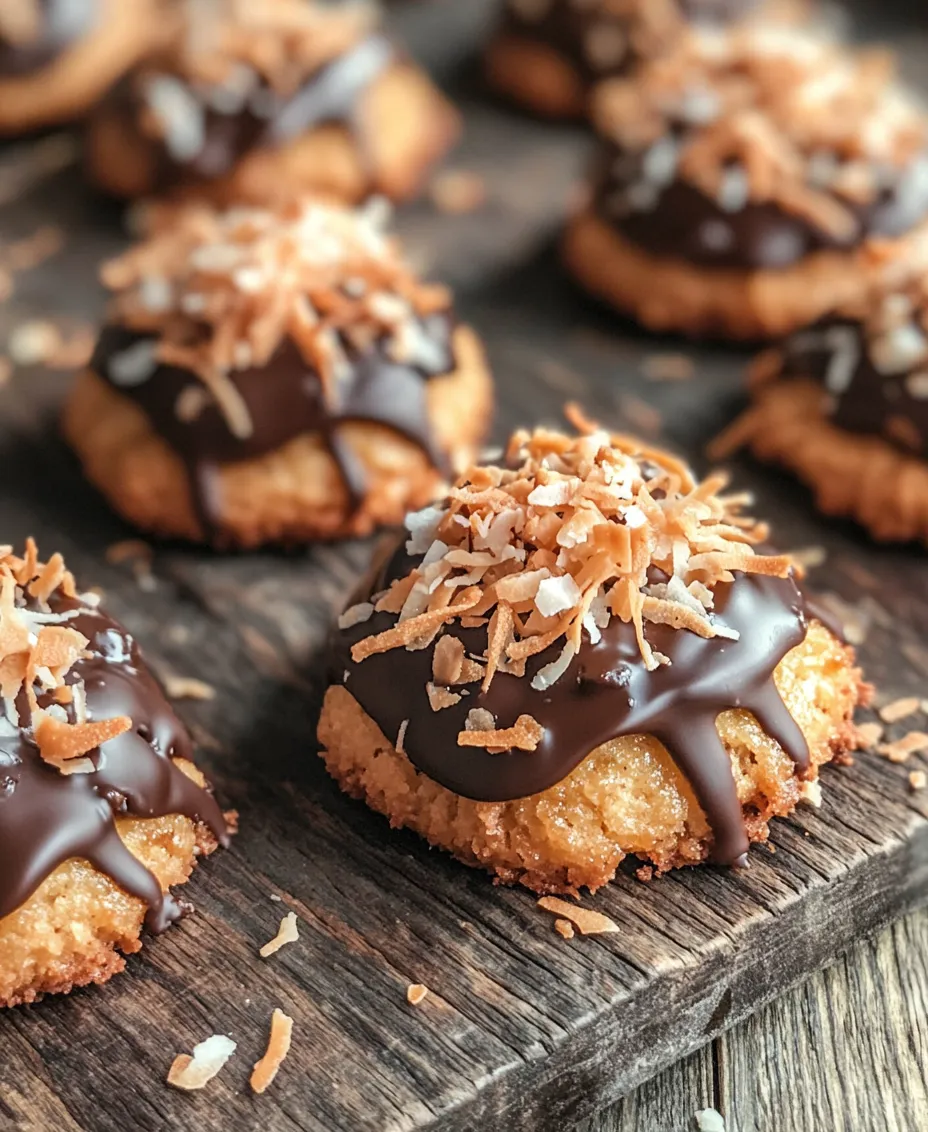
Assembling the Cookies
The assembly of your Samoas cookies is where the magic happens. Follow these steps for a flawless finish:
1. Spoon the Caramel Mixture: Using a tablespoon or small scoop, place a generous amount of the caramel coconut mixture on top of each cookie.
2. Spread Evenly: Use the back of the spoon or a small offset spatula to spread the mixture evenly across the top of each cookie. Aim for a thick layer that will hold its shape.
3. Presentation Matters: For a polished look, ensure that each cookie is topped with a uniform layer of the caramel coconut mixture. This not only enhances the visual appeal but also makes for a delightful eating experience.
Creating the Chocolate Drizzle
No Samoas cookie is complete without its signature chocolate drizzle. Here’s how to achieve it perfectly:
1. Melt Your Chocolate: Chop your chocolate into small, even pieces. Place it in a microwave-safe bowl and microwave it in 30-second intervals, stirring each time until smooth. This prevents overheating, which can cause the chocolate to seize.
2. Drizzle Techniques: Once your chocolate is melted, you can use a fork or a piping bag to drizzle it over the assembled cookies. If using a fork, dip it into the chocolate and wave it back and forth above the cookies to create a beautiful pattern.
3. Creative Drizzling: For an aesthetic appeal, consider using different types of chocolate (dark, milk, or white) for the drizzle. You can also sprinkle some sea salt on top of the chocolate before it sets for an added flavor dimension.
Chilling and Setting the Cookies
Chilling your cookies is a critical step for ensuring the chocolate layer sets properly:
1. Chill in the Refrigerator: After drizzling the chocolate on each cookie, place them in the refrigerator for at least 30 minutes. This helps the chocolate harden and keeps the layers intact.
2. Proper Storage: If you’re not serving the cookies right away, store them in an airtight container in the fridge. This will keep them fresh and delicious for a longer time.
Serving Suggestions
Samoas cookies are not only a treat on their own, but they also pair wonderfully with various beverages and can be elegantly presented at gatherings:
1. Beverage Pairings: Enjoy these cookies with a cup of coffee, tea, or a glass of cold milk. The rich flavors complement each other beautifully.
2. Presentation Ideas: Arrange the cookies on a decorative platter, perhaps with a few sprigs of mint for an added touch of color. They make a delightful centerpiece for dessert tables at parties or special occasions.
3. Storing Leftovers: If you have any leftovers (which is rare!), store them in an airtight container at room temperature for up to a week. For longer storage, keep them in the refrigerator.
Nutritional Information and Serving Size
Understanding the nutritional content of your homemade Samoas cookies can help in enjoying them responsibly:
1. Nutritional Overview: Each cookie contains roughly 150 calories, with a balance of carbohydrates, fats, and sugars. While they are a treat, moderation is key.
2. Portion Control: Consider serving them alongside fresh fruit or a light dessert to balance indulgence with healthier options. This way, you can enjoy the delightful flavors without overdoing it.
Conclusion
Homemade Samoas cookies are a delight to make and even more enjoyable to eat. From the rich caramel coconut layer to the decadent chocolate drizzle, these cookies bring joy to anyone who indulges in them. Don’t hesitate to share this recipe with family and friends – there’s something special about creating these treats together. As you savor each bite, take pride in knowing you crafted these delightful cookies from scratch, bringing smiles and sweetness to your home. Enjoy the satisfaction of your baking accomplishment and the delicious rewards it brings!