Introduction
Welcome to the delightful world of holiday baking, where the aromas of spices, sweets, and festive cheer fill the air. As the holiday season approaches, the search for the perfect cookie to share with family and friends becomes a priority for many. Among the plethora of options, Mint Chocolate Chip Snowball Cookies stand out as a true festive favorite. These cookies beautifully combine the refreshing flavor of mint with the rich sweetness of chocolate, making them a perfect treat for holiday gatherings or a thoughtful gift for loved ones.
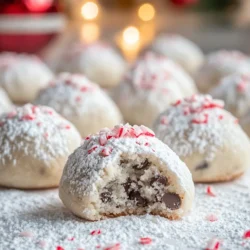
What makes these snowball cookies particularly appealing is their unique appearance and taste. The moment you bite into one, you’re greeted with a soft, melt-in-your-mouth texture, enveloped in a snowy coating of powdered sugar that adds a delightful sweetness. Inside, mini chocolate chips and crushed peppermint provide a burst of flavor that perfectly complements the cookie’s buttery base. The simplicity of the recipe allows bakers of all levels to create these mouthwatering treats, bringing joy and warmth to any occasion.
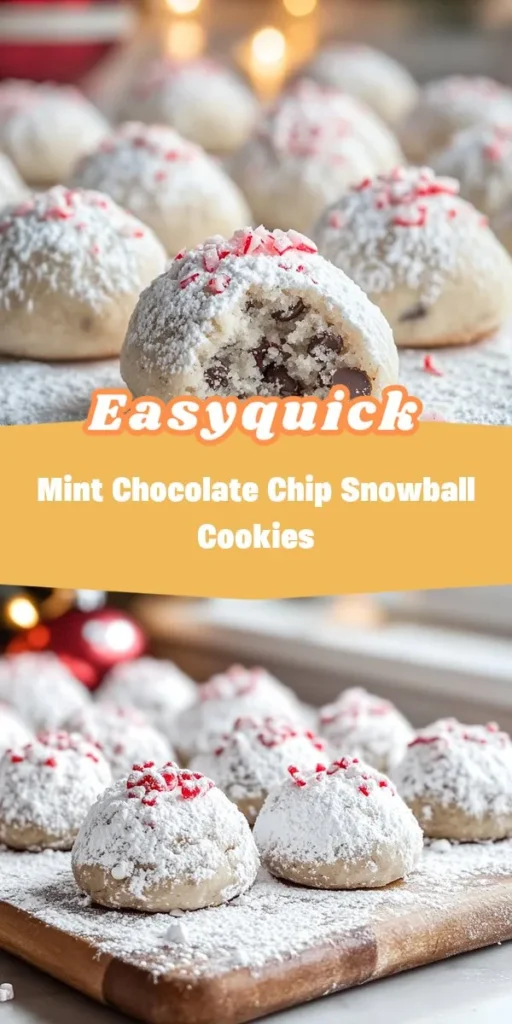
The Allure of Mint Chocolate Chip Snowball Cookies
Mint Chocolate Chip Snowball Cookies are not just another holiday treat; they are an experience. The combination of textures and flavors makes them truly unique. The initial crunch of the powdered sugar coating gives way to a soft, tender cookie that is both comforting and indulgent. The addition of mini chocolate chips adds a rich chocolatey depth, while the crushed peppermint brings a refreshing brightness that evokes the spirit of the season.
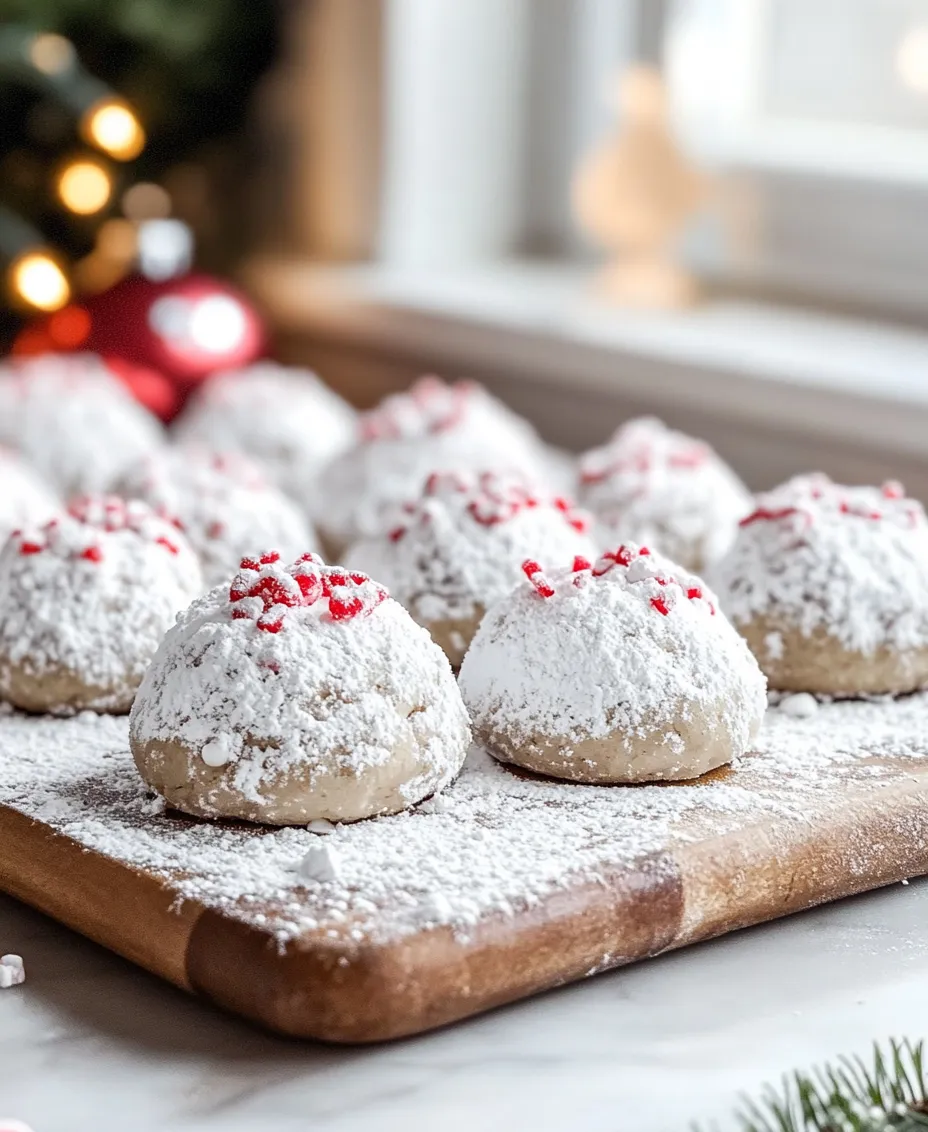
These cookies are visually appealing as well. The contrast of the white powdered sugar against the soft green of the mint and the dark flecks of chocolate creates an inviting look that draws you in. They make for a stunning presentation on a holiday cookie platter or as a gift wrapped in festive packaging. Not only do they taste incredible, but they also embody the essence of the holiday spirit with their vibrant colors and delightful flavors.
Whether you are baking for a holiday party, a family gathering, or simply to enjoy with a cup of cocoa by the fireplace, Mint Chocolate Chip Snowball Cookies are sure to impress. Their easy preparation and charming appearance make them a go-to recipe for both novice bakers and seasoned pros.
Ingredients Overview
Before diving into the baking process, it’s essential to understand the role each ingredient plays in creating the perfect Mint Chocolate Chip Snowball Cookies. Here’s a detailed breakdown of the ingredients you’ll need:
– Unsalted Butter: This is the foundation of our cookie dough. Using unsalted butter is preferred for baking as it allows you to control the amount of salt in the recipe, ensuring a balanced flavor. The butter contributes to the richness and tenderness of the cookies, helping them maintain that soft, melt-in-your-mouth texture.
– Powdered Sugar: Also known as confectioners’ sugar, this ingredient serves two primary purposes: sweetness and texture. Powdered sugar not only sweetens the cookies but also contributes to the delicate, powdery coating that gives these snowball cookies their signature look. Unlike granulated sugar, powdered sugar dissolves quickly into the dough, creating a smooth and creamy consistency.
– Extracts: Flavor extracts are crucial in elevating the taste of your cookies. Vanilla extract brings a warm, comforting flavor that complements the buttery base, while peppermint extract provides that refreshing, minty kick. The combination of these extracts enhances the overall flavor profile, making each bite a delightful experience.
– All-Purpose Flour and Salt: All-purpose flour is the primary dry ingredient that gives the cookies structure. It helps to bind the dough together, allowing the cookies to hold their shape while baking. A pinch of salt is essential in balancing the sweetness of the sugar and enhancing the overall flavor of the cookies.
– Chocolate Chips and Crushed Peppermint: These ingredients are the stars of our cookies. Mini chocolate chips provide bursts of rich chocolate flavor, while crushed peppermint adds a festive crunch and an invigorating minty taste. Together, they create a harmonious blend of flavors that make these cookies truly special.
Step-by-Step Instructions for Perfect Cookies
Now that we’ve covered the ingredients, it’s time to get into the baking process! Follow these detailed steps to ensure your Mint Chocolate Chip Snowball Cookies turn out perfectly:
Preheating the Oven
Before you begin mixing your ingredients, it’s essential to preheat your oven to 350°F (175°C). This step is crucial for even baking. An adequately heated oven ensures that the cookies rise properly and develop that desirable soft and slightly chewy texture. If you skip this step, your cookies may spread too much or bake unevenly, leading to a less-than-perfect final product.
Once your oven is preheated, you’ll be ready to move on to the next steps in the cookie-making process. Stay tuned for the detailed mixing and baking instructions that will guide you through creating these delightful Mint Chocolate Chip Snowball Cookies.
Creaming Butter and Sugar
The foundation of any great cookie lies in the creaming of butter and sugar. This crucial step involves beating softened butter with granulated sugar until the mixture becomes light and fluffy. The process incorporates air into the batter, resulting in a cookie that is tender and airy. Aim for a pale, creamy texture, which indicates that enough air has been incorporated. This not only improves the cookie’s texture but also allows the flavors to meld beautifully later in the baking process.
Make sure your butter is at room temperature, as this will facilitate the creaming process. If your butter is too cold, it won’t incorporate air effectively, and if it’s too warm, the cookies may spread too much during baking. A good rule of thumb is to take the butter out of the refrigerator about 30 minutes before you start baking.
Incorporating Extracts
Once your butter and sugar are creamed to perfection, it’s time to add the flavorings—vanilla extract and peppermint extract. The key to ensuring an even distribution of flavors is to add the extracts gradually while continuing to mix. Start with the vanilla, which provides a rich backbone to the cookie, followed by the peppermint extract.
To avoid any concentrated pockets of flavor, ensure that you mix the extracts in well. A good technique is to beat them in for about 30 seconds to ensure they are fully incorporated. Remember that peppermint extract can be quite potent, so a little goes a long way; you want the mint flavor to be present but not overpowering.
Combining Dry Ingredients
Next, it’s time to combine the dry ingredients: all-purpose flour, baking powder, and a pinch of salt. It’s essential to whisk these ingredients together in a separate bowl first. This helps to evenly distribute the baking powder and salt throughout the flour, which is crucial for proper leavening and flavor.
When adding the dry ingredients to your wet mixture, do so gradually. Begin by adding one-third of the flour mixture, and gently mix until just combined. Repeat this step until all the dry ingredients are incorporated. Be cautious not to overwork the dough; overmixing can lead to tough cookies. The goal is to mix just until the flour disappears, resulting in a soft, slightly sticky dough.
Folding in Chocolate Chips
The final step before baking involves folding in the chocolate chips. Use a spatula for this step, as it allows for gentle incorporation without deflating the dough. Scoop the chocolate chips into the dough, and use a folding motion—bringing the spatula down the center of the bowl and then lifting the dough over the chocolate chips. Repeat this until the chips are evenly dispersed throughout the dough.
This method not only ensures that the chocolate chips are well-distributed but also helps maintain the light texture of the cookie batter.
Shaping the Cookies
To shape your cookies, use a cookie scoop or a tablespoon to portion out the dough. Aim for uniform sizes—about 1 tablespoon per cookie—to ensure even baking. Place the dough balls on a parchment-lined baking sheet, leaving about 2 inches of space between each ball. This spacing allows the cookies to spread without merging together, resulting in beautifully shaped snowball cookies.
Baking Time and Temperature
Preheat your oven to 350°F (175°C) before you begin baking. This temperature is ideal for achieving a nice, golden exterior while keeping the inside soft and chewy. Bake the cookies for about 10-12 minutes, or until the edges set but the centers still look slightly underbaked. The cookies will continue to firm up as they cool on the baking sheet, achieving the perfect balance of texture.
To determine doneness, look for a slight golden brown color on the bottom edges and a puffed appearance on top. If you notice the cookies cracking slightly, that’s a good sign they’re ready to come out.
Coating and Topping
Once your cookies are baked and have cooled slightly, it’s time for the finishing touches. Prepare two bowls: one filled with powdered sugar and the other with crushed peppermint candies. The first step is to roll each warm cookie in the powdered sugar, creating a snowy exterior that complements the mint chocolate flavor beautifully.
After the initial coating, let the cookies cool completely. For an extra festive touch, you can roll them in the crushed peppermint candies as well. This not only adds a delightful crunch but also enhances the visual appeal of your cookies, making them a perfect treat for holiday gatherings.
The Significance of Presentation
Presentation plays a significant role in baking, especially during the holiday season. Mint Chocolate Chip Snowball Cookies, with their snowy white coating and festive peppermint topping, are not just a treat for the taste buds but also a feast for the eyes. A beautifully presented cookie can elevate the entire baking experience, making it feel special and celebratory.
Consider arranging your cookies on a decorative platter or in a festive tin when serving. Adding colorful holiday decorations or sprigs of mint can create a charming display that invites your friends and family to indulge in your handmade treats.
Flavor Pairings and Serving Suggestions
When it comes to enjoying your Mint Chocolate Chip Snowball Cookies, the right beverage can elevate the experience even further. These cookies pair wonderfully with a warm cup of tea, a rich coffee, or even a cozy mug of hot chocolate. The minty freshness complements the warmth of these beverages, making for a delightful afternoon snack or dessert after a holiday meal.
These cookies are also perfect for sharing at holiday gatherings, making them an excellent addition to cookie trays or dessert tables. They can be packaged beautifully and given as gifts, delighting friends and family with their unique flavor and festive appearance.
Storage and Shelf Life
To keep your Mint Chocolate Chip Snowball Cookies fresh, store them in an airtight container at room temperature. This method helps retain their softness and flavor. If you want an extended shelf life, you can refrigerate them. In this case, ensure they’re well-covered to prevent them from drying out.
Under optimal storage conditions, these cookies can last for about one week at room temperature and up to two weeks in the refrigerator. If you want to keep them for longer, consider freezing them. To freeze, place the cookies in a single layer on a baking sheet until solid, then transfer them to a freezer-safe container or bag. They can be stored in the freezer for up to three months. When you’re ready to enjoy them, simply let them thaw at room temperature.
Conclusion
Baking Mint Chocolate Chip Snowball Cookies is more than just creating a delicious treat; it’s about cherishing moments spent in the kitchen, sharing joy with loved ones, and embracing the holiday spirit. These cookies not only bring delightful flavors to the table but also create cherished memories that will last a lifetime.
Encourage yourself and others to embrace the joy of baking, fill your homes with the enticing aroma of mint and chocolate, and create your own wonderful traditions. Whether you’re preparing them for a holiday gathering, gifting them to friends, or enjoying them during a cozy night in with family, these delightful cookies are sure to spread happiness and warmth. So roll up your sleeves, gather your ingredients, and start creating sweet memories with Mint Chocolate Chip Snowball Cookies.