Introduction
If you’re on the hunt for a snack that tantalizes the taste buds, look no further than Pillsbury Biscuit Garlic Butter Cheese Bombs. This delectable dish combines the flaky, buttery goodness of Pillsbury Grands! Biscuits with the mouthwatering flavors of gooey cheese and aromatic garlic butter. Whether you’re entertaining guests, preparing for a family gathering, or simply indulging in a late-night snack, these cheese bombs are a versatile treat that can be served in various settings. Their alluring aroma and irresistible taste make them an instant favorite, captivating anyone who takes a bite.
The beauty of this recipe lies in its fusion of flavors and textures. Each bite offers a delightful crunch from the outer biscuit layer, followed by a warm, cheesy center that melts in your mouth. The addition of garlic butter not only elevates the flavor profile but also adds a richness that complements the mildness of the cheese. With just a few simple ingredients, you can create these cheesy delights that are sure to impress your family and friends.
In this article, we will explore the ingredients that make these cheese bombs stand out, as well as provide you with detailed step-by-step instructions for creating this scrumptious dish in your own kitchen.
Understanding the Ingredients
To create the perfect Pillsbury Biscuit Garlic Butter Cheese Bombs, you’ll need a handful of key ingredients. Each component plays a significant role in achieving the desired flavor and texture, and understanding their importance will help you master this recipe.
Pillsbury Grands! Biscuits
The star of this recipe is undoubtedly the Pillsbury Grands! Biscuits. These pre-made biscuits are a kitchen staple for many, thanks to their convenience and consistent quality. Using these biscuits ensures that you achieve a light and flaky texture, as they are specifically designed to rise beautifully in the oven. The buttery flavor of the biscuits also enhances the overall taste of the cheese bombs, allowing the fillings to shine.
Cheese Selection
The filling for these cheese bombs is a delectable blend of three types of cheese: mozzarella, cream cheese, and Parmesan. Each cheese contributes a unique flavor and texture to the dish.
– Mozzarella: Known for its gooey texture and mild flavor, mozzarella is the perfect addition to the filling. When melted, it creates a stretchy, cheesy experience that everyone loves. Its light taste allows the other flavors in the cheese bomb to come through.
– Cream Cheese: This ingredient adds a rich creaminess to the filling. It helps bind the cheeses together, ensuring the filling remains cohesive and easy to work with. Cream cheese also provides a slight tanginess that balances the richness of the other cheeses.
– Parmesan: A sprinkle of grated Parmesan elevates the dish with its sharp, nutty flavor. This hard cheese adds a depth of taste that complements the creaminess of the mozzarella and cream cheese, creating a well-rounded cheese bomb that is bursting with flavor.
Garlic and Italian Seasoning
To enhance the flavor profile of the cheese bombs, garlic and Italian seasoning are essential. Fresh garlic, when mixed with melted butter, releases a fragrant aroma that is irresistible. The addition of Italian seasoning—typically a blend of herbs like basil, oregano, and thyme—adds a burst of herby goodness that complements the cheesiness of the filling.
Unsalted Butter
Using unsalted butter in this recipe is crucial for controlling the overall saltiness of the dish. The butter not only serves as the base for the garlic flavor but also contributes to the richness of the cheese bombs. By using unsalted butter, you can better balance the flavors of the cheese and seasoning, ensuring that each bite is perfectly seasoned.
Step-by-Step Instructions for Garlic Butter Cheese Bombs
Now that we’ve covered the essential ingredients, it’s time to dive into the preparation process. Below is a detailed breakdown of each step involved in creating these delicious Garlic Butter Cheese Bombs.
Preheating the Oven
Before you start assembling your cheese bombs, the first step is to preheat your oven to 375°F (190°C). Preheating is crucial for achieving the perfect bake. When the oven is heated to the right temperature, the biscuits will rise properly, resulting in a light and fluffy texture. This step ensures that your cheese bombs cook evenly and develop a beautiful golden-brown color.
Preparing the Filling
Next, it’s time to prepare the cheesy filling. In a medium-sized mixing bowl, combine the mozzarella, cream cheese, and grated Parmesan. For the best results, allow the cream cheese to come to room temperature so that it blends smoothly with the other cheeses. Use a spatula or a fork to mix the cheeses until they are well combined.
Tips for Cheese Mixture Consistency:
– If you prefer a cheesier filling, feel free to add more mozzarella or Parmesan.
– For a different flavor profile, consider adding cheddar or gouda to the mixture. These cheeses will provide unique textures and flavors that can elevate your cheese bombs even further.
Preparing the Biscuits
Once your filling is ready, it’s time to prepare the biscuits. Open the package of Pillsbury Grands! Biscuits and separate them. Lightly flour your work surface to prevent sticking. Take one biscuit and gently flatten it using your hands or a rolling pin until it forms a circle about 4 inches in diameter. Be careful not to press too hard, as you want to maintain the integrity of the biscuit dough.
Handling the Biscuits:
– It’s important to handle the biscuits gently to avoid tearing. If you find that a biscuit is too thick to flatten easily, you can use a rolling pin to achieve the desired thickness. Just remember to apply even pressure to keep the biscuit’s flaky texture intact.
Filling and Sealing the Biscuits
With your flattened biscuit ready, it’s time to add the cheesy filling. Place a generous tablespoon of the cheese mixture in the center of the biscuit. Carefully fold the edges of the biscuit over the filling, pinching them together to seal. Ensure that the filling is completely enclosed within the biscuit to prevent any cheese from leaking out during baking.
Tips for Sealing:
– Make sure the seal is tight; otherwise, the filling might ooze out while baking.
– For an extra touch, you can roll the filled biscuit into a ball shape to ensure a secure seal.
By following these steps, you’re well on your way to creating your own batch of Mouthwatering Pillsbury Biscuit Garlic Butter Cheese Bombs. This recipe is not only easy to follow but also guarantees a delicious outcome that will impress anyone who tries them. Stay tuned for the next part, where we will dive into finishing touches, baking instructions, and serving suggestions to elevate your cheese bomb experience!
Instructions on How to Effectively Fill and Seal the Biscuits
Filling and sealing the Pillsbury biscuits requires a delicate touch to ensure that the delicious garlic butter and cheese filling stays inside during baking. Follow these steps for the perfect execution:
1. Prepare the Biscuits: Start by preheating your oven to 375°F (190°C) and preparing a baking sheet lined with parchment paper. Open the can of Pillsbury biscuits and separate them, placing them on a clean surface.
2. Flatten the Biscuits: Take each biscuit and gently flatten it with your fingers or a rolling pin, ensuring it’s about 1/4 inch thick. This will create enough surface area to hold the filling.
3. Add the Filling: Place about one tablespoon of your cheese filling in the center of each flattened biscuit. Be careful not to overfill, as this can lead to leaks. If you’re using multiple types of cheese (like mozzarella and cheddar), you can mix them for a more complex flavor.
4. Seal the Biscuits: To seal, fold the edges of the biscuit over the filling, pinching them together tightly. For extra security, you can twist the edges to form a small pouch. Ensure that there are no gaps where the filling can escape.
5. Place on Baking Sheet: Once sealed, place the filled biscuits seam-side down on the prepared baking sheet. This way, if any filling does escape, it won’t show.
Tips for Ensuring the Filling Does Not Escape During Baking
To avoid any mishaps with the filling leaking out during baking, consider these tips:
– Seal Well: Make sure to pinch the edges firmly. You can also brush a little water around the edges before sealing, which can help the dough stick together better.
– Avoid Overfilling: Stick to the recommended amount of filling. While it might be tempting to add more for extra flavor, overfilling will make it difficult to seal properly.
– Chill Before Baking: If time allows, refrigerate the filled biscuits for about 15 minutes before baking. This helps to firm up the dough, making it less likely to open during the baking process.
Coating with Garlic Butter
Once the biscuits are filled and ready to bake, the next step is to enhance their flavor with a delicious garlic butter coating.
1. Prepare the Garlic Butter: In a small saucepan or microwave-safe bowl, melt 1/4 cup of unsalted butter. Once melted, add 2-3 cloves of minced garlic. Stir well and allow the mixture to simmer briefly, letting the garlic infuse into the butter.
2. Flavor Enhancement: Garlic butter plays a crucial role in elevating the flavor of the cheese bombs. Not only does it add a rich, buttery taste, but the garlic provides a savory kick that pairs perfectly with the cheese.
3. Optional Add-Ins: For an extra layer of flavor, consider adding herbs or spices to the garlic butter. Fresh parsley, thyme, or oregano can complement the richness of the cheese. A pinch of red pepper flakes can add a delightful heat for those who enjoy a spicy twist.
Baking and Serving
Now that your cheese bombs are filled, sealed, and coated, it’s time to bake them to perfection.
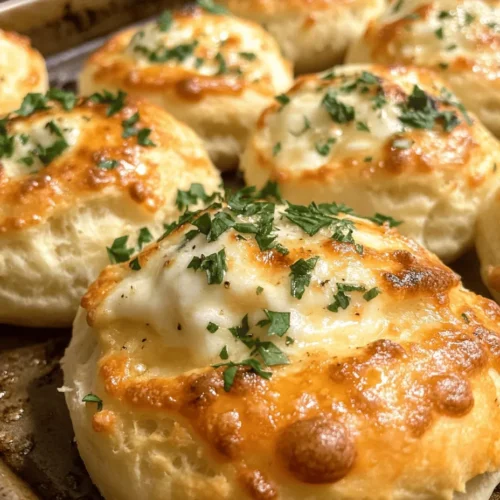
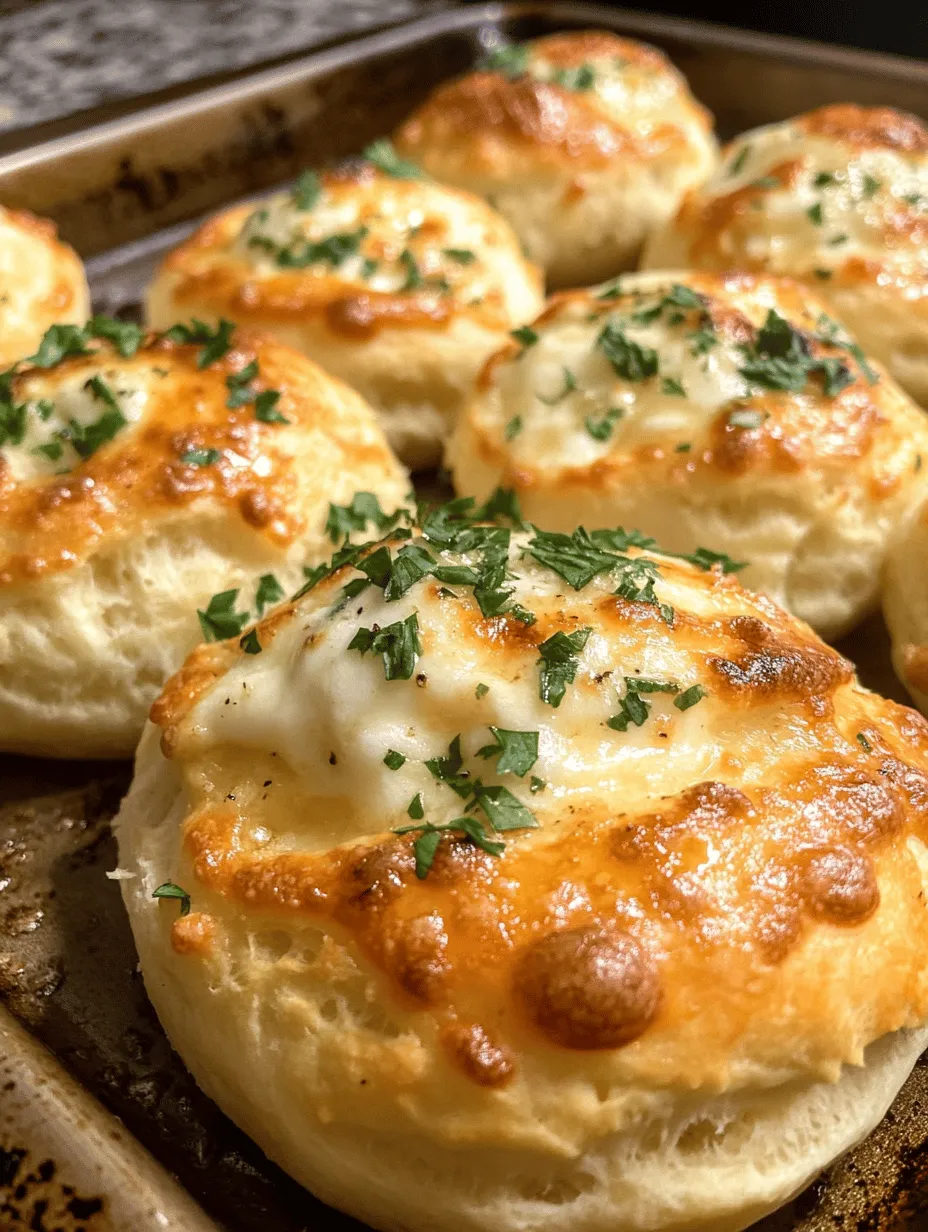
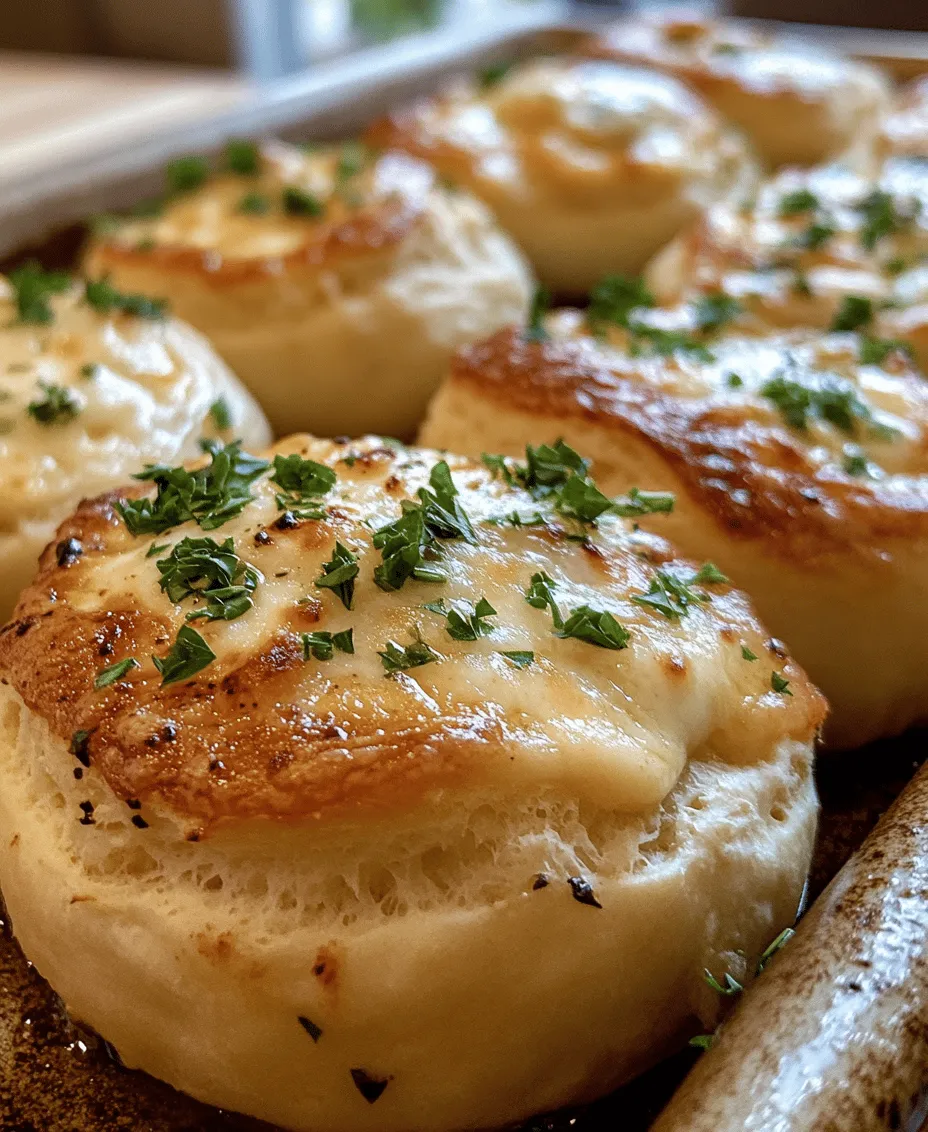
1. Optimal Baking Time: Place the baking sheet in the preheated oven and bake for 12-15 minutes. Keep an eye on them; they should turn a beautiful golden brown when done. A visual cue for doneness is when the tops are slightly puffed and have a light crust.
2. Garnishing and Serving Suggestions: Once removed from the oven, brush the cheese bombs with any remaining garlic butter and sprinkle with fresh herbs like parsley or chives for a pop of color. These cheese bombs can be served hot and are best enjoyed fresh out of the oven. Consider placing them on a serving platter with toothpicks for easy snacking.
Nutritional Information
Understanding the nutritional profile of your Pillsbury Biscuit Garlic Butter Cheese Bombs can help you enjoy them guilt-free.
– Overview of Nutritional Profile: One serving (two cheese bombs) typically contains around 250-300 calories, depending on the amount of cheese and butter used.
– Calorie Count and Fats: Each serving generally includes about 15-20 grams of fat, of which saturated fat may account for 10 grams. This is due to the use of butter and cheese.
– Protein Content: With cheese as a primary ingredient, each serving can provide approximately 10-12 grams of protein, making it a satisfying snack.
– Dietary Restrictions: For those with dietary restrictions, consider using gluten-free biscuits to accommodate gluten sensitivities. You can also explore dairy-free cheese options to make this dish suitable for lactose intolerance.
Pairing Suggestions
To enhance the experience of your cheese bombs, consider these complementary pairings:
– Beverage Ideas: A crisp white wine, such as Sauvignon Blanc, pairs beautifully with the richness of the cheese and garlic. If you prefer non-alcoholic options, consider sparkling water with a twist of lemon or a refreshing iced tea.
– Side Dishes or Dips: Serving these garlic butter cheese bombs with a side of marinara sauce for dipping is a classic choice. The acidity of the marinara cuts through the richness of the cheese. Alternatively, a fresh salad with a light vinaigrette can provide a refreshing contrast.
Creative Variations on the Recipe
One of the best things about Pillsbury Biscuit Garlic Butter Cheese Bombs is their versatility. Here are some creative variations:
1. Ingredient Substitutions: If you want to cater to different dietary preferences, consider using vegan cheese and plant-based butter for a fully vegan version. You can also explore using gluten-free biscuit dough for those who need to avoid gluten.
2. Extra Flavors: For a spicy kick, chop up jalapeños or add a dash of hot sauce to your cheese filling. This can elevate the flavor profile and add excitement for those who enjoy a bit of heat.
3. Vegetarian Options: Incorporate veggies like spinach or sun-dried tomatoes into the cheese filling for a burst of flavor and nutrition. This not only adds color but also makes the dish more filling.
4. Using Different Meats: If you prefer a meaty version, consider adding cooked crumbled sausage, diced ham, or spicy chorizo to the cheese filling. This can turn your cheese bombs into heartier appetizers.
Conclusion
Pillsbury Biscuit Garlic Butter Cheese Bombs are not just a delightful treat; they are a versatile dish that can cater to various tastes and preferences. The combination of flaky biscuit dough, melty cheese, and aromatic garlic butter makes for an irresistible snack that can be enjoyed at any gathering or simply as a cozy night in.
Encourage your family and friends to join you in the kitchen as you whip up this easy yet impressive dish. The process of filling and sealing the biscuits can be a fun activity, perfect for creating memorable moments together. So why not try making these garlic butter cheese bombs at home? You’re bound to impress everyone with your culinary skills and create a dish that will have them coming back for seconds.