Introduction
In the world of desserts, few treats can match the delight of a no-bake cheesecake. Renowned for their convenience and delightful textures, no-bake cheesecakes have gained immense popularity among home bakers and dessert enthusiasts alike. They eliminate the need for an oven, making them a perfect option for those warm summer days or spontaneous gatherings where you want to impress your guests without the fuss of traditional baking.
Among the myriad of no-bake cheesecake recipes available, the No-Bake Orange Creamsicle Cheesecake stands out as a spectacular choice. This dessert captures the essence of a classic creamsicle, evoking memories of childhood summers with its refreshing orange flavor and creamy texture. The bright citrus notes combined with a luscious filling make it an ideal treat for any occasion, whether it’s a family barbecue, a birthday celebration, or simply a sweet way to end the day.
What makes this cheesecake truly unique is its harmonious balance of creaminess and citrus zing. The combination of smooth cream cheese, fresh orange juice, and zest provides a refreshing burst of flavor that is both nostalgic and invigorating. Not only is it visually appealing, with a vibrant orange hue, but it also offers a delightful taste experience that is sure to leave your taste buds dancing with joy.
Understanding the Ingredients
To create the perfect No-Bake Orange Creamsicle Cheesecake, it’s essential to understand the key ingredients that contribute to its deliciousness. Each component plays a crucial role in achieving the desired flavor and texture, making it vital to use quality ingredients for this recipe.
Graham Cracker Crumbs
The foundation of any cheesecake is its crust, and for this recipe, graham cracker crumbs are the star. Their slightly sweet and buttery flavor provides the perfect base, while their fine texture lends a pleasant crunch. When combined with melted butter, the crumbs form a cohesive mixture that can be easily pressed into a pan to create a solid crust. This combination not only enhances the overall flavor but also contributes to the structural integrity of the cheesecake.
Cream Cheese
A no-bake cheesecake wouldn’t be complete without cream cheese. This rich and creamy ingredient is essential for creating the cheesecake filling. Its smooth texture provides the base for the dessert, while its tangy flavor complements the sweetness of the other ingredients. When properly blended, cream cheese contributes to a velvety filling that is both decadent and light, making it a perfect match for the refreshing orange flavors.
Fresh Orange Juice and Zest
To achieve the signature creamsicle flavor, fresh orange juice and zest are non-negotiable. The juice imparts a natural sweetness and vibrant citrus flavor, while the zest adds an aromatic quality that elevates the overall taste of the cheesecake. Using fresh oranges, rather than bottled juice, ensures that your cheesecake is bursting with authentic flavor, making every bite a delightful experience.
Gelatin
In a no-bake cheesecake, setting the filling without the use of an oven is where gelatin comes into play. This key ingredient acts as a stabilizer, allowing the cheesecake to firm up as it chills in the refrigerator. Properly dissolved gelatin creates a smooth texture, ensuring that the cheesecake retains its shape when served. Without it, the filling would remain too soft, making it difficult to slice and serve.
Powdered Sugar
Finally, the choice between powdered sugar and granulated sugar can significantly influence the sweetness and texture of your cheesecake. For this recipe, powdered sugar is recommended as it dissolves easily into the cream cheese, creating a smooth and creamy filling. Its fine texture ensures that there are no gritty bits in your cheesecake, resulting in a luxurious mouthfeel that is essential for a successful dessert.
Preparing the Crust
Now that we’ve covered the essential ingredients, let’s dive into the process of creating the graham cracker crust, which is the first step in assembling your No-Bake Orange Creamsicle Cheesecake. A well-prepared crust not only provides flavor and texture but also serves as the foundation for the entire dessert.
Step 1: Gather Your Ingredients
For the graham cracker crust, you will need:
– 1 ½ cups graham cracker crumbs
– ½ cup unsalted butter, melted
– ¼ cup granulated sugar (optional, for added sweetness)
Step 2: Mix the Ingredients
Begin by mixing the graham cracker crumbs and granulated sugar (if using) in a medium-sized bowl. This will ensure that the sugar is evenly distributed throughout the crust. Next, pour in the melted unsalted butter. The melted butter is crucial as it acts as a binding agent, holding the crumb mixture together.
Step 3: Combine
Using a fork or your hands, mix the ingredients until the graham cracker crumbs are fully coated with butter. The mixture should resemble wet sand and clump together when squeezed in your hand. If it feels too dry, you can add a bit more melted butter to achieve the desired consistency.
Step 4: Press the Crust into the Pan
Once your crust mixture is ready, it’s time to press it into your chosen pan. A 9-inch springform pan is recommended for this cheesecake, as it allows for easy removal once the dessert is set. Start by pouring the crumb mixture into the pan and evenly distributing it across the bottom.
Using the back of a measuring cup or your fingers, firmly press the mixture down to create a solid layer. Make sure to press the crumbs up the sides of the pan slightly, creating a wall that will hold the cheesecake filling. The firmer you press, the better the crust will hold its shape when sliced.
Step 5: Chill the Crust
After pressing the crust into the pan, place it in the refrigerator for about 30 minutes to set. Chilling the crust allows it to firm up, ensuring it provides a sturdy base for the creamy filling. This step is crucial for achieving the best texture and stability in your No-Bake Orange Creamsicle Cheesecake.
Making the Cheesecake Filling
With the crust prepared and chilled, it’s time to move on to the star of the show—the cheesecake filling. This step-by-step guide will walk you through the process of creating a smooth and creamy filling that perfectly complements the graham cracker crust.
Step 1: Gather Your Ingredients
For the cheesecake filling, you will need:
– 16 ounces cream cheese, softened
– 1 cup powdered sugar
– ½ cup fresh orange juice
– Zest of one large orange
– 1 tablespoon unflavored gelatin
– 2 tablespoons cold water
– 1 teaspoon vanilla extract
Step 2: Soften the Cream Cheese
Before you begin mixing the filling, ensure that your cream cheese is at room temperature. This is vital for achieving a smooth and lump-free mixture. To soften the cream cheese quickly, you can cut it into small cubes and let it sit at room temperature for about 30 minutes or microwave it for a few seconds—just be cautious not to melt it.
Step 3: Blend the Ingredients
In a large mixing bowl, combine the softened cream cheese, powdered sugar, fresh orange juice, orange zest, and vanilla extract. Using an electric mixer, beat the ingredients together on medium speed until the mixture is smooth and creamy. This process incorporates air into the filling, making it light and fluffy. Scrape down the sides of the bowl as necessary to ensure everything is well mixed.
Step 4: Dissolve the Gelatin
While the cream cheese mixture is blending, it’s time to prepare the gelatin. In a small bowl, sprinkle the unflavored gelatin over the cold water and let it sit for about 5 minutes to bloom. After it has bloomed, gently heat the mixture in the microwave for about 15-20 seconds until the gelatin is fully dissolved and liquid.
Step 5: Incorporate the Gelatin
Once the gelatin is dissolved, allow it to cool slightly before adding it to the cream cheese mixture. Pour the gelatin into the cheesecake filling while the mixer is running on low speed. This will help incorporate the gelatin evenly throughout the mixture, ensuring a consistent texture.
Step 6: Combine Thoroughly
Continue mixing the filling for another minute or two until everything is well combined. The mixture should be smooth and creamy, with no lumps. Taste the filling and adjust the sweetness if necessary by adding a bit more powdered sugar.
Step 7: Fill the Crust
With your cheesecake filling prepared, it’s time to pour it into the chilled graham cracker crust. Using a spatula, spread the filling evenly across the crust, smoothing the top to create a nice finish.
Step 8: Chill the Cheesecake
Once the filling is in the crust, cover the cheesecake with plastic wrap or aluminum foil and place it back in the refrigerator. Allow it to chill for at least 4 hours, or preferably overnight, to ensure it sets properly. The longer it chills, the firmer and more flavorful it will become.
This No-Bake Orange Creamsicle Cheesecake is sure to be a hit at any gathering, providing a refreshing burst of flavor that is both nostalgic and satisfying. With its creamy filling and delightful orange notes, this dessert captures the essence of summer in every bite. As you prepare the cheesecake, remember that patience is key—allowing sufficient time for chilling will reward you with a perfectly set dessert that is just as beautiful as it is delicious.

Incorporating Flavor
To achieve a delightful taste profile in your No-Bake Orange Creamsicle Cheesecake, the incorporation of fresh orange juice and zest is crucial. These ingredients are what give this cheesecake its signature creamy and citrusy flavor.
Detailed Instructions on Adding Orange Juice and Zest
1. Select Your Oranges: Start by choosing fresh, ripe oranges. Look for oranges that feel heavy for their size and have smooth, shiny skins. Varieties like Navel or Valencia are ideal for juicing due to their sweetness and juiciness.
2. Juicing the Oranges: Cut the oranges in half and use a manual or electric juicer to extract the juice. You’ll need approximately 1/2 cup of orange juice for the recipe. Strain the juice through a fine-mesh sieve to remove any seeds or pulp for a smoother consistency.
3. Zesting the Oranges: Using a microplane or zester, carefully remove the zest from the oranges before juicing. Aim for the outer layer only, avoiding the bitter white pith. You’ll need about 1-2 teaspoons of freshly grated zest, which will add an aromatic quality to your cheesecake.
4. Balancing Flavors: The key to a successful cheesecake lies in balancing the sweet and tart notes. Taste your orange juice before adding it to the mixture; if it’s on the sweeter side, you may want to add a dash of lemon juice to enhance the tartness and achieve a well-rounded flavor profile.
Whipping the Cream
The texture of your No-Bake Orange Creamsicle Cheesecake is largely determined by how well you whip the cream. Using heavy whipping cream is essential for creating a light and airy cheesecake filling.
Importance of Using Heavy Whipping Cream for the Right Texture
Heavy whipping cream contains a higher fat content (at least 36%), which is crucial for achieving stiff peaks. This fat content allows the cream to whip up beautifully, providing structure and volume to your cheesecake.
Step-by-Step Guide on Whipping Cream to Stiff Peaks
1. Chill Your Equipment: For optimal results, chill your mixing bowl and beaters in the refrigerator for about 15 minutes before whipping the cream. Cold equipment helps the cream whip faster and increases the likelihood of achieving stiff peaks.
2. Measure Your Cream: Pour 1 cup of heavy whipping cream into the chilled mixing bowl.
3. Begin Whipping: Start mixing on low speed to avoid splattering, gradually increasing to medium-high speed.
4. Add Sugar: After about 1-2 minutes, when the cream starts to thicken, add 2 tablespoons of powdered sugar (or granulated sugar, if preferred). This will sweeten the cream and help stabilize it.
5. Achieve Stiff Peaks: Continue whipping until the cream holds stiff peaks – this means when you lift the beaters out, the peaks will stand upright without drooping. Be careful not to overwhip, as the cream can turn grainy and eventually separate.
Techniques for Folding Whipped Cream into the Cheesecake Mixture to Maintain Volume
Once whipped, the cream must be folded gently into the cheesecake filling to maintain its lightness:
1. Use a Rubber Spatula: This tool is ideal for folding as it allows for controlled movements.
2. Add a Scoop of Whipped Cream: Start by adding about one-third of the whipped cream to the cream cheese mixture. Stir gently to lighten the mixture.
3. Fold in the Remaining Cream: Add the remaining whipped cream in two parts, carefully folding it in using a figure-eight motion. This technique incorporates air without deflating the whipped cream.
Assembling the Cheesecake
Now that you have your creamy filling prepared, it’s time to assemble your cheesecake.
Instructions for Pouring the Filling Over the Crust
1. Pour the Filling: Spoon the cheesecake filling over the prepared graham cracker crust.
2. Spread Evenly: Use a spatula to spread the filling evenly across the crust, making sure it reaches the edges.
Tips on Smoothing the Top for a Professional Look
1. Level the Surface: Use an offset spatula or the back of a spoon to smooth the top of the cheesecake. Begin from the center and work your way to the edges.
2. Create a Decorative Pattern: For an added touch, you can create swirls or patterns on the surface using the spatula for a professional presentation.
Importance of Chilling the Cheesecake for Proper Setting
Chilling is vital for the cheesecake to set correctly. Refrigeration allows the filling to firm up, ensuring the cheesecake holds its shape when sliced.
Discussion on the Ideal Chilling Time for Best Results
1. Minimum Chill Time: Allow the cheesecake to chill for at least 4 hours. This is the minimum time needed for the filling to set.
2. Overnight Option: For the best flavor and texture, consider chilling the cheesecake overnight. This additional time allows the flavors to meld beautifully.
Serving Suggestions
As you prepare to serve your No-Bake Orange Creamsicle Cheesecake, consider these delightful garnishing ideas to enhance its presentation and taste.
Ideas for Garnishing the Cheesecake
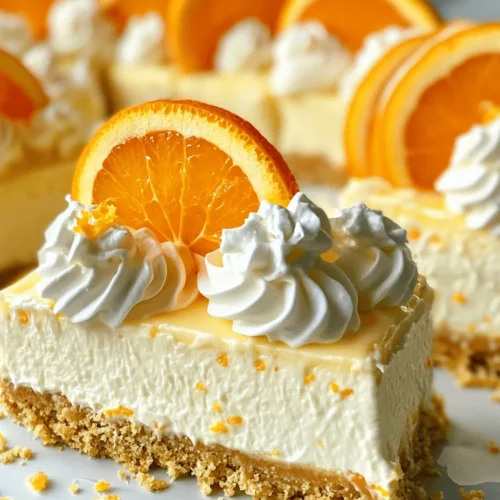
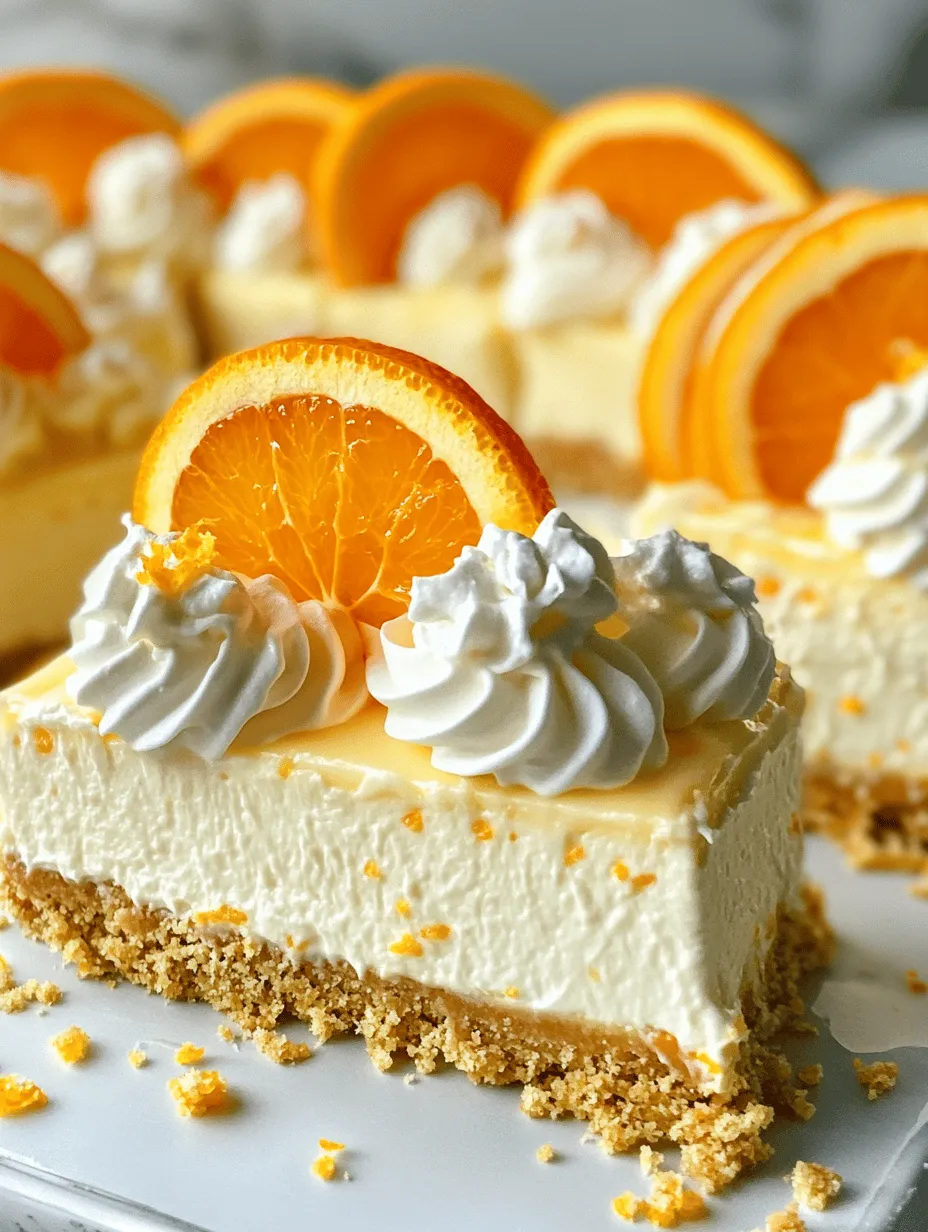
1. Fresh Orange Slices: Thinly slice fresh oranges and arrange them on top of the cheesecake for a visually appealing garnish.
2. Whipped Cream: Pipe dollops of freshly whipped cream around the edges or in the center for a contrasting texture.
3. Mint Leaves: Add fresh mint leaves for a pop of color and a refreshing aroma.
Using Orange Slices for Visual Appeal
Utilizing fresh orange slices not only adds a splash of color but also reinforces the orange flavor, making it an attractive presentation element.
Adding Whipped Cream for Texture Contrast
The lightness of whipped cream complements the creamy filling, creating a delightful contrast in texture that elevates the dessert experience.
Suggestions for Serving Alongside Complementary Items
1. Fresh Fruit: Serve alongside a bowl of mixed berries or slices of kiwi. The tartness of the berries balances the sweetness of the cheesecake.
2. Chocolate Sauce: Drizzle some chocolate sauce on the plate for a rich addition that pairs nicely with the citrus notes.
3. Ice Cream: For an extra indulgence, serve slices of cheesecake with a scoop of vanilla or orange sorbet.
Conclusion
In summary, the No-Bake Orange Creamsicle Cheesecake is a harmonious blend of creamy texture and vibrant citrus flavors, making it an irresistible dessert option. Its simplicity in preparation and the delightful taste it offers make it an excellent choice for various occasions, whether it be a casual family dinner, a potluck gathering, or a festive celebration.
Encouraging readers to try out this refreshing dessert at home will lead to a delightful culinary experience. By following the detailed steps and tips provided, you’ll be sure to impress your family and friends with this sweet treat. So get ready to indulge in a slice of summer with your homemade No-Bake Orange Creamsicle Cheesecake!