Introduction
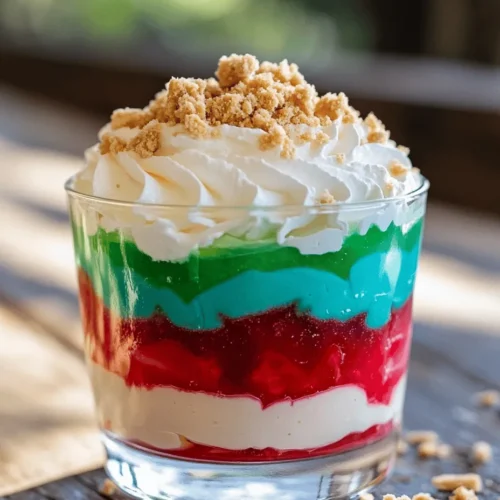
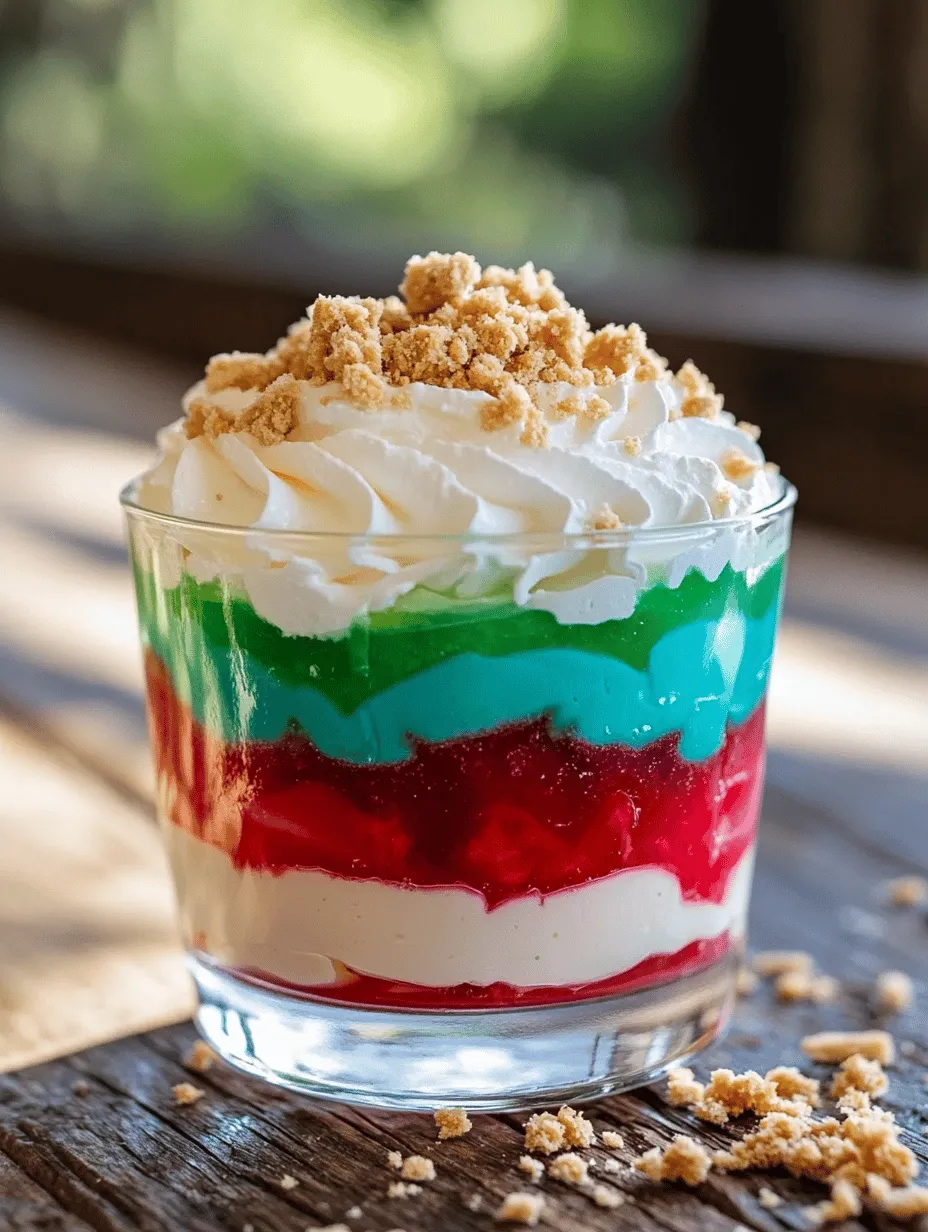
The Rainbow Jello Layered Dessert is a vibrant and visually stunning treat that captures the whimsy of childhood while offering a delightful experience for all ages. This dessert not only tantalizes the taste buds with its array of flavors but also serves as a feast for the eyes, making it an ideal centerpiece for celebrations, gatherings, or simply as a fun family dessert. The beauty of this dessert lies not just in its colorful appearance but also in the nostalgia it evokes—reminding many of birthday parties, summer picnics, and holiday celebrations where such layered delights often steal the show.
Colorful desserts like the Rainbow Jello Layered Dessert have become increasingly popular due to their ability to bring joy and excitement to any occasion. The layers of jello in vibrant hues can symbolize the joy of life and happiness, making them perfect for birthdays, baby showers, or even just a fun afternoon treat. Moreover, the simplicity of the ingredients combined with the visual appeal makes it an approachable dessert for home bakers of all skill levels.
In this article, we will dive deep into the components of this delightful dessert, exploring its ingredients, understanding their roles, and guiding you through the preparation steps. By the end, you will be equipped with the knowledge and skills to create your very own Rainbow Jello Layered Dessert, impressing both friends and family with your culinary prowess.
Understanding the Ingredients
The Gelatin Base
At the heart of the Rainbow Jello Layered Dessert lies the gelatin base, which is responsible for its iconic wobbly texture and colorful appearance. Gelatin is a natural protein derived from collagen, which is found in animal connective tissues. When dissolved in warm water, gelatin forms a gel-like consistency upon cooling, allowing it to set into beautiful layers.
When selecting gelatin for this recipe, you can choose between flavored gelatin packets or unflavored gelatin that allows you to customize the flavors. Flavored gelatin is often available in a variety of colors and tastes, such as strawberry, orange, lemon, lime, and blue raspberry, allowing you to create a rainbow of layers. The choice of flavors is crucial as it not only determines the visual appeal but also contributes to the overall taste of the dessert.
The Role of Different Flavors
The success of the Rainbow Jello Layered Dessert hinges on the selection of different flavors to create a vibrant and delicious experience. Using various flavored gelatins not only enhances the aesthetic appeal but also ensures a delightful mix of tastes. Each layer brings its unique flavor profile to the dessert, making every bite an exciting adventure.
Consider using fruity flavors that complement each other. For example, the tartness of lemon can pair well with the sweetness of strawberry, while blue raspberry offers a refreshing twist. This careful selection of flavors ensures that the dessert is not just eye-catching but also satisfying to the palate.
Nutritional Aspects of Gelatin
Gelatin is often praised for its potential health benefits, thanks to its high protein content and low-calorie count. It is rich in amino acids, which are essential for various bodily functions. Additionally, gelatin can support joint health, improve skin elasticity, and aid in digestion. While the Rainbow Jello Layered Dessert may not be a health food in the traditional sense, the gelatin component does offer some nutritional value, especially when compared to other dessert options rich in sugar and fat.
The Significance of Cool Whip in Layering
To achieve the creamy and smooth texture that balances the gelatin layers, Cool Whip is often incorporated into the Rainbow Jello Layered Dessert. This whipped topping adds a luscious element that elevates the overall experience. Cool Whip is easy to work with, requiring no whipping or special equipment, making it an accessible option for home bakers.
The inclusion of Cool Whip also serves another purpose: it creates a contrasting texture to the gelatin layers. The creaminess of the Cool Whip softens the sharpness of the gelatin’s texture, providing a delightful mouthfeel that enhances the dessert’s overall enjoyment.
Optional Crust Layer Explanation
While the Rainbow Jello Layered Dessert can stand alone with its colorful layers and creamy topping, adding a crust can elevate the dessert to another level. A graham cracker crust, for instance, introduces a delightful crunch that complements the softness of the gelatin and Cool Whip layers. This added texture can make the dessert feel more substantial and satisfying, appealing to a broader range of taste preferences.
Benefits of Adding a Graham Cracker Crust
A graham cracker crust not only enhances the texture of the Rainbow Jello Layered Dessert but also adds a layer of flavor. The buttery sweetness of crushed graham crackers pairs wonderfully with the fruity flavors of the jello, creating a well-rounded dessert experience. Moreover, the crust provides a sturdy base that helps contain the layers, making it easier to slice and serve.
From a nutritional standpoint, the crust does add extra calories and carbohydrates, so it’s worth considering if you’re aiming for a lighter dessert. However, the balance of textures and flavors it brings often outweighs the additional considerations, especially for festive occasions.
Nutritional Considerations of the Crust Ingredients
When crafting the graham cracker crust, the primary ingredients include crushed graham crackers, melted butter, and sugar. While graham crackers offer some whole grain benefits, they are also high in sugar and low in fiber. The butter contributes richness but also adds saturated fat.
For those looking for a healthier alternative, consider using whole grain or gluten-free graham crackers, or even oats and nuts blended together to create a crust that aligns with dietary preferences. Substituting butter with coconut oil or using a reduced-fat margarine can also reduce the overall calorie count while still achieving a delicious crust.
Preparation Steps in Detail
Preparing the Crust: A Closer Look
Before diving into the colorful layers of the Rainbow Jello Layered Dessert, it’s essential to start with the crust. A well-prepared crust serves as the foundation for this dessert, ensuring that all layers hold together beautifully.
Ingredients Breakdown
To make a classic graham cracker crust, you will need the following ingredients:
– 1 ½ cups of graham cracker crumbs: This forms the bulk of your crust. You can either buy pre-crushed graham crackers or crush whole crackers yourself.
– ½ cup of unsalted butter: Melted butter is crucial for binding the crumbs together and providing flavor.
– ¼ cup of granulated sugar: This adds sweetness to the crust, balancing the flavors of the jello layers.
Step-by-Step Instructions for Achieving the Perfect Crust
1. Preheat the Oven: Start by preheating your oven to 350°F (175°C). This ensures that your crust will bake evenly and achieve a crispy texture.
2. Prepare the Graham Cracker Mixture: In a mixing bowl, combine the graham cracker crumbs, granulated sugar, and melted butter. Stir until the mixture resembles wet sand and everything is evenly coated.
3. Press the Mixture into a Pan: Choose a 9-inch pie pan or a square baking dish. Pour the graham cracker mixture into the pan and use the back of a measuring cup or your fingers to firmly press it down into an even layer. Make sure to pack it tightly to prevent it from crumbling later.
4. Bake the Crust: Place the crust in the preheated oven and bake for about 8-10 minutes, or until it is lightly golden and fragrant. Baking the crust helps to set it and enhances the flavor.
5. Cool the Crust: Once baked, remove the crust from the oven and allow it to cool completely. This step is crucial, as adding the gelatin layers to a warm crust can disrupt the setting process of the jello.
How to Know When the Crust is Ready for the Gelatin Layers
The graham cracker crust is ready for the gelatin layers when it is lightly browned and feels firm to the touch. Make sure it has cooled completely before proceeding with the layering process. This ensures that the gelatin will set properly and that each layer will hold its shape when served.
Once the crust is ready, you can move on to preparing the colorful gelatin layers, creating a delightful dessert that is sure to impress. Stay tuned for the next part, where we will explore the process of making the gelatin layers and assembling the Rainbow Jello Layered Dessert!
Crafting the Gelatin Layers
Creating the beautiful, multi-colored layers of the Rainbow Jello Layered Dessert is both an art and a science. The key to achieving those stunning layers lies in the proper preparation and setting of each gelatin layer.
Understanding the Process of Dissolving Gelatin
To begin, you need to dissolve your gelatin properly. This process is crucial for a smooth texture and clear layers. Start by boiling water as per the instructions on your gelatin package. For each layer, you typically will need about one cup of boiling water. Pour the boiling water into a mixing bowl, then add your dry gelatin mix. Stir continuously until the gelatin is completely dissolved; this usually takes about two minutes. The goal is to ensure there are no granules left, which could disrupt the visual appeal of your dessert.
Importance of Waiting for Each Layer to Set
Patience is key when crafting your Rainbow Jello. After preparing each layer, you must allow it to set before pouring the next color. This not only prevents the layers from mixing but also creates those defined lines that make this dessert so visually striking. Generally, you should wait at least 30 minutes to an hour for each layer to firm up in the refrigerator. To check if a layer is set, gently shake the pan; if it wobbles but holds its shape, it’s ready for the next layer.
Tips for Pouring the Layers Without Mixing
Pouring your gelatin layers without mixing can be tricky, but here are some tips to make it easier:
1. Use a spoon: When pouring the next layer, slowly drizzle the gelatin over the back of a spoon. This softens the impact and minimizes the chance of disturbing the layer underneath.
2. Pour slowly: Take your time when pouring each layer. A slow pour reduces the force of the liquid and helps maintain the integrity of the layers.
3. Temperature matters: Make sure each layer is at room temperature before adding the next. This helps avoid thermal shock that could cause the layers to mix.
How to Achieve an Even Distribution for Visual Appeal
To ensure an even distribution of each gelatin layer, consider using a measuring cup with a spout for precise pouring. This allows you to direct the flow of gelatin more accurately. If you have multiple colors to pour, it might help to prepare each layer in advance and keep them chilled but not fully set until you’re ready to layer. This approach allows you to maintain a consistent thickness for each layer, enhancing the dessert’s visual appeal.
Layering Techniques and Presentation
The beauty of the Rainbow Jello Layered Dessert lies in its layers, which can be enhanced through thoughtful presentation techniques.
Importance of Layering in Dessert Aesthetics
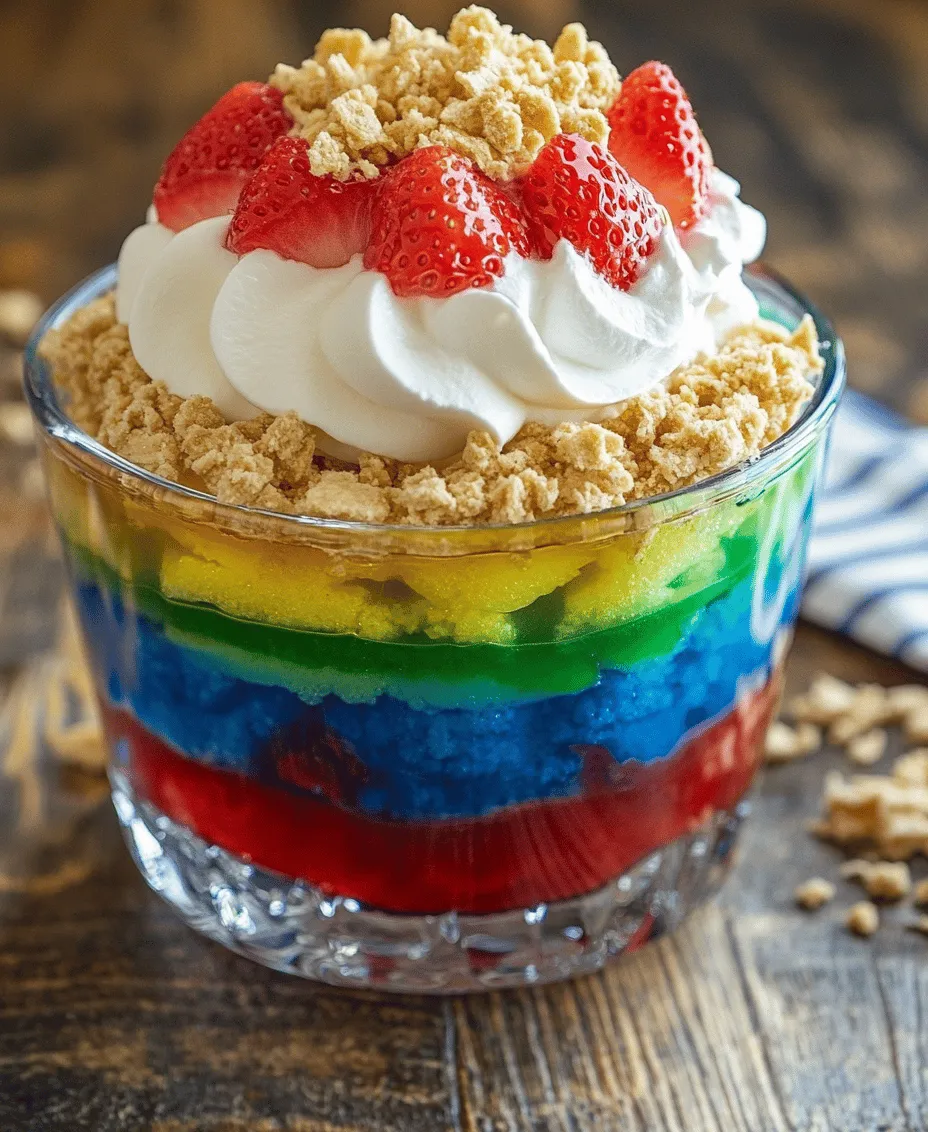
Layering isn’t just about taste; it’s about aesthetics. The vibrant colors of the gelatin can evoke joy and excitement, making it an excellent choice for festive occasions. Each layer should be distinct, showcasing the transition from one vibrant hue to another. This visual delight is what draws people to the dessert and makes it a focal point at gatherings.
How Different Colors Contrast and Complement Each Other
When selecting your gelatin flavors and colors, consider how they interact. For example, a bright red layer can be beautifully complemented by a deep blue or green layer. The contrast between light and dark colors can create a stunning visual effect. Remember that using clear or translucent layers allows for greater light penetration, enhancing the overall beauty of the dessert.
Creative Presentation Ideas
Once your layers are set, you can enhance your dessert’s presentation in several ways:
– Glass cups or jars: Individual servings in clear glass cups or jars showcase the layers beautifully and are perfect for parties.
– Trifle dish: For a larger display, use a trifle dish. This allows everyone to see the colorful layers and makes serving easy.
– Layered parfaits: Serve smaller portions in parfait cups for a more elegant touch.
Suggestions for Garnishing with Additional Toppings
To add more depth to your dessert, consider garnishing with toppings such as:
– Whipped cream: A dollop of whipped cream on top adds a creamy contrast to the gelatin’s texture.
– Fresh fruit: Slices of strawberries, kiwi, or blueberries can enhance both flavor and presentation.
– Mint leaves: A few sprigs of mint can add a touch of freshness and color contrast.
Chilling and Serving the Rainbow Jello
Once your layers are set and your dessert is beautifully presented, it’s time to chill and serve.
Optimal Chilling Times for the Best Texture
For the best texture, ensure that your Rainbow Jello is fully chilled before serving. Depending on the size of your dish and the thickness of your layers, chilling for at least four hours is recommended. If you’re in a hurry, you can place the dessert in the freezer for about 30 minutes, but be cautious not to freeze it solid.
Cutting and Serving Tips to Maintain the Layered Effect
When it comes to serving, the goal is to maintain the layered effect. Here are some tips:
– Use a sharp knife: A sharp knife allows you to cut through the layers cleanly without disturbing them.
– Warm the knife: For an even smoother cut, dip the knife in warm water before slicing. Wipe it clean after each cut to maintain the layers’ integrity.
– Serve with a spatula: Use a spatula to lift out the slices or cubes, which helps retain the layered structure.
Variations in Serving Sizes and Portions
Depending on the occasion, you can adjust the portion sizes:
– Individual servings: Present smaller portions in cups for a more elegant touch at formal gatherings or parties.
– Family-style serving: For casual gatherings, cut the dessert into squares and serve on a platter for guests to help themselves.
Conclusion
The Rainbow Jello Layered Dessert is more than just a treat; it’s a celebration of color, flavor, and creativity. Its vibrant layers not only appeal to the eye but also offer a delightful taste experience that can brighten any gathering.
This dessert’s versatility makes it suitable for various occasions, from birthday parties and holidays to potlucks and casual family dinners. The joy of creating this dessert is matched only by the happiness it brings to those who enjoy it.
Don’t hesitate to experiment with different flavors and colors to personalize your creation. Whether you choose classic fruit flavors or venture into unique combinations, the possibilities are endless.
In the spirit of creativity and sharing, this Rainbow Jello Layered Dessert invites everyone to join in the fun of making and enjoying something truly special. So gather your ingredients, invite some friends or family, and dive into the colorful world of gelatin desserts!