Introduction
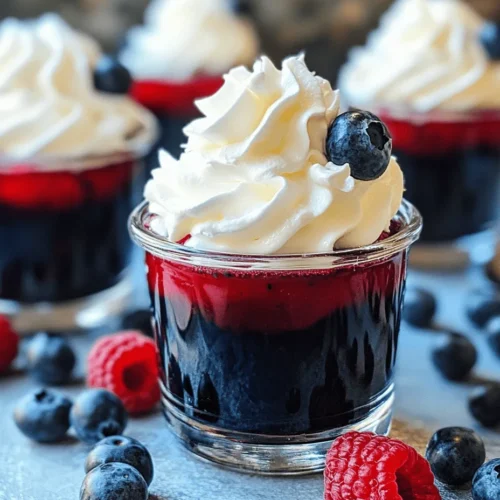
Layered desserts have a unique way of captivating our senses, not just through taste but also visually. Their vibrant colors and distinct layers create an enticing presentation that draws people in. One such delightful dessert is the Red White Blue Layered Jello Cups. These festive treats are particularly significant for patriotic celebrations, such as Independence Day and Memorial Day, where red, white, and blue symbolize national pride.
What makes these layered Jello cups even more appealing is their simplicity. With just a few ingredients, they can be easily prepared, making them a perfect choice for family gatherings and kid-friendly activities. Whether you’re hosting a barbecue or attending a picnic, these Jello cups will impress guests of all ages while adding a splash of color to your dessert table.
The Allure of Layered Desserts
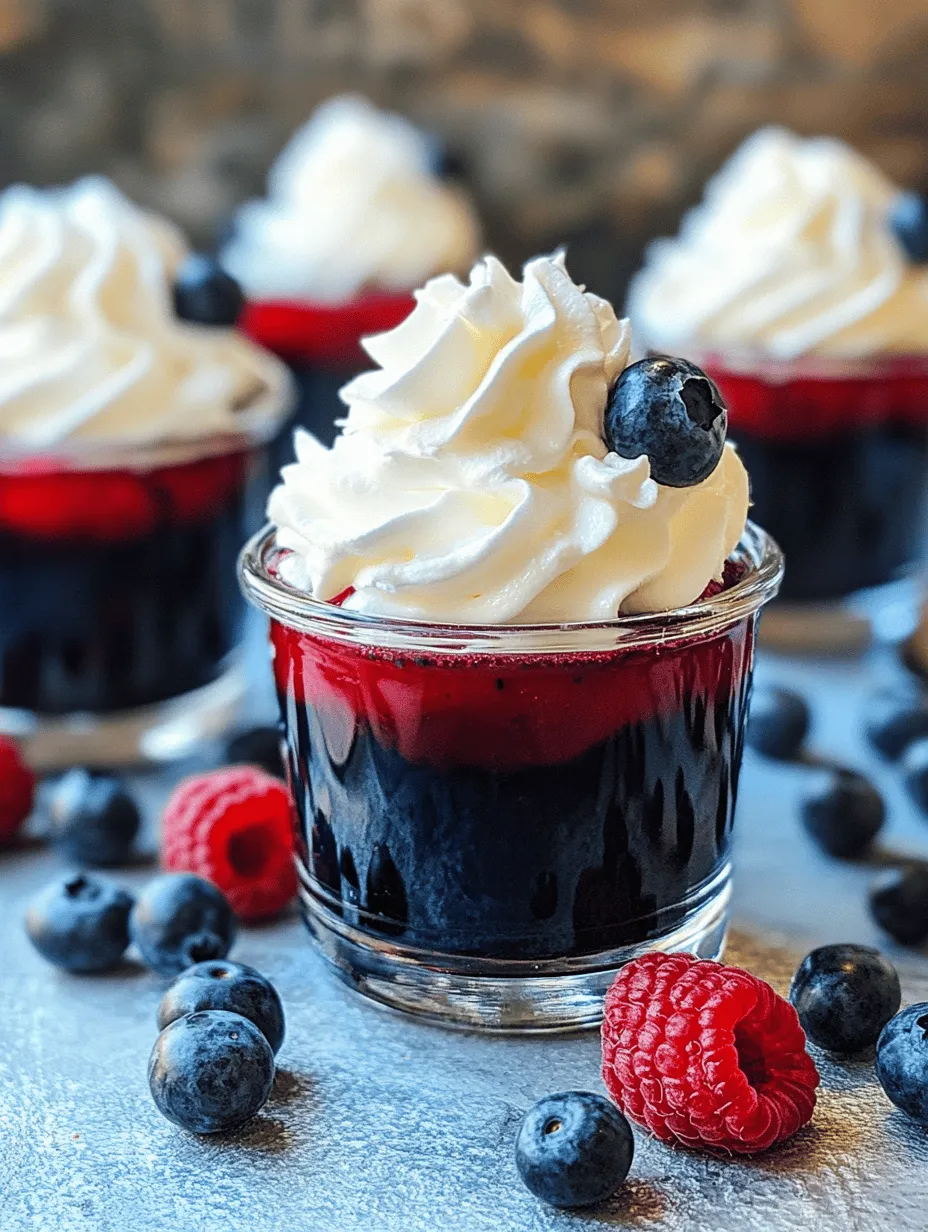
Layered desserts like our Red White Blue Layered Jello Cups are not just about taste; they are a feast for the eyes. The combination of colors and textures creates an enticing visual effect that can elevate any occasion. The appeal lies in the contrast between the smooth, creamy layers and the firm, gelatinous layers, providing a delightful mouthfeel that keeps you coming back for more.
Each layer contributes not only to the overall aesthetic but also to the flavor profile. The sweet and slightly tart taste of raspberry gelatin complements the mild sweetness of blueberry gelatin, while the creamy layer of sweetened condensed milk adds richness. This harmonious balance is what makes layered desserts a favorite choice for festive occasions.
Moreover, gelatin desserts evoke a sense of nostalgia, reminding many of childhood parties, family gatherings, and summer picnics. They are versatile, allowing for a variety of flavors and colors to be combined, making them suitable for any celebration. Whether you choose to stick to the classic red, white, and blue or experiment with other color combinations, layered desserts always bring a sense of joy and celebration.
Ingredients Breakdown
To create these stunning Red White Blue Layered Jello Cups, you will need a few simple yet essential ingredients. Each plays a crucial role in achieving the desired taste and texture. Here’s a comprehensive list of what you will need:
Ingredients:
– Red Raspberry Gelatin: This gelatin layer gives the dessert its vibrant red color and a sweet-tart flavor that sets the tone for the layers.
– Blueberry Gelatin: The blueberry layer not only adds a beautiful blue hue but also provides a mellow sweetness that pairs wonderfully with the tartness of raspberry.
– Sweetened Condensed Milk: This ingredient creates the creamy white layer, adding a rich texture and balancing the sweetness of the gelatin layers.
– Fresh Berries: Raspberries and blueberries can be used as toppings to enhance the visual appeal and offer a fresh burst of flavor while also adding nutritional benefits.
Ingredient Roles:
– Red Raspberry Gelatin: Apart from its vibrant color, this gelatin is a favorite for its fruity flavor that captures the essence of summer. Pairing well with the creamy layer, it provides a refreshing taste.
– Blueberry Gelatin: This flavor is slightly less sweet than raspberry, creating a balanced profile. The blue layer provides a calming visual contrast that enhances the overall appearance of the dessert.
– Sweetened Condensed Milk: This ingredient is key to achieving a creamy texture. Its natural sweetness complements the fruity layers while providing a luscious mouthfeel.
– Fresh Berries: Not only do fresh berries add a pop of color on top, but they also offer vitamins and antioxidants, boosting the nutritional value of your dessert.
Suggested Substitutions:
For those with dietary restrictions or preferences, there are variations you can consider:
– Sugar-Free Gelatin: If you’re looking to reduce sugar intake, opt for sugar-free versions of raspberry and blueberry gelatin. They maintain the same vibrant colors and flavors.
– Coconut Cream: Instead of sweetened condensed milk, you can use coconut cream for a dairy-free, vegan alternative that still provides a creamy texture.
– Different Flavors: Feel free to experiment with other flavors of gelatin, such as strawberry or lemon, while maintaining the color theme.
Step-by-Step Instructions
Creating the Red White Blue Layered Jello Cups is a straightforward process that anyone can master, regardless of culinary experience. Below, we’ll outline the preparation steps for each layer, starting with the red layer:
Making the Red Layer:
1. Prepare the Gelatin: Begin by boiling 1 cup of water in a saucepan. Once boiling, remove it from heat and stir in the red raspberry gelatin powder until fully dissolved. This process is essential to ensure that there are no lumps in your gelatin. Allow the mixture to cool slightly before proceeding.
2. Layering the Gelatin: Take your clear cups or dessert glasses and fill them with approximately 1/4 of the red gelatin mixture. Carefully pour the gelatin into the cups, filling them to about one-third full. This will create a solid base for your dessert.
3. Chill the Red Layer: Place the cups in the refrigerator and allow the red layer to set for about 30 minutes, or until it is firm to the touch. This setting time is crucial, as it prevents the layers from mixing when you add the next layer.
Preparing the White Layer:
4. Mix the Creamy Layer: While the red layer sets, prepare the white layer. In a bowl, combine 1 cup of sweetened condensed milk with 1 cup of boiling water. Stir until well mixed and smooth. This mixture will create the creamy layer that contrasts beautifully with the fruity gelatin.
5. Add to the Cups: Once the red layer is firm, carefully spoon the sweetened condensed milk mixture over the red layer in each cup. Aim to create a smooth, even layer on top of the red gelatin.
6. Chill Again: Return the cups to the refrigerator and allow the white layer to set for another 30 minutes. Again, ensure that the layer is firm before proceeding to the next step.
Making the Blue Layer:
7. Prepare the Blue Gelatin: Just like you did with the red layer, boil another cup of water, remove it from heat, and stir in the blueberry gelatin powder until fully dissolved. Allow it to cool slightly.
8. Final Layering: Once the white layer is set, carefully pour the blueberry gelatin over the white layer in each cup, filling them to the top. This layer will add the final color to your dessert.
9. Final Chill: Place the cups back in the refrigerator and let them chill for an additional hour, or until the blue layer is completely set.
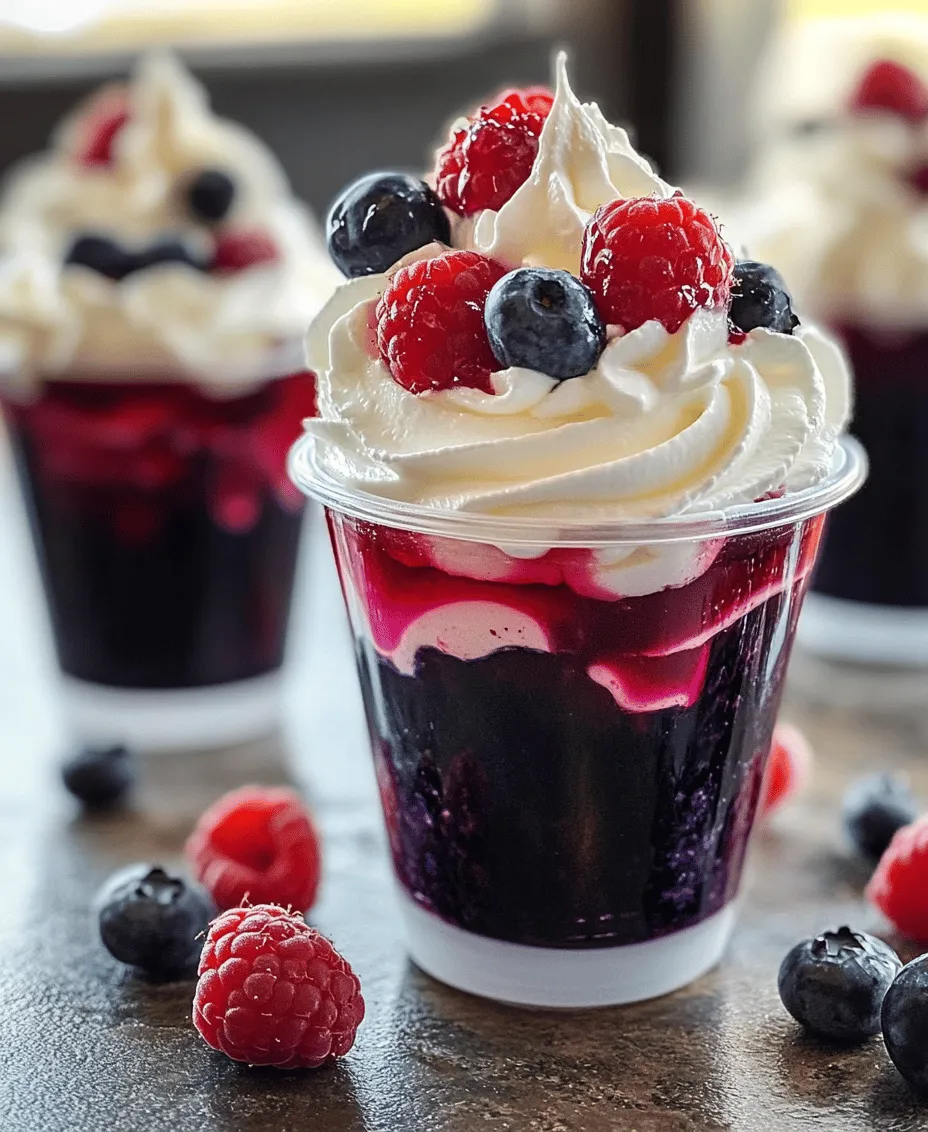
10. Garnish and Serve: Once all layers are fully set, garnish each cup with fresh raspberries and blueberries for an extra touch of color and flavor.
These detailed steps will guide you through the creation of your Red White Blue Layered Jello Cups, ensuring that each layer is perfectly set and ready to impress at your next gathering. Stay tuned for more tips and variations to make this dessert even more delightful!
Tips for Pouring to Maintain Distinct Layers
When creating the Red White Blue Layered Jello Cups, one of the biggest challenges is ensuring that each layer remains distinct and visually appealing. Here are some essential tips to help you achieve that perfectly layered effect:
1. Chill Between Layers: After pouring each layer, allow it to cool and set in the refrigerator for about 15-20 minutes before adding the next layer. This step is crucial to prevent the layers from mixing. The layer should be firm but not fully set, as a slightly tacky surface will help the next layer adhere.
2. Pouring Technique: To avoid disturbing the layers, pour the next layer over the back of a spoon or down the side of the cup. This gentle approach diffuses the liquid and minimizes the risk of the previous layer mixing in.
3. Layer Thickness: Aim for even thickness in each layer. Too thick can lead to longer setting times, while too thin can make the layers fragile. A good rule of thumb is to pour about a quarter cup of each layer at a time.
Preparing the White Layer
The white layer of your Red White Blue Layered Jello Cups is a delightful twist that adds a creamy texture to the dessert. Here’s how to prepare it successfully:
1. Mixing Sweetened Condensed Milk: In a bowl, combine one cup of sweetened condensed milk with one cup of hot water. Stir vigorously until fully blended. The heat from the water will help dissolve the milk smoothly, creating a creamy mixture.
2. Cooling Time: After mixing, allow the white layer to cool to room temperature before pouring it onto the red layer. This step is essential to prevent melting the red layer. If you’re using a quick-setting Jello for the red layer, wait until it has set adequately firm.
3. Pouring the White Layer: Once the white layer has cooled, gently pour it over the red layer, using the spoon method described previously. This technique will help maintain the integrity of the red layer beneath.
Making the Blue Layer
The blue layer not only adds color but also a burst of flavor that complements the sweetened condensed milk. Here’s how to ensure your blue layer sets beautifully:
1. Patience is Key: Just like with the red layer, the blue layer requires patience. After pouring the white layer, let it chill until firm, approximately 20-30 minutes. This waiting period is crucial for achieving clean layers.
2. Mixing the Blue Jello: Prepare the blue layer by mixing one package of blue raspberry Jello with one cup of boiling water. Stir until completely dissolved. For a creamier texture, you can incorporate half a cup of sweetened condensed milk into the blue mixture and stir until combined.
3. Final Cooling: Allow the blue layer to cool to room temperature before pouring it onto the white layer. Again, use the spoon method to gently pour the blue mixture over the white layer, ensuring it sets perfectly without any mixing.
Setting and Serving
After all the layers have been poured and set, it’s time to prepare your Red White Blue Layered Jello Cups for serving:
1. Refrigeration Time: The assembled Jello cups should be kept in the refrigerator for at least 4 hours, or preferably overnight. This extended chilling period ensures that all layers are fully set and ready to be enjoyed.
2. Cup Selection: Choose clear plastic or glass cups to highlight the beautiful layers. Small mason jars or disposable clear cups work well for parties, allowing guests to see the vibrant colors. The size can vary depending on the event, but individual servings are often a hit.
3. Creative Serving Ideas: To amp up the festive spirit, consider decorating the cups with themed decorations. You might use small American flags, edible glitter, or whipped cream on top. Arrange the cups on a colorful platter, or serve them alongside fun summer-themed snacks.
Nutritional Information
Understanding the nutritional content of your Red White Blue Layered Jello Cups can help you enjoy them in moderation. Here’s a general overview of what to expect per serving (assuming each cup is approximately 1/2 cup in size):
– Calories: Approximately 100-150
– Total Fat: 2-4 grams
– Sugars: 15-20 grams
While these treats are indulgent, they can be enjoyed as part of a balanced diet. The Jello provides a fun, nostalgic sweetness that many people enjoy, especially during celebrations. However, it’s important to consume such desserts in moderation as part of a varied diet.
Festive Variations and Customizations
The beauty of the Red White Blue Layered Jello Cups lies in their versatility. Here are some ideas for customizing the recipe to suit different occasions:
1. Flavor Variations: For different holidays or themes, swap the flavors of the Jello. For instance, use green lime Jello for St. Patrick’s Day or orange for Halloween. You can also mix and match flavors to create unique combinations that suit your palate.
2. Additional Layers: Get creative by incorporating additional layers. You can add fruit purees—like pureed strawberries or blueberries—between layers for added flavor and nutrition. Yogurt can also be used as a layer; simply mix plain or flavored yogurt with some gelatin to help it set.
3. Fruit Garnishes: Top the cups with fresh berries or mint leaves to add a fresh element and enhance the presentation. This not only adds visual appeal but also complements the sweetness of the Jello.
Conclusion
Creating the Red White Blue Layered Jello Cups is not just about making a dessert; it’s about crafting a delightful experience that brings joy and nostalgia to your celebrations. These colorful cups serve as a perfect centerpiece for festive gatherings, evoking memories of summer barbecues, Independence Day, and family reunions.
As you embrace the fun of making layered desserts, remember that the process is just as enjoyable as the final product. Gather your family and friends, share in the creation, and revel in the excitement of enjoying these beautiful treats together. Whether it’s a holiday or a simple summer gathering, these Jello cups are sure to be a hit, making every moment a little sweeter.