Introduction
Homemade caramels are a beloved treat among candy enthusiasts, offering a rich, buttery flavor that store-bought versions often fail to replicate. The allure of crafting your own caramels lies not only in the satisfaction of creating delicious candy but also in the ability to customize flavors and textures to your liking. Among the myriad of caramel recipes available, the Six Minute Caramels recipe stands out for its simplicity and speed. In just six minutes, you can whip up a batch of soft, chewy caramels that are perfect for gift-giving, party favor bags, or simply indulging in a sweet moment for yourself.
The beauty of this recipe lies in its straightforward approach, allowing even novice cooks to embrace the art of candy-making without the intimidation often associated with it. Whether you are a seasoned confectioner or just starting out, this recipe offers a delightful blend of ease and taste, allowing you to create mouthwatering caramels in no time. Imagine the joy of pulling a tray of freshly made caramels from your kitchen, the rich aroma wafting through the air, and the excitement of sharing these sweet morsels with friends and family.
Understanding Caramel
To truly appreciate the magic of caramel, it’s essential to understand its science. Caramelization is the process of heating sugar until it melts and turns into a rich, golden-brown syrup. This transformation occurs at around 340°F (170°C), where the sugar molecules break down and recombine, creating new flavors and colors. The result is a delectable treat that has captivated taste buds for centuries.
Caramel comes in various forms, each serving its unique purpose in the culinary world. For instance, you might encounter caramel sauce, which is perfect for drizzling over desserts, or hard caramels that provide a satisfying chew. The texture and flavor profile of homemade caramels are markedly different from their store-bought counterparts. Homemade versions boast a richer taste, a creamier mouthfeel, and the ability to control the sweetness and ingredients used, allowing for a personalized touch that pre-packaged options often lack.
Ingredients Breakdown
To embark on your caramel-making journey, it’s crucial to familiarize yourself with the ingredients that contribute to the perfect batch of Six Minute Caramels. Each component plays a vital role in not only the flavor but also the texture of your final product.
Unsalted Butter
The foundation of any great caramel begins with unsalted butter. This ingredient is essential as it provides richness and creaminess to the caramels. The creamy fat content in butter helps create a smooth and silky texture, while also enhancing the overall flavor. Opting for unsalted butter gives you greater control over the saltiness of your caramels, allowing you to add salt separately according to your taste preferences.
Brown Sugar
Next up is brown sugar, a key player in achieving the deep, complex flavors associated with caramel. Brown sugar contains molasses, which not only contributes to the caramel’s distinct color but also infuses it with a hint of richness and moisture. The use of brown sugar helps create a soft and chewy texture, setting your homemade caramels apart from the often overly sweet and dry versions found in stores.
Light Corn Syrup
Light corn syrup is another critical ingredient in this recipe, acting as a stabilizing agent. Its primary role is to prevent the sugar from crystallizing during the cooking process, ensuring that your caramels remain smooth and free of graininess. This syrup also adds a touch of sweetness and helps maintain the soft consistency of the finished product.
Sweetened Condensed Milk
Sweetened condensed milk is a star ingredient in this recipe, contributing to the creaminess and sweetness of the caramels. It adds a luscious texture that enhances the final product, making your caramels incredibly rich and satisfying. The milk solids and sugars in condensed milk also play a role in the caramelization process, resulting in a beautifully balanced flavor.
Vanilla Extract
To elevate the flavor complexity of your caramels, a splash of vanilla extract goes a long way. This ingredient adds a warm, aromatic note that beautifully complements the sweetness of the sugar and the richness of the butter. The use of high-quality vanilla extract will further enhance the overall taste of your caramels, making them even more irresistible.
Salt
Salt is often an overlooked ingredient in dessert recipes, yet it plays a crucial role in balancing sweetness. In the context of caramels, a pinch of salt enhances the flavors and rounds out the overall taste profile. It creates a delightful contrast that prevents the caramels from becoming cloyingly sweet, making each bite more enjoyable.
Nuts
For those looking to add a personal touch, nuts are an excellent option for customization. Chopped pecans, walnuts, or almonds can be folded into the caramel mixture for added texture and flavor. Nuts not only provide a satisfying crunch but also complement the sweetness of the caramels, creating a delightful blend of flavors.
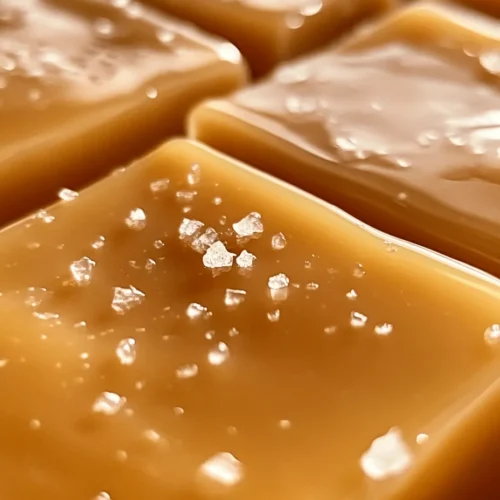
Sea Salt
In recent years, the trend of sweet and salty combinations has taken the culinary world by storm. Sprinkling a touch of flaky sea salt on top of your freshly made caramels adds an elegant finishing touch and enhances the overall experience. The contrast between the sweet caramel and the salty crystals creates a flavor explosion that will keep your taste buds coming back for more.
Step-by-Step Instructions
Now that you have a solid understanding of the ingredients, it’s time to dive into the step-by-step instructions for making Six Minute Caramels. This quick recipe requires careful attention to timing and technique to ensure that your caramels turn out perfectly every time.
Preparation
Before you begin cooking, gather all your ingredients and equipment. This includes unsalted butter, brown sugar, light corn syrup, sweetened condensed milk, vanilla extract, salt, and any nuts you wish to add. It’s also essential to have a heavy saucepan on hand, as this will help distribute heat evenly and prevent scorching.
Step 1: Melt the Butter
Start by placing the unsalted butter in your heavy saucepan over medium heat. Allow it to melt completely, swirling the pan gently to ensure even melting. This step is crucial, as it creates the base for your caramel mixture.
Step 2: Combine the Sugars
Once the butter has melted, add the brown sugar and light corn syrup to the pan. Stir the mixture gently with a wooden spoon or heat-resistant spatula, ensuring that the sugar dissolves completely into the melted butter. This process may take a minute or two, so be patient and keep stirring.
Step 3: Add the Sweetened Condensed Milk
Next, pour in the sweetened condensed milk. This ingredient will give your caramels their signature creaminess. Continue to stir the mixture over medium heat, ensuring all ingredients are well combined.
Step 4: Bring to a Boil
As you stir, increase the heat slightly and bring the mixture to a gentle boil. It’s important to keep stirring continuously during this phase to prevent the caramel from sticking to the bottom of the pan and burning. Monitor the temperature, and aim for a steady boil that doesn’t exceed medium heat.
Step 5: Time the Cooking
Once the mixture is boiling, set a timer for six minutes. Continue stirring constantly, watching for the color to deepen to a rich golden brown. This is where the magic happens, and the caramelization process transforms your mixture into the delicious treat you’re aiming for.
Step 6: Remove from Heat
After six minutes, remove the saucepan from the heat. Be cautious as the mixture will be extremely hot. At this stage, you can stir in the vanilla extract and a pinch of salt, adjusting the amount based on your taste preferences. If you’re adding nuts, now is the time to fold them into the mixture.
Step 7: Pour into a Prepared Pan
Prepare a square baking dish or a lined tray by greasing it lightly with butter. Carefully pour the hot caramel mixture into the prepared pan, using a spatula to spread it evenly if necessary. Allow the caramels to cool completely at room temperature before cutting them into squares or rectangles.
With these initial steps, you are well on your way to mastering the art of homemade caramels. The process may seem straightforward, but the results are sure to impress both yourself and those lucky enough to indulge in your delicious creations. Stay tuned for the next part of the article, where we will delve deeper into tips for achieving the best results and common questions surrounding caramel making.
Techniques for Achieving the Perfect Boiling State
Boiling sugar is an essential step in making six-minute caramels. Achieving the perfect boiling state requires careful attention to temperature and technique. Begin by using a heavy-bottomed saucepan, which distributes heat evenly and minimizes the risk of hot spots that can burn your sugar mixture. Use a candy thermometer for precision—this is your best ally in ensuring your caramel reaches the ideal temperature.
When you begin heating the mixture, watch for the initial bubbling. The sugar will dissolve and form a syrup. It’s important to keep an eye on this process, as the sugar can quickly go from syrup to burnt. The ideal boiling temperature for caramels is around 240°F (115°C), which is the soft-ball stage. This is where the sugar syrup thickens enough to form a chewy caramel. To achieve this, bring the mixture to a boil over medium heat, then gradually increase to medium-high, allowing the mixture to bubble vigorously.
Stirring Methods to Prevent Burning and Achieve the Right Consistency
Stirring your caramel mixture correctly is critical to prevent burning and achieve the desired consistency. Start by gently stirring the mixture with a wooden spoon or heat-resistant silicone spatula as it begins to boil. This helps to dissolve any sugar crystals that may form on the sides of the pan. Once the mixture reaches a rolling boil, reduce the stirring. Constant stirring can introduce air bubbles and affect the texture of the caramel.
Instead, gently swirl the pot occasionally to keep the mixture moving and prevent it from sticking to the bottom. Be vigilant—sugar can go from perfect to burnt in a matter of seconds. As you near the desired temperature, use a candy thermometer to monitor closely, and remove the pot from the heat as soon as it reaches 240°F (115°C).
Tips for Pouring and Setting the Caramel Properly
Once your caramel reaches the perfect temperature, it’s time for pouring. Prepare a baking dish or pan lined with parchment paper or lightly greased to prevent sticking. Carefully pour the hot caramel into the prepared dish, using a spatula to scrape any remaining caramel from the pot. Be cautious, as the mixture will be extremely hot.
Allow the caramel to set at room temperature for at least 2 hours or until completely firm. If you’re in a hurry, you can place the dish in the refrigerator to speed up the cooling process. Once set, you can cut your caramels into squares or rectangles, and they can be individually wrapped in wax paper or cellophane for storage or gifting.
The Perfect Consistency
Determining when your caramels are done cooking is crucial. The ideal consistency is firm yet chewy, allowing for a satisfying bite. As you cook the sugar, watch for visual and textural cues. The mixture will begin to darken slightly, taking on a rich golden hue. When you dip a spoon into the mixture, it should coat the back of the spoon thickly.
To test if the caramels are at the right consistency, you can perform a simple cold water test. Drop a small amount of the caramel into a glass of cold water. If it forms a soft ball that can be flattened between your fingers, your caramels are ready. If it dissolves or forms a hard ball, you may need to adjust the cooking time.
Be mindful of environmental factors that can affect cooking time. High altitudes, for instance, can alter boiling points; thus, you may need to cook your caramels longer. Conversely, in a humid kitchen, the moisture in the air can cause the sugar to take longer to set. Adjust your cooking time accordingly to ensure perfect caramels every time.
Customizing Your Caramels
One of the joys of making six-minute caramels is the ability to customize them to your taste. You can experiment with various flavors and textures to create your own signature caramel. Here are some suggestions to get you started:
1. Flavor Extracts: Adding extracts like almond or maple can enhance the flavor profile of your caramels. Add a teaspoon of extract to the mixture right before it reaches the desired temperature for an aromatic touch.
2. Nuts and Dried Fruits: Incorporating chopped nuts (such as pecans, walnuts, or hazelnuts) or dried fruits (like cranberries or apricots) can add texture and a delightful surprise in each bite. Fold them into the caramel mixture right before pouring.
3. Chocolate Additions: For chocolate lovers, consider swirling melted chocolate into the caramel just after you remove it from the heat. This creates a marbled effect and adds a rich chocolate flavor. Alternatively, you can dip the cut caramels in chocolate for an indulgent treat.
4. Spices: Experimenting with spices can add depth to your caramels. A pinch of sea salt can enhance the sweetness, while a dash of cinnamon or nutmeg can provide warmth and complexity.
Storing and Enjoying Your Caramels
To ensure your homemade caramels maintain their chewy texture and flavor, proper storage is essential. Store them in an airtight container at room temperature for up to two weeks. If you want to keep them longer, consider refrigerating them. However, be aware that refrigeration may alter the texture, making them firmer.
When wrapping your caramels, cut them into uniform squares and wrap each piece in wax paper or cellophane to prevent them from sticking together. This not only makes for a great presentation but also makes it easy for sharing or gifting.
For special occasions, you can get creative with your serving suggestions. Arrange your caramels on a decorative platter for a sweet table centerpiece, or use them as toppings for ice cream sundaes. They can also be added to cookie recipes or enjoyed alongside a warm cup of coffee or tea.
Nutritional Considerations
While six-minute caramels are undoubtedly a treat, it’s essential to be aware of their nutritional content. Each piece is rich in sugars and calories, so moderation is key. If you’re looking to modify the recipe for dietary needs, consider using dairy-free alternatives like coconut cream instead of heavy cream for a vegan-friendly option. You can also reduce the sugar content by substituting part of the sugar with natural sweeteners such as honey or maple syrup, though this may alter the consistency.
Homemade caramels can be enjoyed as part of a balanced lifestyle. It’s all about the joy of creating and sharing something delicious without compromising health.
Conclusion
Making six-minute caramels is not only easy but also a rewarding experience that can bring joy to your kitchen. The process of boiling sugar, creating a rich texture, and customizing flavors allows for creativity and experimentation. Don’t hesitate to play around with variations and make the recipe your own.
The satisfaction of crafting homemade treats for yourself and loved ones is unmatched. Whether shared at gatherings or gifted on special occasions, these caramels are bound to delight anyone who tries them. So gather your ingredients, embrace the art of candy-making, and enjoy the delicious results of your efforts. Happy cooking!