Introduction
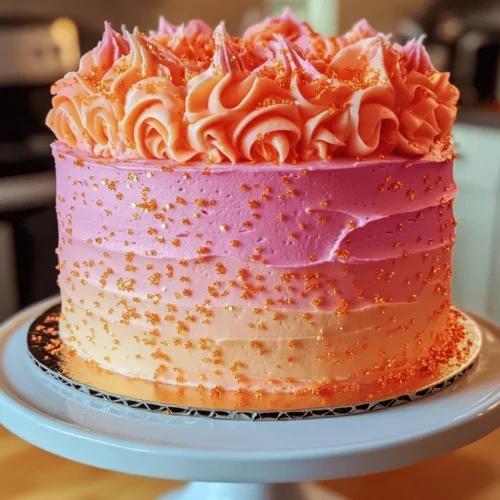
The Sunset Cake is not just a dessert; it is a visual masterpiece that captures the vibrant hues of a picturesque sunset. With its stunning layers that transition from rich orange to soft pink, this cake is a feast for the eyes as much as it is for the palate. It embodies the essence of celebration, making it the perfect centerpiece for birthdays, anniversaries, and any festive gathering. Each slice is a delightful combination of flavors, creating a memorable experience that is sure to impress your guests.
Baking has always been a cherished activity, not only for its delicious outcomes but also for the joy it brings into our lives. The process of creating something from scratch allows us to express our creativity and share love with those around us. The Sunset Cake, with its unique flavors and vibrant appearance, is an excellent way to bring family and friends together, fostering connections and creating lasting memories. Whether it’s a casual afternoon tea or a grand celebration, this cake is bound to be the star of the show.
Understanding the Ingredients
To create the perfect Sunset Cake, you’ll need a selection of core ingredients that each play a crucial role in achieving the desired flavor, texture, and overall aesthetic. Let’s explore these ingredients and their contributions to the baking process:
All-Purpose Flour
All-purpose flour serves as the foundation of our cake, providing the necessary structure and texture. Its moderate protein content allows for the right balance between tenderness and strength, ensuring that our cake rises beautifully and holds its shape. When measuring flour, it’s essential to spoon it into the measuring cup and level it off to avoid using too much, which can lead to a dense cake.
Granulated Sugar
Sugar is not just for sweetness; it also plays a vital role in moisture retention. Granulated sugar helps to create a tender crumb, trapping moisture within the cake layers. This ingredient also aids in browning, giving our Sunset Cake that lovely golden hue. The right amount of sugar is key to achieving the perfect level of sweetness without overwhelming the other flavors.
Unsalted Butter
Using unsalted butter in this recipe allows for greater control over the salt content. Butter adds rich flavor and contributes to the cake’s moistness. When creamed with sugar, it helps to incorporate air, creating a light and fluffy texture. It’s important to use butter at room temperature, as this ensures it blends easily with the other ingredients for a smooth batter.
Whole Milk
Whole milk adds creaminess and moisture to the cake, enhancing its flavor profile. The fat content in whole milk also contributes to a tender crumb, making each bite delightful. When baking, it’s best to use milk at room temperature to ensure a smooth batter and even baking.
Eggs
Eggs serve multiple purposes in baking; they act as a binding agent and provide leavening. The proteins in eggs help to create structure, while the fat content contributes to the cake’s richness. Beating the eggs until they are frothy can add additional air to the batter, contributing to the cake’s rise.
Baking Powder
Baking powder is a crucial leavening agent that helps the cake rise beautifully. It works by releasing carbon dioxide gas when moistened and heated, creating air pockets that give the cake its light and airy texture. It’s important to use fresh baking powder to ensure the cake rises properly.
Vanilla and Almond Extracts
These extracts add depth and complexity to the flavor profile of the cake. Vanilla brings a warm sweetness that complements the other ingredients, while almond extract adds a subtle nutty note, enhancing the overall experience. A little goes a long way, so it’s best to use these extracts sparingly.
Fresh Orange Juice and Zest
The addition of fresh orange juice and zest brings brightness and freshness to the cake. The acidity in the juice balances the sweetness, while the zest adds an aromatic citrus flavor that elevates the cake. Using fresh ingredients is key to achieving an authentic taste.
Pink and Orange Gradient Frosting
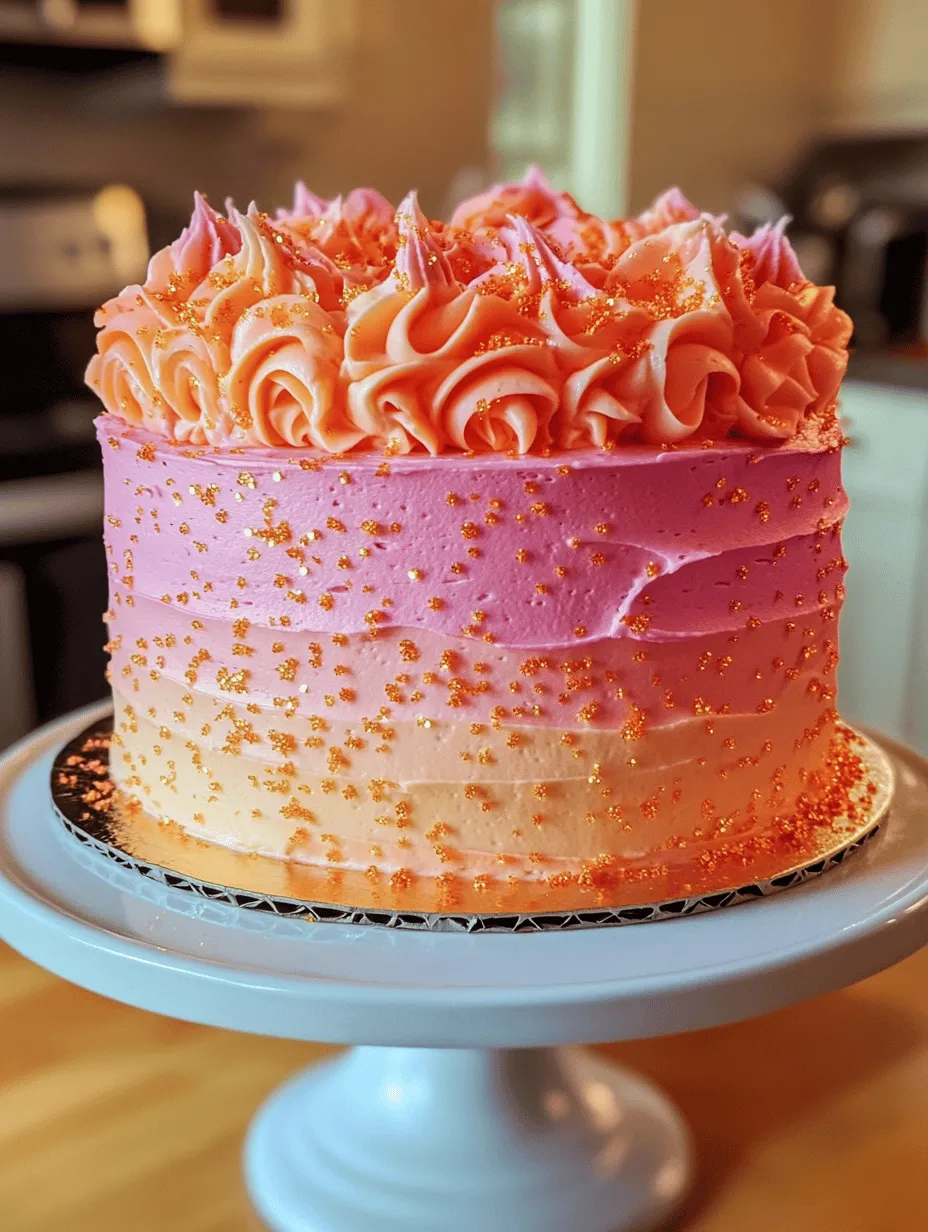
The frosting is where the visual magic happens. A pink and orange gradient frosting not only enhances the cake’s aesthetic appeal but also adds a creamy texture and sweetness. This frosting can be achieved with the right combination of buttercream and food coloring, creating a stunning ombre effect that mirrors the beauty of a sunset.
Edible Glitter
To finish off our Sunset Cake, a sprinkle of edible glitter adds a touch of glamour and whimsy. This decorative element elevates the cake from simple to spectacular, making it a perfect choice for celebrations. When choosing edible glitter, look for high-quality options that are safe for consumption.
Baking Process Explained
Now that we have a clear understanding of the ingredients that make up our Sunset Cake, let’s dive into the baking process. This step-by-step breakdown will guide you through each part of the preparation, ensuring that you achieve the best possible results.
Prepping the Pans
The first step in baking any cake is preparing the pans. Proper greasing and flouring of your cake pans is essential to prevent sticking and ensure clean removal once baked. Here’s how to do it:
1. Grease the Pans: Use softened butter or non-stick cooking spray to coat the sides and bottoms of your cake pans. Be generous, ensuring that every surface is covered.
2. Flour the Pans: After greasing, sprinkle a little all-purpose flour into each pan. Gently tilt and tap the pans to coat the greased surfaces with flour. This creates a barrier that allows the cake to rise without sticking.
3. Line with Parchment: For added assurance, consider lining the bottom of each pan with parchment paper. This provides an extra layer of protection against sticking and helps maintain the cake’s shape.
With your pans properly prepared, you are ready to move on to the next steps in the baking process, where the magic of the Sunset Cake truly begins.
As we continue to explore the steps involved in baking this delightful cake, you’ll discover helpful techniques and tips that will ensure your Sunset Cake is a showstopper at your next gathering. From mixing the batter to mastering the art of frosting, every detail counts in creating a cake that is as delicious as it is beautiful. Stay tuned for the next installment, where we will delve deeper into the mixing and baking process, ensuring your journey to creating the perfect Sunset Cake is seamless and enjoyable.
Creaming Method: How to Achieve the Perfect Texture
To create an irresistible Sunset Cake, mastering the creaming method is essential. This technique combines butter and sugar until they are light and fluffy, incorporating air to produce a tender crumb. Start with room temperature unsalted butter, about 1 cup (226 grams), and granulated sugar, around 2 cups (400 grams). Using a stand mixer or hand mixer, beat the butter and sugar together on medium speed for about 3 to 5 minutes. The mixture should become pale and fluffy, indicating that enough air has been incorporated.
Remember to scrape down the sides of the bowl occasionally to ensure even mixing. If your butter is too soft or melted, it won’t trap the air effectively, leading to a denser cake. For optimal texture, the butter should be soft enough to leave a slight indentation when pressed but not overly greasy or slick.
Incorporating Wet and Dry Ingredients: Avoiding Over-Mixing
Once your creamed mixture is ready, it’s time to add the wet and dry ingredients. Start by mixing together your dry ingredients: 3 cups (360 grams) of all-purpose flour, 1 tablespoon of baking powder, and a pinch of salt in a separate bowl. In another bowl, combine your wet ingredients: 1 cup (240 ml) of milk and 2 teaspoons of vanilla extract.
When incorporating the dry and wet mixtures into the butter and sugar, alternate between the two, starting and ending with the dry ingredients. This method helps maintain the cake’s structure while preventing over-mixing. After adding each portion, mix just until you no longer see dry flour, as over-mixing can develop gluten and result in a tough cake. Aim for a smooth batter with a few small lumps remaining.
Importance of Cooling: Why Cooling is Crucial Before Frosting
Once your cake layers are baked to a beautiful golden brown, it’s crucial to allow them to cool completely before frosting. Cooling not only prevents the frosting from melting but also ensures that the layers settle and firm up. If you frost the cake while it’s still warm, the heat may cause the frosting to slide off, leading to a messy presentation and uneven distribution.
To cool your cake properly, remove it from the oven and let it sit in the pans for about 10 to 15 minutes. Then, carefully transfer the cakes to a wire rack. This allows airflow around the layers, speeding up the cooling process. Patience is key; letting the cakes cool for at least an hour ensures that you achieve the best results when it’s time to frost.
Frosting the Sunset Cake
Insights into Creating and Applying the Pink and Orange Gradient Frosting
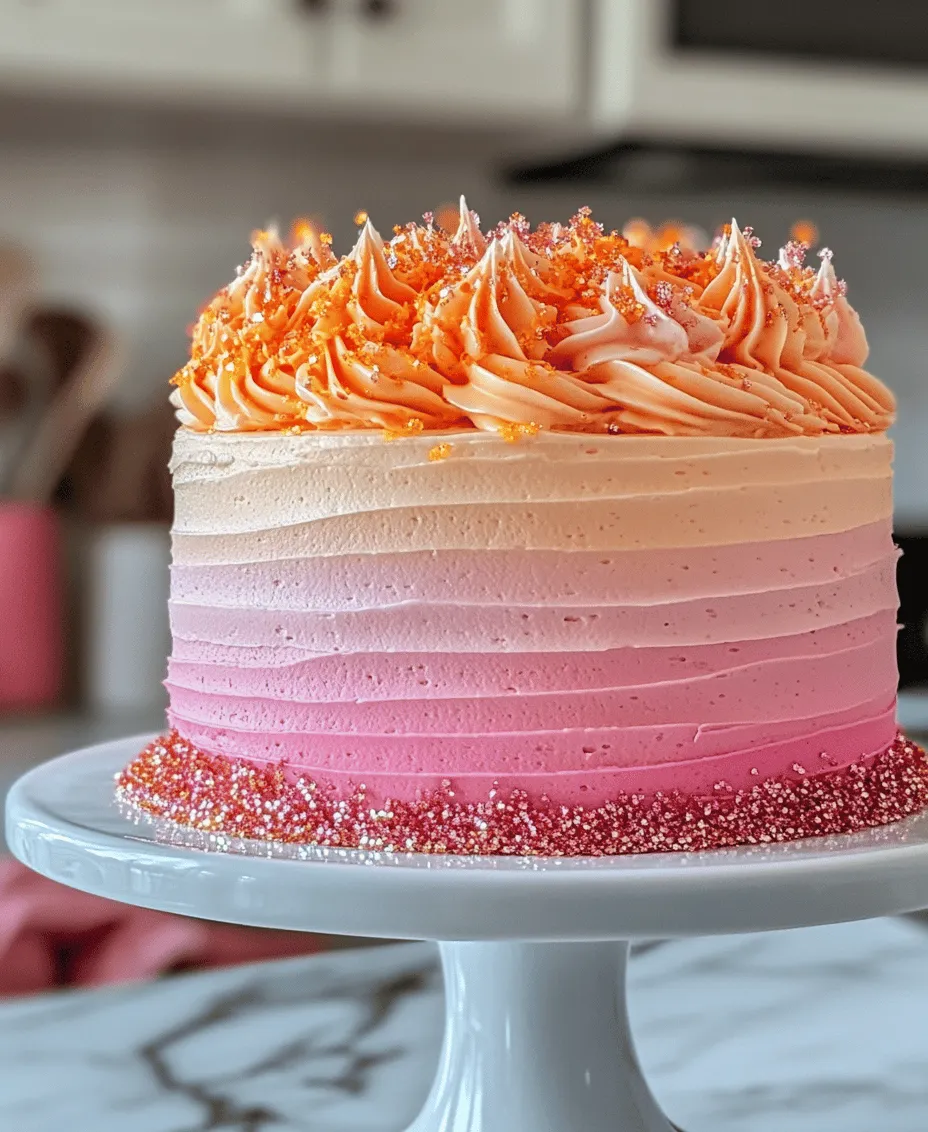
The signature feature of the Sunset Cake is its stunning pink and orange gradient frosting that mimics the colors of a vibrant sunset. To create this visually appealing effect, you can prepare a classic buttercream frosting. Start with 1 cup (226 grams) of softened unsalted butter, gradually adding about 4 cups (480 grams) of powdered sugar and mixing until smooth. Split the frosting into three bowls, tint one with orange gel food coloring and another with pink. Leave the third bowl white for a beautiful gradient effect.
To apply the frosting, start by spreading a thin layer of the white frosting on the top and sides of the cooled cake for a crumb coat, which seals in any loose crumbs. Chill the cake for 30 minutes to set this base layer. Next, using an offset spatula, apply the orange frosting at the bottom of the cake and the pink towards the top, blending them slightly in the middle to create a seamless gradient.
Discussion on Store-Bought vs. Homemade Frosting Options: Pros and Cons
When it comes to frosting, you may wonder whether to go for homemade or store-bought options. Homemade frosting, while more time-consuming, allows for customization in flavor and texture. You can adjust the sweetness, add flavor extracts, or incorporate unique ingredients like citrus zest or spices. On the other hand, store-bought frosting is a convenient option that saves time and effort, especially when you’re in a hurry.
However, store-bought frosting can sometimes be overly sweet or contain preservatives, which may not align with the desired taste profile of your Sunset Cake. If you choose to purchase frosting, opt for premium brands that use quality ingredients for a more authentic flavor.
Techniques for Achieving a Smooth and Visually Appealing Finish on the Cake
To achieve a smooth and visually appealing finish on your Sunset Cake, consider a few techniques. First, ensure your frosting is slightly chilled and not too soft, as this will help it hold its shape better. Use a bench scraper or an offset spatula to smooth the sides and top of the cake. For a professional finish, you can dip your spatula or scraper in warm water and wipe it dry before smoothing the frosting. The warmth will help to melt any imperfections, giving you a flawless look.
Another technique is to use a piping bag fitted with a large round tip to create decorative borders or rosettes along the edges of the cake. This not only enhances the visual appeal but also adds a touch of elegance. Finally, don’t forget to add edible glitter or sprinkles to really make your Sunset Cake shine.
Adding Edible Glitter: Tips for Effective Application
Edible glitter can elevate your Sunset Cake, adding a sparkle that mimics the shimmering hues of a sunset. When using edible glitter, apply it after the frosting has set slightly to prevent it from sinking into the frosting. You can use a clean, dry brush to lightly dust the glitter over the top of the cake or sprinkle it gently from a distance to ensure a uniform application.
If you’re feeling creative, consider creating patterns or designs with the glitter to make your cake uniquely yours. Just be sure to use food-safe, high-quality edible glitter to ensure it’s safe for consumption.
Serving Suggestions and Pairings
Ideas on How to Present the Sunset Cake Elegantly for Different Occasions
Presentation plays a crucial role in how your Sunset Cake is perceived. For a stunning display, place the cake on a decorative cake stand, allowing the vibrant colors to shine. Consider garnishing the cake with fresh fruits like strawberries or citrus slices that complement the flavor profile and enhance the visual appeal. Use a simple white or pastel plate to showcase the colors of the cake without distraction.
For special occasions, consider decorating the table with themed decorations that echo the sunset colors, such as soft oranges, pinks, and yellows. Adding candles or fairy lights can create a warm ambiance, making the Sunset Cake the centerpiece of your gathering.
Suggested Beverages That Complement the Flavors of the Cake
Pairing beverages with your Sunset Cake can enhance the overall experience. A classic pairing would be a cup of freshly brewed coffee or a rich cup of Earl Grey tea, which complements the sweetness and adds depth to the flavors. For a refreshing twist, consider serving the cake with a citrus-infused sparkling water or lemonade. These beverages can balance the sweetness of the cake, making for a delightful combination.
For adult gatherings, a light rosé or a refreshing summer cocktail, such as a mimosa, can also be excellent choices that align beautifully with the vibrant theme of the cake.
Tips for Pairing with Fruit or Ice Cream to Enhance the Tasting Experience
Adding a side of fresh fruit or a scoop of ice cream can elevate your Sunset Cake to new heights. Consider serving slices of the cake with fresh berries, such as raspberries or blueberries, which add a tart contrast to the sweetness. Alternatively, a scoop of vanilla or coconut ice cream can complement the cake’s flavors and provide a creamy texture.
If you want to get creative, consider making a fruit compote with seasonal fruits to drizzle over the cake. This can add a fresh element that enhances the cake’s overall presentation and taste.
Occasions to Celebrate with Sunset Cake
Highlighting Various Occasions Where the Sunset Cake Would Be a Showstopper
The Sunset Cake is versatile and can shine at various occasions, making it a delightful centerpiece.
Birthdays: A Colorful Centerpiece for Celebrations
For birthdays, the Sunset Cake’s vibrant colors can bring joy and excitement to the celebration. Its unique appearance makes it a conversation starter and a perfect way to celebrate another year of life. Personalize the cake with themed decorations or candles that match the party’s aesthetic.
Summer Gatherings: Perfect for Outdoor Picnics and Barbecues
As summer approaches, the Sunset Cake becomes an ideal choice for outdoor gatherings. Its bright colors evoke the warmth of the season, making it a refreshing treat at picnics and barbecues. Pair it with outdoor-friendly plates and utensils to keep things casual and fun.
Weddings and Anniversaries: A Romantic Touch with Its Sunset Hues
For weddings and anniversaries, the Sunset Cake adds an element of romance with its warm hues. Consider incorporating elements that reflect the couple’s love story, such as personalized cake toppers or floral arrangements that mirror the cake’s colors.
Seasonal Parties: Aligning with Seasonal Themes and Colors
The Sunset Cake is not limited to summer. Its colors can align beautifully with seasonal themes, such as autumn gatherings with rich oranges and reds, or spring celebrations with pastel hues. Adapt the frosting colors to reflect the season and create a stunning dessert that enhances your table setting.
Conclusion
The Sunset Cake is not just a treat for the taste buds; it is a feast for the eyes and a celebration of life’s special moments. Its beautiful gradient frosting and delightful flavor make it a remarkable addition to any occasion, whether it be a festive birthday party, a romantic wedding, or a casual summer gathering.
Embracing the art of baking this cake not only brings joy to the baker but also creates lasting memories for those who share in its enjoyment. As you slice into this stunning dessert and share it with loved ones, you’ll find that the Sunset Cake truly embodies the beauty of celebrations and the happiness they bring.
So, gather your ingredients, follow the steps, and allow the Sunset Cake to shine at your next event, creating delicious memories filled with love, laughter, and, of course, cake.