

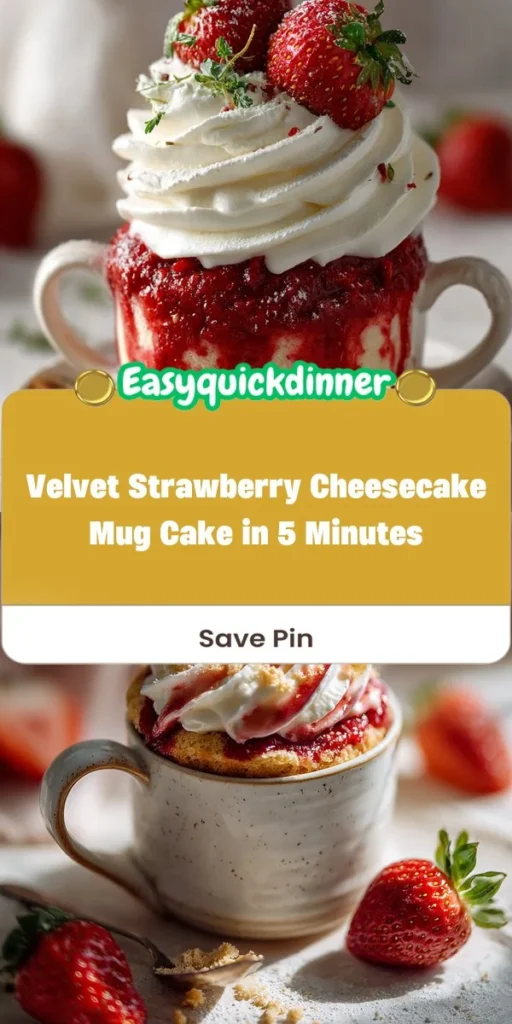
Velvet Strawberry Cheesecake Mug Cake
About This Recipe
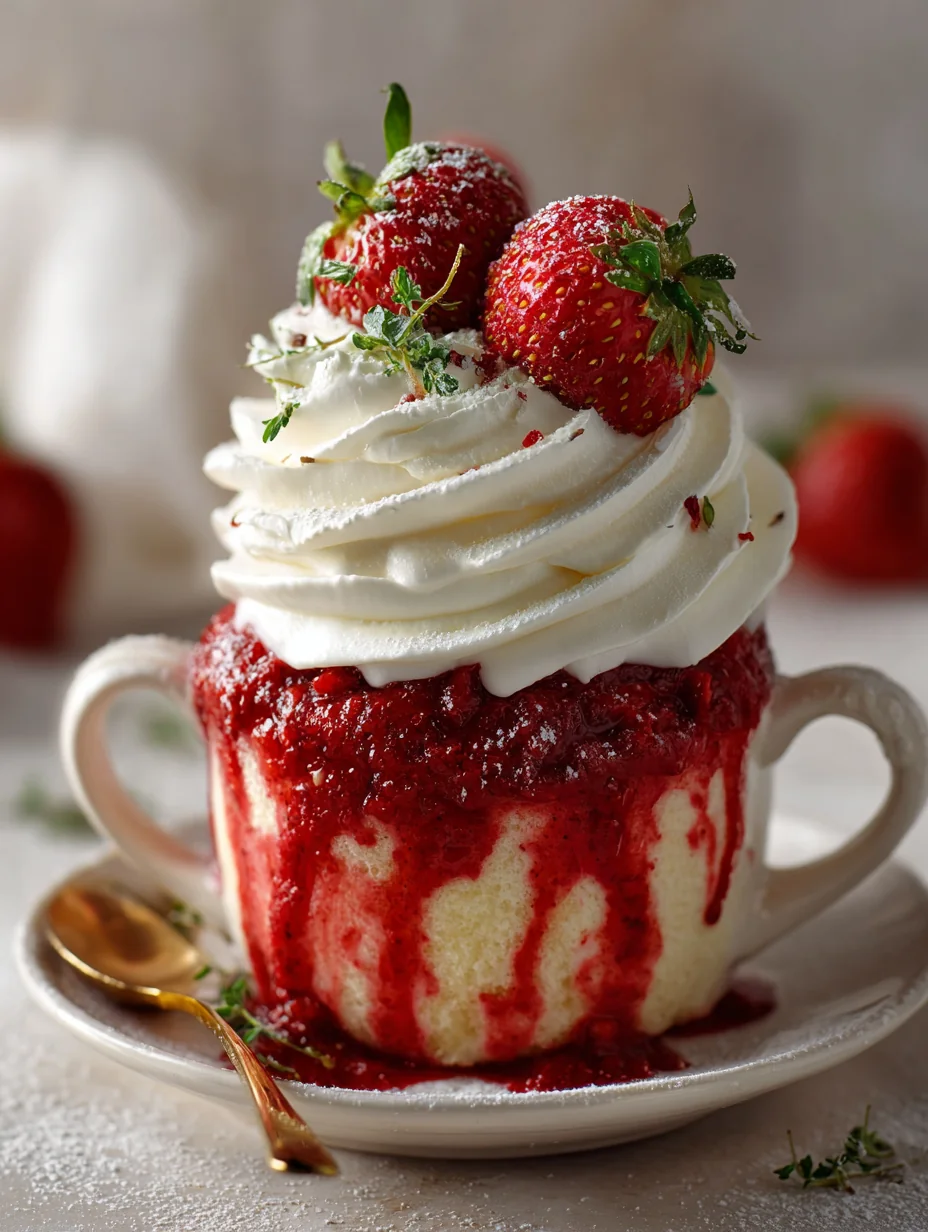
The Velvet Strawberry Cheesecake Mug Cake is a delightful dessert that artfully blends the lusciousness of cheesecake with the convenience of a microwave mug cake. Imagine indulging in a decadent treat that captures the essence of creamy cheesecake, topped with fresh strawberries, yet takes only minutes to prepare. This recipe is your perfect solution for satisfying sweet cravings without the hassle of baking an entire cake. Whether you’re enjoying a cozy night in or need a quick dessert to impress, this mug cake is sure to become a favorite in your dessert repertoire.
Why You’ll Love This
There are countless reasons to fall in love with the Velvet Strawberry Cheesecake Mug Cake. Here are some highlights:
- Quick Preparation Time: With just five minutes from start to finish, you can whip up this delicious dessert whenever the craving strikes.
- Single-Serving Size: This recipe is designed for one, making it perfect for personal treats without the temptation of leftover cake.
- Delightful Combination of Textures: The fluffy mug cake pairs perfectly with the creamy cheesecake filling, creating a harmonious blend that’s sure to please your palate.
- Customizable: Feel free to switch up the fruits or toppings based on your preferences. Try raspberries, blueberries, or even a drizzle of chocolate for an extra indulgent twist.
- Beginner-Friendly: No baking skills are required! This recipe is straightforward, making it accessible for anyone looking to create a sweet treat.
🥗 Ingredient Breakdown
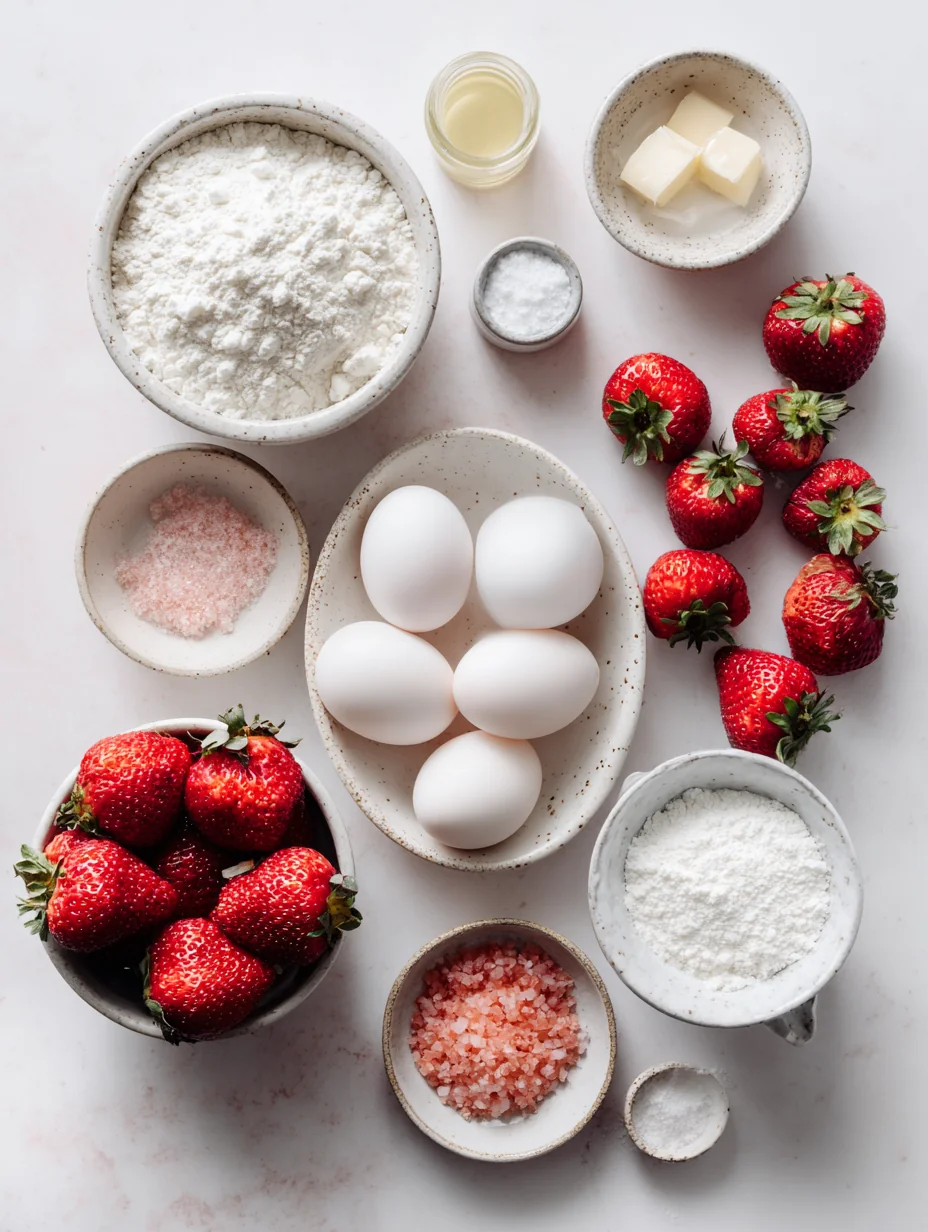
Understanding each ingredient’s role in this recipe will not only help you make the mug cake perfectly but also deepen your appreciation for the science of baking. Here’s a breakdown of what you’ll need:
- All-Purpose Flour: This is the backbone of your mug cake, providing structure and stability. Its gluten content helps the cake rise and gives it a light texture.
- Granulated Sugar: Sugar adds sweetness to your cake, enhancing the overall flavor profile. It also contributes to the cake’s moistness and texture.
- Cocoa Powder: While this recipe focuses on strawberries, a hint of cocoa powder adds depth, creating a subtle chocolate taste that beautifully complements the fruit.
- Baking Powder: This leavening agent is crucial for achieving that fluffy texture. It reacts with the wet ingredients to produce carbon dioxide, which causes the batter to rise during cooking.
- Salt: A small pinch of salt is essential; it balances the sweetness of the sugar and enhances the overall flavors in your cake.
- Milk: Milk is a key wet ingredient that adds moisture to the batter. It helps create a soft and tender cake, ensuring that every bite melts in your mouth.
- Vegetable Oil or Melted Butter: Both options add richness and moisture to the cake. Butter will impart a delicious flavor, while vegetable oil can create a lighter texture.
- Vanilla Extract: This ingredient adds a warm, comforting flavor to the cake. It’s a classic addition that elevates the dessert by providing a fragrant aroma and depth of taste.
- Cream Cheese: The star of the show, cream cheese, creates the luscious cheesecake swirl. Its tangy flavor and creamy texture contrast beautifully with the cake.
- Powdered Sugar: Used to sweeten the cheesecake filling, powdered sugar dissolves easily, ensuring a smooth and creamy mixture that enhances the overall decadence.
- Fresh Strawberries: Not only do strawberries add a burst of freshness and flavor, but they also provide a beautiful garnish, making your mug cake visually appealing.
Step-by-Step Preparation
Now that you have a good understanding of the ingredients, let’s dive into the preparation process. Follow these steps to create your Velvet Strawberry Cheesecake Mug Cake:
1. Mix the Dry Ingredients: In a microwave-safe mug, combine 4 tablespoons of all-purpose flour, 2 tablespoons of granulated sugar, 1 tablespoon of cocoa powder, 1/8 teaspoon of baking powder, and a pinch of salt. Use a fork or a small whisk to mix the dry ingredients until they are well combined.
2. Add the Wet Ingredients: Next, pour in 3 tablespoons of milk, 2 tablespoons of vegetable oil or melted butter, and 1/4 teaspoon of vanilla extract to the dry mixture. Stir everything together until you achieve a smooth batter with no lumps. The mixture should be thick but pourable.
3. Prepare the Cheesecake Filling: In a small bowl, mix 2 tablespoons of cream cheese with 1 tablespoon of powdered sugar. If you have any leftover vanilla extract, you can add a drop for extra flavor. Mix until smooth and creamy.
4. Fold in the Strawberries: Chop a few fresh strawberries into small pieces and gently fold them into the cream cheese mixture. This will create a delightful filling that adds both flavor and texture to your mug cake.
5. Layer the Batters: In your prepared mug, pour half of the cake batter as the base layer. Then, spoon the cheesecake filling mixture on top. Finally, pour the remaining cake batter over the cheesecake layer, creating a beautiful layered effect.
6. Microwave the Mug Cake: Place the mug in the microwave and cook on high for about 1 to 1.5 minutes. Keep an eye on it as microwave times can vary. The cake is done when it has risen and is set in the center.
7. Cool and Serve: Allow the mug cake to cool for a minute before enjoying. You can top it with additional fresh strawberries or a dollop of whipped cream for extra decadence.
By following these steps, you’ll have a stunning Velvet Strawberry Cheesecake Mug Cake that is sure to impress, even if you’re new to baking!
Component Preparation
To start your Velvet Strawberry Cheesecake Mug Cake, it’s essential to prepare your ingredients properly. Here are some key points to ensure everything comes together seamlessly.
Softening Cream Cheese
For a smooth and creamy cheesecake layer, it’s crucial to soften your cream cheese. Here’s how to do it effectively:
1. Room Temperature Method: Remove the cream cheese from the refrigerator and let it sit at room temperature for about 30 minutes before you begin. This will make it easier to mix and will help prevent lumps in your cheesecake mixture.
2. Microwave Method: If you’re short on time, you can microwave the cream cheese. Place it in a microwave-safe bowl and heat it in 10-second intervals until softened, making sure not to melt it. Stir in between intervals for even softening.
Dicing Strawberries
Properly dicing your strawberries enhances both the texture and presentation of the mug cake. Follow these techniques:
1. Washing: Rinse the strawberries under cold water and pat them dry with a paper towel.
2. Hull Removal: Use a sharp paring knife to remove the green hull. Cut the top off and gently slide the knife under the hull to detach it from the fruit.
3. Dicing: Place the strawberry upright on a cutting board. Slice it vertically into quarters, then rotate and cut horizontally to create small, even pieces. This method helps maintain the integrity of the strawberries during baking.
Measuring Ingredients Accurately
Accurate measurements are key to successful baking. Here are some tips to avoid mishaps:
1. Use Dry and Liquid Measuring Cups: Ensure you use dry measuring cups for flour and sugar, and liquid measuring cups for milk and oil. This distinction is vital for accuracy.
2. Leveling Off Dry Ingredients: When measuring flour or sugar, scoop it into the measuring cup, and then use a straight edge, like a knife, to level it off without packing it down.
3. Weighing Ingredients: If you have a kitchen scale, weighing your ingredients can provide the most accurate measurements, particularly for flour and sugar.
Assembly & Serving Tips
Assembling your Velvet Strawberry Cheesecake Mug Cake is a rewarding process. Here are some tips to ensure an even bake and delightful presentation.
Layering the Batter and Cheesecake Mixture
1. Start with the Batter: Spoon in half of the cake batter into the bottom of your microwave-safe mug. This layer should be thick enough to support the cheesecake mixture without collapsing.
2. Add the Cheesecake Layer: Using a spoon, dollop the cheesecake mixture over the cake batter, making sure to keep it centralized to prevent it from spreading too much.
3. Finish with Remaining Batter: Gently spoon the remaining cake batter on top of the cheesecake layer. This will create a beautiful layered effect as it bakes.
Garnishing and Serving Suggestions
1. Fresh Strawberries: Top your cooked mug cake with fresh strawberry slices for an added burst of flavor and color.
2. Whipped Cream: A dollop of whipped cream can elevate the dessert, adding richness and a creamy texture that pairs beautifully with the cheesecake.
3. Serving Temperature: The mug cake can be served warm straight from the microwave for a gooey texture or allowed to cool slightly for a firmer cheesecake-like consistency. Both options are delicious!
Presentation
The visual appeal of your Velvet Strawberry Cheesecake Mug Cake can enhance the overall experience. Consider these presentation ideas:
1. Decorative Mugs: Use brightly colored or uniquely shaped mugs to create an inviting display. Mugs with fun designs or patterns can make your dessert feel special.
2. Photographing Tips: To capture the perfect shot for social media, use natural light and try different angles. A close-up of the cake with fresh strawberries in the background can make for an appealing image.
3. Beverage Pairing: Consider serving the mug cake alongside a cup of coffee, tea, or even a glass of milk. This combination makes for a delightful dessert experience.
Variations
Encourage your creativity by experimenting with variations of the Velvet Strawberry Cheesecake Mug Cake:
1. Fruit Substitutions: Swap strawberries for other fruits like raspberries, blueberries, or bananas. Each fruit brings a unique flavor profile and color to your dessert.
2. Add-Ins: For an extra flavor kick, consider adding chocolate chips or nuts to the cake batter. These add-ins can provide texture and richness.
3. Gluten-Free Option: Substitute all-purpose flour with a gluten-free flour blend. Ensure that all other ingredients, especially the baking powder, are also gluten-free to maintain the integrity of the recipe.
Storage Guidelines
If you have leftovers or want to prepare your mug cake in advance, here’s how to store it properly:
1. Refrigerating Leftovers: Store any uneaten mug cake in an airtight container in the refrigerator. It can last for up to 2-3 days.
2. Reheating: To enjoy your mug cake again, simply reheat it in the microwave for about 15-20 seconds. Check the temperature before serving to avoid overheating.
3. Make-Ahead Cheesecake Mixture: You can prepare the cheesecake mixture in advance and store it in the refrigerator. This allows for quick assembly when you’re ready to enjoy your mug cake.
FAQ
Can I make this recipe without a microwave?
Yes, you can bake the mug cake in a conventional oven. Preheat your oven to 350 degreesF (175 degreesC), and place the filled mug in a baking dish with water to create a water bath. Bake for about 25-30 minutes or until a toothpick comes out clean.
How can I adjust the sweetness to my preference?
You can reduce or increase the sugar in the cake batter and cheesecake mixture to suit your taste. Start by reducing the sugar by a tablespoon and adjust as necessary.
Is it possible to use non-dairy alternatives for the ingredients?
Absolutely! Use non-dairy cream cheese and milk substitutes such as almond or oat milk. Ensure that the alternatives fit your dietary needs.
What are the signs that the mug cake is fully cooked?
The mug cake is done when it has risen, appears set, and a toothpick inserted into the center comes out clean or with a few moist crumbs.
How do I prevent the mug cake from overflowing in the microwave?
To prevent overflow, ensure you do not fill the mug more than halfway with batter. A standard 12-ounce mug is recommended to provide enough space for rising.
Conclusion
The Velvet Strawberry Cheesecake Mug Cake is a delightful and simple dessert that brings joy to any occasion. With its rich layers of cake and creamy cheesecake, it’s a perfect treat for both beginner bakers and seasoned pros. Don’t hesitate to explore variations or adjust the recipe to your liking. Enjoy the process, and savor every bite of this quick yet satisfying dessert!