Introduction
In the world of culinary delights, few things evoke the warmth and nostalgia of homemade preserves. Among these, orange marmalade holds a special place, capturing the essence of bright, sun-kissed oranges in a jar. The appeal of crafting your own marmalade lies not just in its rich flavor but also in the joy of preserving seasonal fruits, allowing you to enjoy their vibrant tastes throughout the year. Whether spread on a warm slice of toast, dolloped onto scones, or used as a glaze for meats, homemade orange marmalade is a versatile staple that can elevate any meal.
Orange marmalade, with its distinct combination of sweetness and tartness, has been a beloved accompaniment in culinary traditions across the globe. It is particularly cherished in British breakfast culture, where it often features prominently on toast alongside butter. The unique texture, punctuated by bits of citrus peel, offers a satisfying contrast to the smoothness of butter or cream cheese. Beyond breakfast, this delightful preserve finds its way into various recipes, from marinades and salad dressings to desserts, showcasing its ability to enhance flavors in both sweet and savory dishes.
Making marmalade at home presents numerous benefits that go beyond simply crafting a delicious spread. First and foremost, homemade orange marmalade guarantees freshness, allowing you to savor the peak flavors of ripe oranges. Additionally, it offers a level of customization that store-bought versions cannot match. You can adjust the sweetness, explore different citrus combinations, and even experiment with herbs and spices to create a marmalade uniquely yours. Moreover, making marmalade at home can be a healthier option; you can control the ingredients and avoid preservatives often found in commercial products.
Understanding Orange Marmalade
At its core, orange marmalade is a fruit preserve made from oranges, sugar, and water, with the potential addition of other ingredients to enhance flavor. Unlike jams and jellies, which are typically made from fruit pulp or juice alone, marmalade retains the fruit’s peel, providing texture and a characteristic bitter note that balances the sweetness of the sugar. This combination of flavors creates a delightful contrast that is both refreshing and satisfying.
The origins of marmalade trace back to the 16th century, with the earliest recorded recipes appearing in Portugal. The name “marmalade” itself derives from the Portuguese word “marmelada,” which refers to a quince paste. Over time, the preparation evolved, and by the 18th century, orange marmalade began to emerge as a popular preserve in Britain. It became increasingly widespread during the Victorian era, thanks in part to advances in canning technology and the establishment of commercial production. Today, orange marmalade continues to be celebrated for its rich history and enduring popularity.
From a nutritional standpoint, oranges are a powerhouse of health benefits. Rich in vitamin C, dietary fiber, and antioxidants, they play a crucial role in supporting the immune system and promoting overall health. Lemons, often used in conjunction with oranges in marmalade recipes, also pack a nutritional punch. Their high acidity not only enhances the flavor profile of the marmalade but also contributes to its preservation by creating an environment less conducive to spoilage. Together, these citrus fruits create a vibrant and healthful spread that can be enjoyed guilt-free.
Essential Ingredients for Zesty Classic Orange Marmalade
To create the perfect zesty classic orange marmalade, it is essential to select high-quality ingredients that will contribute to the flavor, texture, and preservation of the final product. Below is a detailed description of the key ingredients you will need, along with tips for choosing the best options.
Oranges: Variety and Selection Tips
The star of any orange marmalade is, of course, the oranges. When selecting oranges for your marmalade, look for varieties that are both sweet and slightly tart to achieve the perfect balance. Common choices include Valencia oranges, which are juicy and flavorful, and Seville oranges, known for their intense tartness and distinctive aroma. Seville oranges are traditionally used for making marmalade due to their high pectin content, which helps achieve a desirable gel-like consistency.
When choosing oranges, opt for ones that are firm, heavy for their size, and have smooth, unblemished skin. Avoid any fruits that show signs of soft spots or discoloration. If possible, purchase organic oranges to reduce exposure to pesticides and other chemicals. Freshness is key; using in-season oranges will yield the best flavor and texture.
Lemons: Importance for Balance and Flavor
Lemons play a crucial role in the making of orange marmalade, not only for their flavor but also for their natural acidity. The addition of lemon juice enhances the overall taste of the marmalade, balancing the sweetness of the sugar and the natural sweetness of the oranges. Furthermore, the acidity from lemons aids in the preservation process, helping to extend the shelf life of your homemade marmalade.
When selecting lemons, look for bright yellow fruits that are firm and heavy for their size. Just like with oranges, choosing organic lemons is a good idea to minimize potential pesticide residues. Fresh lemons will yield more juice, so opt for those that feel slightly soft when gently squeezed, indicating juiciness.
Granulated Sugar: Role in Preservation and Sweetness
Sugar is not only a sweetener; it plays a vital role in the preservation of your marmalade. During the cooking process, sugar helps to extract pectin from the fruit, which is essential for achieving the desired gel-like consistency. Additionally, sugar acts as a preservative, inhibiting the growth of bacteria and mold, thus extending the shelf life of your homemade marmalade.
When making orange marmalade, granulated sugar is the most commonly used form. However, you can experiment with reducing the quantity or substituting with alternatives like honey or agave syrup if desired. Keep in mind that altering the sugar content can affect the texture and preservation properties of your marmalade, so adjustments should be made with caution.
Water: Purpose in Cooking Down the Fruit
Water is an essential ingredient in the marmalade-making process, serving as the medium in which the oranges and lemons cook down. It helps to soften the fruit, releasing their natural juices and flavors. The amount of water used can vary depending on the juiciness of the oranges; typically, you will want to use just enough to prevent the fruit from sticking to the bottom of the pot while simmering.
Salt: Enhancing Flavor
Though it may seem counterintuitive, a small amount of salt can enhance the overall flavor of your orange marmalade. Salt helps to balance the sweetness and acidity of the fruit, bringing out the natural flavors and creating a more complex taste profile. A pinch of salt added during the cooking process can make a significant difference in the final product.
Vanilla Extract: Optional Flavor Enhancer
For those looking to add a unique twist to their orange marmalade, a splash of vanilla extract can introduce a warm, aromatic note that complements the citrus flavors beautifully. While not a traditional ingredient, vanilla can elevate the overall experience of the marmalade, making it a delightful addition if you wish to experiment. Adding vanilla is completely optional, so feel free to omit it if you prefer a more classic taste.
Step-by-Step Guide to Making Orange Marmalade
Now that you have gathered your essential ingredients, it’s time to embark on the delightful journey of making your own zesty classic orange marmalade. The process involves careful preparation and cooking to extract the best flavors from the fruit. Below, you’ll find a detailed step-by-step guide to help you through each stage of marmalade-making.
Preparing the Fruit
The first step in creating your homemade orange marmalade is to prepare the fruit properly. This involves washing, slicing, and removing seeds from the oranges and lemons.
1. Washing the Fruit: Begin by thoroughly washing your oranges and lemons under cool running water. This step is crucial to remove any dirt or residues from the skin, especially if you are using non-organic fruit. A gentle scrub with a soft brush can help ensure that your fruit is clean.
2. Cutting Techniques: After washing, it’s time to slice the fruit. Start by cutting the oranges in half and then into thin slices, ensuring you include the peel, as it is a defining characteristic of marmalade. The thickness of the slices will affect the final texture, so aim for uniformity to promote even cooking.
3. Removing Seeds: As you slice the oranges, be on the lookout for seeds. While some may naturally break apart during the cooking process, it’s best to remove them to avoid any unpleasant surprises in your finished marmalade. You can do this by gently prying them out with a small knife or your fingers.
4. Preparing Lemons: Repeat the same process for the lemons. Cut them in half, remove any seeds, and slice thinly, ensuring that you capture the juice as well. The combination of orange and lemon slices will create the ideal base for your marmalade.
Cooking the Fruit
Once your fruit is prepared, it’s time to move on to the cooking process, where the magic of marmalade-making truly begins.
1. Simmering for Texture and Flavor Release: In a large, heavy-bottomed pot, combine the sliced oranges and lemons with the water. The water will help to soften the fruit and release its natural juices. Place the pot over medium heat and bring the mixture to a gentle simmer. Allow it to cook for approximately 30-45 minutes, stirring occasionally to prevent sticking.
2. Tips for Ensuring Even Cooking: To achieve an even texture, make sure that the fruit is submerged in the water as it cooks. If necessary, you can add a little more water to keep everything moist. The goal is to soften the fruit and allow the flavors to meld together, creating a fragrant base for your marmalade.
3. Adding Sugar and Salt: After the fruit has softened, it’s time to add the sugar and a pinch of salt. Stir the sugar into the mixture, allowing it to dissolve completely. Keep the heat on medium-low and continue to simmer the mixture, stirring frequently. The sugar will help to thicken the marmalade as it cooks down, transforming the mixture into the luscious spread you desire.
As you progress through these initial steps, the anticipation of creating your zesty classic orange marmalade builds. The bright, citrusy aroma will fill your kitchen, inviting you to savor the process. Stay tuned for the next part of this article, where we will delve deeper into the final cooking stages and the canning process, ensuring your homemade marmalade is perfectly preserved and ready to enjoy!
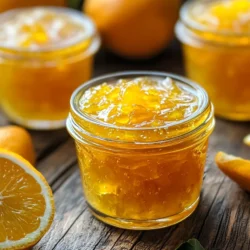
Zesty Classic Homemade Orange Marmalade
Sugar-Dissolving Process
The heart of making zesty orange marmalade lies in the careful interaction between sugar and citrus juice. When you begin the cooking process, it’s essential to dissolve the sugar thoroughly. Start by combining your prepared orange peels, juice, and the measured sugar in a large saucepan. Over low to medium heat, gently stir the mixture until the sugar has completely dissolved. This process is crucial as undissolved sugar can lead to a grainy texture in the final product.
As the mixture heats up, you’ll notice a syrupy consistency forming. It’s vital to stir continuously to prevent the sugar from sticking to the bottom of the pan and burning. Once the sugar is fully integrated with the orange flavor, you can increase the heat to bring your marmalade to a rolling boil. This step marks the transition into the next phase of cooking, where the magic of marmalade truly begins.
How Salt Enhances the Overall Taste
Adding a pinch of salt may seem counterintuitive when making a sweet preserve, but it plays an essential role in enhancing the flavor profile of your marmalade. Salt acts as a flavor enhancer, bringing out the natural sweetness of the oranges while balancing the tartness. The key is to add just a small amount—about 1/8 teaspoon per batch.
Incorporating salt into your marmalade not only improves the overall taste but also highlights the zesty notes of the oranges. The result is a more complex flavor that keeps your taste buds engaged, making each spoonful a delightful experience.
Testing for Consistency
One of the most crucial steps in making orange marmalade is testing for the right consistency. You want your marmalade to be thick enough to spread but not so thick that it becomes gelatinous. As your mixture simmers, you will need to monitor its progress closely.
The Gel Test:
To easily test the consistency, you can perform the gel test. Here’s how:
1. Prepare a Plate: Place a small plate in the freezer for about 10 minutes before you start cooking. This will help you test the marmalade’s consistency effectively.
2. Spoon some Marmalade: Once your mixture has been boiling for about 15-20 minutes, take a spoonful and drop it onto the chilled plate.
3. Tilt the Plate: After a minute, run your finger through the mound of marmalade on the plate. If the line holds and the marmalade doesn’t immediately run back together, you have achieved the desired consistency.
If your marmalade is still too runny, continue boiling and test again in a few minutes. Remember, patience is key in getting that perfect texture!
Signs That Marmalade is Ready for Jarring
As you approach the end of the cooking time, there are several signs to look for that indicate your marmalade is ready for jarring.
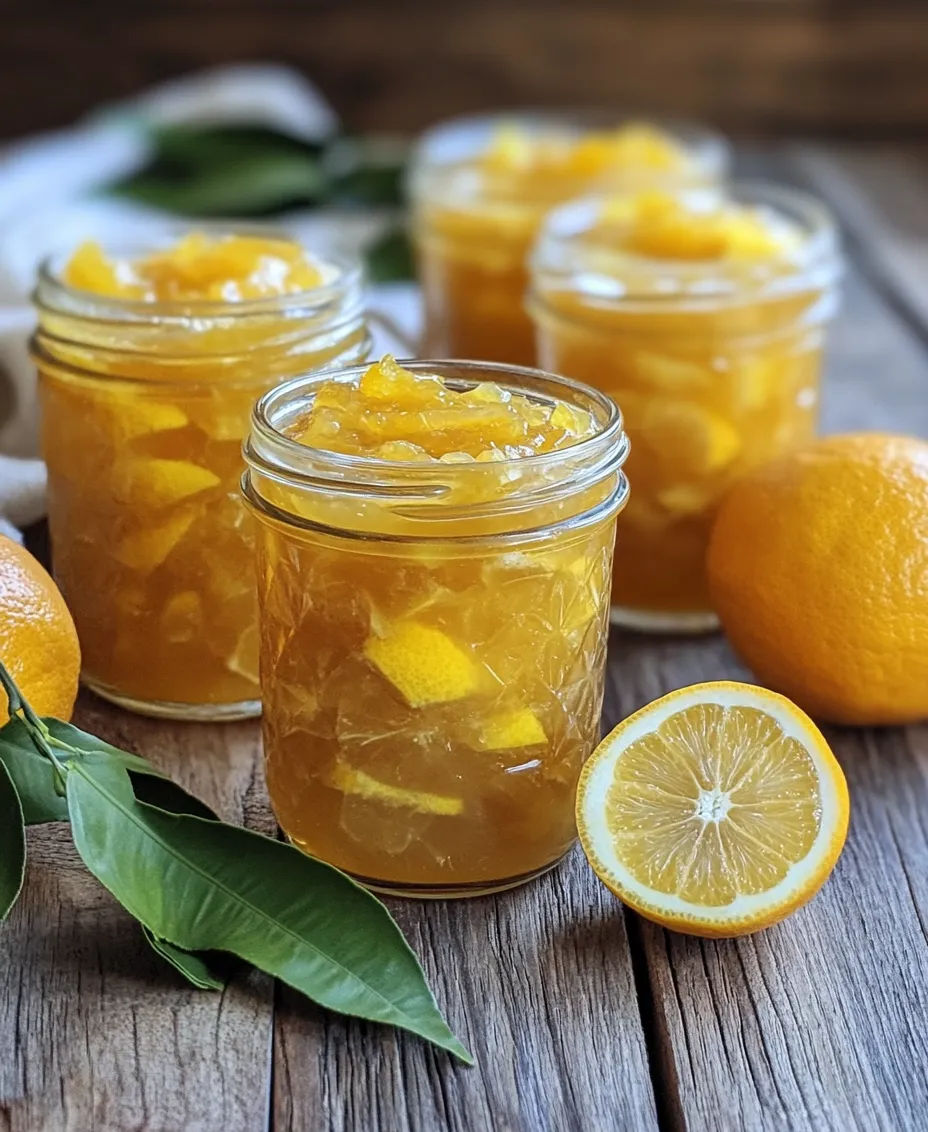
1. Color Change: The marmalade should shift to a beautiful, deep amber color as it thickens.
2. Bubbles: You will notice the bubbles in the marmalade change in size. Initially, they are larger and foamy, but as it thickens, they become smaller and more concentrated.
3. Consistency Test: As previously mentioned with the gel test, if the marmalade holds its shape on the plate, it’s time to jar it.
4. Temperature: The mixture should reach a temperature of around 220°F (104°C) to ensure it gels properly.
Adding Vanilla (Optional)
For those looking to elevate their homemade orange marmalade, consider adding a splash of vanilla extract. This optional ingredient can transform the flavor profile, imparting a warm, aromatic note that complements the bright citrus flavors beautifully.
When to Add It for Best Results:
The best time to add vanilla is just a few minutes before you finish cooking your marmalade. This allows the vanilla flavor to infuse without cooking off all its delicate nuances. Start with about a teaspoon of pure vanilla extract, tasting as you go to achieve your preferred level of flavor enhancement.
Jarring the Marmalade
Once your marmalade has reached the desired consistency and flavor, it’s time to jar it. Proper jarring is essential for preserving your homemade marmalade and ensuring it stays fresh.
Importance of Sterilizing Jars:
Before you begin, make sure your jars are sterilized. You can do this by placing them in a boiling water bath for 10 minutes or running them through the dishwasher on a hot cycle. Sterilization eliminates any bacteria that could spoil your marmalade.
Proper Techniques for Filling and Sealing Jars:
1. Filling Jars: Using a funnel, carefully pour the hot marmalade into the sterilized jars, leaving about 1/4 inch of headspace at the top.
2. Sealing: Wipe the rims of the jars with a clean, damp cloth to remove any residue. Place sterilized lids on top and screw on the metal bands until they are fingertip-tight.
3. Processing (Optional): For longer shelf life, consider processing your jars in a boiling water bath for about 10 minutes. This step ensures a vacuum seal, further preserving freshness.
Cooling and Storing
Once jarring is complete, it’s time to cool and store your delicious orange marmalade.
Best Practices for Cooling to Ensure Freshness:
Place the jars upright on a clean kitchen towel or wire rack to cool completely. As they cool, you should hear a popping sound, indicating the jars are sealing correctly.
Storage Options and Shelf Life of Homemade Marmalade:
Store your cooled jars in a cool, dark place like a pantry or cupboard. Properly sealed, homemade orange marmalade can last for up to a year. Once opened, refrigerate and use within a month for the best flavor and quality.
Tips for Perfecting Your Marmalade
– Adjusting Sweetness and Tartness: Everyone’s taste buds are different. Feel free to adjust the sugar content based on your preference for sweetness. You can also blend in other citrus fruits like lemons or grapefruits to enhance the tartness.
– Experimenting with Different Citrus Fruits or Additional Spices: Don’t hesitate to get creative! Try mixing in lemon zest or even a hint of ginger for a unique twist. Other fruits like blood oranges or clementines can also be used for varied flavors.
– Common Pitfalls to Avoid in Marmalade Making: One common mistake is not cooking the marmalade long enough, leading to a runny consistency. Additionally, avoid overcooking, which can result in a bitter taste. Always keep a close eye on the cooking process and perform the gel test!
Serving Suggestions for Orange Marmalade
Homemade orange marmalade is a versatile spread that can elevate many dishes.
– Popular Uses for Marmalade in Breakfast and Baking: Spread the marmalade on toast, bagels, or English muffins for a delightful breakfast treat. It also works wonderfully as a filling for pastries, cakes, and tarts.
– Pairing Recommendations: Pair your marmalade with cheeses like cream cheese or goat cheese for an elegant appetizer. It’s also delicious served alongside roasted meats, providing a sweet contrast to savory dishes.
– Creative Recipes Incorporating Orange Marmalade: Consider using marmalade as a glaze for chicken or salmon. It adds a zesty flavor that complements grilled or baked proteins beautifully. You can also swirl it into yogurt or oatmeal for a refreshing twist.
Conclusion
Making homemade orange marmalade is not just about preserving fruit; it’s about crafting a delicious treat that brings joy to your kitchen. The satisfaction of creating something from scratch is unparalleled, and with a few simple ingredients, you can produce a delightful spread that will brighten up any breakfast table.
I encourage you to experiment with this recipe, adjusting flavors and ingredients to suit your preferences. The beauty of homemade preserves lies in their adaptability, allowing you to infuse your own culinary personality. In a world of mass-produced products, there is immense value in creating something uniquely yours, and your homemade orange marmalade is sure to become a cherished staple in your kitchen for years to come.