

Deliciously Simple and Nutritious: A Weeknight Wonder Ready in 30 Minutes
—
Introduction
There’s something wonderfully nostalgic about the aroma of tuna cakes sizzling in a hot skillet. The first time I made these quick protein-packed delights, I was just a teenager in my family’s cramped kitchen, where every corner held a promise of delicious chaos. My mom would often whip up these tuna cakes on busy weeknights, the kind of evenings when the sun dipped low, casting a golden hue through the window, illuminating the flour-dusted countertops and our eager faces. The rhythmic sound of the spatula scraping against the frying pan set a comforting cadence, creating an atmosphere that felt both lively and intimate.
As the cakes cooked, the scent of cooked tuna and fresh herbs filled the air, mingling with the warm notes of toasted breadcrumbs. The golden-brown crust developed a satisfying crunch, while the tender middle promised a burst of flavorful goodness. I could hardly wait for them to cool, my fingers itching to snag a piece straight from the pan.
Over the years, these tuna cakes became a staple in my kitchen, a quick solution to hunger pangs that never compromised on flavor or nutrition. They are packed with protein, making them a filling option for lunch or dinner, and they always leave you feeling satisfied but not heavy. Each bite offers a delightful contrast between the crispy exterior and the soft, savory interior, a combination that never fails to impress.
Now, as I share my own take on this treasured recipe, I invite you to experience the joy of creating these tuna cakes in your own home. They are easy to prepare, require minimal cleanup, and are perfect for customizing with your favorite ingredients. Let’s dive into the details of this recipe, exploring the flavors, textures, and techniques that make these tuna cakes a weeknight wonder.
—
Why This Recipe Works
The beauty of Quick Protein-Packed Tuna Cakes lies in their perfect balance of flavors and textures, achieved through a few key techniques that ensure a reliably delicious result every time.
1. Flavor Harmony: The combination of canned tuna, fresh herbs, and a hint of lemon zest creates a symphony of flavors. The tuna brings a mild, savory base, while the herbs—think parsley or dill—add vibrant freshness. The lemon zest brightens the mixture, cutting through the richness and enhancing the overall taste.
2. Textural Contrast: This recipe capitalizes on the contrast between the crispy exterior and the tender inside. You’ll achieve that perfectly golden crust by using panko breadcrumbs, which are lighter and flakier than traditional breadcrumbs. As they fry, they create an irresistible crunch that complements the soft, moist interior of the cakes.
3. Ingredient Role: Each major ingredient plays a crucial role in the final result. The egg acts as a binder, helping the mixture hold together while providing richness. Mayonnaise contributes creaminess and moisture, ensuring the cakes don’t dry out. Additionally, the choice of seasonings—like garlic powder and onion powder—adds depth without overshadowing the delicate flavor of the tuna.
4. Unique Twist: Unlike generic store-bought tuna cakes, which can be overly processed and lack personality, this recipe allows you to control the ingredients. You can adjust the seasonings to your liking or even incorporate additional veggies for a personalized touch, elevating the dish to something uniquely yours.
—
What Makes It Special
Here’s what sets these Quick Protein-Packed Tuna Cakes apart from typical restaurant or store-bought versions:
– Freshness: When you make these cakes at home, you can ensure that every ingredient is fresh, resulting in a superior flavor that packaged options simply can’t match.
– Cost-Effective: Tuna cakes are incredibly budget-friendly. With pantry staples and a couple of fresh ingredients, you can create a wholesome meal for the entire family without breaking the bank.
– Customization: This recipe is a blank canvas. Feel free to experiment with different herbs, spices, or even add finely diced vegetables like bell peppers or zucchini to enhance both flavor and nutrition.
– Surprising Elements: One of the standout features of this recipe is the addition of capers or olives, which lend a delightful briny note that elevates the overall flavor profile. This unexpected twist truly differentiates your homemade cakes from any pre-packaged alternative.
—
Ingredient Breakdown

To create your Quick Protein-Packed Tuna Cakes, you’ll need the following key ingredients, each playing an essential role in the final dish:
1. Canned Tuna: The star of the show, canned tuna provides a rich source of protein and omega-3 fatty acids. Opt for tuna packed in water for a lighter option, or choose oil-packed tuna for a richer flavor. You’ll need about 12 ounces, which typically equals two standard cans.
2. Panko Breadcrumbs: These Japanese-style breadcrumbs are lighter and provide a wonderful crunch when fried. You’ll need about ¾ cup. If you can’t find panko, regular breadcrumbs will work, but the texture won’t be quite as airy.
3. Egg: One large egg binds the mixture together, helping the cakes maintain their shape during cooking. It also contributes moisture, so don’t skip this ingredient!
4. Mayonnaise: About ¼ cup of mayonnaise adds creaminess and flavor, ensuring the cakes stay moist inside. You can use regular or light mayonnaise, or substitute with Greek yogurt for a tangy twist.
5. Fresh Herbs: Whether you choose parsley, dill, or even green onions, about ¼ cup of finely chopped fresh herbs enhances the flavor profile. They add a pop of color and freshness that keeps the dish vibrant.
6. Lemon Zest: The zest of one lemon brings brightness and a refreshing note. It’s a small addition, but it makes a big impact on the overall flavor.
7. Seasonings: A combination of garlic powder, onion powder, salt, and pepper rounds out the flavor. Use about ½ teaspoon of garlic powder and onion powder each, along with salt and pepper to taste.
Substitutions:
– For a dairy-free version, simply replace mayonnaise with a dairy-free alternative or avocado.
– To make it gluten-free, swap panko breadcrumbs with gluten-free breadcrumbs or ground oats.
– For a vegan option, consider using canned chickpeas instead of tuna, along with a flaxseed egg (1 tablespoon ground flaxseed mixed with 2.5 tablespoons water) to bind.
You can find most of these ingredients at your local grocery store, but if you’re looking for specialty items like panko breadcrumbs or fresh herbs, consider checking out an international market or a health food store for the best quality.
—
Equipment Needed
To whip up these delightful tuna cakes, you’ll need a few essential tools:
1. Mixing Bowl: A large mixing bowl is crucial for combining your ingredients evenly. Look for one with enough capacity to allow for easy mixing without spills.
2. Frying Pan: A non-stick frying pan is ideal for cooking your tuna cakes. It ensures that the cakes won’t stick and allows for an even browning. If you don’t have a non-stick pan, a cast-iron skillet will work just as well.
3. Spatula: A sturdy spatula is essential for flipping the cakes without breaking them apart. A silicone or wooden spatula prevents scratching your non-stick surfaces.
4. Measuring Cups and Spoons: Accurate measurements are key to achieving the perfect balance of flavors, so having a good set of measuring cups and spoons is important.
5. Zester or Grater: If you’re using fresh lemon zest, a zester or fine grater will help you achieve that fragrant, bright zest without the bitter pith.
6. Food Processor (Optional): While not essential, a food processor can streamline the chopping of herbs and mixing of ingredients, making prep even quicker.
By having these tools on hand, you’ll set yourself up for success, making the process of creating these quick protein-packed tuna cakes as enjoyable as the final product.
Step-by-Step Instructions

1. Prepare Your Ingredients: Start by gathering all your ingredients: canned tuna, breadcrumbs, egg, diced onions, parsley, and seasoning. Open the tuna cans and drain them thoroughly, ensuring there’s no excess liquid. This is crucial, as too much moisture can lead to soggy cakes. You want to smell the fresh brininess of the tuna, which should remind you of the ocean.
2. Mix the Base: In a large mixing bowl, combine the drained tuna, 1 cup of breadcrumbs, 1 beaten egg, ½ cup of finely chopped onions, and ¼ cup of chopped parsley. Fold gently until everything is mixed just enough to combine. The goal is to keep the mixture light and airy, so avoid overmixing. You should hear a soft squelch as you mix, and the smell of fresh herbs should come through.
3. Season the Mixture: Add salt, pepper, and any additional spices you prefer (like garlic powder or a dash of cayenne for heat). Tasting the mixture at this stage is key; you want to ensure the flavors are balanced. The smell of the spices should be aromatic and inviting.
4. Shape the Cakes: With your hands, form the mixture into small patties, about 2-3 inches in diameter and ½ inch thick. This step is where you’ll want to be gentle; pressing too hard can lead to dense cakes. Aim for a uniform thickness so they cook evenly. You should see the flecks of parsley and onion throughout the patties.
5. Heat the Pan: In a large skillet, add 2 tablespoons of olive oil and heat over medium heat. Look for shimmering oil, which indicates it’s hot enough for frying. You should hear a slight sizzle when you add the cakes, signaling that they’re cooking properly.
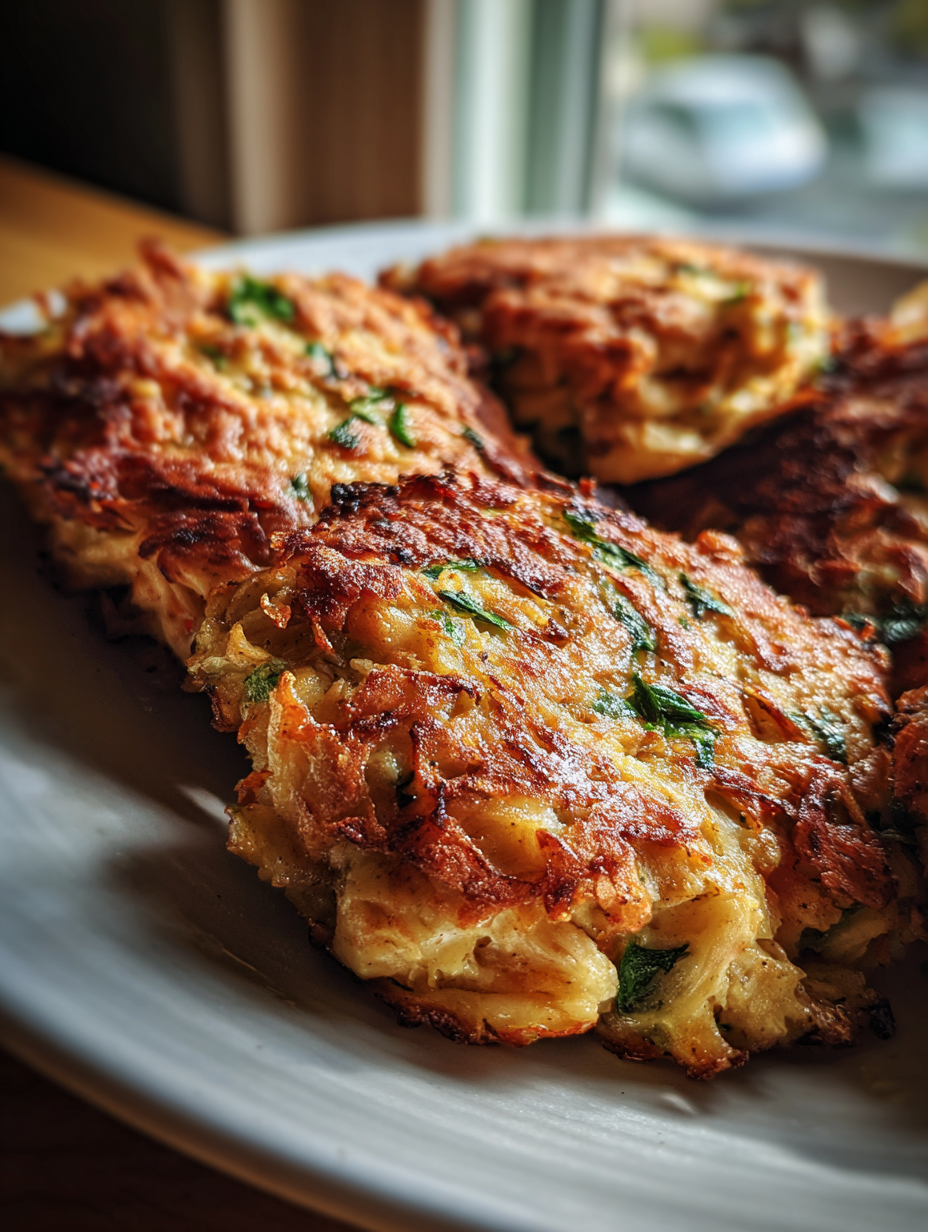
6. Cook the Cakes: Carefully place the patties in the skillet, making sure not to overcrowd them. This allows for proper browning. Let them cook for about 3-4 minutes on each side until they are golden brown. You should smell a delicious, savory aroma filling your kitchen. Check for a deep golden crust before flipping—this is your cue to turn them over.
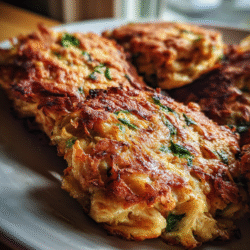
7. Drain and Serve: Once cooked, remove the cakes from the skillet and place them on a paper towel-lined plate to drain any excess oil. This ensures they stay crispy. You should see a beautiful golden color, and if you gently press on them, they should feel firm yet springy. Serve warm, garnished with a sprinkle of fresh parsley for that final touch!
Chef’s Note: If you want to keep them warm while you finish cooking the rest, place the cooked cakes in a low oven (around 200°F or 93°C) on a baking sheet.
Pro Tips for the Best Results
1. Use Quality Tuna: Opt for high-quality canned tuna, such as sustainably caught albacore, for the best flavor. The richness of the tuna will directly impact the taste of your cakes.
2. Chill the Mixture: After mixing the ingredients, let the mixture chill in the refrigerator for about 15-30 minutes. This helps the cakes hold their shape better during cooking, preventing them from falling apart.
3. Monitor Oil Temperature: Ensure your pan is hot enough before adding the cakes. If the oil isn’t hot, the cakes will absorb excess oil and become greasy. A good test is to drop in a small piece of the mixture; it should sizzle immediately.
4. Don’t Skip the Breadcrumbs: Using panko breadcrumbs will give your cakes a delightfully crispy exterior. If you use regular breadcrumbs, you may lose that satisfying crunch.
5. Experiment with Herbs: Fresh herbs like dill or chives can elevate the flavor profile. Consider adding them for a fresh twist. The scent of fresh herbs will enhance your dish and make it more aromatic.
6. Rest Before Serving: Allow the cakes to rest for a couple of minutes after cooking. This helps the interior firm up and makes them easier to handle.
7. Customize Your Spices: Don’t hesitate to experiment with spices. A pinch of smoked paprika or some finely chopped jalapeños can add a delightful kick that transforms the dish.
Common Mistakes to Avoid
1. Using Too Much Liquid: If your tuna is too wet, the cakes won’t hold together and will fall apart in the pan. Always drain excess liquid very well before mixing.
2. Overmixing the Ingredients: Mixing too vigorously can lead to dense cakes. Instead, fold gently to keep the mixture light and airy.
3. Under-seasoning: Skipping proper seasoning can result in bland cakes. Always taste your mixture before cooking and adjust the seasoning to your preference.
4. Cooking on Too High Heat: Cooking the cakes on high heat can burn the outside while leaving the inside undercooked. Medium heat ensures even cooking and a nice golden crust.
5. Not Letting the Mixture Chill: If you skip chilling the mixture, the cakes may fall apart while frying. A short chill time helps them firm up, making them easier to handle.
6. Overcrowding the Pan: Putting too many cakes in the skillet at once can cause the temperature to drop, leading to soggy cakes. Cook in batches to maintain the pan temperature.
7. Skipping the Drain Step: Not draining the cakes on paper towels can make them greasy. This step is essential for achieving that perfect crispy texture.
Creative Variations
1. Seasonal Variation: Spring Herb Tuna Cakes: Substitute fresh peas and mint for the parsley in your tuna mixture. The sweet burst of peas combined with the aromatic mint will give your cakes a refreshing twist perfect for spring.
2. Dietary-Friendly Version: Keto Tuna Cakes: Replace breadcrumbs with almond flour or crushed pork rinds to keep the cakes low-carb. This tweak allows you to enjoy a crispy texture while staying true to your keto lifestyle.
3. Gourmet Elevated Version: Truffle Tuna Cakes: Add a drizzle of truffle oil to your mixture, and use panko breadcrumbs for a luxurious touch. Serve these cakes with a homemade lemon aioli for a restaurant-quality appetizer.
4. Quick 15-Minute Version: Microwave Tuna Cakes: For a busy night, mix the ingredients and form the patties, then microwave them on a plate for about 5-6 minutes until cooked through. While they won’t have the crispy exterior, they will still be delicious and quick!
5. Kid-Friendly Version: Cheesy Tuna Cakes: Add ½ cup of shredded cheddar cheese to your mixture. Kids love cheese, and it will melt beautifully, making the cakes even more delectable and appealing to young palates.
6. International Twist: Mediterranean Tuna Cakes: Incorporate chopped sun-dried tomatoes, olives, and feta cheese into your mixture. Serve with a side of tzatziki for a flavorful, Mediterranean-inspired delight.
Serving Ideas
When it comes to plating your Quick Protein-Packed Tuna Cakes, you have the opportunity to transform a simple dish into a stunning presentation. Here are a few inspiring ideas to make your tuna cakes shine:
1. The Classic Stack: Layer two tuna cakes on top of each other, drizzling a vibrant sriracha mayo or homemade tartar sauce around the base. Add a sprinkle of fresh dill or chopped parsley on top for a pop of color. Serve this on a rustic wooden board for a homey feel.
2. The Salad Plate: Serve your tuna cakes on a bed of mixed greens with thinly sliced radishes and cherry tomatoes. Drizzle with a light vinaigrette, and top the cakes with avocado slices for a creamy contrast. The fresh greens will balance the richness of the cakes beautifully.
3. The Mediterranean Twist: Plate your tuna cakes alongside a small bowl of tzatziki sauce and a handful of cucumber sticks. Garnish with black olives and feta cheese crumbles. Present this on a ceramic platter for a vibrant Mediterranean feel.
4. The Dipping Delight: Create a fun appetizer-style presentation by serving individual tuna cakes on small plates with a variety of dipping sauces: chipotle mayo, lemon aioli, and sweet chili sauce. Add a few fresh herbs like cilantro or basil for a pop of green.
5. The Rustic Bowl: Serve your tuna cakes in a shallow bowl with a generous scoop of couscous or quinoa. Top with a colorful medley of roasted vegetables like bell peppers, zucchini, and eggplant. Finish with a drizzle of balsamic reduction for an elegant touch.
Each of these serving ideas not only elevates the dish but also invites your guests to enjoy the meal visually before they even take a bite.
What to Serve With
Pairing dishes with your Quick Protein-Packed Tuna Cakes can create a delightful culinary experience. Here are six complementary options to consider:
1. Crispy Sweet Potato Fries: The sweetness of the fries contrasts beautifully with the savory flavor of the tuna cakes. Their crispy texture provides a satisfying crunch, creating a delightful bite.
2. Zucchini Noodles with Pesto: Light and refreshing, zucchini noodles tossed in homemade or store-bought pesto make a perfect side. The herby, nutty flavors of the pesto enhance the tuna cakes while adding a vibrant green color to your plate.
3. Chilled Gazpacho: This refreshing cold soup is a fantastic starter that cleanses the palate. Its bright acidity and cool temperature provide an excellent balance to the warm, savory tuna cakes.
4. Lemon Dill Quinoa Salad: A light quinoa salad mixed with diced cucumbers, tomatoes, and a lemon-dill dressing complements the flavors in the tuna cakes perfectly. The nutty quinoa adds a lovely texture and keeps the meal wholesome.
5. Sparkling Lemonade: A glass of sparkling lemonade provides a refreshing contrast to the richness of the tuna cakes. The acidity of the lemon cuts through the flavors, creating a zesty pairing that uplifts the dish.
6. Chocolate Avocado Mousse: For dessert, indulge in a creamy chocolate avocado mousse. Its rich, velvety texture provides a sweet finish to the meal, while the avocado offers a surprising health boost.
These pairings create a balanced meal that delights the senses and enhances the enjoyment of your tuna cakes.
Storage Guide
To ensure your leftover Quick Protein-Packed Tuna Cakes remain fresh and delicious, proper storage is key. Here’s how to do it:
– Container Type: Use airtight glass containers to store your tuna cakes. Glass is ideal because it prevents odors and keeps the cakes from drying out.
– Temperature: Store your tuna cakes in the refrigerator at a temperature of 40°F (4°C) or lower. This helps to maintain freshness and safety.
– Shelf Life: When stored properly, your tuna cakes can last up to 3 days in the fridge.
– Signs of Spoilage: Before consuming, check for any off smells, discoloration, or a slimy texture. If any of these signs are present, it’s best to discard the cakes.
– Refreshing Before Serving: To refresh your tuna cakes before serving, lightly pan-fry them in a skillet with a splash of olive oil for about 2-3 minutes on each side. This will restore their crispness and enhance the flavor. Alternatively, you can bake them at 350°F (175°C) for about 10-15 minutes, which also helps to bring back their original texture.
Freezing Tips
Yes, your Quick Protein-Packed Tuna Cakes freeze well, making them a fantastic option for meal prep. Here’s how to freeze them properly:
– Portioning: Divide your tuna cakes into individual portions or meal-sized servings to make thawing easier later.
– Wrapping Method: Wrap each portion tightly in plastic wrap and then place them in a freezer-safe zip-top bag or an airtight container. Removing as much air as possible will prevent freezer burn.
– Labeling: Label your bags with the date and contents to keep track of how long they’ve been frozen.
– Storage Duration: Your tuna cakes can be stored in the freezer for up to 3 months without significant loss of quality.
– Quality Changes: After thawing, expect a slight change in texture; they may be a bit softer but still delicious.
– Thawing Method: The best way to thaw your tuna cakes is in the refrigerator overnight. This allows them to defrost slowly, maintaining moisture and flavor.
Reheating Guide
When it’s time to enjoy your leftover Quick Protein-Packed Tuna Cakes, reheating them correctly will help preserve their deliciousness. Here’s how:
– Microwave: Place the tuna cakes on a microwave-safe plate. Heat on high for 30-60 seconds. To prevent drying out, cover with a damp paper towel while microwaving.
– Oven: Preheat your oven to 350°F (175°C). Place the tuna cakes on a baking sheet and cover with foil to retain moisture. Heat for 10-15 minutes or until warmed through.
– Stovetop: Heat a non-stick skillet over medium heat. Add a small splash of water or broth to create steam, then add the tuna cakes. Cover the skillet and heat for 3-4 minutes on each side. This method helps to keep them moist while warming them.
– Texture and Flavor Restoration: Adding a splash of lemon juice or a drizzle of olive oil during reheating can help restore some moisture, enhancing the original flavor and texture.
Nutrition Overview
When you savor your Quick Protein-Packed Tuna Cakes, you’re not just indulging in a tasty treat; you’re also nourishing your body. Here’s an approximate nutritional breakdown per serving:
– Calories: 200
– Protein: 25g
– Carbohydrates: 15g
– Fat: 8g
– Fiber: 2g
– Sugar: 1g
Tuna is a powerhouse of protein and omega-3 fatty acids, promoting heart health and muscle recovery. The addition of whole grain breadcrumbs enhances the fiber content, aiding digestion and providing sustained energy. Finally, fresh herbs like parsley not only add flavor but also a boost of vitamins. Enjoying these cakes is a great way to consume essential nutrients while delighting in a delicious meal.
Frequently Asked Questions
Q: Can I substitute canned tuna with another type of fish?
A: Absolutely! You can use canned salmon, sardines, or even cooked shredded chicken. Just keep in mind that each type of fish may impart a different flavor profile to your cakes.
Q: Are there any gluten-free options for the breadcrumbs?
A: Yes! You can substitute traditional breadcrumbs with gluten-free breadcrumbs or even crushed gluten-free crackers. This way, you can enjoy your tuna cakes without gluten.
Q: How long does it take to make these tuna cakes?
A: From start to finish, you can prepare and cook these tuna cakes in about 30 minutes. Perfect for a quick weeknight meal!
Q: Can I make the mixture ahead of time?
A: Definitely! You can prepare the mixture a day in advance. Store it in an airtight container in the fridge and form the cakes when you’re ready to cook.
Q: What kitchen tools do I need to make these tuna cakes?
A: You’ll need a mixing bowl, a fork for mashing, a skillet for cooking, and a spatula for flipping. A measuring cup is handy for portioning the mixture.
Q: How can I make these cakes spicier?
A: To add some heat, incorporate minced jalapeños or a dash of cayenne pepper into the mixture. You can also serve them with a spicy dipping sauce for an extra kick.
Q: What if I don’t have mayonnaise?
A: You can substitute mayonnaise with Greek yogurt for a healthier option or use mustard for a zesty flavor. Both alternatives will keep the cakes moist.
Q: Can I bake these tuna cakes instead of frying them?
A: Yes, you can bake them! Preheat your oven to 375°F (190°C) and place the cakes on a greased baking sheet. Bake for 20-25 minutes, flipping halfway through for an even golden-brown color.
Final Thoughts
As you embark on making your Quick Protein-Packed Tuna Cakes, remember that the key to a flavorful dish lies in the freshness of your ingredients and how you serve them. Experiment with different garnishes and sides to make the meal truly your own. I’m genuinely excited for you to try this recipe and see how it can quickly become a favorite in your household.
So gather your ingredients, turn on your favorite playlist, and enjoy the process. Don’t forget to snap a photo of your tuna cakes and share your creation with friends or on social media.
Quick Protein-Packed Tuna Cakes
Ingredients
- 2 cans canned tuna drained
- 1 cup breadcrumbs preferably whole wheat
- 1 large egg beaten
- 0.5 cups green onion chopped
- 2 tablespoons mayonnaise for moisture
- 2 tablespoons olive oil for frying
Instructions
- In a large bowl, combine the drained tuna, breadcrumbs, beaten egg, chopped green onion, and mayonnaise.
- Mix the ingredients until well combined and form into patties, about 2-3 inches in diameter.
- Heat olive oil in a large skillet over medium heat.
- Cook the tuna cakes for about 4-5 minutes on each side, or until golden brown and cooked through.
- Remove from skillet and let drain on paper towels before serving.