


Introduction
If you’re in search of a cookie that perfectly marries the rich flavors of chocolate with the refreshing taste of mint, look no further than Andes Mint Cookies. These delightful treats not only satisfy your sweet tooth but also evoke a sense of nostalgia with every bite. The combination of smooth chocolate and crisp mint is a flavor profile that has enchanted cookie lovers for generations. Whether you’re baking for a holiday gathering, a birthday party, or simply to share with loved ones, Andes Mint Cookies offer a touch of indulgence that makes any occasion feel special.
Baking cookies at home is more than just a culinary endeavor; it’s a way to create lasting memories with family and friends. The aroma of freshly baked cookies wafting through your home can instantly bring people together, creating a warm and inviting atmosphere. As you mix, bake, and share these Andes Mint Cookies, you’ll find yourself wrapped in the joy of baking and the sweet moments it fosters.
The Allure of Andes Mint Cookies
What sets Andes Mint Cookies apart from other chocolate chip varieties is the unique flavor profile introduced by the signature Andes mints. These small, green-wrapped treats are known for their smooth chocolate and refreshing mint flavor, transforming a classic cookie into a mint-chocolate masterpiece. The mint adds a coolness that beautifully counters the richness of the chocolate, making each bite an exhilarating experience.
There’s an undeniable nostalgia associated with mint chocolate desserts, often reminding us of family gatherings, holiday celebrations, and cozy evenings spent with loved ones. Andes Mint Cookies can easily become a beloved staple in your baking repertoire, perfect for sharing during Christmas, Easter, or any festive get-together. Their versatility means they can also be served as a delightful treat at birthday parties, potlucks, or even as an everyday indulgence with a glass of milk.
Ingredients Breakdown
To create these delicious Andes Mint Cookies, it’s essential to understand the role of each ingredient in the recipe. Here’s a detailed look at what you’ll need:
– Unsalted Butter: The foundation of any great cookie, unsalted butter is crucial for achieving the right texture. Using softened butter allows for easy mixing and contributes to a tender, chewy cookie. The fat in the butter helps to create a rich flavor while keeping the cookies moist.
– Granulated Sugar vs. Brown Sugar: This recipe calls for both granulated and brown sugar, each contributing unique qualities to the cookies. Granulated sugar promotes a crisp texture, while brown sugar, with its molasses content, adds moisture and a deeper flavor. This combination results in a beautifully balanced cookie that is both chewy and slightly crisp.
– Eggs: Eggs serve as a binding agent in the cookie dough, providing structure and richness. The proteins in eggs help the cookies rise and maintain their shape during baking, ensuring they don’t spread too thin.
– Vanilla Extract: A splash of vanilla extract enhances the overall flavor profile of the cookies. Its warm, aromatic notes complement the chocolate and mint, creating a harmonious blend of flavors that elevates these treats.
– Flour and Cocoa Powder: All-purpose flour is the backbone of the cookie, providing the necessary structure. Cocoa powder contributes a rich chocolate flavor, ensuring that the cookies are decadent and satisfying. The right balance of flour and cocoa is essential for achieving the desired texture.
– Baking Soda and Salt: Baking soda is a leavening agent that helps the cookies rise, creating a light and airy texture. A pinch of salt is crucial for flavor balance, enhancing the sweetness while bringing out the richness of the chocolate.
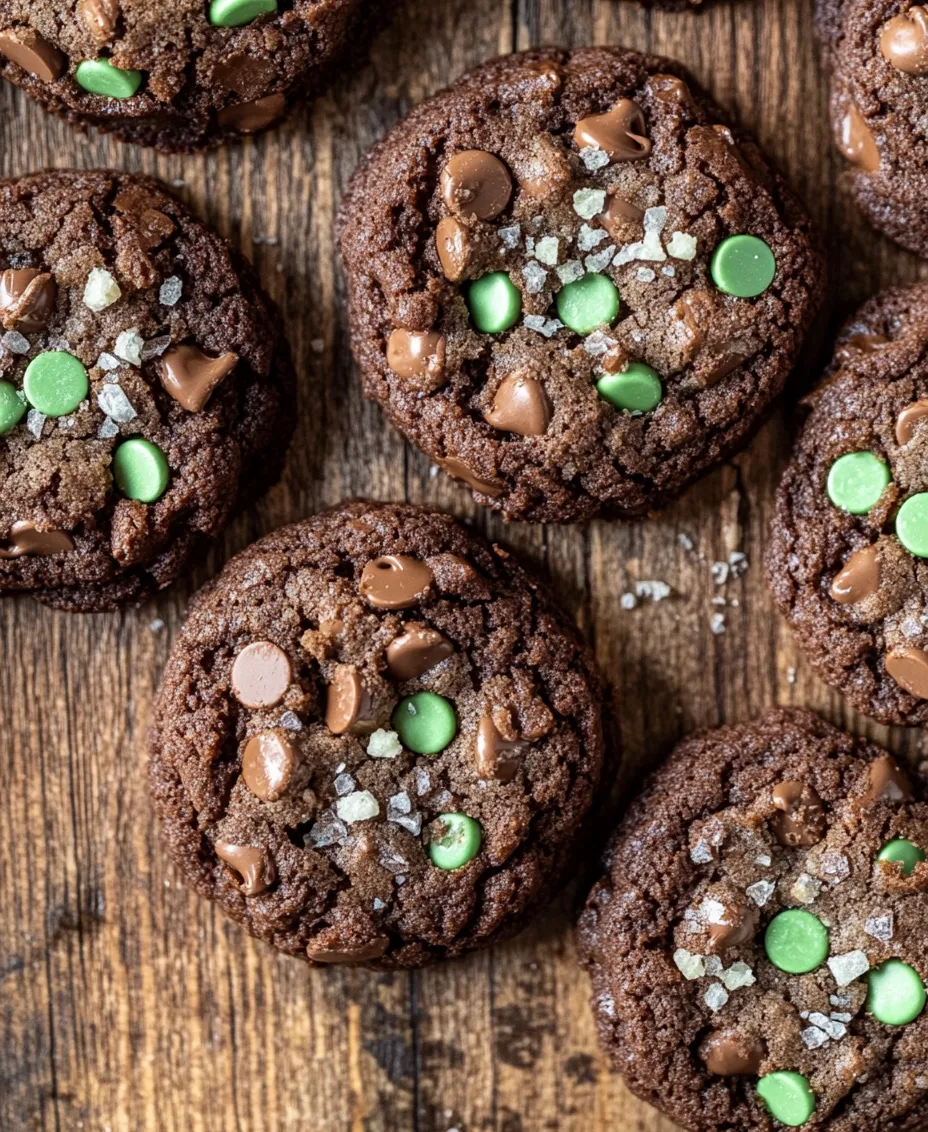
– Andes Mints and Chocolate Chips: These are the star ingredients that define the cookie’s signature taste. Chopped Andes mints add an unmistakable minty flavor, while chocolate chips provide bursts of rich chocolate in every bite. Together, they create an irresistible combination that keeps you coming back for more.
– Powdered Sugar: For the finishing touch, powdered sugar can be used to dust the cookies after baking. This adds a beautiful presentation and a touch of sweetness that complements the mint chocolate flavor.
Step-by-Step Guide to Making Andes Mint Cookies
Now that you have a clear understanding of the ingredients and their roles, let’s dive into the process of making these delightful Andes Mint Cookies. The first step is to prepare your workspace and gather your ingredients.
Preheating the Oven
Before you begin mixing your ingredients, it’s essential to preheat your oven to 350°F (175°C). Preheating is crucial for ensuring that your cookies bake evenly and achieve the perfect texture. An oven that is at the right temperature will allow the cookies to rise and set properly, preventing them from becoming too flat or overcooked.
As your oven heats up, take this time to line your baking sheets with parchment paper. This not only prevents the cookies from sticking but also makes cleanup a breeze. Preparing your baking sheets in advance ensures that once your cookie dough is ready, you can transfer it to the oven without any delays.
With the oven preheating and your baking sheets prepared, you’re ready to move on to the next steps of mixing your ingredients and creating the cookie dough. Stay tuned for the detailed instructions on how to bring these Andes Mint Cookies to life, where each step will guide you toward creating a delicious treat that will impress your family and friends.
Creaming the Butter and Sugars
Achieving the right texture in your Andes Mint Cookies starts with the creaming process. Use room-temperature butter, which helps to incorporate air into the mixture, creating a light and fluffy texture. Begin by placing the softened butter in a large mixing bowl. Use an electric mixer on medium speed to beat the butter for about 30 seconds until it is smooth. Gradually add granulated sugar and brown sugar, continuing to mix until the mixture is creamy and pale, typically around 2-3 minutes. This step is crucial as it helps to dissolve the sugars and introduces air, leading to a tender, chewy cookie.
Incorporating the Eggs
Once your butter and sugars are perfectly creamed, it’s time to incorporate the eggs. Add the eggs one at a time, mixing well after each addition. This gradual incorporation helps maintain the emulsion and ensures a uniform texture throughout the dough. For optimal results, consider using eggs at room temperature as well. This allows for better mixing and contributes to a more homogenous batter. If you want to add a splash of vanilla extract for additional flavor, this is the time to do it. Mix until just combined; overmixing at this stage can lead to denser cookies.
Mixing Dry Ingredients
Next, prepare your dry ingredients separately to ensure even distribution. In a medium bowl, whisk together all-purpose flour, baking soda, and a pinch of salt. The baking soda is crucial as it acts as a leavening agent, helping your cookies rise and achieve that perfect texture. Whisking the dry ingredients also helps to aerate the flour, preventing any clumping. Once combined, it’s ready to be added to your wet mixture.
Combining Wet and Dry Mixtures
When it’s time to combine your wet and dry mixtures, proceed with caution. Begin by adding about half of the dry mixture to the wet ingredients. Gently fold the flour mixture into the wet ingredients using a spatula or wooden spoon. This method helps to avoid overmixing, which can lead to tough cookies. Continue to alternate between adding the dry ingredients and mixing until just combined. The goal is to have a cohesive dough without any visible flour pockets while avoiding excessive mixing.
Folding in Chocolate and Mints
One of the highlights of Andes Mint Cookies is the rich chocolate and mint flavor. Once your dough is nearly mixed, it’s time to fold in the chocolate chips (or chunks) and the crushed Andes mints. Use a spatula to carefully incorporate these delicate ingredients, ensuring they are evenly distributed throughout the dough without breaking them down too much. This will enhance the minty chocolate flavor in every bite, providing a delightful surprise.
Forming the Cookies
For uniformity in size and spacing, use a cookie scoop or tablespoon to portion out the dough. Roll each portion into a ball and place it on a baking sheet lined with parchment paper, spacing them about 2 inches apart. This spacing is essential because the cookies will spread during baking. If you prefer a thicker cookie, you can slightly chill the dough before forming the cookies. This helps them hold their shape better while baking.
Baking Tips
Baking your Andes Mint Cookies requires attention to detail for the perfect outcome. Preheat your oven to 350°F (175°C) before placing the cookies inside. Bake for about 10-12 minutes, or until the edges are set but the centers are still soft. The cookies may appear slightly underbaked, but they will continue to firm up as they cool. To ensure an even bake, rotate your baking sheet halfway through the baking time.
Finishing Touch
For an attractive finish, consider dusting the warm cookies with powdered sugar immediately after baking. This not only adds a touch of elegance but also enhances the flavor. To take it a step further, press an unwrapped Andes mint onto the top of each cookie right after they come out of the oven. The heat from the cookie will slightly melt the mint, creating a deliciously sweet topping.
Baking Tips for Success
– Optimal Baking Times and Temperatures: Stick to the recommended baking time of 10-12 minutes. Keep an eye on your cookies, as oven temperatures can vary. If you notice the edges are golden brown but the center is still soft, it’s time to take them out.
– How to Know When Cookies are Fully Baked: Look for the edges to be set and slightly golden. The centers will look soft; this is normal as they will continue to firm up while cooling.
– Importance of Cooling Times for Flavor Development: Allow the cookies to cool on the baking sheet for about 5 minutes before transferring them to a wire rack. This cooling period is crucial for flavor development and ensures they don’t fall apart.
Storing and Serving Suggestions
To maintain the freshness of your Andes Mint Cookies, store them in an airtight container at room temperature. They can last for up to one week, but trust us, they will probably be gone much sooner! For longer storage, consider freezing them. Place the cookies in a single layer in a freezer bag, separating layers with parchment paper to prevent sticking. They can be frozen for up to three months.
When it comes to serving, these cookies are delightful on their own, but pair them with a glass of milk for a classic treat. They also complement coffee or hot cocoa perfectly. For a festive touch, consider creating a dessert platter with Andes Mint Cookies alongside other treats like brownies and chocolate-covered strawberries.
Exploring Variations of Andes Mint Cookies
While the classic Andes Mint Cookie recipe is a hit, don’t hesitate to customize it to suit your taste preferences. Here are a few suggestions:
– Adding Nuts: Chopped nuts like walnuts or pecans can introduce a pleasant crunch. Add about half a cup to the dough during the final mixing stage.
– Different Types of Chocolate: Swap the semi-sweet chocolate chips for milk chocolate or dark chocolate for a different flavor profile. You can also mix and match for a more complex taste.
– Gluten-Free or Vegan Adaptations: If you are looking for gluten-free options, substitute all-purpose flour with a 1:1 gluten-free flour blend. For vegan adaptations, use plant-based butter and flax eggs (one tablespoon of ground flaxseed mixed with three tablespoons of water per egg) as replacements.
Conclusion
Baking Andes Mint Cookies is not only a delightful culinary activity but also a way to create lasting memories with loved ones. The rich chocolate and refreshing mint create a harmonious flavor that is sure to please anyone who takes a bite. As you embark on this baking adventure, we encourage you to share this recipe with friends and family, fostering joyful moments together. Whether enjoyed fresh out of the oven or savored over a cup of coffee, these cookies are bound to leave a lasting impact on your taste buds and create cherished moments in your kitchen. Happy baking!
