Follow Me On Pinterest!


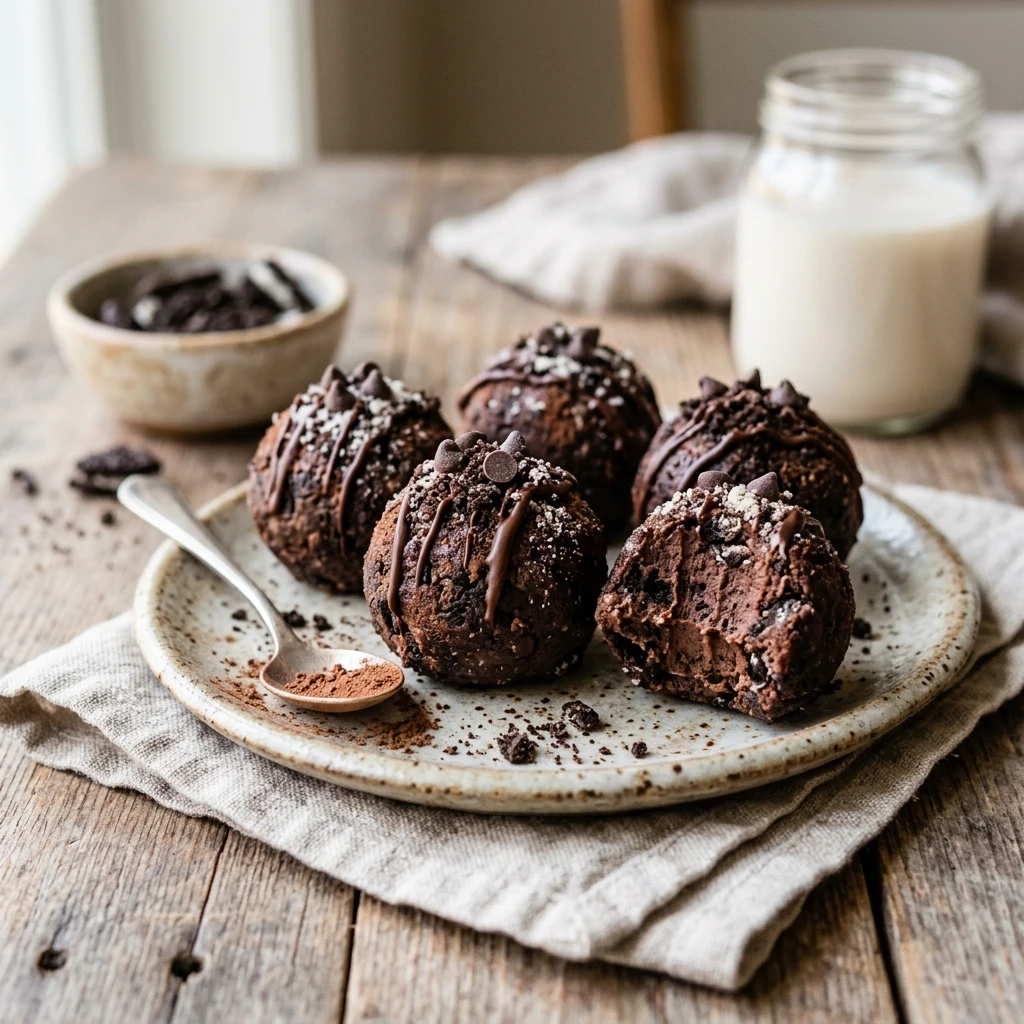
If you have been scrolling through social media lately, you have probably seen cottage cheese making a massive comeback in the most unexpected ways. From ice cream to bread, this high-protein staple is the secret weapon for healthy snacking. These Cottage Cheese Protein Oreo Balls are the ultimate game-changer for anyone who loves the classic cookies-and-cream flavor but wants to stay on track with their fitness goals. They are creamy, decadent, and taste like a rich truffle, yet they are packed with protein and contain much less sugar than a traditional Oreo ball. Whether you need a quick post-workout snack or a guilt-free dessert to satisfy your late-night cravings, these little bites of heaven are about to become your new obsession.
Recipe Information
- Prep Time: 15 minutes
- Cook Time: 0 minutes (No-bake)
- Total Time: 45 minutes (includes chilling)
- Servings: 12 balls
- Difficulty: Easy
Nutrition values
Per serving (1 ball):
- Calories: 88 kcal
- Protein: 7g
- Carbs: 9g
Why Make This Cottage Cheese Protein Oreo Balls – Healthy
Most traditional Oreo truffles are loaded with cream cheese and powdered sugar, making them calorie bombs that leave you feeling sluggish. This version swaps those heavy ingredients for blended cottage cheese and high-quality protein powder. You get the same luscious texture with a fraction of the fat and a significant boost of muscle-building protein. Plus, these are incredibly easy to make with no oven required. They are perfect for meal prepping and will stay fresh in your fridge for a quick grab-and-go treat throughout the week. Even if you aren’t a fan of cottage cheese on its own, you will never know it is the base of this recipe once it is blended and mixed with chocolatey Oreo goodness.
Ingredients
- 1 cup low-fat cottage cheese (small curd works best)
- 1/2 cup vanilla or chocolate whey protein powder
- 1/4 cup coconut flour (helps absorb moisture)
- 8 Oreo cookies (or a gluten-free/low-sugar alternative), crushed into fine crumbs
- 1 tbsp maple syrup or stevia (optional, depending on protein powder sweetness)
- 1/2 cup dark chocolate chips (for coating)
- 1 tsp coconut oil (to thin the chocolate)
Directions
Step 1: Blend the Cottage Cheese
Place the cottage cheese into a high-speed blender or food processor. Blend until it is completely smooth and creamy with no lumps remaining. This step is crucial for achieving that cheesecake-like texture inside the Oreo balls.
Step 2: Mix the Base Ingredients
Transfer the smooth cottage cheese into a medium mixing bowl. Stir in the protein powder, coconut flour, and the crushed Oreo crumbs. If you prefer a sweeter taste, add your maple syrup or sweetener at this stage. Mix until a thick, dough-like consistency forms.
Step 3: Shape the Balls
Using a small cookie scoop or a tablespoon, portion out the mixture and roll it between your palms to form 12 even balls. Place the balls on a parchment-lined tray and pop them into the freezer for about 20 minutes to firm up.
Step 4: Melt the Chocolate
While the balls are chilling, place the dark chocolate chips and coconut oil in a microwave-safe bowl. Microwave in 30-second intervals, stirring in between, until the chocolate is silky and fully melted.
Step 5: Coating and Final Chill
Remove the balls from the freezer. Using a fork, dip each ball into the melted chocolate, letting the excess drip off. Place them back on the parchment paper. Sprinkle a few extra Oreo crumbs on top if desired. Refrigerate for another 10 minutes until the chocolate shell sets.
Expert Tips for Perfect Cottage Cheese Protein Oreo Balls – Healthy
To get the best results, always blend your cottage cheese until it looks like yogurt; otherwise, the texture will be gritty. If the “dough” feels too sticky to roll, add an extra tablespoon of coconut flour to help it bind. I also recommend using a protein powder that you actually enjoy the taste of, as it provides a lot of the flavor profile. If you find the chocolate is too thick for dipping, adding a tiny bit more coconut oil will make it much easier to work with. Lastly, keep these stored in the refrigerator right up until you eat them to maintain the best texture.
Delicious Variations
You can easily customize these protein balls to suit your cravings. Try using Mint Oreos for a refreshing twist, or swap the dark chocolate coating for white chocolate for a “birthday cake” vibe. If you want even more protein, you can add a tablespoon of powdered peanut butter (PB2) into the mix. For a gluten-free version, simply use gluten-free sandwich cookies. You can also roll the balls in cocoa powder or shredded coconut instead of dipping them in melted chocolate to save on calories and sugar.
Frequently Asked Questions
Can I taste the cottage cheese?
Not at all! Once the cottage cheese is blended and mixed with the chocolate protein powder and Oreo crumbs, it takes on a neutral, creamy flavor similar to cheesecake or mild cream cheese.
How should I store these Oreo balls?
You must store these in an airtight container in the refrigerator. They will stay fresh and delicious for up to 5-7 days. Do not leave them at room temperature for too long, as the cottage cheese base will soften.
Can I freeze them for later?
Yes! These freeze beautifully. Store them in a freezer-safe bag for up to 3 months. Just let them thaw in the fridge for about 15 minutes before eating so they aren’t too hard.
What type of protein powder is best?
A whey-casein blend usually works best for texture because it absorbs liquid well. However, any whey protein or plant-based protein will work; just be prepared to adjust the amount of coconut flour if the mixture is too wet.
Do I have to use coconut flour?
Coconut flour is highly absorbent, which makes it ideal for this recipe. If you don’t have it, you can use almond flour or oat flour, but you will likely need to double the amount to achieve the same thickness.
Conclusion
Making healthy choices doesn’t mean you have to give up the flavors you love. These Cottage Cheese Protein Oreo Balls prove that you can enjoy a decadent, chocolatey treat while fueling your body with quality ingredients. They are simple to prepare, kid-approved, and perfect for anyone looking to increase their daily protein intake without the boredom of standard shakes. Give this recipe a try, and you will see exactly why cottage cheese is the reigning king of healthy ingredient swaps!


Cottage Cheese Protein Oreo Balls – Healthy
- Total Time: 45 minutes
- Diet: High-Protein, Vegetarian
Ingredients
Scale
- 1 cup low-fat cottage cheese (small curd works best)
- 1/2 cup vanilla or chocolate whey protein powder
- 1/4 cup coconut flour (helps absorb moisture)
- 8 Oreo cookies (or a gluten-free/low-sugar alternative), crushed into fine crumbs
- 1 tbsp maple syrup or stevia (optional, depending on protein powder sweetness)
- 1/2 cup dark chocolate chips (for coating)
- 1 tsp coconut oil (to thin the chocolate)
Instructions
- Place the cottage cheese into a high-speed blender or food processor. Blend until it is completely smooth and creamy with no lumps remaining. This step is crucial for achieving that cheesecake-like texture inside the Oreo balls.
- Transfer the smooth cottage cheese into a medium mixing bowl. Stir in the protein powder, coconut flour, and the crushed Oreo crumbs. If you prefer a sweeter taste, add your maple syrup or sweetener at this stage. Mix until a thick, dough-like consistency forms.
- Using a small cookie scoop or a tablespoon, portion out the mixture and roll it between your palms to form 12 even balls. Place the balls on a parchment-lined tray and pop them into the freezer for about 20 minutes to firm up.
- While the balls are chilling, place the dark chocolate chips and coconut oil in a microwave-safe bowl. Microwave in 30-second intervals, stirring in between, until the chocolate is silky and fully melted.
- Remove the balls from the freezer. Using a fork, dip each ball into the melted chocolate, letting the excess drip off. Place them back on the parchment paper. Sprinkle a few extra Oreo crumbs on top if desired. Refrigerate for another 10 minutes until the chocolate shell sets.
- Cook Time: 45 minutes (includes chilling)