

Wrap Yourself in Crunchy Goodness
—
Introduction
You might remember the first time you heard that tantalizing crunch of crispy onion chips. It was a sunny afternoon in your kitchen, the kind where the golden light streamed through the window, illuminating the vibrant colors of fresh veggies laid out on the counter. As you reached for a bag of those irresistible onion chips, a wave of nostalgia washed over you, taking you back to family picnics full of laughter and delightful bites. With each crunch, you could almost hear the echoes of those carefree afternoons, surrounded by your loved ones, sharing stories and savoring every morsel.
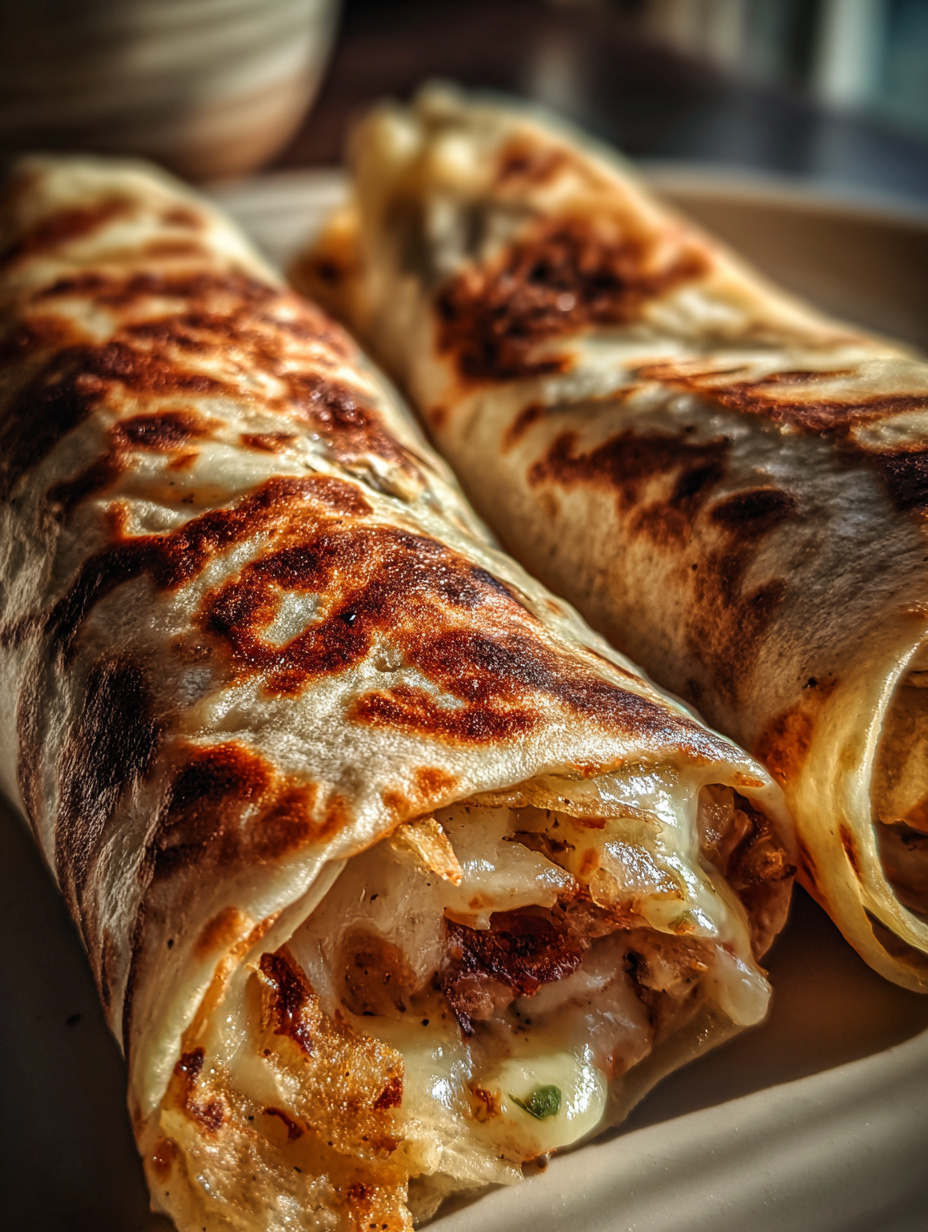
In that moment, you decided to elevate the crunch you loved so much into a meal that could be enjoyed any day of the week. You envisioned soft flour tortillas enveloping a medley of shredded chicken, fresh lettuce, and garden-fresh tomatoes, all topped off with those irresistible crispy onion chips. This was more than just a lunch; it was a celebration of textures — the soft, warm embrace of the tortilla, the tender chicken, and the satisfying crunch of the onion chips. As you wrapped it all up and took that first bite, the flavors danced together, and you knew you’d created something special.
This Crispy Onion Chip Wrap is not only a quick and satisfying option for lunch but also a delightful reminder of those cherished moments. It’s perfect for busy days when you crave something simple yet packed with flavor. Let’s dive into this recipe that brings together those joyous memories and transforms them into a delicious, air-fried delight.
—
Why This Recipe Works
What makes the Crispy Onion Chip Wrap a standout choice for your lunch routine? Let’s break it down! The beauty of this dish lies in the harmonious flavor combinations and delightful texture contrasts. The seasoned shredded chicken, enhanced by the warmth of chili powder and the aromatic depth of cumin, creates a savory base that is both satisfying and flavorful. When combined with the freshness of shredded lettuce and diced tomatoes, you get a burst of brightness that perfectly balances the spices.
The crispy onion chips are not just a topping; they are the star of this wrap, introducing a satisfying crunch that elevates each bite. The air fryer transforms them into an even crispier version, providing that unmistakable texture that you crave. When you bite into the wrap, the contrast of the soft tortilla against the crunch of the onion chips is simply irresistible.
The role of each ingredient is pivotal. The flour tortillas serve as a soft, warm canvas for the other flavors, while the sour cream adds a creamy richness that ties everything together. Unlike store-bought options that often skimp on quality and freshness, this recipe allows you to control every component, ensuring that you enjoy a wrap that is as wholesome as it is delicious.
By air-frying, you achieve that coveted crispy texture without deep-frying, making this wrap a healthier choice that doesn’t compromise on taste. Your lunch will not only be quick to prepare but also packed with flavor, helping you power through your day with satisfaction.
—
What Makes It Special
This Crispy Onion Chip Wrap offers unique qualities that set it apart from typical lunch options. Here are a few reasons to love it:
– Freshness and Customization: Unlike pre-packaged wraps or fast-food options, you have complete control over the ingredients. You can tailor your wrap to your preferences, swapping in your favorite proteins or fresh veggies without worrying about preservatives or added sugars.
– Cost-Effective: Making this wrap at home saves you money compared to dining out. With simple, affordable ingredients, you can whip up a meal that feels gourmet without breaking the bank.
– Surprising Crunch: The addition of crispy onion chips not only adds an unexpected layer of texture but also infuses an explosion of flavor that elevates the standard wrap experience. You might even find yourself craving the crunch as often as the filling!
– Healthy Air-Frying: This method not only reduces the amount of oil needed but also gives you that crispy finish you adore, all while keeping the calories in check. You get to enjoy a satisfying crunch without the guilt of deep-fried indulgence.
Each of these elements contributes to making your lunch not only a meal but a delightful experience that is both satisfying and memorable.
—
Ingredient Breakdown
Let’s take a closer look at the ingredients that make up your Crispy Onion Chip Wrap, ensuring you understand their roles and how to make the most of them:
– Crispy Onion Chips (2 cups): These are the heart of the wrap, introducing that essential crunch. You can opt for store-bought chips or make your own for a fresher taste. If you’re feeling adventurous, consider adding more for an extra crunch!
– Chili Powder (1 tablespoon): This spice adds warmth and depth to the chicken, enhancing the overall flavor profile of the wrap. Adjust the amount according to your heat preference.
– Cumin (1/2 teaspoon): A crucial spice that brings an earthy richness to the mix, cumin complements the chili powder beautifully, creating a robust flavor base.
– Garlic (3 cloves, minced): Fresh garlic adds a punch of aromatic flavor that makes your chicken truly sing. It’s essential for a more complex taste that elevates the entire dish.
– Grilled Chicken Breast (1 cup, shredded): The protein of choice in this wrap, shredded chicken provides a satisfying bite while soaking up the spices for a flavorful experience. You can easily substitute this with shredded beef, turkey, or even black beans for a vegetarian option.
– Shredded Lettuce (1 cup): This adds a refreshing crunch and lightness to balance the richness of the chicken and sour cream. Feel free to use your favorite greens.
– Tomato (1 medium, diced): Fresh tomatoes bring juiciness and a pop of color to your wrap, enhancing its visual appeal and flavor.
– Sour Cream (1/4 cup): Used as a spread, sour cream adds creaminess that brings all the flavors together. You can also substitute with Greek yogurt for a tangy twist.
– Olive Oil (2 tablespoons): Brushing the tortillas with olive oil helps them crisp up beautifully in the air fryer, giving them that golden, crunchy exterior.
– Flour Tortillas (4 large): These serve as the wrap base, providing a soft and pliable surface to hold your delicious filling. Whole wheat or gluten-free tortillas are great alternatives if you’re looking for a healthier option.
Substitution Options:
– Dairy-Free: Use dairy-free sour cream or a cashew cream.
– Gluten-Free: Choose gluten-free tortillas, which are widely available in most stores.
– Vegan: Replace the chicken with black beans or grilled vegetables and use a plant-based sour cream.
Finding these ingredients should be easy at your local grocery store, but if you’re looking for specialty items like homemade onion chips, consider checking out farmers’ markets or local health food stores for the freshest options.
—
Equipment Needed
To create your Crispy Onion Chip Wrap, you’ll need a few essential tools that will make the process smooth and enjoyable:
– Air Fryer: This is your star appliance for achieving that perfect crunch without the mess of deep frying. Look for models that have adjustable temperature settings and a decent capacity for those larger wraps.
– Mixing Bowl: A medium-sized mixing bowl is necessary for combining the chicken with spices. Opt for a glass or stainless steel bowl that’s easy to clean.
– Brush: A pastry brush is ideal for applying olive oil to the tortillas. If you don’t have one, a clean paper towel can work in a pinch.
– Knife and Cutting Board: A sharp knife is essential for dicing your tomatoes and shredding your chicken. A sturdy cutting board will provide a safe surface for all your chopping needs.
– Tongs: These will be your best friend when it comes to flipping the wraps halfway through cooking, ensuring even crispiness.
While all these tools are essential for making the wraps perfectly, if you’re in a pinch, you can use alternatives. For example, a regular baking sheet can substitute for an air fryer if you bake them instead (though they won’t be as crispy).
Step-by-Step Instructions
1. Preheat the Air Fryer: Start by preheating your air fryer to 375°F (190°C) for about 5 minutes. This step is crucial because a properly preheated air fryer ensures that your wraps get that perfect crispy texture. While the air fryer warms up, gather your ingredients and get ready for the next steps.
2. Season the Chicken: In a medium bowl, combine 1 cup of shredded grilled chicken breast with 1 tablespoon of chili powder, 1/2 teaspoon of cumin, and 3 minced garlic cloves. Use your hands or a fork to mix until the chicken is evenly coated in the spices. You should smell the fragrant spices and garlic as you mix; this is a good sign that your chicken will be flavorful. Chef’s Note: If you use leftover chicken, make sure it’s shredded into small, bite-sized pieces for easy wrapping.
3. Prepare the Tortillas: Brush the flour tortillas lightly with 2 tablespoons of olive oil on one side. Place them in the air fryer basket with the oiled side down. Air fry for 3-4 minutes or until they just start to crisp up. You’re looking for a slight golden hue; the tortillas should be warm and flexible but not fully browned yet. If they puff up, that’s completely normal and adds to the texture!
4. Assemble the Wraps: Carefully remove the tortillas from the air fryer and lay them flat on a clean surface. Start layering by adding 1 cup of shredded lettuce, followed by 1 medium diced tomato, and finally, the seasoned chicken. Sprinkle a generous amount of crispy onion chips on top. You want to distribute the ingredients evenly, ensuring that each bite packs a flavorful punch. Chef’s Note: Layering the ingredients in this order helps to create a balance of crunch and freshness in every bite.
5. Spread the Sour Cream: Next, take 1/4 cup of sour cream and spread about 1 tablespoon on top of the filling in each tortilla. This will not only add creaminess but also help to bind the filling together. Be generous; the sour cream adds a delightful tanginess that complements the spices. Fold gently to avoid spilling the contents.
6. Wrap and Cook: Now, carefully wrap each tortilla tightly, tucking in the sides as you go to encase the fillings. Place the wraps seam-side down in the air fryer basket. Air fry the wrapped tortillas at 375°F (190°C) for 8-10 minutes, flipping halfway through. Look for a golden brown color and a crispy exterior. If you hear a nice crunch as you flip, that’s a good sign that you’re on the right track!
7. Rest and Serve: Once cooked, remove the wraps from the air fryer and let them rest for a couple of minutes. This resting period allows the fillings to settle, preventing them from spilling out when you cut them. After resting, slice each wrap in half and serve warm. Pair them with extra sour cream or your favorite dipping sauce for an added kick.
Pro Tips for the Best Results
1. Oil Control: Use just enough olive oil to lightly coat the tortillas. Too much oil can make them soggy instead of crispy. A fine mist of cooking spray can also work wonders if you’re looking to cut back on calories.
2. Perfect Temperature: Ensure your air fryer is preheated; this creates an ideal cooking environment. If you skip preheating, you risk uneven cooking, resulting in a chewy rather than crispy wrap.
3. Layer Wisely: When layering your ingredients, think about balance. Start with the lettuce for moisture control, then add heavier ingredients on top. This prevents sogginess and keeps your wraps crispy.
4. Cheese Addition: Consider adding a sprinkle of cheese inside your wrap before cooking. A little shredded cheese will melt beautifully and create a gooey texture that enhances the overall experience.
5. Crispy Onion Chips: If you’re using store-bought crispy onion chips, don’t skimp on the quantity you add. They provide not only crunch but also a burst of umami flavor that makes each bite delightful.
6. Use Parchment Paper: For easier cleanup, line the air fryer basket with perforated parchment paper before placing your wraps. This prevents sticking while allowing hot air to circulate and maintain crispiness.
7. Experiment with Fillings: Don’t be afraid to mix and match fillings based on what you have on hand. Leftover roasted vegetables, different proteins, or even beans can add variety to this recipe without compromising flavor.
Common Mistakes to Avoid
1. Skipping Preheating → Not preheating your air fryer can lead to uneven cooking. You might end up with a warm but chewy tortilla instead of a crisp one. Always preheat for optimal results.
2. Overstuffing the Wraps → Adding too much filling can make it impossible to wrap tightly and can result in a messy meal. Stick to a balanced portion to keep everything contained.
3. Using Cold Ingredients → If your chicken or other fillings are cold, they can cool down the tortilla, preventing it from crisping up. Always ensure your ingredients are at room temperature before assembly.
4. Ignoring Cooking Times → Cooking for too long can cause the wraps to become overly crispy and, eventually, burnt. Keep a close eye on them, especially during the final cooking phase, to achieve the perfect golden color.
5. Not Resting the Wraps → Cutting into the wraps immediately after cooking can cause them to fall apart. Allowing them to rest for a couple of minutes helps the fillings settle.
6. Neglecting Flavor Balance → If you don’t season your protein well, the dish can taste bland. Make sure to taste your filling before assembling and adjust the seasoning as necessary.
Creative Variations
1. Seasonal Variation: For a fall twist, incorporate roasted butternut squash and cranberries inside your wraps. The sweetness of the squash and tartness of the cranberries will add a delightful contrast to the crispy onion chips.
2. Dietary-Friendly Version: Create a vegan version by substituting the chicken with black beans or chickpeas. Add diced avocado and a sprinkle of nutritional yeast for creaminess and a cheesy flavor without dairy.
3. Gourmet Elevated Version: Upgrade your wraps by using grilled shrimp or marinated steak in place of chicken. Pair it with arugula and a drizzle of truffle aioli for a touch of luxury that will impress at any gathering.
4. Quick 15-Minute Version: For a super quick version, use pre-cooked rotisserie chicken and skip the seasoning step. This allows you to assemble and air fry in under 15 minutes without sacrificing flavor.
5. Kid-Friendly Version: Make these wraps appealing to kids by using mild taco seasoning and adding shredded cheese. You can also allow them to customize their own wraps to make mealtime more fun.
6. International Twist: Take inspiration from Mediterranean cuisine by filling your wraps with hummus, cucumbers, feta cheese, and kalamata olives. This brings a refreshing and tangy flavor profile that contrasts beautifully with the crispy onion chips.
Serving Ideas
When it comes to plating your Crispy Onion Chip Wraps, the presentation can elevate your lunch from simple to sensational. Here are some delightful ideas:
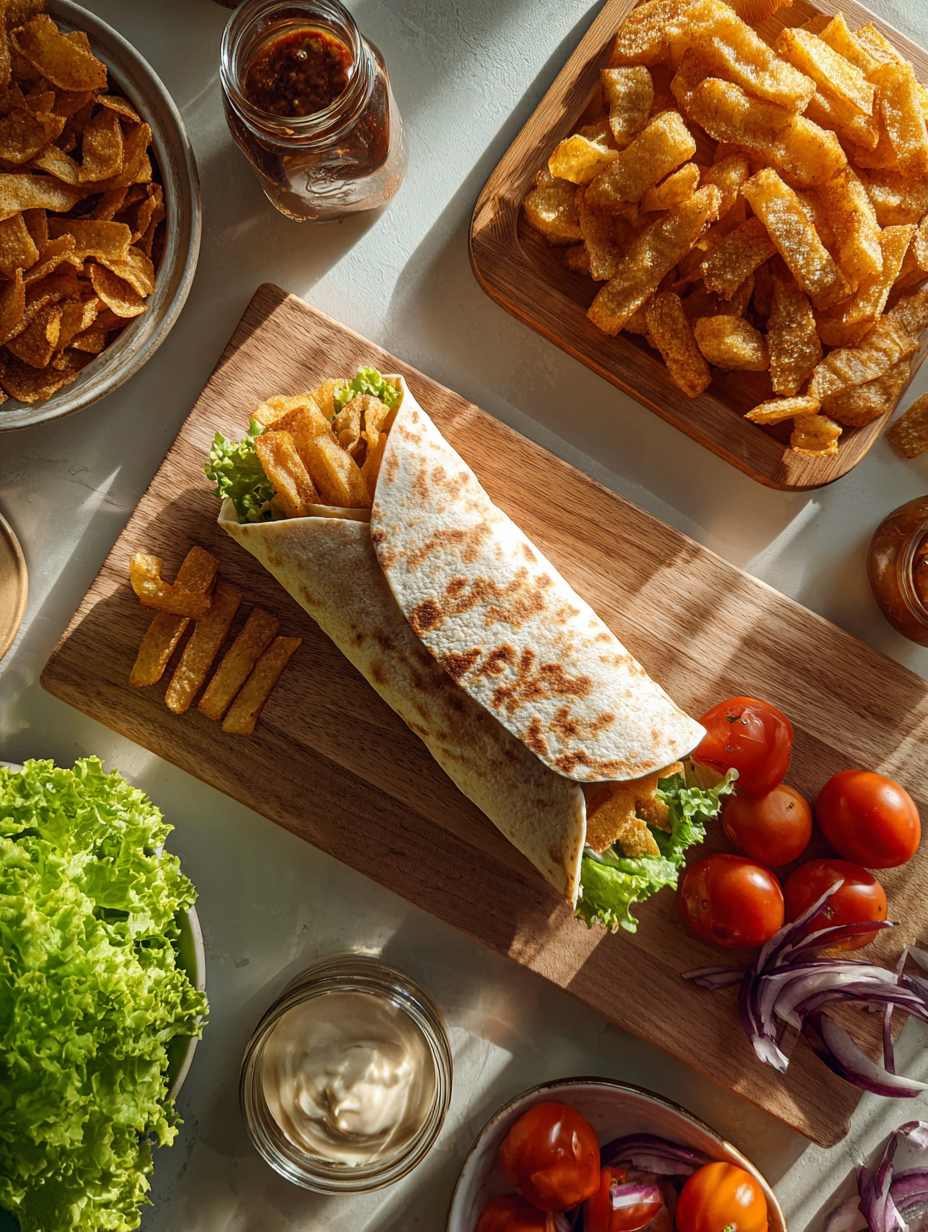
1. Colorful Platter: Arrange the wraps on a large wooden board, cut diagonally in half, showcasing the vibrant fillings. Add a small bowl of sour cream or your favorite dipping sauce in the center. Surround the wraps with slices of lime and sprigs of fresh cilantro for a pop of color.
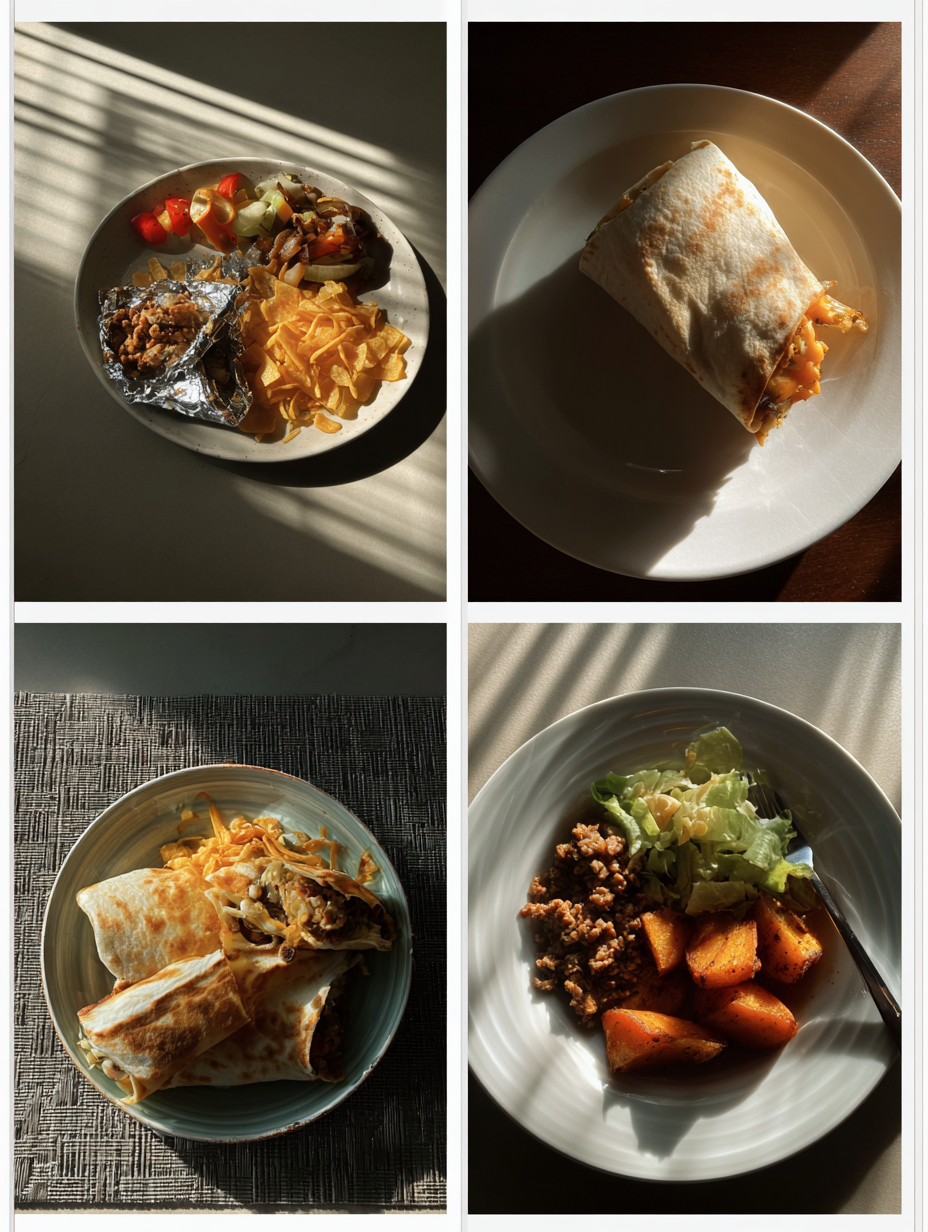
2. Individual Plates: For a more personal touch, serve each wrap on a white plate, drizzled with a swirl of sour cream. Garnish with finely chopped chives or scallions. This not only enhances the visual appeal but also adds a fresh flavor contrast.
3. Lettuce Leaf Base: Place the wraps on a bed of crisp romaine or butter lettuce leaves. This adds a fresh crunch and can double as an edible plate. The green color enhances the wraps’ presentation while providing a refreshing bite.
4. Bento Style: Create a bento-style lunch by placing the wraps in a divided container alongside small portions of dipping sauces, carrot sticks, and cherry tomatoes. This is a fun way to offer variety and makes for an appealing lunchbox option.
5. Garnish and Serve: Top each wrap with a sprinkle of extra crispy onion chips right before serving for an added crunch. A few slices of avocado on the side not only look gorgeous but also add creaminess that complements the dish beautifully.
What to Serve With
Pairing these Crispy Onion Chip Wraps with complementary dishes can enhance your meal experience. Here are some delightful suggestions:
1. Fresh Mango Salsa: The sweetness of mango salsa contrasts beautifully with the savory wraps, adding a tropical flair that brightens each bite.
2. Chilled Gazpacho: This refreshing cold soup offers a delightful contrast in temperature and is packed with vegetables. Its acidity balances the richness of the wraps.
3. Crisp Garden Salad: A simple salad with mixed greens, cucumbers, and a light vinaigrette brings a refreshing crunch and adds a wellness boost to your meal.
4. Coconut Lime Rice: The creaminess of coconut with the zesty lime pairs perfectly with the savory notes of the wraps, creating a harmonious flavor combination.
5. Pineapple Coconut Smoothie: For a drink, a smoothie made with coconut milk, fresh pineapple, and a hint of banana is not only refreshing but also complements the crispy wraps’ flavors.
6. Chocolate Avocado Mousse: To finish on a sweet note, serve a rich chocolate avocado mousse. Its velvety texture is a delightful contrast to the crispy wraps and rounds out the meal beautifully.
Storage Guide
To keep your Crispy Onion Chip Wraps fresh for later enjoyment, proper storage is key. Here’s how to do it right:
– Containers: Store the wraps in airtight containers made of glass or BPA-free plastic. This prevents moisture from making the tortillas soggy.
– Temperature: Keep your wraps in the refrigerator at 40°F (4°C) or lower. This keeps them safe to eat for a few days.
– Best By: These wraps can be stored for up to 2 days. After this period, the quality may decline, and the fillings can become mushy.
– Signs of Spoilage: Look for any off smells, changes in color, or a slimy texture on the vegetables. If any of these occur, it’s best to discard the wraps.
– Refreshing Before Serving: When you’re ready to enjoy leftovers, you can use the air fryer to re-crisp the wraps. Air fry at 350°F (175°C) for about 3-5 minutes to restore that delightful crunch.
Freezing Tips
If you want to prepare your Crispy Onion Chip Wraps ahead of time, freezing is a great option:
– Freezing Suitability: These wraps can freeze well, but it’s advisable to assemble them without the crispy onion chips. Add those fresh after thawing and reheating.
– Instructions: Wrap each individual wrap in plastic wrap followed by aluminum foil to prevent freezer burn. Label them with the date for easy reference.
– Storage Duration: They can stay fresh in the freezer for up to 3 months.
– Quality Changes: Expect a slight change in texture once thawed, as the tortilla may become softer.
– Thawing Method: To thaw, move the wraps to the refrigerator overnight. Then, reheat them in the air fryer or oven for that crispy finish.
Reheating Guide
When you’re ready to savor your Crispy Onion Chip Wraps again, follow these reheating methods:
– Microwave: Heat your wrap on a microwave-safe plate for 30-45 seconds at medium power. To prevent drying out, place a damp paper towel over the wrap while microwaving.
– Oven: Preheat your oven to 375°F (190°C). Place the wraps on a baking sheet and cover them with aluminum foil to prevent burning. Heat for about 10-15 minutes, checking occasionally until warmed through.
– Stovetop: Heat a skillet over medium-low heat. Add a splash of water to create steam, then cover the skillet with a lid. Steam the wraps for about 5 minutes to warm them without losing texture.
– Restoring Texture: To restore that crispy goodness, finish off in the air fryer for an additional 3-4 minutes after reheating by any method.
Nutrition Overview
Each serving of your Crispy Onion Chip Wrap is not only delicious but also packed with nutrition. Here’s an approximate breakdown:
– Calories: 420
– Protein: 28g
– Carbohydrates: 38g
– Fat: 18g
– Fiber: 4g
– Sugar: 2g
Key Ingredients:
– Chicken Breast: A great source of lean protein, helping to keep you full and satisfied.
– Crispy Onion Chips: While adding crunch and flavor, they also provide fiber, aiding in digestion.
– Tomatoes and Lettuce: These fresh veggies contribute essential vitamins and antioxidants, promoting overall health.
Enjoy these wraps as part of a balanced meal, knowing that you’re fueling your body with wholesome ingredients!
Frequently Asked Questions
Q: Can I use different proteins in this recipe?
A: Absolutely! While grilled chicken is delicious, you can substitute it with turkey, beef, tofu, or even black beans for a vegetarian option. Just make sure to season them similarly for the best flavor.
Q: How can I make this recipe gluten-free?
A: To make your wraps gluten-free, simply swap the flour tortillas for gluten-free tortillas made from corn or rice. Ensure your crispy onion chips are also gluten-free.
Q: Can I prepare these wraps in advance?
A: Yes! You can assemble the wraps without air frying them in advance, wrap them tightly, and store them in the fridge for up to 2 days. Just air fry them when ready to serve.
Q: Is there a way to make these wraps spicier?
A: Definitely! You can add sliced jalapeños or a sprinkle of cayenne pepper to the chicken mixture for an extra kick. Alternatively, serve with a spicy dipping sauce.
Q: How do I prevent my wraps from getting soggy?
A: To avoid sogginess, layer your fillings with a base of lettuce first. This acts as a barrier between wet ingredients and the tortilla. Also, consider adding crispy onion chips right before serving.
Q: What should I do if I don’t have an air fryer?
A: If you don’t have an air fryer, you can use a regular oven. Just preheat it to 375°F (190°C) and bake the wraps on a lined baking sheet for about 15-20 minutes, flipping halfway through.
Q: Can I freeze these wraps?
A: Yes, these wraps can be frozen, but it’s best to leave out the crispy onion chips until you reheat them. Wrap them well, and they can last for up to 3 months in the freezer.
Q: How do I make these wraps more nutritious?
A: To boost the nutrition, consider adding more veggies like bell peppers, cucumbers, or avocados. You can also use whole wheat tortillas for added fiber.
Final Thoughts
As you embark on making your Crispy Onion Chip Wraps, remember that the key to their delightful crunch and flavor lies in the layering of fresh ingredients and that satisfying crispy finish. Don’t be afraid to customize the recipe with your favorite proteins or veggies – this dish is all about making it your own! I truly hope you find joy in preparing these wraps, whether for a quick lunch or a gathering with friends. Once you take that first bite, I’m sure you’ll be hooked. So go ahead, gather your ingredients, and whip up this crispy masterpiece today!

Crispy Onion Chip Wrap Recipe (Air Fryer Lunch) 🥙🧅
Ingredients
- 2 cups crispy onion chips store-bought or homemade
- 1 tablespoon chili powder
- 1/2 teaspoon cumin
- 3 cloves garlic minced
- 1 cup grilled chicken breast shredded
- 1 cup shredded lettuce
- 1 medium tomato diced
- 1/4 cup sour cream for spreading
- 2 tablespoons olive oil for brushing
- 4 large flour tortillas
Instructions
- Preheat the air fryer to 375°F (190°C) for about 5 minutes. While preheating, prepare the chicken by mixing it with chili powder, cumin, and minced garlic in a bowl.
- Brush the flour tortillas lightly with olive oil on one side and place them in the air fryer basket oil-side down. Air fry for 3-4 minutes until they are slightly crispy.
- Remove the tortillas from the air fryer and layer each with shredded lettuce, diced tomatoes, the seasoned chicken, and a generous sprinkle of crispy onion chips.
- Spread a tablespoon of sour cream on top of the filling, then carefully wrap each tortilla tightly. Place the wraps seam-side down in the air fryer basket.
- Air fry the wraps at 375°F (190°C) for an additional 8-10 minutes until golden brown and crispy, flipping halfway through for even cooking.
- Once cooked, remove the wraps and let them rest for a couple of minutes before cutting them in half. This helps keep the fillings intact.
- Serve warm with extra sour cream or your favorite dipping sauce on the side.
Notes
Tip 2: These wraps can be made ahead and stored in the fridge for up to 2 days.
Variation: Substitute the chicken with black beans for a vegetarian option.