When it comes to indulgent pastries, few can rival the light and airy delight of French crullers. These exquisite treats are a staple in French patisserie, cherished for their unique texture and delicate flavor. Unlike traditional donuts, crullers boast a distinctively airy bite that melts in your mouth, making them a favorite among dessert lovers everywhere. Their origins can be traced back to France, where they were crafted with care, and today, they continue to enchant those who encounter them.
French crullers are made from a choux pastry, which is a mixture of water, butter, flour, and eggs. This dough is piped into beautiful shapes, often resembling twisted rings or spirals, and then fried to perfection. The result is a pastry that is crisp on the outside and wonderfully soft on the inside. What sets crullers apart is not just their texture, but also their versatility. They can be glazed with a simple sugar glaze, dipped in chocolate, or even adorned with colorful sprinkles, making them a delightful addition to any occasion—be it a festive gathering, a cozy brunch, or a sweet snack to enjoy with your afternoon coffee.
One of the most appealing aspects of heavenly French crullers is their accessibility. With a bit of patience and the right ingredients, you can recreate this delightful pastry in the comfort of your own kitchen. The process is simpler than you might think, and once you experience the heavenly taste of freshly made crullers, you’ll find it hard to resist making them again. So, let’s roll up our sleeves and embark on this delightful culinary journey!
Understanding the Ingredients: What Makes Crullers Special
Before we dive into the preparation of heavenly French crullers, it’s essential to understand the key ingredients that make them so special. Each component plays a critical role in achieving that perfect texture and flavor profile.
The Base: Water and Unsalted Butter
The foundation of French crullers lies in the combination of water and unsalted butter. This mixture is heated until the butter melts and the water reaches a gentle boil. Once combined, the flour is added all at once, creating a dough that is both smooth and elastic. The steam produced during the cooking process is crucial, as it helps to create the crullers’ signature airy texture. The unsalted butter contributes richness and flavor, while the water ensures the mixture is just the right consistency for frying.
The Sweet Touch: Granulated Sugar
Granulated sugar is not just a sweetener in this recipe; it plays a multifaceted role. While it certainly adds sweetness to the crullers, sugar also aids in browning during the frying process, contributing to that golden-brown exterior. This caramelization enhances the flavor, giving the crullers a rich depth that balances the lightness of the pastry. It’s essential to use the right amount of sugar to achieve that perfect balance between sweetness and flavor.
The Essential Bind: Eggs
Eggs are vital to the structure and moisture of the cruller dough. They not only bind the ingredients together but also provide the necessary leavening properties. As the crullers fry, the eggs help create a beautifully puffy texture that is characteristic of this pastry. Additionally, eggs contribute to the shine and smoothness of the dough, ensuring that your crullers look as good as they taste.
The Flavor Boost: Vanilla Extract and Spices
Vanilla extract is a key ingredient that enhances the overall flavor profile of the crullers. Its warm, sweet notes complement the other ingredients beautifully. For those looking to add a unique twist, consider incorporating spices like nutmeg or cinnamon. These optional additions can elevate the taste of your crullers and provide a delightful surprise with each bite.
The Frying Medium: Oil Selection
Choosing the right frying oil is crucial for achieving the perfect cruller. Oils with a high smoke point, such as canola or vegetable oil, are ideal for frying. These oils allow the crullers to cook evenly without burning. Temperature control is also paramount; maintaining the oil at the right temperature (around 350°F) ensures that the crullers fry properly, resulting in a crisp exterior while keeping the inside soft and airy.
Step-by-Step Guide to Making Heavenly French Crullers
Now that we’ve explored the essential ingredients that make French crullers so special, let’s move on to the preparation and cooking process. Making crullers is a rewarding experience that fills your kitchen with delightful aromas and results in a heavenly treat.
Preparing the Choux Pastry
1. Gather Your Ingredients: Before you start, make sure you have all your ingredients measured and ready to go. This will streamline the process and ensure that you can work efficiently.
2. Heat the Water and Butter: In a medium saucepan, combine 1 cup of water and 1/2 cup of unsalted butter. Place the saucepan over medium heat and allow the mixture to come to a gentle boil. Stir occasionally until the butter is completely melted.
3. Add the Flour: Once the mixture is boiling, remove the saucepan from the heat and quickly add 1 cup of all-purpose flour. Stir vigorously with a wooden spoon or spatula until the flour is fully incorporated and the dough begins to pull away from the sides of the pan. You should see a thin film forming on the bottom of the saucepan.
4. Cook the Dough: Return the saucepan to the heat and continue to cook the dough for an additional 1-2 minutes, stirring constantly. This step helps to dry out the dough slightly, which is essential for achieving the right texture.
5. Cool the Dough: Transfer the dough to a mixing bowl and allow it to cool for about 5-10 minutes. This cooling period is important because it prevents the eggs from cooking when they are added.
6. Incorporate the Eggs: Once the dough has cooled slightly, add 4 large eggs, one at a time, mixing well after each addition. The dough will appear slightly glossy and smooth once all the eggs are fully incorporated. This step is crucial, as the eggs provide the structure and moisture needed for the crullers.
7. Add Flavors: Mix in 1 teaspoon of vanilla extract and any optional spices you desire. This is your chance to get creative and customize the flavor of your crullers.
8. Prepare for Frying: Once your dough is ready, transfer it to a piping bag fitted with a star tip. This will allow you to create the classic cruller shape when frying.
9. Heat the Oil: In a deep pot or heavy skillet, heat about 2-3 inches of oil to a temperature of 350°F. Use a thermometer for accuracy, as maintaining the right temperature is key to perfect frying.
10. Pipe the Crullers: Once the oil is hot, carefully pipe the cruller dough into the oil in a spiral or ring shape. Fry only a few at a time to prevent overcrowding.
The journey to making heavenly French crullers is just beginning. Stay tuned as we continue with the frying process, glazing options, and tips for achieving the ultimate cruller experience!
Heavenly French Crullers: A Step-by-Step Guide to Perfection
Creating heavenly French crullers is a delightful journey that takes you from a simple mixture of ingredients to a beautifully glazed pastry that is both light and airy. Following the right techniques is essential to achieving that perfect texture and flavor. Here, we will delve deeply into the next steps of making these exquisite pastries, ensuring you have all the knowledge needed to impress your family and friends.
Incorporating the Eggs
Once you have combined the flour, butter, and milk mixture, the next step involves incorporating eggs into the dough. This is a critical moment in cruller preparation, as the eggs provide structure and richness to the pastry.
To achieve the ideal texture, it’s important to add the eggs one at a time, mixing thoroughly after each addition. This method allows the dough to absorb the eggs properly, resulting in a velvety and smooth consistency. After the first egg is added, mix vigorously until fully incorporated before adding the next. You’ll know the dough is ready when it pulls away from the sides of the bowl and has a glossy finish. The final consistency should be somewhat thick yet pliable, similar to a soft frosting. This texture is crucial, as it will allow the crullers to hold their shape during piping and frying.
Piping the Crullers: Techniques for Success
Piping crullers is where creativity meets culinary skill. To create the perfect shape, start by transferring your dough into a piping bag fitted with a large star tip. This will not only provide the classic fluted edge but also help in achieving that signature cruller appearance.
Before you start piping, it’s beneficial to practice on a piece of parchment paper. This will give you a feel for how the dough flows and allow you to refine your technique. When piping, hold the bag at a 90-degree angle to the surface, applying consistent pressure to create a uniform shape. Aim to pipe rings that are about 2-3 inches in diameter. For a classic cruller look, pipe a circle and then pipe a second circle on top, slightly overlapping the first.
Remember to leave enough space between each cruller on the parchment paper, as they will expand while frying. If you’re new to piping, don’t worry! With a little practice, you’ll achieve those beautiful, swirled shapes that make crullers so visually appealing.
Heating the Oil: Safety and Precision
Frying crullers requires precision, particularly when it comes to oil temperature. The ideal frying temperature for crullers is between 350°F to 375°F. Using a deep-fry thermometer is highly recommended to ensure safety and accuracy. This will help you avoid undercooking or burning the pastries.
When heating the oil, use a heavy-bottomed pot to prevent heat loss and maintain an even temperature. Fill the pot with enough oil to allow the crullers to float while frying, typically about 2-3 inches deep. It’s vital to monitor the temperature continuously; if it falls too low, the crullers will absorb oil and become greasy, while an excessively high temperature can cause them to brown too quickly without cooking through.
Safety is paramount when frying. Keep a lid nearby to cover the pot in case of splatter, and never leave hot oil unattended. Always have a slotted spoon or spider tool ready for safe handling of the crullers.
Frying the Crullers: Achieving Golden Perfection
Once your oil has reached the optimal temperature, it’s time to fry the crullers. Carefully lift each piped cruller off the parchment paper and gently lower it into the hot oil. To avoid splashing, always lower the cruller away from you. Fry in batches, ensuring not to crowd the pot, as this can cause the temperature to drop.
Fry each cruller for about 3-4 minutes on one side until it turns a beautiful golden brown. To ensure an even fry, gently flip the cruller halfway through the cooking time using your slotted spoon. This technique helps maintain an airy texture and prevents the cruller from becoming soggy. Once golden, remove the crullers from the oil and place them on a paper towel-lined plate to absorb any excess oil.
Preparing the Glaze: Achieving the Perfect Consistency
While the crullers cool, it’s time to prepare the glaze. A simple glaze consists of powdered sugar, milk, and vanilla extract. In a mixing bowl, combine 2 cups of powdered sugar with 1/4 cup of milk and 1 teaspoon of vanilla extract. Whisk until smooth, adjusting the consistency as needed. If the glaze is too thick, add a bit more milk; if it’s too thin, incorporate more powdered sugar.
For a flavor twist, consider adding a hint of almond extract or citrus zest to the glaze. This adds an exciting layer of flavor that can elevate your crullers to the next level. The perfect glaze should be smooth and pourable, able to coat the crullers without dripping excessively.
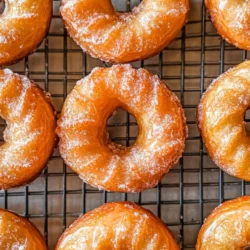
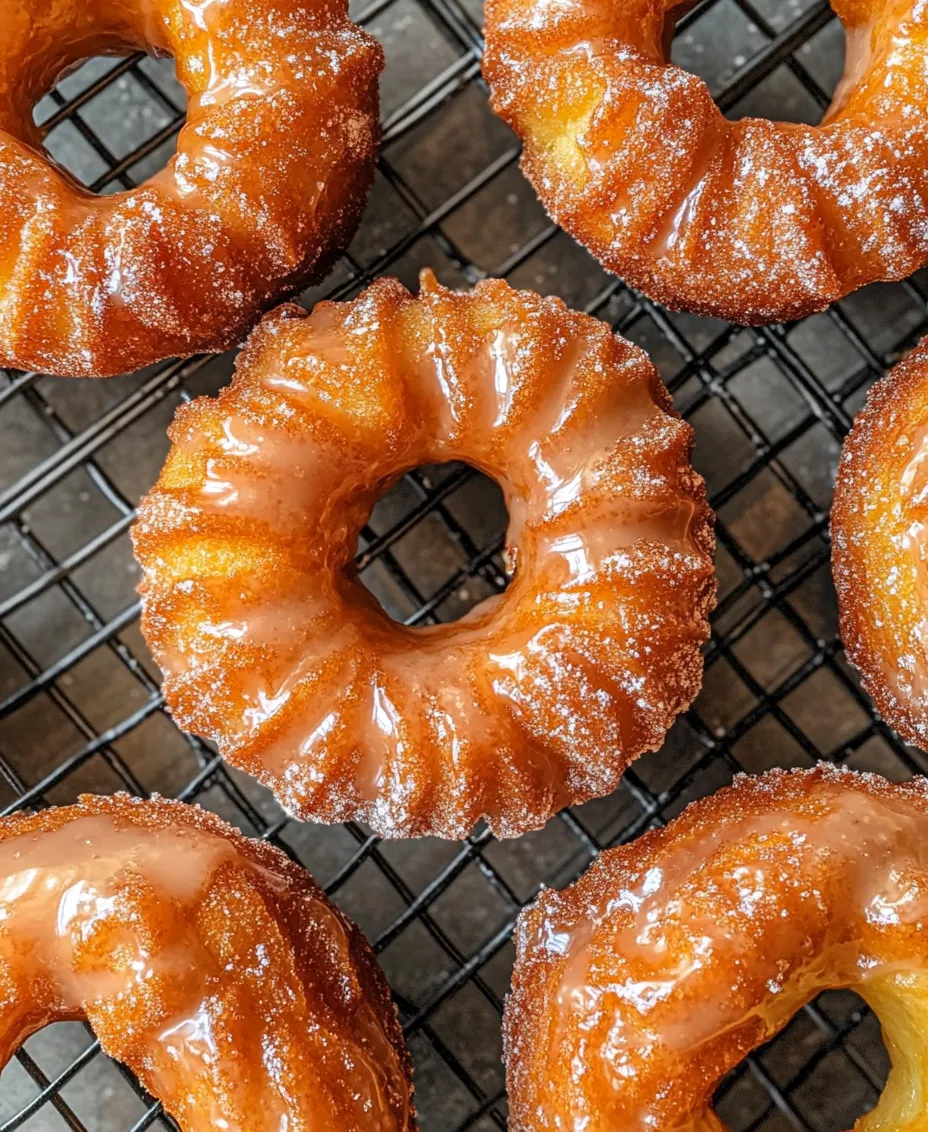
Glazing the Crullers: A Finishing Touch
Glazing your crullers is the moment where all your hard work pays off. Once the crullers have cooled slightly but are still warm, dip the top of each cruller into the glaze, allowing any excess to drip off. For an extra touch of elegance, you can also sprinkle some colorful sprinkles or finely chopped nuts on the glazed side before the glaze sets.
The glossy finish not only enhances the visual appeal of the crullers but also adds a delightful sweetness that complements the light and airy texture of the pastry. Allow the glazed crullers to sit for a few minutes to let the glaze set, resulting in a beautifully finished product.
Serving Suggestions: Enjoying Your Heavenly Crullers
Heavenly crullers are versatile and can be enjoyed in numerous ways. Serve them warm alongside a steaming cup of coffee or a fragrant tea for a delightful breakfast treat. Their lightness makes them a perfect pairing with beverages, allowing you to savor the combination of flavors.
For a more festive touch, crullers can serve as a dessert centerpiece during gatherings or special celebrations. Consider presenting them on a tiered cake stand for an eye-catching display. You can also fill crullers with whipped cream or pastry cream for an indulgent twist, making them a delightful dessert option.
Additionally, crullers can be enjoyed plain if you prefer a less sweet option, or you can experiment with various glazes, such as chocolate or caramel, to cater to different tastes. The possibilities are endless, making these pastries a delightful addition to any occasion.
Conclusion: Relishing the Experience of Homemade French Crullers
Making your own heavenly French crullers is a rewarding experience that brings joy not only from the delicious results but also from the process itself. From the careful mixing of ingredients to the artful glazing, each step is an opportunity to create something special. The satisfaction of crafting these delightful pastries from scratch is unparalleled, and sharing them with loved ones creates bonds and cherished memories.
As you embark on your cruller-making journey, don’t hesitate to experiment with flavors and techniques. Whether you’re trying a new glaze or adding unique fillings, the joy of cooking is in the exploration. These heavenly crullers can become a beloved family tradition, a centerpiece for celebrations, or a simple indulgence enjoyed on a quiet morning.
So roll up your sleeves and dive into the world of crullers. With each batch you make, you’ll not only master the art of pastry but also create delightful moments that bring people together. Enjoy the process, relish the flavors, and celebrate the connections that good food creates.