Introduction
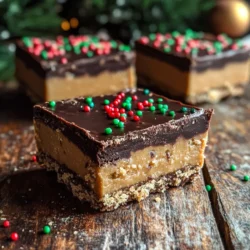
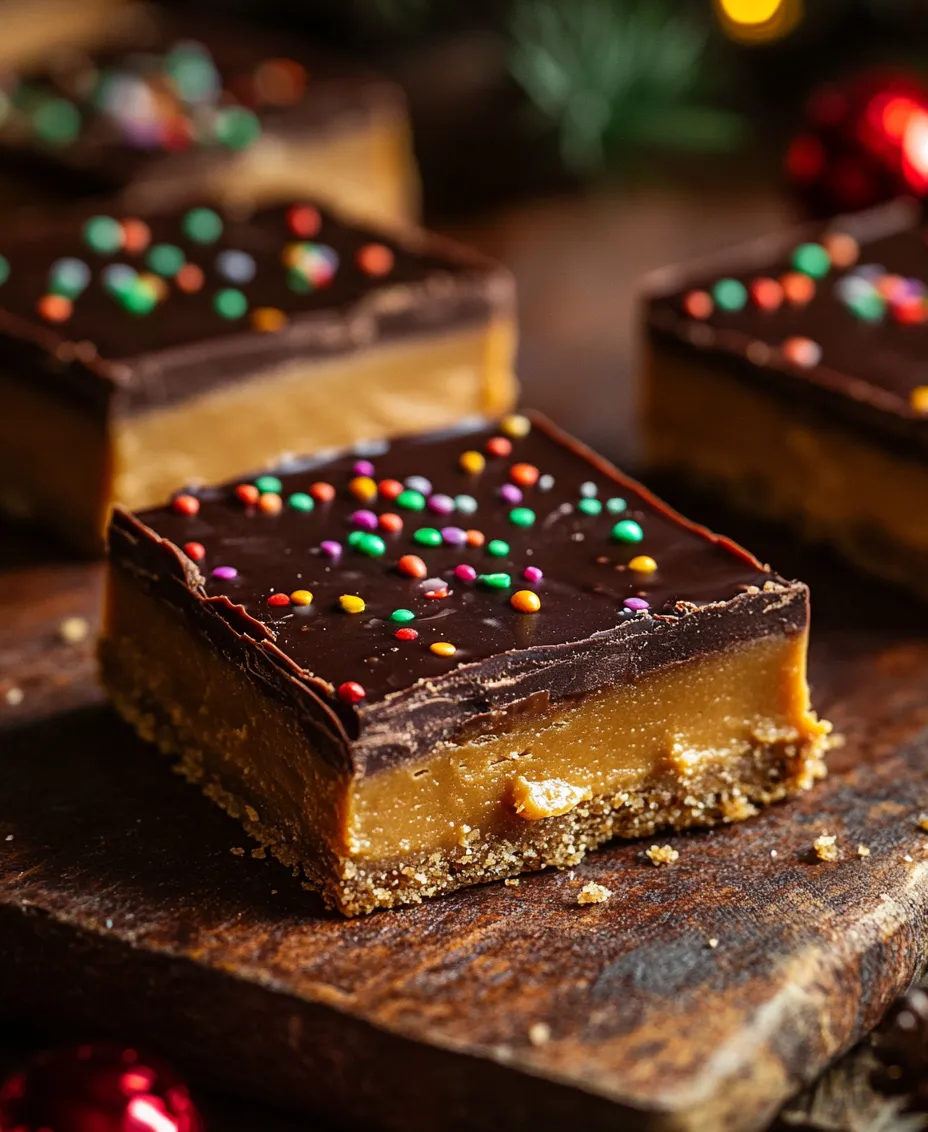
The holiday season is a time for celebration, joy, and, most importantly, indulgence in delicious treats. As gatherings with family and friends draw near, many of us seek out delightful desserts that can be prepared ahead of time to ease the stress of holiday baking. One such treat that has gained popularity in recent years is the Make-Ahead PB Chocolate Christmas Squares. These squares combine the beloved flavors of peanut butter and chocolate, a classic duo that warms the heart and satisfies the sweet tooth.
What makes these squares truly special is not just their delightful taste but also their ease of preparation. With a straightforward recipe, you can whip up a batch of these festive squares in no time, allowing you more freedom to enjoy the season with your loved ones. These treats not only make for a perfect dessert after a holiday meal but also serve as a lovely gift when shared in decorative packaging. In this article, we will guide you through the entire process of creating these delectable squares, from understanding the key ingredients to a step-by-step preparation guide that ensures your success in the kitchen.
Understanding the Ingredients
To create unforgettable Make-Ahead PB Chocolate Christmas Squares, it’s essential to understand the role of each ingredient that contributes to their rich flavor and delightful texture. Let’s delve into the key components that make this recipe shine.
Unsalted Butter
Butter serves as the cornerstone of this recipe, providing a rich and creamy base that enhances the overall flavor of the squares. Unsalted butter is often preferred in baking as it allows you to control the total salt content in the dish. The butter not only contributes to the indulgent taste but also helps to bind the ingredients together, creating a smooth consistency. When mixed with peanut butter, it forms a luscious base that melts in your mouth, making each bite a delightful experience.
Creamy Peanut Butter
Peanut butter is the star of the show in this recipe, bringing its unique flavor profile and creamy texture to the forefront. The choice of creamy peanut butter ensures that the mixture remains smooth and easy to spread. Its rich, nutty flavor balances beautifully with chocolate, creating a harmonious blend that is loved by many. For those who prefer a bit of crunch, chunky peanut butter can be used as a substitute, adding an extra layer of texture.
Powdered Sugar and Graham Cracker Crumbs
The sweetness and structure of the dessert come from powdered sugar and graham cracker crumbs. Powdered sugar, with its fine texture, dissolves easily into the mixture, ensuring a smooth finish without any graininess. It also contributes to the sweetness of the squares, which is essential for balancing the richness of the peanut butter and chocolate.
Graham cracker crumbs serve a dual purpose: they add a subtle flavor and provide stability to the squares. When combined with the other ingredients, they help create a firm structure that holds together when cut into squares. The combination of these two components creates a delightful sweetness that complements the savory notes of peanut butter.
Chocolate Chips (Semi-Sweet and White)
No dessert is complete without chocolate, and this recipe calls for both semi-sweet and white chocolate chips. The semi-sweet chocolate adds depth with its rich, slightly bitter flavor, which contrasts beautifully with the sweetness of the other ingredients. It provides a lush layer on top of the squares, creating a visually appealing finish.
White chocolate, on the other hand, adds a touch of sweetness and creaminess, enhancing the overall flavor profile. The combination of these two types of chocolate not only elevates the dessert but also creates a stunning visual contrast, making the squares irresistibly inviting.
Vanilla Extract and Salt
Vanilla extract is a crucial flavor enhancer that adds depth and complexity to the recipe. A splash of vanilla can elevate the taste of baked goods, enriching the overall flavor profile of the squares. Additionally, a pinch of salt is essential in balancing sweetness and amplifying the flavors of the other ingredients. It may seem counterintuitive to add salt to a dessert, but it plays a vital role in rounding out the flavors, ensuring a well-balanced treat.
Optional Garnishes
To add a festive touch to your Make-Ahead PB Chocolate Christmas Squares, consider incorporating optional garnishes. Sprinkles in holiday colors or crushed peppermint can be sprinkled on top of the chocolate layer before it sets, creating a visually appealing finish that captures the spirit of the season. These garnishes not only enhance the presentation but also add an extra layer of flavor and texture that makes the squares even more delightful.
Step-by-Step Preparation of PB Chocolate Christmas Squares
Now that we’ve explored the essential ingredients, let’s dive into the step-by-step preparation of these delectable squares. This straightforward process will guide you in creating a perfect batch of Make-Ahead PB Chocolate Christmas Squares, ensuring that they are a hit at your holiday gatherings.
Preparing the Base
The first step in creating your PB Chocolate Christmas Squares is preparing the creamy base. Start by gathering all your ingredients and equipment. You will need a mixing bowl, a spatula or wooden spoon, and a baking dish lined with parchment paper for easy removal after chilling.
1. Cream the Butter and Peanut Butter: Begin by placing the unsalted butter and creamy peanut butter in a large mixing bowl. Using a hand mixer or a sturdy spatula, cream the two together until they are well combined and smooth. This step is crucial, as it creates a rich and creamy mixture that will serve as the foundation for your squares. Aim for a light and fluffy texture, which will help incorporate air into the mixture.
2. Gradually Add Powdered Sugar: Once the butter and peanut butter are well combined, gradually add the powdered sugar to the bowl. It’s best to do this in increments to avoid a cloud of powdered sugar. Mix on low speed initially, then increase to medium until the sugar is fully incorporated. The mixture should become thick and slightly sticky, resembling cookie dough.
3. Incorporate Graham Cracker Crumbs: Next, add the graham cracker crumbs to the mixture. Gently fold them in until they are evenly distributed, ensuring that the mixture remains thick and cohesive. This step is essential for creating the desired structure of the squares.
Layering in the Dish
With your base mixture ready, it’s time to transfer it into the prepared baking dish.
1. Press the Mixture Evenly: Spoon the mixture into the lined baking dish. Using a spatula or your hands, press it down evenly across the bottom of the dish. This step is vital to ensure that the squares hold their shape when cut. Aim for a uniform thickness, which will make for even cooking and a pleasant texture.
2. Smooth the Surface: Once the mixture is evenly spread, use the spatula to smooth the surface, creating a clean and flat layer. This will help the top chocolate layer adhere better and create an appealing final presentation.
3. Chill the Base: After pressing down the mixture, place the baking dish in the refrigerator for about 30 minutes. Chilling the base allows it to firm up, making it easier to layer the chocolate on top later. This step is crucial for achieving the right texture in your squares.
As the base chills, you can prepare for the next steps in the recipe, which will include melting chocolate and creating the top layer that will bring this festive treat to life. Stay tuned for the continuation of this delicious journey into the world of Make-Ahead PB Chocolate Christmas Squares, where you’ll learn how to complete this delightful dessert and impress your friends and family this holiday season.
Melting the Chocolate
Achieving the perfect melted chocolate consistency is crucial for your PB Chocolate Christmas Squares. There are several methods to melt chocolate, but two of the most popular techniques are using a microwave or a double boiler.
Microwave Method: Start by chopping your chocolate into small, uniform pieces to ensure even melting. Place the chocolate in a microwave-safe bowl and heat it in short intervals of 20-30 seconds, stirring in between each interval. This prevents the chocolate from burning. The chocolate should be smooth and glossy when fully melted.
Double Boiler Method: If you prefer a more traditional approach, a double boiler can provide more control over the melting process. Fill a saucepan with a couple of inches of water and bring it to a simmer. Place a heatproof bowl over the saucepan, ensuring it doesn’t touch the water. Add the chopped chocolate to the bowl, stirring frequently until it melts completely. This method is ideal for those who want to avoid any risk of scorching the chocolate.
Creating the Chocolate Layer
Once your chocolate is melted, it’s time to create the luscious chocolate layer for your squares. Start by pouring the melted chocolate into the prepared baking dish lined with parchment paper. Using a spatula, spread the chocolate evenly across the bottom of the dish.
To achieve a smooth finish, take your time with this step. You can gently tilt the pan from side to side, allowing the chocolate to flow and fill in any gaps. If you find that the chocolate is starting to set before you’ve achieved an even layer, place it back in the microwave for a few seconds to gently warm it up. Once smoothed, let the chocolate layer cool slightly before adding the peanut butter mixture.
Marbling the White Chocolate
To create a visually appealing marbled effect with the white chocolate, you’ll need to prepare it in the same way as the dark chocolate. Once melted, pour it over the peanut butter layer after it has been spread evenly over the dark chocolate.
Using a skewer or a knife, gently swirl the white chocolate into the peanut butter layer. Be careful not to over-mix; the goal is to create a beautiful marbled pattern without fully combining the two layers. This technique not only enhances the visual appeal but also adds an exciting flavor twist with each bite.
Chilling and Setting
After you have layered and marbled your chocolate, it’s essential to chill the squares to achieve the right texture. Place the baking dish in the refrigerator and allow the mixture to set for at least 2 hours. This chilling time helps the layers firm up, making them easier to cut.
Refrigeration also enhances the flavors, allowing the chocolate and peanut butter to meld beautifully. If you’re in a hurry, a quick 30-minute chill in the freezer can help set the squares, but be cautious not to leave them too long as they can become too hard.
Cutting and Serving
Once your PB Chocolate Christmas Squares have set, it’s time to cut them into perfect portions. Remove the baking dish from the refrigerator and lift the parchment paper to pull the entire slab out.
Use a sharp knife to cut the squares into equal pieces. A warm knife can make cutting through the chocolate easier; simply run it under hot water, dry it off, and then start cutting. Aim for bite-sized squares, typically about 1 to 2 inches, making them easy to serve and enjoy.
These squares are delightful on their own, but you can also serve them with a dusting of powdered sugar or a drizzle of extra melted chocolate for an elegant touch.
Storing PB Chocolate Christmas Squares
To maintain the freshness of your PB Chocolate Christmas Squares, proper storage is crucial.
Refrigeration: Store the squares in an airtight container in the refrigerator. They will stay fresh for up to two weeks, allowing you to enjoy them throughout the holiday season without worrying about spoilage. If you notice that the squares become too hard in the fridge, simply let them sit at room temperature for a few minutes before serving.
Freezing Options: For longer preservation, consider freezing the squares. Cut them into pieces and layer them between parchment paper in an airtight container or freezer bag. They can last up to three months in the freezer. When you’re ready to enjoy them, simply remove the desired number of squares and let them thaw in the refrigerator or at room temperature. Avoid refreezing once thawed, as this can affect the texture.
Celebrating the Festive Season with PB Chocolate Squares
These PB Chocolate Christmas Squares are not only a delightful treat for yourself but also perfect for sharing during the festive season.
Perfect for Gatherings: Their rich flavor and appealing presentation make them a crowd-pleaser at holiday parties and family gatherings. Set out a platter of these squares alongside other festive treats, and watch as they disappear quickly.
Gift Ideas: These squares also make fantastic homemade gifts. Package them in decorative boxes or tins, and tie them with a festive ribbon for a thoughtful present for friends, neighbors, or coworkers. A handwritten note or card expressing holiday cheer can add a personal touch.
Customization Options: One of the best things about these squares is their versatility. You can easily customize them to suit your taste or dietary preferences. Consider adding chopped nuts like pecans or walnuts for extra crunch, or substitute the chocolate for white chocolate or a mix of dark and milk chocolate for a different flavor profile. You can even experiment with adding spices like cinnamon or peppermint for a seasonal twist.
Conclusion
Preparing these Make-Ahead PB Chocolate Christmas Squares brings joy and satisfaction, not just in the delightful taste but in the process of sharing with loved ones. They are incredibly easy to make and require minimal effort while delivering maximum flavor.
As you embrace the spirit of the holiday season, consider making these squares a part of your celebrations. Their versatility allows them to fit perfectly into various festive occasions, whether as a sweet treat for your family or a thoughtful gift for friends.
Encourage your loved ones to indulge in the joy of baking and sharing these scrumptious treats. By doing so, you’re not only treating your taste buds but also creating cherished memories that will last a lifetime. Happy holidays, and enjoy every delicious bite of your PB Chocolate Christmas Squares!